E.BATTERY CHARGING AND REPLACEMENT
Important:Please have your headset fully charged before use,that'll extend the battery life.
Charging:There will have 6 times of alarm sound comes from headset every 30 seconds when battery is
low.Put the headset(receiver) into “c" the headset charging cradle to start charging(System will auto shut off
in 3 minutes after the alarm sound to protect the battery).
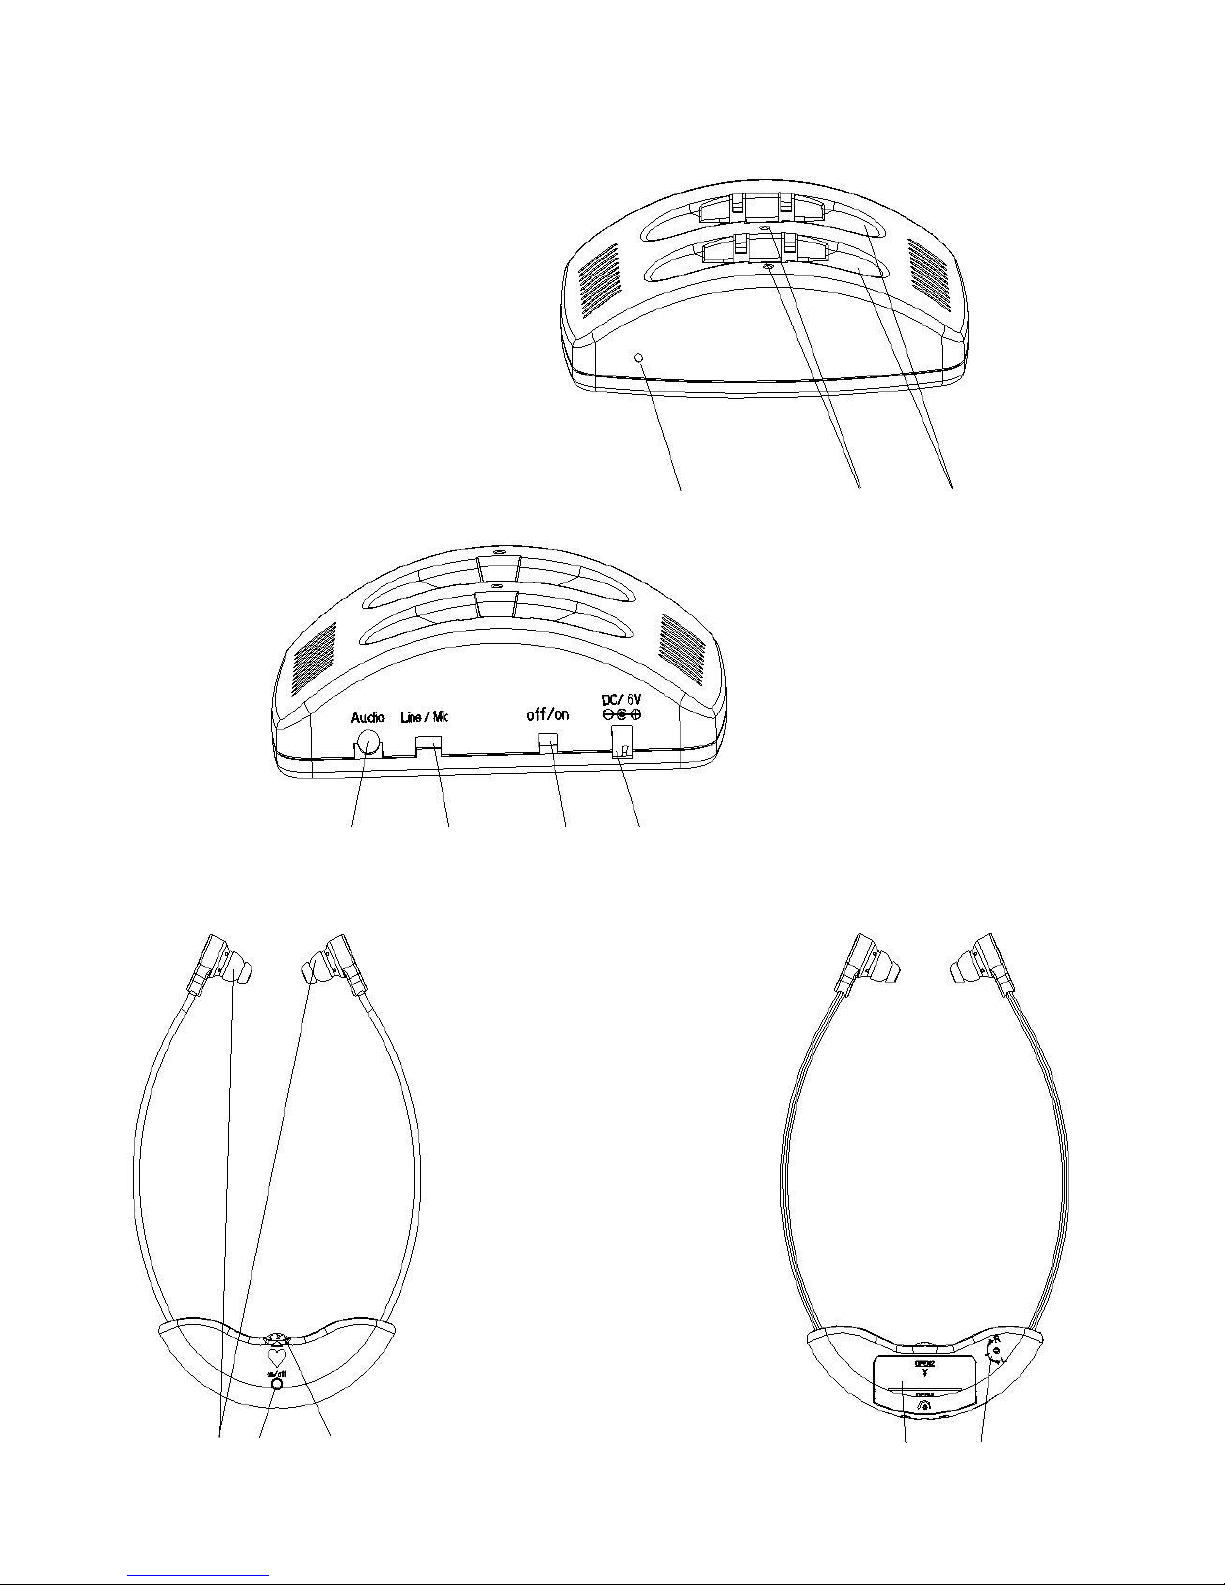
1).Connect one end of the supplied AC power adapter to a power outlet,and another end to "g" the DC in
jack which located at the rear of the transmitter.Then,"b" the headset charging leds will light up in
Green.Then,"b" the headset charging leds will light up in Green.
2).Insert the headset into "c“ the charging cardle of transmitter. "b" the charging power indicators will
change from Green to Red(Note:After 4‐5 hours when fully charged,The charging indicator will change from
Red to Orange, then to Green).
Battery replacement:Use the supplied multi‐use screw driver to remove the screw out in battery
compartment which locates at rear of the headset, open④ the battery compartment,and replace the inner
battery with a new one.
F.INSTALLATION
1).Connect one end of the supplied AC power adapter to a power outlet,and another end to "g" the DC in
jack which located at the rear of the transmitter.Then,"b" the headset charging leds will light up in Green.
2).Connect the system to TV or other audio equipment with supplied audio adaptors according to following
connecting options.Note: The headset will auto turn off if there is no signal for 3 minutes.
Important:You MUST connect the transmitter to "OUTPUT" of your TV or other audio equipment.
Option A.Using 3.5mm to 3.5mm cable Insert one end of the 3.5mm jack into "d" the audio in jack at rear of
the transmitter.Insert another end of 3.5mm jack to "headphone"socket of your TV or other audio
equipment that connect to.
Option B.Using 3.5mm to 2RCA adaptor:Insert one end of the 3.5mm cable into 3.5mm RCA cable, another
end of 3.5mm cable into "d" the audio in jack at rear of the transmitter. Connect 3.5mm RCA jack to
corresponding red and white sockets of your TV or other audio equipment that connect to.
Option C.Using microphone:If your TV do not have audio output,connect a microphone to "d" the audio jack
at rear of the transmitter,place the microphone close to your TV speaker.Then,switch "e" to "MIC"
mode.Your'll also have high definition TV volume.
3).Press② the headset on/off button to turn on the headset,start to use the system.
G.START TO USE
1).Set③ the readable volume mark to a low level(to protect your hearing from sudden loud sound) before
putting the①the ergonomic earplug in your ears.Keep its front(the heart logo)facing towards the
transmitter.
2).Rotate③ the volume control of headset to your preferred mark that being frequently used.
3).Use the supplied multi‐use screw driver to adjust⑤ the balance control that locate at rear of headset‘s
right side if the loudness is not the same in both ears.
4).After use,turn off the headset and return it to “c" the transmitter's charging cradle to charge for later use
or store.Keep the front face of the headset and the transmitter in consistency to avoid reverse charging.
Note:When you forgot to turn off the headset, headset will auto off when being placed in charging cradle.