QUICK-REFERENCE GUIDE – BASIC CONTROLS
Preparation of Portable Memory
Data Management (Move Data)
Exam End
Insert the Portable Memory to the Portable Memory Port on the
front panel until it clicks.
Ensure the Portable Memory Access Indication.
Press the MOVE DATA key and MOVE DATA screen (above)
appears on the monitor.
Select the unit of data movement.
The Progress Bar screen appears on the monitor while moving the data.
The Progress Bar screen disappears when data movement is complete.
1
1
2
2
3
Note: The lighting status of the Portable Memory Access indicator is lit
(green) when the device is ready and blinks (orange) when the EU-ME2 is
accessing memory. In the latter case, do not remove the Portable Memory.
* Do not turn off the EU-ME2 and external storage device while the
Progress Bar is displayed.
* It is highly recommended to periodically back up data.
Portable Memory Port
MOVE DATA screen
MOVE
DATA key
Progress Bar screen
Portable Memory
Access Indicator
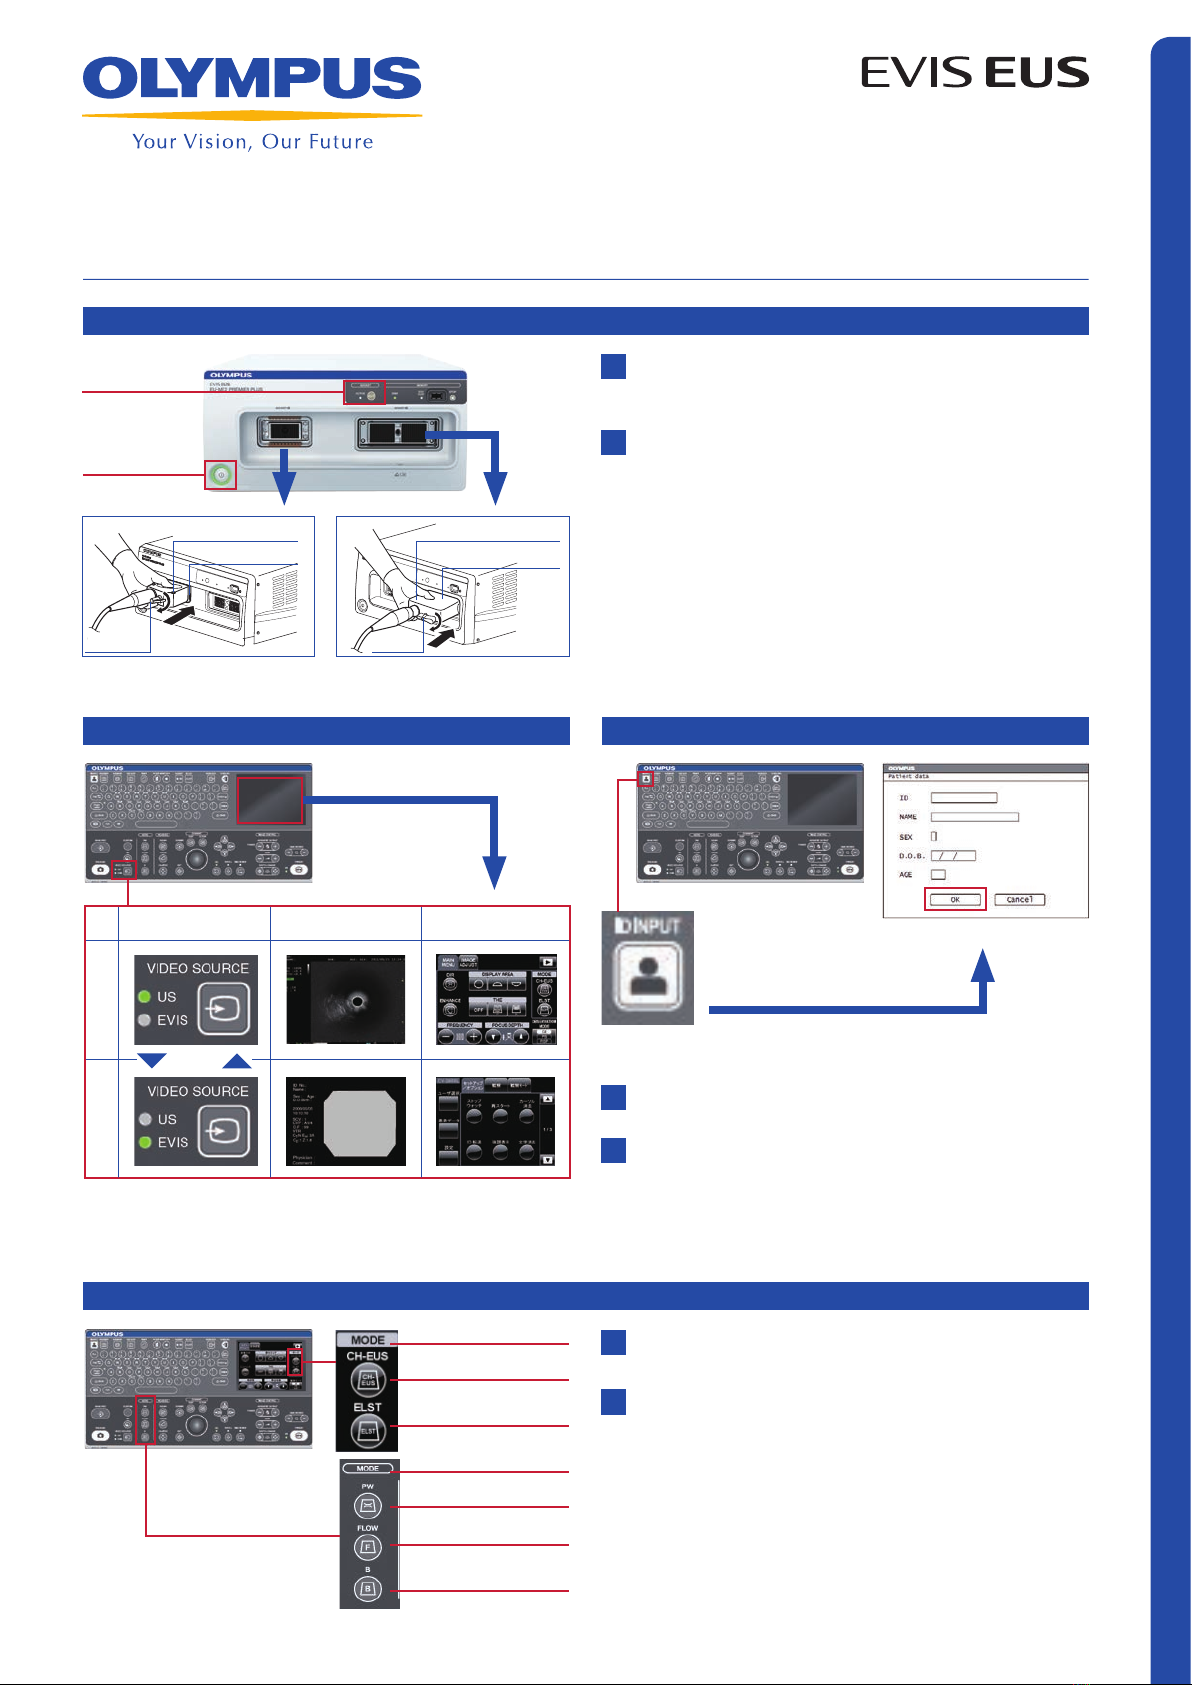
Press the power switch and confirm that the power indicator
(green light) is not lit.
Turn the lever of the US scope connector counterclockwise and
disconnect the scope by pulling the connector straight back once
the lever comes to a stop.
Disconnecting Ultrasound Endoscopes
1
2
* Please confirm either the power switch or ACTIVE switch is turned off
when the scope is connected.
* You can change scopes by turning off the ACTIVE switch, which has
eliminated the hassle of turning off the EU-ME2.
With mechanical scanning scopes With electronic scanning scopes
Power switch
ACTIVE switch
Function Description
Move all saved data Moves all image data saved in the internal
memory
Move data saved today Moves the image data saved on the same
day as the movement date
Move data saved in
current exam
Moves the image data saved during the
current examination
Setting Set Value
Observation monitor Ultrasound image cleared
Patient data display Cleared
Comment display Cleared
Measurement result display Cleared
FREEZE Frozen
Press the EXAM
END key on the
keyboard and set
the EU-ME2 to the
original settings.
* If an examination starts with the CV-290/CV-190/CV-180, the keyboard
should be used in EVIS operation mode and use the EXAM ON button on
the LCD touch panel.
EXAM
END key
Unit of Data Movement
Settings returned to the original on exam end
Portable Memory
MAJ-1925
Socket1
Lever
Ultrasound connector
Lever
Ultrasound connector
Socket2
E0428753 · 11/15 · PR
Specifications, design, and accessories are subject to change without any notice or obligation on the part of the manufacturer.
Postbox 10 49 08, 20034 Hamburg, Germany
Wendenstrasse 14–18, 20097 Hamburg, Germany
Phone: +49 40 23773-0, Fax: +49 40 233765
www.olympus-europa.com
Disclaimer: Any content or information (“Content”) presented herein is illustrative in nature and
does not guarantee or represent specific information, outcomes, or results. Olympus Corporation,
its subsidiaries, affiliates, directors, officers, employees, agents, and representatives (collectively
“Olympus”) does not represent to or warrant the accuracy or applicability of the Content. Under no
circumstances shall Olympus be liable for any costs, expenses, losses, claims, liabilities, or other
damages (whether direct, indirect, special, incidental, consequential, or otherwise) that may arise
from, or be incurred in connection with, the Content or any use thereof.