Olympus nortec 600 User manual

NORTEC 600 — Getting Started Guide 1
Intended Use
The NORTEC 600 is designed to perform nondestructive inspections of industrial and commercial
materials. Do not use the NORTEC 600 for any purpose other than its intended use.
Instruction Manual
Before use, thoroughly review the NORTEC 600 User’s Manual. Use the product as instructed. The
User’s Manual contains essential information on how to use this Olympus product safely and
effectively. Keep the User’s Manual in a safe, accessible location.
Safety Signal Words
Indicates an imminently hazardous situation and calls attention to a procedure, practice, or the like
that if not correctly performed or adhered to will result in death or serious personal injury.
Indicates a potentially hazardous situation and calls attention to a procedure, practice, or the like that
if not correctly performed or adhered to could result in death or serious personal injury.
Indicates a potentially hazardous situation and calls attention to an operating procedure, practice, or
the like that if not correctly performed or adhered to may result in minor or moderate personal injury,
material damage, particularly to the product, destruction of part or all of the product, or loss of data.
DANGER
WARNING
CAUTION
NORTEC 600 Eddy Current Flaw Detector
Getting Started Guide

2 NORTEC 600 — Getting Started Guide
Contents of the Case
The NORTEC 600 comes standard with several key accessories:
1. ISO-15548 certificate or calibration
certificate (short form of the ISO-15548)
(P/N: 7922035 [U8030145]).
2. Charger/adaptor (P/N: EP-MCA-X), where
“X” represents the power cord model
(refer to the User’s Manual)
3. AC power cord
4. Getting Started leaflet (P/N: DMTA-10039-
01YY, where “YY” denotes the language)
5. NORTEC 600 User’s Manual and PC
interface program on CD-ROM
(P/N: N600-CD [U8030151])
6. Instrument transport case (P/N: 600-TC
[U8780294])
7. Universal PowerLink eddy current probe
cable (P/N: 9122083 [U8800073]). Although
in some countries this item may be
included, for most countries it is optional and must be purchased separately. Please contact your
Olympus representative for more details.
8. microSD memory card, 2 GB (1 internal, 1 external) (Olympus P/N: MICROSD-ADP-2GB
[U8779307])
9. USB 2.0 (mini-AB) to PC cable (P/N: EPLTC-C-USB-A-6 [U8840031])
10. 73 watt-hour battery for 600 Series products, 10.8 V, 6.8 Ah, 73 Wh (P/N: 600-BAT-L-2 [U8760058])
11. AA battery holder for emergency use (Olympus P/N: 600-BAT-AA [U8780295])
12. Factory-installed hand strap on left side of NORTEC 600 instrument (Olympus P/N: 38DLP-HS
[U8779371])
Connections and Electrical Warning
Charger/adaptor
AC power cord
and probe cable
NORTEC 600 unit
Transport case (may differ from your model, depending on image
available at time of publication)
Li-ion battery
MicroSD Memory
Card and USB to
PC cable
Getting Started leaflet and
calibration certificate
User’s manual and PC
interface program on
CD-ROM
DC power connector
PROBE connector
(16 pin LEMO)
BNC connector

NORTEC 600 — Getting Started Guide 3
Do not allow metallic or foreign objects to enter the device through connectors or any other openings.
Otherwise, an electric shock or malfunction may result.
Charging the Lithium-Ion Battery
The NORTEC 600 charges the internal lithium-ion battery while it is connected to the AC
charger/adaptor.
If the NORTEC 600 is to be used with a rechargeable battery, only use Olympus battery P/N: 600-BAT-
L-2 [U8760058]. Using any other type of battery might cause an explosion and injury.
The NORTEC 600 charger/adaptor (P/N: EP-MCA-X) is designed to power the NORTEC 600 and
charge the lithium-ion battery only (P/N: 600-BAT-L-2 [U8760058]). Do not attempt to charge any other
batteries, including alkaline batteries, using the battery holder (P/N: 600-BAT-AA [U8780295]), and do
not use any other charger/adaptor. Doing so might cause an explosion or injury.
Do not attempt to power or charge other electronic equipment with the charger/adaptor (P/N: EP-
MCA-X) unless specifically instructed in the manual. Misuse of the charger/adaptor can cause other
batteries and/or instruments to explode, leading to serious injury or death.
The lithium-ion battery is not fully charged when the instrument is shipped. You must charge the
battery for two to three hours before using the battery power to operate the instrument.
CAUTION
MicroSD card slot
Input/output (I/O) door
USB port
VGA OUT connector
(under rubber cover)
I/O connector (under
rubber cover)
Removable MicroSD card
WARNING
WARNING
IMPORTANT

4 NORTEC 600 — Getting Started Guide
To Install or Replace the Lithium-Ion Battery
1. Unfold the instrument stand.
2. Unscrew the two thumb screws securing the
battery compartment cover at the back of the
instrument.
3. Remove the battery compartment cover.
4. Remove the battery and/or install the new
battery (P/N: 600-BAT-L-2 [U8760058]) in the
battery compartment.
5. Check the cover gasket to make sure it is
clean and in good condition.
6. Install the battery compartment cover, and
then tighten the two thumb screws.
To Install the MicroSD Card
1. Remove the MicroSD card (P/N: MICROSD-
ADP-2GB [U8779307]) from its packaging.
2. Loosen the two thumb screws, and then
open the instrument I/O door.
3. Hold the card so that the MicroSD card label
faces toward the rear of the instrument.
4. Gently slide the card into the MicroSD slot
until it clicks.
To remove the MicroSD card from the instrument, gently push the card into the slot and release. A
spring-loaded mechanism will partially eject the card, and then you can grasp and remove it from the
instrument.
Lithium-ion battery
Instrument stand
Battery
compartment cover
MicroSD
card
Thumb
screws (two)
MicroSD card slot
NOTE

NORTEC 600 — Getting Started Guide 5
Starting Up the Instrument
When power is turned on, the NORTEC 600 starts up in one of two modes, depending on what is
connected to the instrument.
If no probe is connected, or if a probe that is not a PowerLink type of probe is connected, the first
screen displayed by the NORTEC 600 software is the application quick-setup menu. Choose from
among the basic applications on this menu to automatically configure the appropriate instruments
settings.
The NORTEC 600 applications are designed for quick setup of the instrument. However, always
follow published maintenance procedures when inspecting.
Navigating the Application Menu
Navigating the menu is designed to be intuitive, and the settings for each application have been
programmed to permit immediate inspection; little or no additional instrument setup is needed.
1. Rotate the knob to highlight one of the eight applications.
2. Press the Enter key ( ) to select the application.
OR
Press the Return key ( ) to go back to the NORTEC 600 main screen.
Alternatively, if a PowerLink probe is connected to the instrument when it is turned on, the
NORTEC 600 starts up in the PowerLink recognition screen.
NOTE

6 NORTEC 600 — Getting Started Guide
Proceed as follows:
In the PowerLink recognition screen, load the program stored in the PowerLink probe to set up
the instrument by pressing the A function key.
The KEEP LAST SETTINGS function lets you load the previous parameters if they are
compatible with the probe or accessory that is detected.
This automatically sets up the instrument.
OR
Bypass the stored program in the probe by pressing the Return key ( ) to gain access to the
instrument’s main inspection screen.
Main Inspection Screen
After the initial steps through the quick-setup menu or PowerLink menu, the main inspection screen is
displayed.
The battery power indicator always remains visible at the top of the screen, except when in full-screen
mode. The time and date also always remain visible, except when in full-screen mode.
The rectangular readout in the top-left corner of the screen is named the quick-access bar. It displays
either the instrument’s combined horizontal and vertical gain settings, horizontal gain only, vertical
gain only, or angle setting when the GAIN ( ) or ANGLE ( ) direct-function keys are
pressed. The quick-access bar remains visible until any other key is pressed.

NORTEC 600 — Getting Started Guide 7
The real-time readings bar displays user-configurable readings (measurements). It can display a
maximum of two real-time readings from among the available choices. The real-time readings bar can
be set to display one or two readings, or it can be disabled.
The instrument settings are displayed on the right hand side of the main screen. The displayed
settings information can change, depending on the menu key that is pressed. The menu keys are the
five keys located along the bottom of the front panel: MAIN FILTER ( ), DISP ( ), ALARM
( ), MEM ( ), and ADV SETUP ( ).
Depending on the context and on the available functions and options, various indicators and numeric
values appear on the screen and around the main measurement value.
Keypads
The NORTEC 600 is available with an English, Chinese, Japanese, or international keypad
configuration. The text labels on some keys may be replaced by pictograms, depending on the keypad
configuration.
Direct- function
keys
Function keys
Real-time readings bar
Menu keys
Quick-access bar
Operation menu
(instrument
settings)
FULL NEXT key
SmartKnob

8 NORTEC 600 — Getting Started Guide
English keypad
Japanese keypad

NORTEC 600 — Getting Started Guide 9
Function name International
keypad symbol Function description
Enter The Enter key is used to make selections.
Return The Return (or Back) key is used to exit a menu and
return to a previous screen.
MAIN FILTER Provides access to the main menu, which controls
functions such as frequency, gain, angle, and filters.
Chinese keypad
International keypad

10 NORTEC 600 — Getting Started Guide
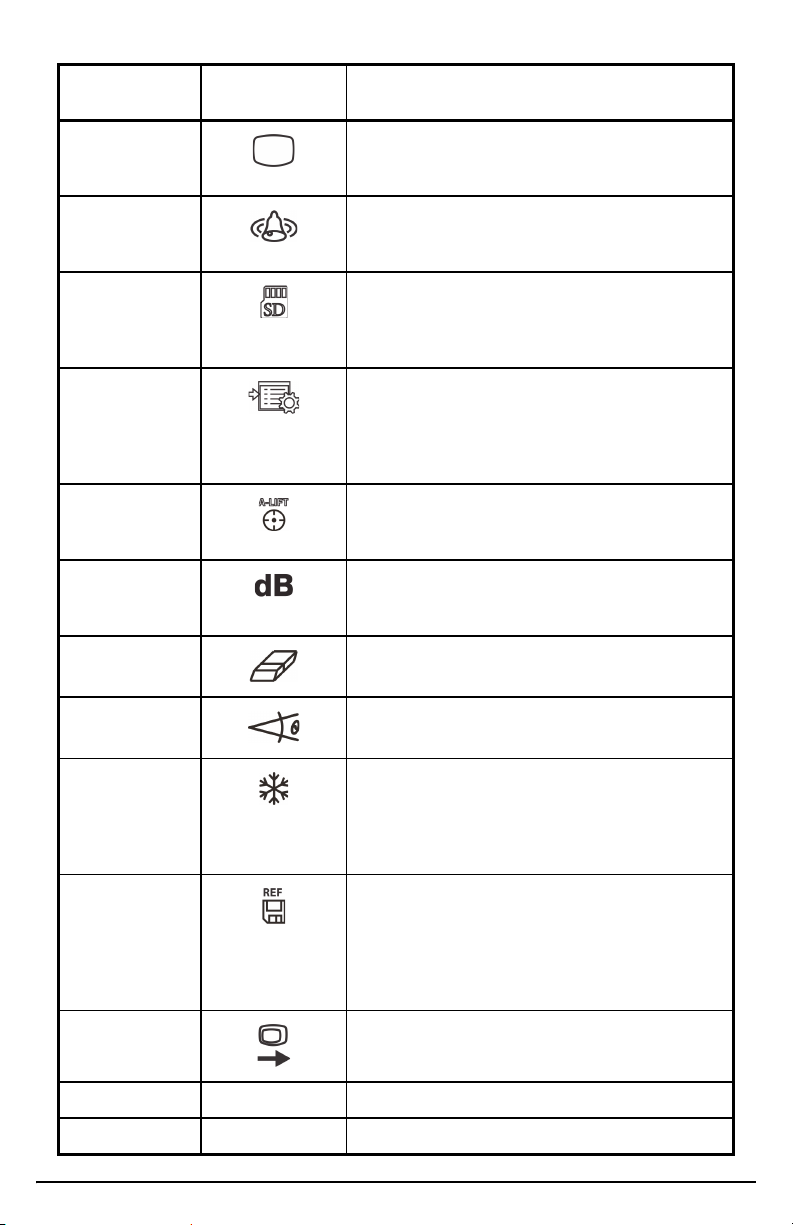
DISP Provides access to the display menu, which
controls functions such as display mode, position,
trace, and grid.
ALARM Provides access to the alarm menu, which controls
functions such as alarm type, dwell time, horn
volume, and alarm position.
MEM Provides access to the memory menu, which
controls functions such as previewing stored
memory files, recalling and editing stored files,
capture mode, capture time, and user information.
ADV SETUP Provides access to the instrument’s advanced
settings, including the application selection menu,
ALL SETTINGS menu, frequency mode, colors,
password, systems setup, reset, unlock options,
and legal/regulatory information.
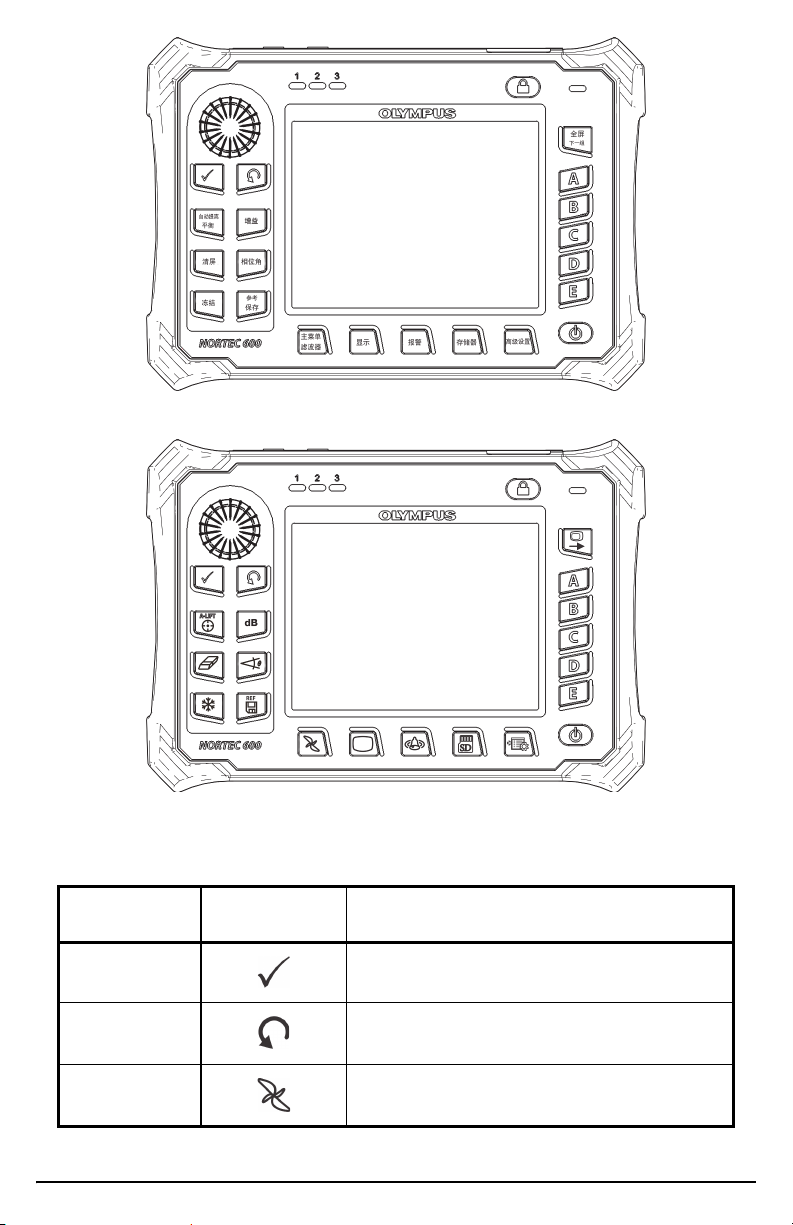
A-LIFT NULL If this direct-function key is pressed once, it nulls
(zeros) the instrument. If this key is pressed and
held, the Auto Liftoff is set.
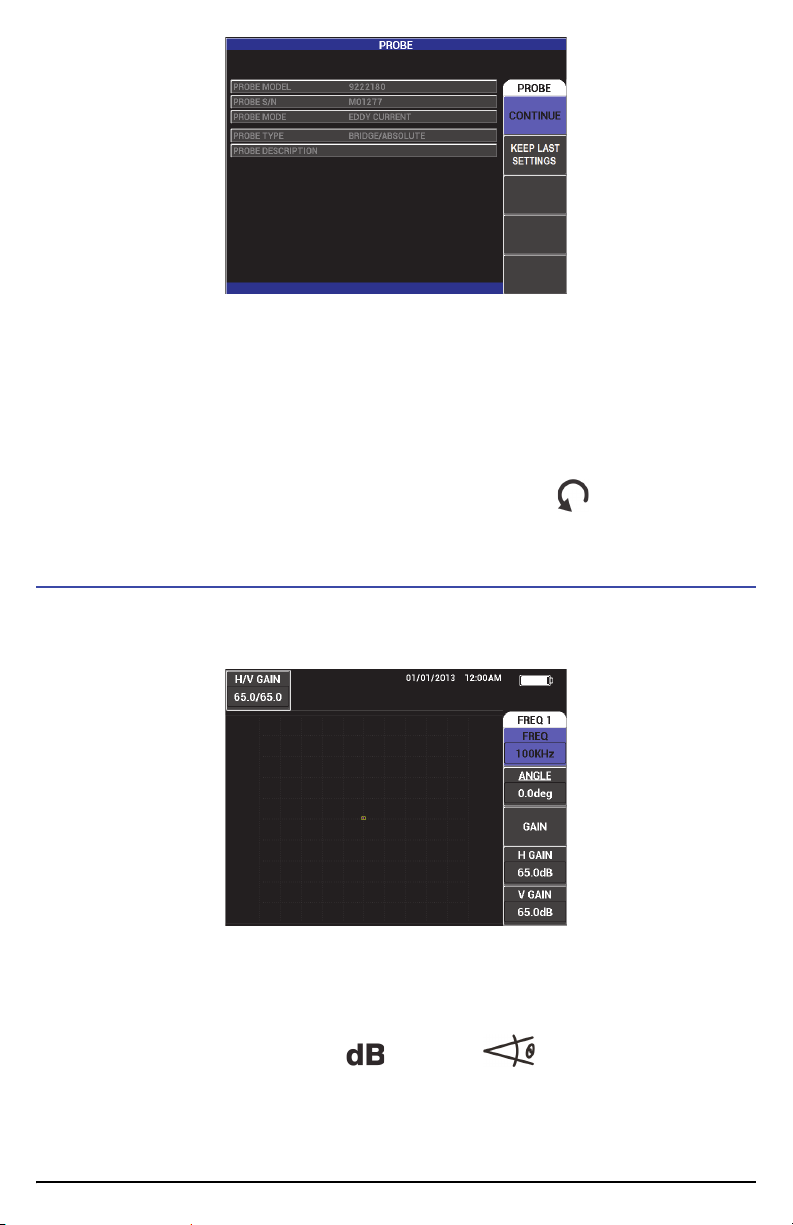
GAIN Direct-function key used to display either the
instrument’s combined horizontal and vertical gain
settings, horizontal gain only, or vertical gain only.
ERASE Direct-function key used to erase the currently
displayed image.
ANGLE Direct-function key used to display the angle.
FREEZE Direct-function key used to freeze the image
displayed on the instrument for further evaluation.
When the image is frozen, the NORTEC 600 also
allows calibrating the eddy current signals, and
changing the gains or angle.
REF SAVE Direct-function key used to save images and
settings in the instrument’s memory. When this key
is pressed once (and released), the currently
displayed image and settings are saved. When this
key is pressed and held, the current instrument
image is set as the reference memory display.
FULL NEXT Used to expand the instrument display to full
screen, or to select items in the menu.
AAFunctionkey
BBFunctionkey
Function name International
keypad symbol Function description

NORTEC 600 — Getting Started Guide 11
Battery Precautions
• Before disposing of a battery, check your local laws, rules, and regulations, and follow them
accordingly.
• Transportation of lithium-ion batteries or AA-size lithium metal batteries is regulated by the
United Nations under the United Nations Recommendations on the Transport of Dangerous
Goods. It is expected that governments, intergovernmental organizations, and other international
organizations shall conform to the principles laid down in these regulations, thus contributing to
worldwide harmonization in this field. These international organizations include the
International Civil Aviation organization (ICAO), the International Air Transport Association
(IATA), the International Maritime Organization (IMO), the US Department of Transportation
(USDOT), Transport Canada (TC), and others. Please contact the transporter and confirm current
regulations before transportation of lithium-ion batteries or lithium metal batteries.
• Do not open, crush, or perforate batteries; doing so could cause injury.
• Do not incinerate batteries. Keep batteries away from fire and other sources of extreme heat.
Exposing batteries to extreme heat (over 80 °C) could result in an explosion or personal injury.
• Do not drop, hit, or otherwise abuse a battery, as doing so could expose the cell contents, which
are corrosive and explosive.
• Do not short-circuit the battery terminals. A short circuit could cause injury and severe damage
to a battery, making it unusable.
• Do not expose a battery to moisture or rain; doing so could cause an electric shock.
• Only use the NORTEC 600 unit or an external charger approved by Olympus to charge the
batteries.
• Only use batteries supplied by Olympus.
• Do not store batteries that have less than 40 % remaining charge. Recharge batteries to between
40 % and 80 % capacity before storing them.
• During storage, keep the battery charge between 40 % and 80 %.
• Do not leave batteries in the NORTEC 600 unit during instrument storage.
Equipment Disposal
Before disposing of the NORTEC 600, check your local laws, rules, and regulations, and follow them
accordingly.
CCFunctionkey
DDFunctionkey
EEFunctionkey
Function name International
keypad symbol Function description
CAUTION

Olympus Scientific Solutions Americas, 48 Woerd Avenue, Waltham,
MA 02453, USA
www.olympus-ims.com
Printed in the United States of America • Copyright © 2014, 2016, 2018 by Olympus. All rights reserved.
Part ID: U8030146 *U8030146* Printed on Rolland Hitech50,
which contains 50 % post-
consumer fiber.
DMTA-10039-01EN
Rev. E, February 2018 *DMTA-10039-01EN*
50%
NORTEC 600 — Getting Started Guide
Trademarks
microSD Logo is a trademark of SD-3D, LLC.
All brands are trademarks or registered trademarks of their respective owners and third party entities.
Other manuals for nortec 600
1
Table of contents
Other Olympus Security Sensor manuals

Olympus
Olympus OmniScan X3 User manual

Olympus
Olympus nortec 600 User manual

Olympus
Olympus Panametrics Epoch 4 Plus User manual

Olympus
Olympus OmniScan MX2 User manual

Olympus
Olympus EPOCH 600 Assembly instructions

Olympus
Olympus EPOCH 6LT User manual

Olympus
Olympus EPOCH 650 User manual

Olympus
Olympus Sonic 1200S/HR User manual

Olympus
Olympus EPOCH 6LT User manual

Olympus
Olympus EPOCH 1000 Series User manual