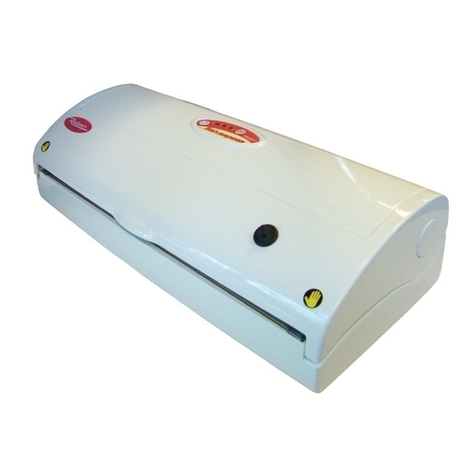
Omcan VP-IT-0300 User manual

Revised - 10/04/2023
Toll Free: 1-800-465-0234
Fax: 905-607-0234
Email: [email protected]
www.omcan.com
Vacuum Packaging
Model VP-IT-0300
Item 47718
Instruction Manual

2
Page
--------------------------------------------------------------------------- 3 - 4
--------------------------------------------------------------------------- 4 - 7
-------------------------------------------------------------------------- 7
--------------------------------------------------------------------------------------- 7 - 8
--------------------------------------------------------------------------------------- 8 - 10
----------------------------------------------------- 10 - 13
---------------------------------------------------------------------------- 14 - 15
---------------------------------------------------------------------------- 16
------------------------------------------------------------------------------------------- 17 - 18
---------------------------------------------------------------------------- 19
Table of Contents
Section
General Information
Safety and Warranty
Technical Specications
Installation
Operation
Maintenance and Troubleshooting
Parts Breakdown
Electrical Schematics
Notes
Warranty Registration
Model VP-IT-0300

3
General Information
Omcan Manufacturing and Distributing Company Inc., Food Machinery of America, Inc. dba Omcan
and Omcan Inc. are not responsible for any harm or injury caused due to any person’s improper or
negligent use of this equipment. The product shall only be operated by someone over the age of 18, of
CHECK PACKAGE UPON ARRIVAL
Upon receipt of an Omcan shipment please inspect for external damage. If no damage is evident on the
external packaging, open carton to ensure all ordered items are within the box, and there is no concealed
damage to the machine. If the package has suered rough handling, bumps or damage (visible or concealed),
please note it on the bill of lading before accepting the delivery and contact Omcan within 24 hours, so we may
initiate a claim with the carrier. A detailed report on the extent of the damage caused to the machine must be
lled out within three days, from the delivery date shown in the shipping documents. Omcan has no recourse
for damaged products that were shipped collect or third party.
instructions.
equipment if servicing or returning of the machine is required.
---------------------------------------------------------------------------------------------------------------------------------------------------
Omcan Fabrication et distribution Companie Limité et Food Machinery d’Amerique, dba Omcan et
Omcan Inc. ne sont pas responsables de tout dommage ou blessure causé du fait que toute personne
ait utilisé cet équipement de façon irrégulière. Le produit ne doit être exploité que par quelqu’un de
de la machine annule toute garantie, et peut causer un préjudice à des personnes utilisant la machine
ou des personnes à proximité de la machine pendant son fonctionnement.
VÉRIFIEZ LE COLIS DÈS RÉCEPTION
Dès réception d’une expédition d’Omcan veuillez inspecter pour dommages externes. Si aucun dommage
n’est visible sur l’emballage externe, ouvrez le carton an de s’assurer que tous les éléments commandés
sont dans la boîte, et il n’y a aucun dommage dissimulé à la machine. Si le colis n’a subi aucune mauvaises
manipulations, de bosses ou de dommages (visible ou cachée), notez-le sur le bond de livraison avant
d’accepter la livraison et contactez Omcan dans les 24 heures qui suivent, pour que nous puissions engager
une réclamation auprès du transporteur. Un rapport détaillé sur l’étendue des dommages causés à la machine
doit être rempli dans un délai de trois jours, à compter de la date de livraison indiquée dans les documents
d’expédition. Omcan n’a aucun droit de recours pour les produits endommagés qui ont été expédiées ou cueilli
par un tiers transporteur.

4
General Information
Safety and Warranty
Avant d’utiliser n’importe quel équipement, toujours lire et vous familiariser avec toutes les opérations
et les consignes de sécurité.
Omcan voudrais vous remercier d’avoir choisi cette machine. Il est primordial de conserver ces
l’expédition de l’équipement si l’entretien ou le retour de la machine est nécessaire.
---------------------------------------------------------------------------------------------------------------------------------------------------
Omcan Empresa De Fabricacion Y Distribucion Inc. Y Maquinaria De Alimentos De America, Inc. dba
Omcan y Omcan Inc. no son responsables de ningun daño o perjuicío causado por cualquier persona
inadecuada o el uso descuidado de este equipo. El producto solo podra ser operado por una persona
máquina mientras esta en el funcionamiento.
REVISE EL PAQUETE A SU LLEGADA
Tras la recepcion de un envio Omcan favor inspeccionar daños externos. Si no hay daños evidentes en el
empaque exterior, Habra el carton para asegurararse que todos los articulos solicitados ésten dentro de la
caja y no encuentre daños ocultos en la máquina. Si el paquete ha sufrido un manejo de poco cuidado, golpes
o daños (visible o oculto) por favor anote en la factura antes de aceptar la entrega y contacte Omcan dentro
de las 24 horas, de modo que podamos iniciar una reclamación con la compañia. Un informe detallado sobre
los daños causados a la máquina debe ser llenado en el plazo de tres días, desde la fecha de entrega que se
muestra en los documentos de envío. Omcan no tiene ningun recurso por productos dañados que se enviaron
a recoger por terceros.
funcionamiento y seguridad.
Omcan le gustaría darle las gracias por la compra de esta máquina. Es de la mayor importancia para
salvar estas instrucciones para futuras consultas. Además, guarda la caja original y el embalaje para el
WARNINGS
• Pay attention, during machine operation, to the presence of heating elements on the heating bar.
• Use embossed bags to store vacuum packed food, the same type and brand as those supplied; operation
of the appliance is not guaranteed with other types and brands of bag.
• Do not place the appliance in water and do not use it if the plug or the cable attached to the plug are wet.
• Every type of intervention on the appliance, including the cleaning operations must be carried out with the

5
Safety and Warranty
plug cable disconnected from the power socket.
• Vacuum packing does not replace other preservation procedures, but can be used alongside them.
• Perishable foods however require refrigeration or freezing to avoid deterioration; vacuum packing
lengthens their preservation time and maintains their organoleptic qualities intact.
• The pre-packaged products must be in any case consumed with the expiry date indicated on the
packaging.
• A higher vacuum level indicates less presence of oxygen, and therefore the possibility of better
preservation.
• Liquids must be refrigerated before being packaged in vacuum pack bags to prevent them leaking or
suction in the vacuum chamber.
• Powder products and grains must be covered with a napkin before being vacuum packed to avoid them
being sucked into the vacuum chamber, which would obstruct the valve or damage the pump.
• Containers not suitable for vacuum packing preservation can implode due to the eect of the air pressure,
causing damage and injury; for freezer preservation, only use the specic tempered glass jars for freezers.
• The vacuum pump and the sealing system are equipped with thermal protection; in the event of
overheating, the machine automatically stops and can start working again only after a few minutes of
cooling.
• The automatic operating settings were created at the time of manufacture to obtain the best performance
of the machine, in terms of safety and reliability. If in particular cases, dierent performance is required to
those pre-set, you need to proceed in manual mode.
• If you don’t wait the minimum time required between the connection to the mains and the start of the work
cycle, you need to disconnect and re-insert the plug in the socket and wait the minimum time required (15
seconds).
• When using with containers it is recommended to use the appliance in manual mode and to pay close
attention to the heating of the sealing bar, to avoid burns.
• If worn, the cable should be replaced by a specialist technician with cable type HAR H05VV-F or however
equal to the cable supplied.
• Practice and experience will allow you to obtain the best results from the appliance with every dierent type
of food.
• For its use, pay attention the appliance is on a at and stable surface.
• To work, the appliance must be connected to a power socket that is always easily accessible during use.
• Acoustic level under 60 dBA.
• Minors must not play with the appliance.
• Cleaning and maintenance of the appliance must not be carried out by unsupervised minors.
INFORMATION ON VACUUM PACK PRESERVATION
VACUUM PACKING
It means removing the air from a container or bag, to preserve the content from harmful eects caused by
oxygen, such as oxidation or development of mould and bacteria. All the objects, in contact with the air, are
subject to alterations; these alterations are particularly obvious in food. The air and humidity in foodstus
cause mould and micro-organisms to develop, a loss of avour and smell and colour alterations. Preservations
systems, such as refrigeration, freezing and drying, have the purpose of reducing and preventing such
alterations; vacuum packing, thanks to air extraction, considerably lengthens the preservation period of the
foodstu whether fresh or preserved. To make the vacuum time ecient and lasting, the container and the bag
6
Safety and Warranty
must be correctly sealed.
VACUUM PACKING PRESERVATION
Preservation, especially of foodstus, takes place using particular humidity and temperature conditions (for
example in the press, refrigerator or freezer); vacuum packing, in addition to the normal preservation methods,
considerably lengthens the time these products can be preserved. Vacuum packing preservation also enables
avour, smell, color and nutritional quality of the food to be unchanged.
WHY PRESERVE WITH VACUUM PACKING?
BECAUSE IT SAVES YOU MONEY: you can purchase larger quantities of products and in the periods most
indicated, keeping them fresh and intact thanks to vacuum packing!
BECAUSE YOU AVOID WASTE: the portions of excess food will not go to waste, but can be kept and used
later!
BECAUSE IT SAVES YOU TIME: you can conveniently cook your meals, preserve them in vacuum packs and
use them as you wish, simply by reheating them!
BECAUSE IT’S MORE HYGIENIC: vacuum packaging prevents the development of mould, bacteria, micro-
organisms and allows you to use the refrigerator and the freezer, avoiding the risk of contamination among
foodstus and the dispersion of odours!
BECAUSE IT IS SIMPLE: with our appliances, everyone can obtain professional quality vacuum packing at
home, using the most suitable appliance for your needs, and a complete series of accessories for any type of
preservation. Double layer vacuum packing bags, containers in polycarbonate also for oven, microwave and
freezer use, and dishwasher safe, universal round and rectangular lids for use with containers, bowls, jars and
saucepans for normal household use, small, re-usable lids for glass jars!
WARNINGS
The preservation time of the food greatly depends on the initial conditions of the food. Vacuum packing does
not replace other preservation systems. Food that requires appropriate temperature conditions must be kept in
the fridge or freezer even if vacuum packed. All pre-packaged products must however be consumed before the
expiry date indicated on the packaging. Some types of fruit and vegetables must be peeled or blanched and
frozen before vacuum packing.
RESIDENTIAL USERS: vendor assumes no liability for parts or labor coverage for component failure
or other damages resulting from installation in non-commercial or residential applications. The right
possible.
1 YEAR PARTS AND LABOUR BENCH WARRANTY
equipment.
improper use.

7
Installation
Safety and Warranty
Technical Specications
Model
Operation Type Automatic
280 W
Electrical 110-120V / 60Hz / 1
Body Inox
Pump One Cylinder Energy Saving
Pump Capacity -0.9 Bar | 40 L/min
Vacuum Seal Bar
Width 11.8” / 300mm
Outlet for Canister
Attachment Yes
Vacuometer Yes
Dimensions 15.4” x 10.8” x 4.9” / 390 x 275 x 125mm
Weight 11.5 lbs. / 5.2 kgs.
17.3” x 12.6” x 8.3” / 440 x 320 x 210mm
14.1 lbs. / 6.4 kgs.
Item Number 47718
Install the product on a at surface that takes into consideration the dimensions of the appliance, levelled,
smooth, dry, robust, with the height o the ground of approximately 80 cm and with the useful space necessary
Please see https://omcan.com/disclaimer for complete info.
WARNING:
The packaging components are classied as normal solid urban waste and can therefore be disposed of
without diculty.
DO NOT DISCARD ANY PACKAGING MATERIALS IN THE ENVIRONMENT!

8
Operation
Installation
GENERAL USE MANUAL
Having inserted the power supply plug in an adequate socket, wait 15 seconds before starting operations.
The appliance is set and guaranteed for use with Reber branded embossed bags, the functionalities of the
appliance are not guaranteed in the event of use with dierent bag types or brands. The vacuum packers with
external suction are not suitable for use with products with a high rate of humidity. Any suction of liquids can
damage the appliance (pump, electronic data sheet and gaskets of the vacuum chamber); such damage is
considered improper use of the machine and is not covered by warranty. The appliance must be kept in a dry
place at a temperature of between +10° and + 30°. The bags, especially if the packaging is open, must be kept
in a dry place at a temperature of between +10° and + 30°.
GENERAL SETTINGS
THE FACTORY SETTINGS INCLUDE
• Electronically set sealing power of 5 time/power units, suitable for the bags supplied, with a thickness of
95/105 micron.
• The sealing power set can be modied using electronic programming using the appliance buttons.
• The appliance is prepared for automatic use of the vacuum/sealing cycle, simply by pressing the start
button, without any other use of the buttons.
• Pressing the start button during functioning of the appliance terminates all other operations, stopping both
the pump and the sealing bar.
• Electronic programming enables manual functioning passage.
• In manual operating mode, you need to press and release the start button to start the air suction operation
and press and release the sealing button to start the sealing operation.
• ATTENTION: if the sealing button is pressed during the sealing operation, the sealing operation is
interrupted.
• The appliance is prepared for a standby time of 3 seconds between reaching the vacuum level set and the
start of the sealing process (super vacuum function).
• The appliance is prepared for a standby time of 7 seconds at the end of the sealing operation to obtain
better sealing quality.
• The appliance is equipped with a welding booster function which increases the welding time by 20% for the
rst 3 work cycles, beyond 3 cycles, if the appliance is not used for more than 5 minutes, it is advisable to
disconnect the appliance from the network to reinitialize the system and use the booster again.
around it for use and maintenance.
ENVIRONMENTAL CONDITIONS
Minimum temperature +10° - Maximum temperature + 30°.
Minimum humidity 30% - Maximum humidity 80%.

9
Operation
NOTE: the optimal sealing time can vary based on the type of bag used and the temperature and
protection activating.
IMPORTANT
In the event of long periods of non-use and/or low temperatures in the work or storage environment of the
appliance and the bags, before carrying out the packing procedure, you are advised to keep the pump on for at
least a minute and to carry out a vacuum/sealing cycle with a bag, with the cover closed. This operation allows
removal of any residual humidity in the sealing zone and establishes the temperature of pump operation.
VACUUM PACKING IN BAG
• Prepare the product by eliminating any roughness that could perforate the bag.
• Insert the product to preserve in a bag suitable for preservation of vacuum packed food, leaving at least 5
cm of free space from the bag opening.
• Lift the cover of the machine and rest the well-laid bag on the sealing bar, taking care to insert the open
side of the bag in the vacuum chamber.
• Insert the cable plug in an electricity socket, start the vacuum pump by pressing the switch and exerting
light pressure with your hands on the cover to create a rst negative pressure in the vacuum chamber; you
don’t need to press until the end of the operation, but only until the bag starts to stick to the product.
• At the end of the sealing operation, the machine stops. The cover will automatically open.
• Before placing the bag back for preservation, you should check the good quality of the sealing, i.e. the
absence of folds or impurities that could enable air passage.
VACUUM PACKING IN ROLL SEALING OPERATION WITHOUT VACUUM
• Lift the cover of the machine and rest the well-laid bag or portion of roll on the sealing bar, taking care NOT
to insert the open side of the bag in the vacuum chamber.
• Start the vacuum pump pressing the switch and exert light pressure with your hands on the cover to create
a rst negative pressure in the vacuum chamber.
• At the end of the sealing operation, the machine stops. Open the cover.
• Cut the sealed roll to the desired length and proceed to vacuum pack as described in the previous chapter.
• This operation requires containers with lids with a vacuum valve and a specic attachment for containers;
only use containers suitable for vacuum packing, in plastic or tempered glass).
• Always set the manual operating cycle to avoid damaging the sealing bar. The product to be vacuum
packed must always be at room temperature in order not to damage the container and the lid.
• Lift the cover of the machine and identify the air intake.
• Insert the tube of the attachment for containers in the air intake.
• Fill the container leaving at least 3 cm. of free space from the upper edge, and position the lid.
• Slightly unscrew the plug on the lid so the valve is released.

Operation
• Position the attachment on the plug, covering the valve completely.
• Start the pump on the vacuum until the desired vacuum level is reached.
level.
• Once the machine is switched o, remove the attachment for containers from the lid and screw in the plug
until the valve is blocked.
• To open the container, slightly unscrew the plug until the valve is released, then move the valve so air
enters the container.
VACUUM PACKING WITH UNIVERSAL LIDS
• Proceed as per vacuum packaging in the container, taking care the edge of the container used sticks
perfectly to the universal lid seal.
• In case of prolonged use on the same container, the seal of the lid can have a groove left by the edge of
the container; to eliminate any use problems, you must rotate the gasket on the opposite side; then the
groove with shortly disappear by itself.
• The seal of the lids can be removed for washing; once dry they must be correctly positioned; Attention! The
seal must be washed exclusively by hand with lukewarm water.
THE VACUUM LEVEL
The vacuum packers come with a vacuum sensor installed on the electronic board that detects reaching
the vacuum level obtained on the bag or container, controlling the start of the sealing function (automatic
operation). Certain models are also equipped with a device (LED and/or vacuum gauge with hand) that
enables the user to check the vacuum level created: switching on the red LED and/or the hand in the red zone
of the vacuum gauge indicates the optimal vacuum level has been reached. It is however possible to delay the
start of the sealing operation to obtain a greater vacuum level, i.e. not damage the machine in any way. The
vacuum level reachable by the machine is conditioned by the equality and shape of the food (or objects) in the
bag. Some food (sh, tomatoes, etc.) contain liquids that when compressed leak and can be sucked in causing
damage to the machine, and foodstus that due to their poor consistency can become crushed or damaged
by an excessive vacuum level; for this food, you are advised to check the level of adherence of the bag and
proceed to welding before any crushing.
Maintenance and Troubleshooting
UNDERSTAND AND RESOLVE DOUBTS ON CORRECT USE OF THE APPLIANCES
FOR VACUUM PACKING
The appliance is tested at the time of manufacturing with at least 3 vacuum/sealing cycles. If you are having
diculty during use, doubts or problems, you can proceed with some tests to check the eciency of the
product.

11
Maintenance and Troubleshooting
AUTO-DIAGNOSIS TESTS
INTERNAL COMPONENT OPERATION
• With the cover open, press the start button and close the air press with a nger.
• If the hand on the vacuum gauge reaches red (and/or the red led switches on) and sealing automatically
starts, internal operation is correct.
• If the hand on the vacuum gauge reaches red (and/or the red led switches on) but sealing does not
automatically start, you need to set the machine for automatic operation and try again.
• If the hand on the vacuum gauge does not reach red (and/or the red light does not switch on) the vacuum
pump is damaged or there is an air leak in the internal tubes circuit - contact a support centre for repair.
OPERATION OF THE COVER AND GASKETS ON THE VACUUM CHAMBER
• Close the cover on the machine (without inserting the bag), press the start button and exert light pressure
on the cover to start the automatic cycle.
• If the hand on the vacuum gauge reaches red (and/or the red led switches on) and sealing automatically
starts, machine operation is correct.
• If the hand on the vacuum gauge reaches red (and/or the red led switches on) but sealing does not
automatically start, you need to set the machine for automatic operation and try again.
• If the hand on the vacuum gauge does not reach red (and/or the red light does not switch on), you need to
check the chamber gaskets of the vacuum (clean the gaskets or replace them) and try again.
BAG INSERTION TEST
• Lift the cover.
• Position the open end of the empty bag in the chamber of the vacuum, between the gaskets in the vacuum
chamber.
• Lower the cover, press the start button and exert light pressure on the cover to start the automatic cycle.
• If the hand on the vacuum gauge reaches red (and/or the red led switches on) and sealing automatically
starts, machine operation is correct.
• If the hand on the vacuum gauge reaches red (and/or the red led switches on) but sealing does not
automatically start, you need to set the machine for automatic operation and try again.
Using these tests, you can check machine operation and you get correct insertion of the bag in the vacuum
chamber. Correct packaging is only obtained if enough free space is left between the product and the machine
(approx. 5 cm. are usually enough) provided the bag can be inserted well laid between the gaskets of the
vacuum chamber, without creating folds that could create air leaks, reducing the vacuum level and the quality
of sealing.
THE MACHINE DOES NOT START
• Check you have correctly inserted the plug in the electricity socket and the press is powered.
THE BAG IS NOT WELL SEALED/AIR IS ENTERING THE BAG
• During the winter period, and in the presence of extreme temperature changes, the sealing bar can ll
with humidity. On rst start-up of the cold machine you should execute a completed vacuum/sealing cycle
with the cover closed (also without a bag) to reset the machine and stabilise the temperature and humidity
conditions. To avoid problems also on rst use, the appliance must be kept in a dry place at a temperature

12
Maintenance and Troubleshooting
of between +10° and + 30°.
• The bags are composed of an outer layer in nylon to protect against air intake; the nylon tends to absorb
humidity especially in the presence of temperature changes; the humidity absorbed prevents correct
sealing: to solve the problem, the bags must be kept in a dry place at temperature between +10° and + 30°.
• The humidity absorbed by the outer layer of the bag can be eliminated by sealing the bag twice.
• Check you have left sucient free space between the product to pack and the opening of the bag; a limited
space creates folds and bends to prevent correct sealing and limits the vacuum level reachable.
• Check you have cleaned the opening of the bag near the sealing point; any impurities deriving from
passage of the product to package, prevents correct sealing.
• Check you have removed all possible roughness that could perforate the bag; the machines create a high
vacuum level with resulting adhesion of the bag to the product, any point or roughness can create micro-
pores in the bag to let air in.
• Humid products can cause liquid to rise towards the opening of the bag, damaging sealing; check you have
dried the products to package or use a double bag; insert the product in a rst bag, fold the mould of the
bag a few times and place it in a second bag with the opening folded of the rst turned towards the bottom
of the second. You can execute the vacuum function and any residual liquids will stay in the rst bag
without passing into the second, as such obtaining ecient sealing.
• When you use rolls, the rst sealing must be carried out by positioning the mouth on the roll on the sealing
bar and not in the vacuum chamber; the machine seals correctly only if the cover exerts correct pressure
on the sealing bar. Anticipating sealing before having a sucient vacuum level can create channels with air
passage and make sealing inecient. You are advised to carry out a complete automatic vacuum/sealing
cycle.
• Sealing only function: position the opening of the bag on the sealing bar and not in the vacuum chamber;
the machine seals correctly only if the cover exerts correct pressure on the sealing bar. Anticipating sealing
before having a sucient vacuum level can create channels with air passage and make sealing inecient.
You are advised to carry out a complete automatic vacuum/sealing cycle.
• If air enters the bag during the sealing phase and after a correct vacuum/sealing cycle, you need to replace
the bag which is probably damaged.
THE MACHINE DOES NOT CREATE A VACUUM IN THE BAG
• Check you have correctly positioned the opening of the bag between the seals of the vacuum chamber.
• Proceed with auto-diagnosis tests to ensure the machine is working correctly.
• The machine works correctly with original, embossed type bags. Dierent bags may not work adequately;
check you have used the correct bags.
• During the summer period (when temperatures are higher) or in the event of prolonged use, the residual
heat on the sealing bar can create pre-sealing of the bag to prevent the machine from correctly sucking:
decrease the sealing power using the electronic programming to decrease the sealing time, wait a few
minutes for the sealing bar to cool and continue to work with a lower sealing power.
• Check the seals on the vacuum chamber; in the event of slight liquid suction the seals can harden and get
damaged; in this case you need to change the seals.
THE MACHINE DOES NOT AUTOMATICALLY SEAL
• Proceed with auto-diagnosis tests to ensure the machine is working correctly.
• Start a vacuum cycle and manually seal to check the sealing bar is working properly.
• Check the electronic settings as described in the paragraph “Reset the factory parameters” or adjust the

13
Maintenance and Troubleshooting
setting on automatic operation as described in the paragraph “Pass from manual to automatic operation”.
• Check you have left sucient free space between the product to pack and the opening of the bag; a limited
space creates folds and bends on the opening of the bag that limits the vacuum level reachable and
prevent the vacuum sensor from starting automatic sealing.
THE MACHINE DOES NOT REACH A CONVENIENT VACUUM LEVEL
• Check you have correctly positioned the opening of the bag between the seals of the vacuum chamber.
• Proceed with auto-diagnosis tests to ensure the machine is working correctly.
• The machine works correctly with original, embossed type bags. Dierent bags may not work adequately;
check you have used the correct bags.
• Check you have removed all possible roughness that could perforate the bag; the machines create a high
vacuum level with resulting adhesion of the bag to the product, any point or roughness can create micro-
pores in the bag to let air in.
• Check you have left sucient free space between the product to pack and the opening of the bag; a limited
space creates folds and bends on the opening of the bag that limits the vacuum level reachable.
• Check the seals on the vacuum chamber; in the event of slight liquid suction the seals can harden and get
damaged; in this case you need to change the seals.
Note: hydraulic oil to be used is Omcan item 15713.

14
Parts Breakdown
Model VP-IT-0300 47718

15
Parts Breakdown
Model VP-IT-0300 47718
Item No. Description Position Item No. Description Position Item No. Description Position
AO021 Body for 47718 1 AO028 Seal Switch for 47718 11 AO038 Green Wiring for 47718 21
AO022 Base for 47718 2 AO029 Welding LED for 47718 13 AO039 Black Wiring for 47718 21
AO023 Cover for 47718 3 AO030 Green LED for 47718 14 AO040 Cable/Plug for 47718 22
AO024 Lower Vacuum Chamber for 47718 4 AO031 Vacuum Pump for 47718 15 AO041 Hinges with Screws for 47718 23
AO025 Upper Vacuum Chamber for 47718 5 AO032 Pump Base for 47718 16 AO042 Vacuum Socket for 47718 24
41618 Sealing Bar Complete for 47718 6 AO033 Solenoid Valve for 47718 17 AO043 Screw Rivet for 47718 25
72249 Top Bar for 47718 7 AO034 Electronic Board for 47718 18 AO044 Cover Screws for 47718 26
72246 Gasket for 47718 8 AO035 Filter Socket with Fuse for 47718 19 AO045 Base Feet for 47718 27
AO026 Vacuum Gauge for 47718 9 AO036 “N” Series Hose Set for 47718 20
AO027 Start/Stop Switch for 47718 10 AO037 “NF” Series External Filter for 47718 20

16
Electrical Schematics
Model VP-IT-0300 47718

17
Notes
________________________________________________________________________________________
________________________________________________________________________________________
________________________________________________________________________________________
________________________________________________________________________________________
________________________________________________________________________________________
________________________________________________________________________________________
________________________________________________________________________________________
________________________________________________________________________________________
________________________________________________________________________________________
________________________________________________________________________________________
________________________________________________________________________________________
________________________________________________________________________________________
________________________________________________________________________________________
________________________________________________________________________________________
________________________________________________________________________________________
________________________________________________________________________________________
________________________________________________________________________________________
________________________________________________________________________________________
________________________________________________________________________________________
________________________________________________________________________________________
________________________________________________________________________________________
________________________________________________________________________________________
________________________________________________________________________________________
________________________________________________________________________________________

18
Notes
________________________________________________________________________________________
________________________________________________________________________________________
________________________________________________________________________________________
________________________________________________________________________________________
________________________________________________________________________________________
________________________________________________________________________________________
________________________________________________________________________________________
________________________________________________________________________________________
________________________________________________________________________________________
________________________________________________________________________________________
________________________________________________________________________________________
________________________________________________________________________________________
________________________________________________________________________________________
________________________________________________________________________________________
________________________________________________________________________________________
________________________________________________________________________________________
________________________________________________________________________________________
________________________________________________________________________________________
________________________________________________________________________________________
________________________________________________________________________________________
________________________________________________________________________________________
________________________________________________________________________________________
________________________________________________________________________________________
________________________________________________________________________________________

19
Warranty Registration
Gracias por comprar un producto Omcan usted. Para registrar su garantía para este producto, complete la información a continuación,
cortar la tarjeta en la perforación y luego enviarlo a la dirección indicada a continuación. También puede registrarse en línea en:
Merci d’avoir acheté un produit Omcan. Pour enregistrer votre garantie pour ce produit, complétez les informations ci-dessous, détachez la
carte au niveau de la perforation, puis l’envoyer à l’adresse spécié ci-dessous. Vous pouvez également vous inscrire en ligne en visitant:
Thank you for purchasing an Omcan product. To register your warranty for this product, complete the information below, tear o the card at
the perforation and then send to the address specied below. You can also register online by visiting:
OMCAN
PRODUCT WARRANTY REGISTRATION
3115 Pepper Mill Court,
Mississauga, Ontario
Canada, L5L 4X5
https://omcan.com/warranty-registration/
Purchaser’s Information
Name: Company Name:
Address:
Telephone:
City: Province or State: Postal or Zip: Email Address:
Country: Type of Company:
Restaurant Bakery Deli
Dealer from which Purchased: Butcher Supermarket Caterer
Dealer City: Dealer Province or State: Institution (specify):
Invoice: Other (specify):
Model Name: Model Number: Serial Number:
Machine Description:
Date of Purchase (MM/DD/YYYY): Date of Installation (MM/DD/YYYY):
Would you like to extend the warranty? Yes No
Por correo en Canadá
Pour postale au Canada
For mailing in Canada
Por correo en los EE.UU.
For mailing in the US
OMCAN
PRODUCT WARRANTY REGISTRATION
4450 Witmer Industrial Estates, Unit 4,
Niagara Falls, New York
USA, 14305

Since 1951 Omcan has grown to become a leading distributor of equipment and supplies to the North
American food service industry. Our success over these many years can be attributed to our commitment
to strengthen and develop new and existing relationships with our valued customers and manufacturers.
Today with partners in North America, Europe, Asia and South America, we continually work to improve
and grow the company. We strive to offer customers exceptional value through our qualied local sales
and service representatives who provide convenient access to over 6,500 globally sourced products.
Depuis 1951 Omcan a grandi pour devenir un des “leaders” de la distribution des équipements et
matériel pour l’industrie des services alimentaires en Amérique du Nord. Notre succès au cours de ces
nombreuses années peut être attribué à notre engagement à renforcer et à développer de nouvelles
et existantes relations avec nos clients et les fabricants de valeur. Aujourd’hui avec des partenaires en
Amérique du Nord, Europe, Asie et Amérique du Sud, nous travaillons continuellement à améliorer et
développer l’entreprise. Nous nous efforçons d’offrir à nos clients une valeur exceptionnelle grâce à
nos ventes locales qualiées et des représentants de service qui offrent un accès facile à plus de 6500
produits provenant du monde entier.
Desde 1951 Omcan ha crecido hasta convertirse en un líder en la distribución de equipos y suministros
de alimentos en América del Norte industria de servicios. Nuestro éxito en estos años se puede atribuir
a nuestro compromiso de fortalecer y desarrollar nuevas relaciones existentes con nuestros valiosos
clientes y fabricantes. Hoy con socios de América del Norte, Europa, Asia y América del Sur, que trabajan
continuamente para mejorar y crecer la empresa. Nos esforzamos por ofrecer a nuestros clientes valor
excepcional a través de nuestro local de ventas y representantes de los servicios que proporcionan un
fácil acceso a más de 6,500 productos con origen a nivel mundial.
This manual suits for next models
1
Table of contents
Other Omcan Kitchen Appliance manuals

Omcan
Omcan MS-IT-0330-N User manual

Omcan
Omcan MS-IT-0370-H User manual

Omcan
Omcan 28 User manual

Omcan
Omcan Santos 02 User manual

Omcan
Omcan 195F User manual

Omcan
Omcan 44507 User manual

Omcan
Omcan VP-NL-0004-SN User manual

Omcan
Omcan MS-IT-0220-B User manual

Omcan
Omcan VP-IT-0330 User manual

Omcan
Omcan MS-CN-0220-C User manual

Omcan
Omcan WC-CN-0181-DB User manual

Omcan
Omcan FW-CN-0200-H User manual

Omcan
Omcan ABN-HD User manual

Omcan
Omcan MS-IT-0300-A User manual

Omcan
Omcan VP-IT-0330-S User manual

Omcan
Omcan VP-CN-0600 User manual

Omcan
Omcan 13655 User manual

Omcan
Omcan GR-IT-1500-H User manual

Omcan
Omcan WC-CN-0275-D User manual

Omcan
Omcan MS-CN-0195-E User manual