Omcan CE-CN-0082T-WG User manual

Revised - 10/24/2023
Toll Free: 1-800-465-0234
Fax: 905-607-0234
Email: [email protected]
www.omcan.com
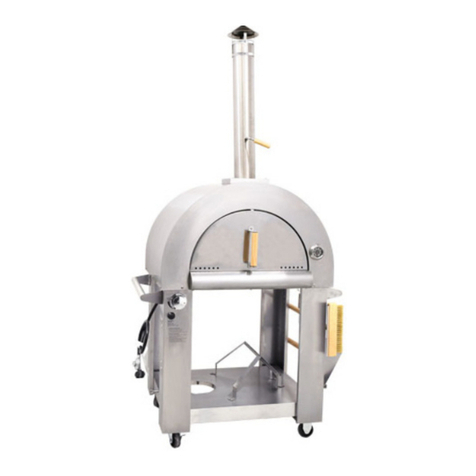
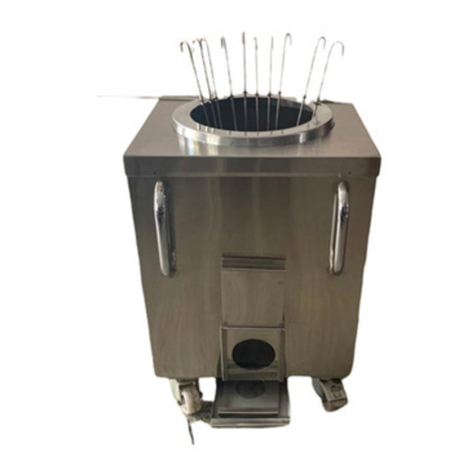
Wood and Gas Oven
Model CE-CN-0082T-WG
Item 47875
Instruction Manual

2
Page
--------------------------------------------------------------------------- 3 - 4
--------------------------------------------------------------------------- 4 - 8
-------------------------------------------------------------------------- 8
-------------------------------------------------------------------------------------- 9 - 15
------------------------------------------------------------------------------------- 16 - 19
--------------------------------------------------------------------------------- 19 - 24
---------------------------------------------------------------------------- 25 - 26
---------------------------------------------------------------------------- 27
Table of Contents
Section
General Information
Safety and Warranty
Technical Specications
Installation
Operation
Maintenance
Parts Breakdown
Warranty Registration
Model CE-CN-0082T-WG

3
General Information
Omcan Manufacturing and Distributing Company Inc., Food Machinery of America, Inc. dba Omcan
and Omcan Inc. are not responsible for any harm or injury caused due to any person’s improper or
negligent use of this equipment. The product shall only be operated by someone over the age of 18, of
sound mind, and not under the inuence of any drugs or alcohol, who has been trained in the correct
operation of this machine, and is wearing authorized, proper safety clothing. Any modication to the
machine voids any warranty, and may cause harm to individuals using the machine or in the vicinity of
the machine while in operation.
CHECK PACKAGE UPON ARRIVAL
Upon receipt of an Omcan shipment please inspect for external damage. If no damage is evident on the
external packaging, open carton to ensure all ordered items are within the box, and there is no concealed
damage to the machine. If the package has suered rough handling, bumps or damage (visible or concealed),
please note it on the bill of lading before accepting the delivery and contact Omcan within 24 hours, so we may
initiate a claim with the carrier. A detailed report on the extent of the damage caused to the machine must be
lled out within three days, from the delivery date shown in the shipping documents. Omcan has no recourse
for damaged products that were shipped collect or third party.
Before operating any equipment, always read and familiarize yourself with all operation and safety
instructions.
Omcan would like to thank you for purchasing this machine. It’s of the utmost importance to save
these instructions for future reference. Also save the original box and packaging for shipping the
equipment if servicing or returning of the machine is required.
---------------------------------------------------------------------------------------------------------------------------------------------------
Omcan Fabrication et distribution Companie Limité et Food Machinery d’Amerique, dba Omcan et
Omcan Inc. ne sont pas responsables de tout dommage ou blessure causé du fait que toute personne
ait utilisé cet équipement de façon irrégulière. Le produit ne doit être exploité que par quelqu’un de
plus de 18 ans, saine d’esprit, et pas sous l’inuence d’une drogue ou d’acohol, qui a été formé pour
utiliser cette machine correctement, et est vêtu de vêtements de sécurité approprié. Toute modication
de la machine annule toute garantie, et peut causer un préjudice à des personnes utilisant la machine
ou des personnes à proximité de la machine pendant son fonctionnement.
VÉRIFIEZ LE COLIS DÈS RÉCEPTION
Dès réception d’une expédition d’Omcan veuillez inspecter pour dommages externes. Si aucun dommage
n’est visible sur l’emballage externe, ouvrez le carton an de s’assurer que tous les éléments commandés
sont dans la boîte, et il n’y a aucun dommage dissimulé à la machine. Si le colis n’a subi aucune mauvaises
manipulations, de bosses ou de dommages (visible ou cachée), notez-le sur le bond de livraison avant
d’accepter la livraison et contactez Omcan dans les 24 heures qui suivent, pour que nous puissions engager
une réclamation auprès du transporteur. Un rapport détaillé sur l’étendue des dommages causés à la machine
doit être rempli dans un délai de trois jours, à compter de la date de livraison indiquée dans les documents
d’expédition. Omcan n’a aucun droit de recours pour les produits endommagés qui ont été expédiées ou cueilli
par un tiers transporteur.
4
Safety and Warranty
General Information
WARNING
Improper installation, adjustment, alteration, service or maintenance can cause property damage, injury or
death. Read the installation, operating and maintenance instructions thoroughly before installing or servicing
this equipment.
Avant d’utiliser n’importe quel équipement, toujours lire et vous familiariser avec toutes les opérations
et les consignes de sécurité.
Omcan voudrais vous remercier d’avoir choisi cette machine. Il est primordial de conserver ces
instructions pour une référence ultérieure. Également conservez la boîte originale et l’emballage pour
l’expédition de l’équipement si l’entretien ou le retour de la machine est nécessaire.
---------------------------------------------------------------------------------------------------------------------------------------------------
Omcan Empresa De Fabricacion Y Distribucion Inc. Y Maquinaria De Alimentos De America, Inc. dba
Omcan y Omcan Inc. no son responsables de ningun daño o perjuicío causado por cualquier persona
inadecuada o el uso descuidado de este equipo. El producto solo podra ser operado por una persona
mayor de 18 años, en su sano juicio y no bajo alguna inuencia de droga o alcohol, y que este ha sido
entrenado en el correcto funcionamiento de esta máquina, y ésta usando ropa apropiada y autorizada.
Cualquier modicación a la máquina anúla la garantía y puede causar daños a las personas usando la
máquina mientras esta en el funcionamiento.
REVISE EL PAQUETE A SU LLEGADA
Tras la recepcion de un envio Omcan favor inspeccionar daños externos. Si no hay daños evidentes en el
empaque exterior, Habra el carton para asegurararse que todos los articulos solicitados ésten dentro de la
caja y no encuentre daños ocultos en la máquina. Si el paquete ha sufrido un manejo de poco cuidado, golpes
o daños (visible o oculto) por favor anote en la factura antes de aceptar la entrega y contacte Omcan dentro
de las 24 horas, de modo que podamos iniciar una reclamación con la compañia. Un informe detallado sobre
los daños causados a la máquina debe ser llenado en el plazo de tres días, desde la fecha de entrega que se
muestra en los documentos de envío. Omcan no tiene ningun recurso por productos dañados que se enviaron
a recoger por terceros.
Antes de utilizar cualquier equipo, siempre lea y familiarizarse con todas las instrucciones de
funcionamiento y seguridad.
Omcan le gustaría darle las gracias por la compra de esta máquina. Es de la mayor importancia para
salvar estas instrucciones para futuras consultas. Además, guarda la caja original y el embalaje para el
envío del equipo si servicio técnico o devolución de la máquina que se requiere.

5
Safety and Warranty
YOUR SAFETY AND THE SAFETY OF OTHERS ARE VARY IMPORTANT
We have provided many important safety messages in this manual and on your appliance. Always read and
obey all safety messages.
All safety messages will follow the safety alert symbol and either the word “DANGER” or “WARNING”. These
words mean:
• Failure to comply with these instructions could result In a re or explosion that could cause serious bodily
injury, death, property damage.
• You can be killed or seriously injured if you don’t follow these instructions.
All safety messages will tell you what the potential hazard is, or tell you how to reduce the chance of injury, and
tell you what will happen If the instructions are not followed.
DANGER
If you smell gas:
1. Shut o gas to the appliance.
2. Extinguish any open ame.
3. Open lid.
4. If odor continues, keep away from the appliance and immediately call your gas supplier or your re
department.
Failure to follow these instructions could result in re or explosion which could cause property
damage, personal injury or death.
WARNING
1. Do not store or use gasoline or other ammable liquids or vapors in the vicinity of this or any other
appliance.
2. Gas not connected for use shall not be stored in the vicinity of this or any other appliance.
WARNING
1. Never operate this appliance unattended.
2. Never operate this appliance within 10ft (3.0m) of any structure, combustible material or other gas cylinder.
3. Never operate this appliance near any ammable liquid.
4. Do not ll cooking vessel beyond maximum ll line.
5. Never allow oil or grease to get hotter than 400°F or 200°C. If the temperature exceeds 400°F {200°C) or if
oil begins to smoke, immediately turn the burner or gas supply OFF.
6. Heated liquids remain at scalding temperatures long after the cooking process. Never touch cooking
appliance until it has cooled to 115°F (45°C) or less.
7. If a re should occur, keep away from the appliance and immediately call your re department. Do not
attempt to extinguish an oil or a grease re with water.
Failure to follow these instructions could result in re or explosion which could cause property
damage, personal injury or death.
WARNING
1. Use outdoors only.
2. Read the instructions before using the appliance.

6
Safety and Warranty
Warning: accessible parts may be vary hot. Keep young children away.
3. This appliance must be kept away from ammable materials during use.
4. Do not move the appliance during use.
5. Turn o the gas supply at the gas container after use.
6. Do not modify the appliance.
WARNING
The fuel supply cylinder(s) to be used must be constructed and marked in accordance with the
specications for propane cylinders of the U.S.Department of Transportation (DOT),or CAN/CSA 8339.
WARNING
This appliance shall be used only outdoors, in a well-ventilated space, and shall not be used in a
building, garage, or any other enclosed area.
WARNING
The installation must conform with local codes, or in the absence of local codes, with the National Fuel
Gas Code, ANSIZ223.1/NFPA54, or the Natural Gas and Propane Installation Code, CSAB149.1
The appliance must be isolated from the gas supply piping system by closing its individual manual
shuto valve during any pressure testing of the gas supply piping system attest pressures equal to or
less than 1/2 psi (3.5 kPa).
WARNING
Cylinders must be stored outdoors in a well-ventilated area out of the reach of children. Disconnected
cylinders must not be stored in a building, garage, or any other enclosed area. If the cylinder is tted
with a Type I Cylinder Connection Device, a statement that protective dust cap must be installed on the
valve outlet.
WARNING
The cylinder(s) should not be allowed to remain in a high heat area such as a closed car, trunk, or in
direct sunlight.
WARNING
Storage of an appliance indoors is permissible, only if the cylinder(s) is disconnected and removed
from the appliance.
WARNING
The cylinder must be provided with a shuto valve terminating in a cylinder valve outlet. A safety relief
device having a direct communication with the vapor space of the cylinder, the cylinder supply system
must be arranged for vapor withdrawal, and the cylinder used must include a collar to protect the
cylinder valve.
WARNING
The handling, storage, and transportation of all sizes of gas cylinders must be in accordance with
Storage and Handling of Liquid Petroleum Gases, NFPA58, or Natural Gas and Propane Installation

7
Safety and Warranty
Code, CSAB149.1.
WARNING
LP-gas cylinders are not to be stored in any compartments on the appliance that are not intended for
cylinder storage and that such unauthorized storage could lead to an explosion, re, or personal injury.
WARNING
Gas appliance pressure regulators, regarding protection (when supplied) to prevent freezing rain,
snow, etc., from collecting over the vent hole of propane rst.
PRECAUTIONS
1. A statement that the installation must conform with local codes, or in the absence of local codes, with the
National Fuel Gas Code, ANSI 2223. 1/NFPA 54,or the Natural Gas and Propane Installation Code, CSA
8149.1, as applicable, including:
2. Instructions to the eect that this appliance shall be used only outdoors, and shall not be used in a building,
garage, or any other enclosed area.
3. A statement that this appliance is not intended to be installed in or on a boat. For other than a recreational
vehicle gas grill, a statement that this appliance is not intended to be installed in or on a recreational
vehicle.
4. Minimum clearance from sides and back of unit to combustible construction,12 inches (30cm) from both
sides and 12 inches (30cm) from the back.
5. The regulator and hose assembly must be inspected before each use of the grill. The hose used should not
exceed 1.5m, If there is excessive abrasion or wear or if the hose is cut,it must be replaced prior to the grill
being put into operation. The replacement hose assembly shall be that specied by the manufacturer. The
pressure regulator and hose assembly supplied with the appliance must be used.
6. Do not leave the appliance unattended. Keep children and pets away from the appliance at all times.
7. This appliance will be hot during and after use. Use insulated oven mitts or gloves for protection from hot
surfaces or splatter from cooking liquids.
8. Do not move the appliance when in use.
9. This appliance is not intended for and should never be used as a heater.
10. Maintenance instructions (including recommended frequency guidelines) relative to:
- Keeping appliance area clear and free from combustible materials, gasoline, and other ammable vapors
and liquids.
- Not obstructing the ow of combustion and ventilation air.
- Keeping the ventilation opening(s) of the cylinder enclosure free and clear from debris.
- Visually checking burner ames, with pictorial representations.
- Checking and cleaning burner/venturi tubes for insects and insect nests. A clogged tube can lead to a re
beneath the appliance information for obtaining replacement parts and where they may be obtained.
RESIDENTIAL USERS: vendor assumes no liability for parts or labor coverage for component failure
or other damages resulting from installation in non-commercial or residential applications. The right
is reserved to deny shipment for residential usage; if this occurs, you will be notied as soon as
possible.

8
Safety and Warranty
1 YEAR PARTS AND LABOUR BENCH WARRANTY
Within the warranty period, contact Omcan Inc. at 1-800-465-0234 to schedule a drop o to either
an Omcan authorized service depot in the area, or to an Omcan Service warehouse to repair the
equipment.
Unauthorized maintenance will void the warranty. Warranty covers electrical and part failures, not
improper use.
Please see https://omcan.com/disclaimer for complete info.
WARNING:
The packaging components are classied as normal solid urban waste and can therefore be disposed of
without diculty.
In any case, for suitable recycling, we suggest disposing of the products separately (dierentiated
waste) according to the current norms.
DO NOT DISCARD ANY PACKAGING MATERIALS IN THE ENVIRONMENT!
Technical Specications
Model CE-CN-0082T-WG
Material Stainless Steel #430
Color Stainless Steel
Firebrick Inside the
Oven Yes
Heating Time 20 - 30 minutes
Dimensions 32.3” x 28.7” x 47.2” / 820 x 730 x 1200mm
Cooking Area 0.48m2 (25.2” x 29.5” / 640 x 750mm)
Adjustable Feet Yes
Fuel Wood and Gas
Number of Burners 1
BTU 35,000
Packaging Dimensions 33.5” x 33.5” x 23.6” / 850 x 850 x 600mm
Item Number 47875

9
Installation
ASSEMBLE YOUR OVEN FIRST WITH FOLLOWED STEPS:
1. Bottom shelf installment with 4pcs of 1/4x14mm screws.
Note: use a brush to clean the screws.
2. Fasten legs on the oven body with 12pcs of 1/4”x14mm screws.

10
Installation
3. Ash support installment with 4pcs of 1/4”x14mm screws.
4. Install the gas system assembly and the oven knob as shown in the gure.

11
Installation
5. Install the igniter.
6. Install the electrode and igniter.

12
Installation
7. Install the electrode xed cover and orice connector.
8. Install the ash box on the oven bottom.

13
Installation
9. Install the door handle with each 2 pieces of 1/4”x14mm screws + insulation mat + at washer + spring
washer + 1/4” bolts.
10. Put 8 rebricks and a mesh cover inside the pizza oven.

14
Installation
11. Install the chimney cap.
12. Install Chimney with 4pcs of 1/4”x14mm screws.

15
Installation
LEAK TESTING
GENERAL
Although all gas connections on the grill are leak tested at the factory prior to shipment, a complete gas
tightness check must be performed at the installation site due to possible mishandling in shipment,or excessive
pressure unknowingly being applied to the unit. Periodically check the whole system for leaks following the
procedures listed below. If the smell of gas is detected at any time you should immediately check the entire
system for leaks.
BEFORE TESTING
Make sure that all packing material is removed from the grill including the burner tie-down straps. DO NOT
SMOKE WHILE LEAK TESTING. NEVER PERFORM LEAK TEST WITH AN OPEN FLAME. Make a soap
solution of one part liquid detergent and one part water. You will need a spray bottle, brush, or rag to apply the
solution to the ttings. For the initial leak test, make sure the L.P. cylinder is full.
TO TEST
1. Make sure the control valves are in the “OFF” position, and turn on the gas supply.
2. Check all connections from the LP gas regulator and supply valve up to and including the connection to
the manifold pipe assembly (the pipe that goes to the burners). Soap bubbles will appear where a leak is
present.
3. If a leak is present,immediately turn o the gas supply and tighten the leaky ttings.
4. Turn the gas back on and recheck.
5. Should the gas continue to leak from any of the ttings, turn o the gas supply and contact Omcan.
Only those parts recommended by the manufacturer should be used on the grill. Substitution will void the
warranty. Do not use the grill until all connections have been checked and do not leak.
GAS FLOW CHECK
Each grill burner is tested and adjusted at the factory prior to shipment; however, variations in the local gas
supply may make it necessary to adjust the burners. The ames of the burners should be visually checked.
Flames should be blue and stable with no yellow tips, excessive noise or lifting. If any of these conditions exist,
check to see if the air shutter or burner ports are blocked by dirt, debris, spider webs, etc. If you have any
questions regarding ame stability, please call Omcan.
ALWAYS CHECK FOR LEAKS AFTER EVERY L.P. TANK CHANGE
Check all gas supply ttings for leaks before each use. It is handy to keep a spray bottle of soapy water near
the shut-o valve of the gas supply line. Spray all the ttings. Bubbles indicate leaks.

16
Operation
GAS USE CAUTION
BEFORE USING YOUR GAS FIRED PIZZA OVEN, PLEASE FOLLOW THE INSTRUCTION BELOW.
IF YOU SMELL GAS:
1. Close the gas.
2. Extinguish free ames.
3. Open the oven door.
THE GAS ESCAPE COULD CAUSE FIRE OR EXPLOSIONS CAUSING SERIOUS INJURIES OR
DAMAGES TO OBJECTS. IN CASE OF A GAS LEAK, DO NOT LIGHT THE OVEN AND DETERMINE
THE REASON FOR MALFUNCTION IN ORDER TO PREVENT FIRE AND/OR EXPLOSION.
Always use heat resistant utensils while cooking. Plastic spoons, forks, tongs etc and other similar materials
will not withstand the high temperatures in your oven and should be avoided. Always keep children and pets
away from the oven during use. The oven temperatures can be extremely high and can cause severe burns.
Keep fuel supply pipes far from hot surfaces. The color of oven surfaces can change due to high temperatures.
Do not use the oven in case of malfunction. This oven has been design only for the outside use and it has
not to be used in garages, in porches or verandas closed or covered. Never extinguish the ames with water.
Do not extinguish res using water. Do not use open ames near the oven. Do not place empty gas cylinders
near the oven. Do not paint or apply anything on the oven. Please follow the instructions for the connection
of the regulator. After a period of non-use, please check for gas leaks or burner obstructions. Any ammable
materials must be at least 100 em /39,3 in far from the oven. Should a grease re occur, turn the gas o and
close the oven door until the re is out. The liqueed petroleum gas (LGP) is not natural gas. The conversion
or attempted use of natural gas in a LGP unit is dangerous and will void your warranty. A rusty or dented
gas cylinder may be hazardous and must be controlled by your gas supplier. Do not use gas cylinders with a
damaged valve. Even an apparently empty cylinder could still contain gas. The cylinder should be transported
and stored accordingly. During operation, use heat resistant mittens or cooking gloves. All parts sealed by the
manufacturer must not be tampered.
TIPS FOR GAS USE
The oven you have purchased may have some or all the feature listed below. The locations and appearances
of the features shown here may not match what you are having on your model.

17
Operation
Any alteration of the product may be potentially hazardous. Use only low pressure exible pipes and regulators
allowed by the current regulation. To replace the pressure regulators and exible pipes please refer only to
the manufacturer instructions. Check hose each time before using the oven for nicks, cracking, abrasions or
cuts. If the hose is found to be damaged in any way,do not use the oven. Move the oven door holding the wood
handles.
LIGHTING
Check all gas connections for gas leak before starting your oven. Do not lean over the oven when lighting.
Keep your face and body at least 50 em /19,6 inches far from the oven door. When lighting the oven, the oven
door must be open. The burner control knob must be in the o position before turning on the LGP cylinder
valve.
1. Make sure burner knobs are turned to OFF.
2. For gas oven using a propane tank. Slowly open the tank valve.
Note: if ow limiting device activates, your oven may not light. If your oven does not light, the ames will be
low and will not heat properly. Turn tank valve and burner knob o and wait 30 seconds. After shutting o
the tank, very slowly open tank valve and wait 5 seconds before lighting.
3. Push the pulse ignitor module,push in and turn the burner knob to IGNITE/HI for the burner. The burner will
light immediately. When burner is lit, turn knob to desired setting.
- If the ame does not light, leave the knob turning it to “o position”. Wait 5 minutes and try again.
- Do not keep on oven at the maximum power more than 20 minutes.
- Do not exceed the limit temperature of 426°C / 800°F.
- During operation, never disconnect the gas regulator or other junctions.
- Do not touch external surfaces and the chimney ue during oven operation.
TO LIGHT THE GRILL WITH MATCH
If a burner will not light after several attempts using the control knobs, the burners may be lit with a Match.
1. If you have already attempted to light the main burner with the igniter, allow 5 minutes for any accumulated
gas to dissipate.
2. Insert a match into the lighting rod.
3. Strike the match to light it.
4. Gently hold the lit match close to the burner
5. Push the pulse ignitor module and push in and turn the control knob to IGNITE/ON. Hold this knob in for
15 seconds after the burner is lit. You will hear the “snapping” sound of the spark until after the knob is
released.
6. Remove the match and replace the manual lighting extension inside the cabinet door.
7. If the burner does not light within seconds turn the knob to the “OFF” position, wait 5 minutes and try again.
CAUTION
When using a match to light the grill make sure to use the attached lighting rod.
WARNING
Before lighting, please check the connection with proper procedure if leak turn the gas o.

18
Operation
WARNING
Do not store a spare LP-Gas cylinder under or near the appliance.
WARNING
If the information in above warning is not followed exactly, a re causing death or serious injury may occur.
WARNING
When lighting, keep your face and hands as far away from the grill as possible.
WARNING
This appliance will be hot during and after use. Use insulated oven mitts or gloves for protection from hot
surfaces or splatter from cooking liquids.
WARNING
Never ll the cylinder beyond 80 percent full.
WARNING
Open oven door during lighting.
COOKING
Always preheat your oven before cooking. Heat for 5-10 minutes or until the thermometer reaches
300-330°C / 572-626°F. Calculate a longer cooking time in cold or windy days or high altitudes. Calculate a
shorter cooking time if the external temperature is particularly hot. The cooking time depends on the weather
conditions or the quantities, dimensions and shape of food. Depending on the cooking condition, you may need
to regulate the burner knob in order to reach the right cooking temperature.
• Switch o the gas red oven and wait it to cool down before cleaning.
• To clean the oven don’t use traditional oven detergents, abrasive detergents, (kitchen detergents) or
detergents containing citrus extracts, nor use abrasive steel wool.
• The gas burner must be cleaned periodically, and remove any food residue. Make sure to not damage the
valves and the burners during cleaning.
ADVICE FOR COOKING PIZZA
Wait for around 15 minutes after lighting the oven, with the burner knob at maximum and the door closed to
reach the optimum temperature for cooking an excellent Neapolitan pizza (with an higher moisture degree): air
temperature of 400°C, refractory oor temperature of 350°C. Once the optimal temperature is reached, turn the
burner to the minimum position and open the door. The oven will maintain a constant temperature and you can
begin inserting the pizzas. Check and remove any residual grease to avoid a grease re. While cooking, do not
lean over the open oven or place hands or ngers on the front edge of the oven.
If the ames go out during cooking, turn o the gas knob and the gas cylinder knob. Wait ve minutes before
lighting up the oven again. During operation the oven can reach high temperatures. Do not move the oven or
leave it unattended while burning.

19
Operation
Maintenance
IF THE OVEN COOLS DOWN TOO QUICKLY
The cause could be either from the rst starting or starting the oven after a long period of inactivity. Avoid
making a small or fast re that would not heat the oven to capacity. Verify that water and/or humidity have not
inltrated the oven. Please verify that the burner is working well, so close the door.
IF THE OVEN DOES NOT COOK AS DESIRED
Check that the oven has reached the right temperature. Make a re with approximately 10 minutes of high
ame. Ensure the oven maintains the desired temperature for the duration of the cooking time; use the
door to adjust the heat intensity as well as the ame adjuster: open and close the door to raise or lower the
temperature as necessary. A statement to contact the factory, the factory representative, or a local service
company to perform maintenance and repairs.
Running at such high temperatures every time it’s used allows a lot of cooking and other debris to be burned
right o. However, in order to enjoy delicious and fast-cooking foods, your oven will need quick clean-outs after
each use, as well as deep cleaning on a regular basis.
REMOVE DEBRIS AND ASHES
Using your brush, reach right to the back of your oven and pull toward you to bring large pieces of wood and
other debris to the front of the oven. Scoop them out with your hands and discard them. Then, grab your ash
shovel, remove as much as you can, and place the ash into the garbage if you’re going to discard it. If you
have a garden, those ashes can provide loads of nutrients for your plants after they sit outside three to four
months. They can also be added to compost bins if you have them.
SCRAPE AND SWEEP THE OVEN FLOOR
Your scraper is the next tool you’ll need. Use it to scrape the oor of your oven, removing any ash, foods, or
spots that have become stuck onto the cooking surface. Then, use your brass brush to sweep what’s left out of
your oven and into the trash.
CLEAN PIZZA STONE
Remove the pizza stone and clean with your brass brush. Then wipe it using a dampened soft cloth. It’s
important to only do this while the stone is cold. Never clear with a hot or warm stone. Do not use a lot of water
as the stone is very absorbent and will crack if exposed to high temperatures in this state. Allow the stone to
dry for 24 hours before next use.
CLEAN THE INSIDE OF THE OVEN AND REPLACE STONE
You can gently remove the stones by hand. Feel free to use a at head screwdriver to pry up the rst stone.
While cleaning the oor of the oven, be mindful to do so gently. There is no need to apply any cleaning solution
to the interior of the oven, as smoke and ames discolor the inside during each use. Only clean appliance with

20
Maintenance
recommended cleaning agents.
WIPE INSIDE AND OUT
Put a small amount of powdered cleanser onto a clean, dry cloth and wipe all exterior parts of your oven to
remove soot and stains and to restore your oven’s shine. Always wipe in the direction of the stainless steel
grain for best results. Use a little water inside and wipe clean with a dry cloth.
WARNING
This conversion kit shall be installed by a qualied service agency in accordance with the manufacturer’s
instructions and all applicable codes and requirements of the authority having jurisdiction. If the information
in these instructions is not followed exactly, a re, an explosion or production of carbon monoxide may result
causing property damage, personal injury or loss of life. The qualied service agency is responsible for the
proper installation of this kit. The installation is not proper and complete until the operation of the converted
appliance is checked as specied in the manufacturer’s instructions supplied with the kit.
NG CONVERSION
1. Separate and disassemble 11 and 14 with a wrench.
This manual suits for next models
1
Table of contents
Other Omcan Oven manuals

Omcan
Omcan PE-IT-0024-S User manual

Omcan
Omcan CE-CN-1188 User manual

Omcan
Omcan PE-IT-0038-D User manual

Omcan
Omcan CE-IN-24X24-C User manual

Omcan
Omcan WO-CN-0640R 43113 User manual

Omcan
Omcan CE-CN-0098-WG User manual

Omcan
Omcan CE-TW-3600 Service manual

Omcan
Omcan CE-TW-0356 User manual

Omcan
Omcan PE-IT-0038-DS User manual

Omcan
Omcan WO-CN-1390-SS User manual
Popular Oven manuals by other brands

HOMCOM
HOMCOM 800-095 Assembly & instruction manual

Siemens
Siemens HB513ABR1 User manual and installation instructions

AEG
AEG COMPETENCE KB9820E User information

AEG
AEG DEK431010M user manual

AEG
AEG BPK556220W user manual

Parkinson Cowan
Parkinson Cowan Alto 60Gm Owners handbook and installation instructions