HELPFUL HINTS
NOTE: For best results, go through the operating procedures, carefully noting all
cautionary points and hints, which are included for your understanding and benefit.
•Make sure the machine is running atfull speed before beginning to juice.
•Do not force feed the juicer. For most fruits and vegetables, a slow, steady
pushdown the chute will work best. If the juicer begins to vibrate, a
slightly harder push should bring it back into balance.
•There is no need to cut a fruit or vegetable into sections that will fit whole
into the feeder chute. If it must be cut, cut only into large pieces that easily
fit down the feeder chute.
•When making adrink that usesa combination of more than one fruit or
vegetable, we suggest alternating the various fruits or vegetables when
placing themin the machine.For example: Carrot Apple Juice – place
one or two pieces of carrot in feeder chute, then a piece or two of apple.
Keep alternating in this manner.
•When juicing leafy greens, we suggest that you twist and roll the green into
a ball the size of a golf ball. Always place the greens into the juicer first,
followed by crispier vegetables such as carrots, celery, etc. The juice from
these vegetableswill force additional juice from the greens.
•When juicing very soft fruits and vegetables, such as tomatoes, grapes
and peaches, we suggest that you do not use the filters! Feed the machine
slowly, pausing between placing each fruit or vegetable into the feeder
chute. This will allow the juicer additional time to extract juice through
the strainer basket.It is also very helpful to alternate with firmer fruits
and vegetables. We suggest using seedless grapes and removing the peels
from tomatoes and peaches. Due to the softness of these fruits and
vegetables, some vibration mayoccur.
•Allow the Omega Juicer to run for one or two minutes after turning off the
Juicer to allow all juice to be extracted from the pulp. Once the juicer is
turned off, it is normal for the juicer to continue to spin for a minute or
two due to the precision balancing of the Omega Juicer.
•SELECTING FRUITS ANDVEGETABLES. It is very important that
you select fruits and vegetables that are very fresh –firm, crisp and juicy!
•CLEANING THE FRUITS AND VEGETABLES. Before you begin
juicing, thoroughly wash all dirt and sprays from the fruits and vegetables
as many of the valuable food elements are under the surface near the skin.
HINT: The only exceptions are cucumbers, pineapples, oranges and grapefruit.
These should be peeled.
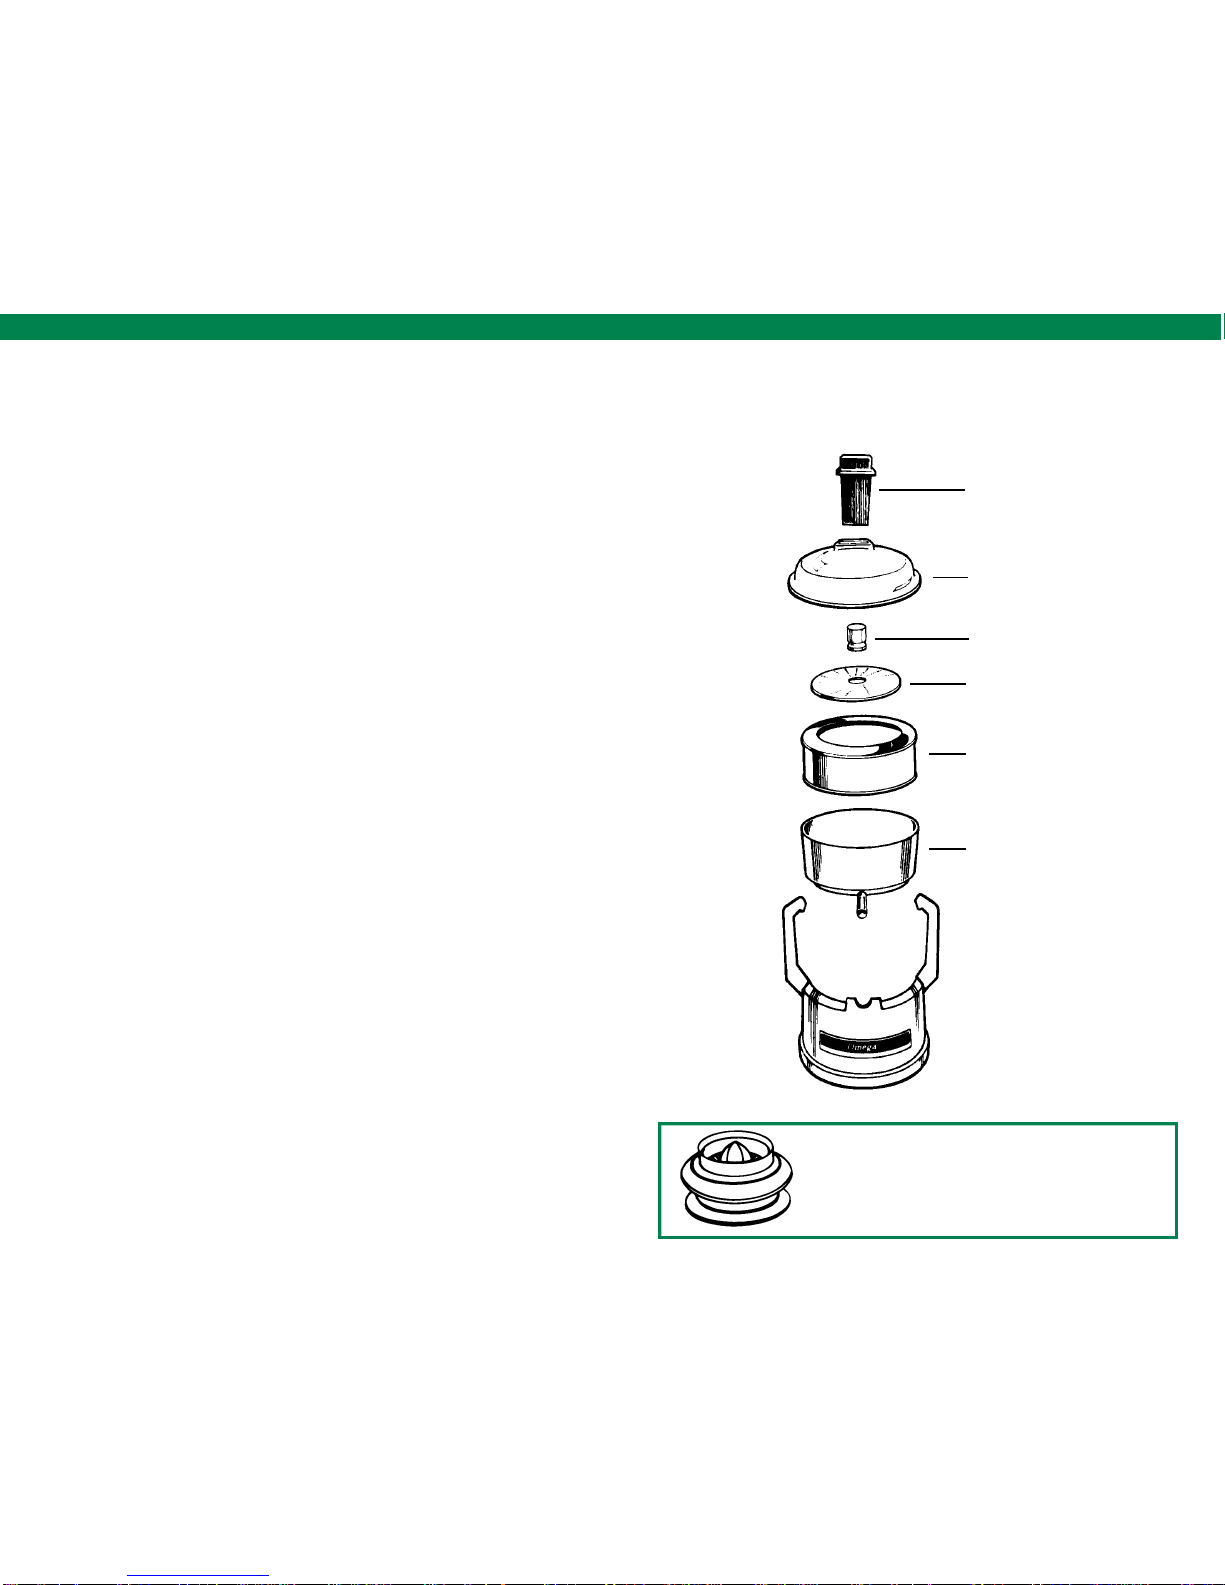
ASSEMBLY
NOTE: For best results, go through the assembly procedures, carefully
noting all cautionary points and hints, which are included for your
understanding and benefit.
STEP 1 Place bowl on motor base housing with spout facing you and
in the middle of the two raised projections.
STEP 2 Place strainer basket inside bowl, making certain that it rests
flat on platform center hex nut.
STEP 3 Insert cutter blade inside strainer basket with teeth up
centering it over hex nut.
STEP 4 Tighten clutch nut finger tight.
STEP 5 Insert optional filter liner into strainer basket.
STEP 6 Place cover on bowl with feeder chute opening to rear.
STEP 7 Place tabs of latch arms over cover and secure.
STEP 8 Insert plunger in cover opening.
DISASSEMBLY
STEP 1 Remove plunger from cover opening.
STEP 2 Release side latch arms by inserting finger into side opening at
bottom of the motor base and pulling upward.
STEP 3 Remove cover.
STEP 4 Unscrew clutch nut by turning counter-clockwise.
STEP 5 Lift out cutter blade from inside strainer basket.
STEP 6 Remove strainer basket.
STEP 7 Remove bowl.