omnicleanair.com 425-512-0379 info@omnicleanair.com
4640 Campus Place, Ste 100, Mukilteo, WA 98275
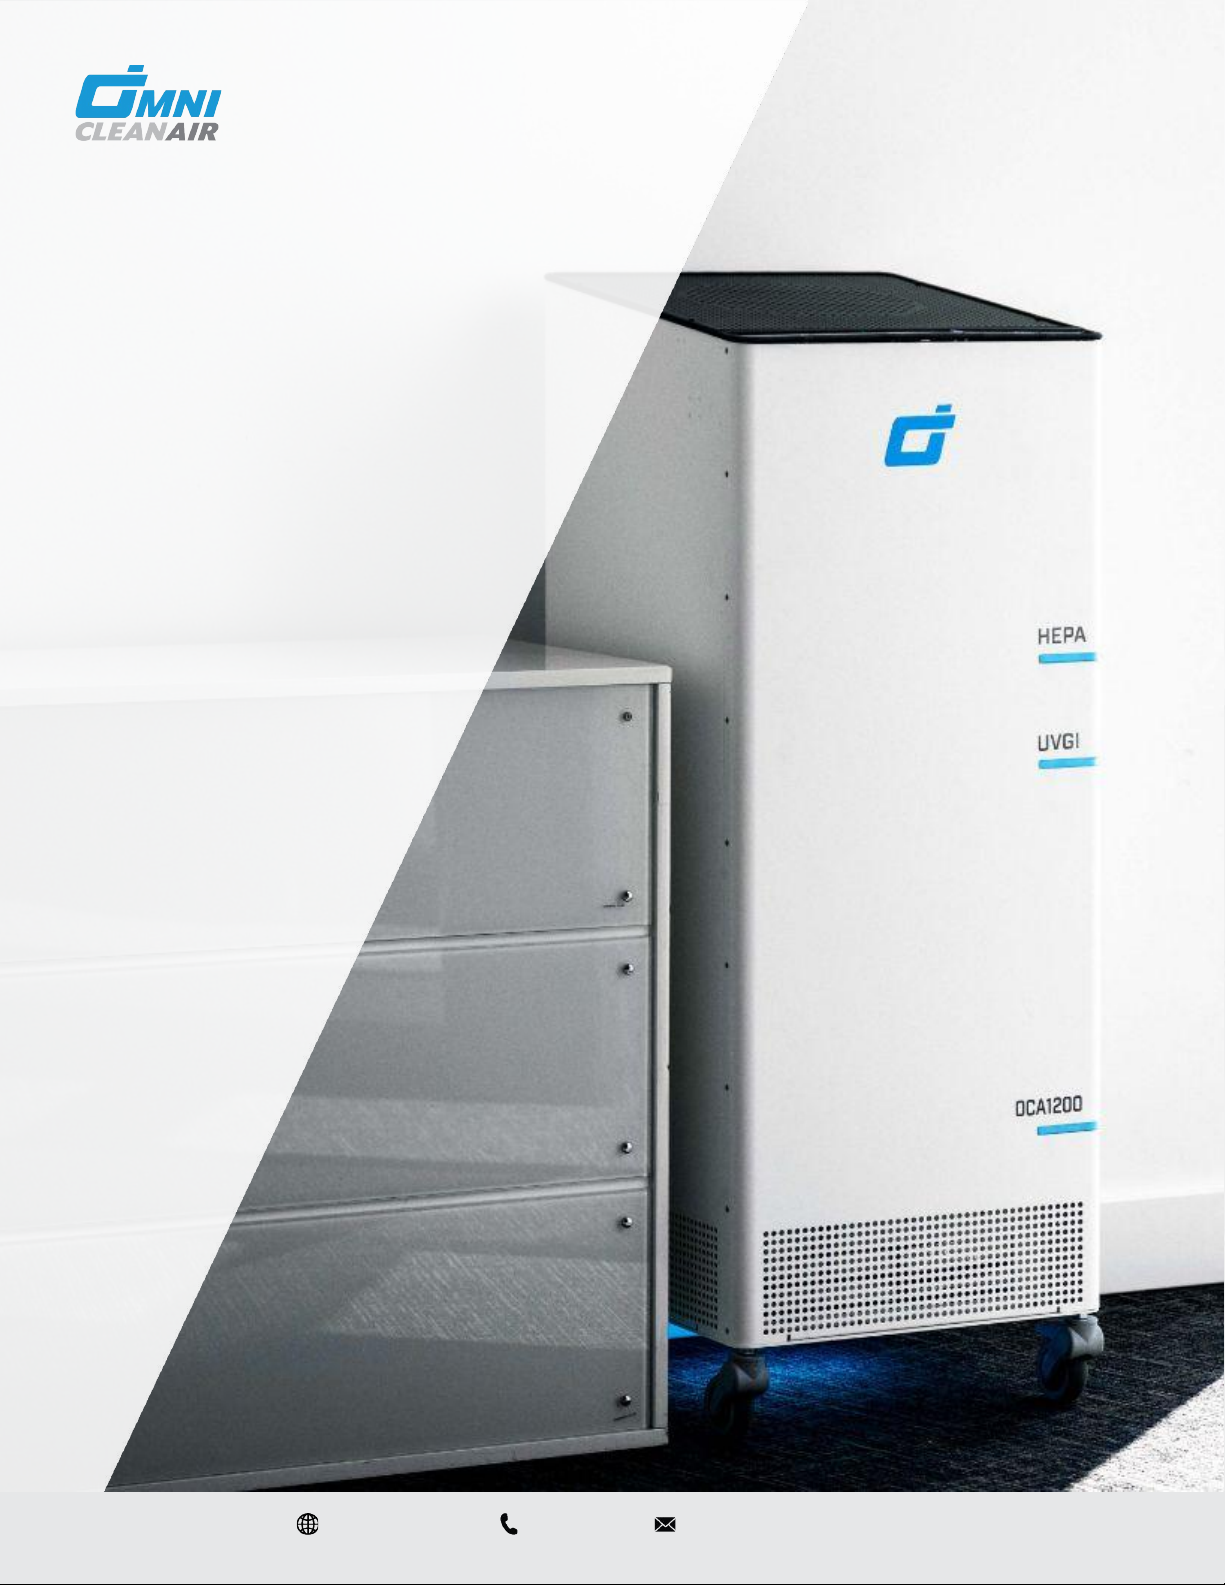
HEPA Filtration
The HEPA filter purifies the air and will gradually become loaded with sub-micron particulates.
Even when the HEPA filter is fully loaded, the filter is still removing particulates from the air at
the rated efficiency, yet at a reduced airflow. This will affect the ability of the machine to
provide positive or negative pressure within the containment. We recommend changing the
HEPA filter after no more than 365 days of operation.
UV Germicidal Lights
UVGI lights are installed in the compartment below the HEPA filter. The air passing by the UVGI
lights is sterilized and the bio-contaminants captured on the HEPA are killed or deactivated. To
maintain the full effectiveness of the UV Germicidal we recommend replacing the lights after
365 days of operation.
PreFilter
Near the bottom of the machine and right above the air intake grate is an access door for the
pleated PreFilter. The PreFilter is rated Minimum Efficiency Reporting Value (MERV) 11, and is
designed to remove dust, pollen, mold spores and other small particles from the air before it
passes through the HEPA filter. This will significantly extend the usable lifetime of the HEPA
filter, which is much more costly to replace. We recommend changing the PreFilter after no
more than 90 days of operation.
7
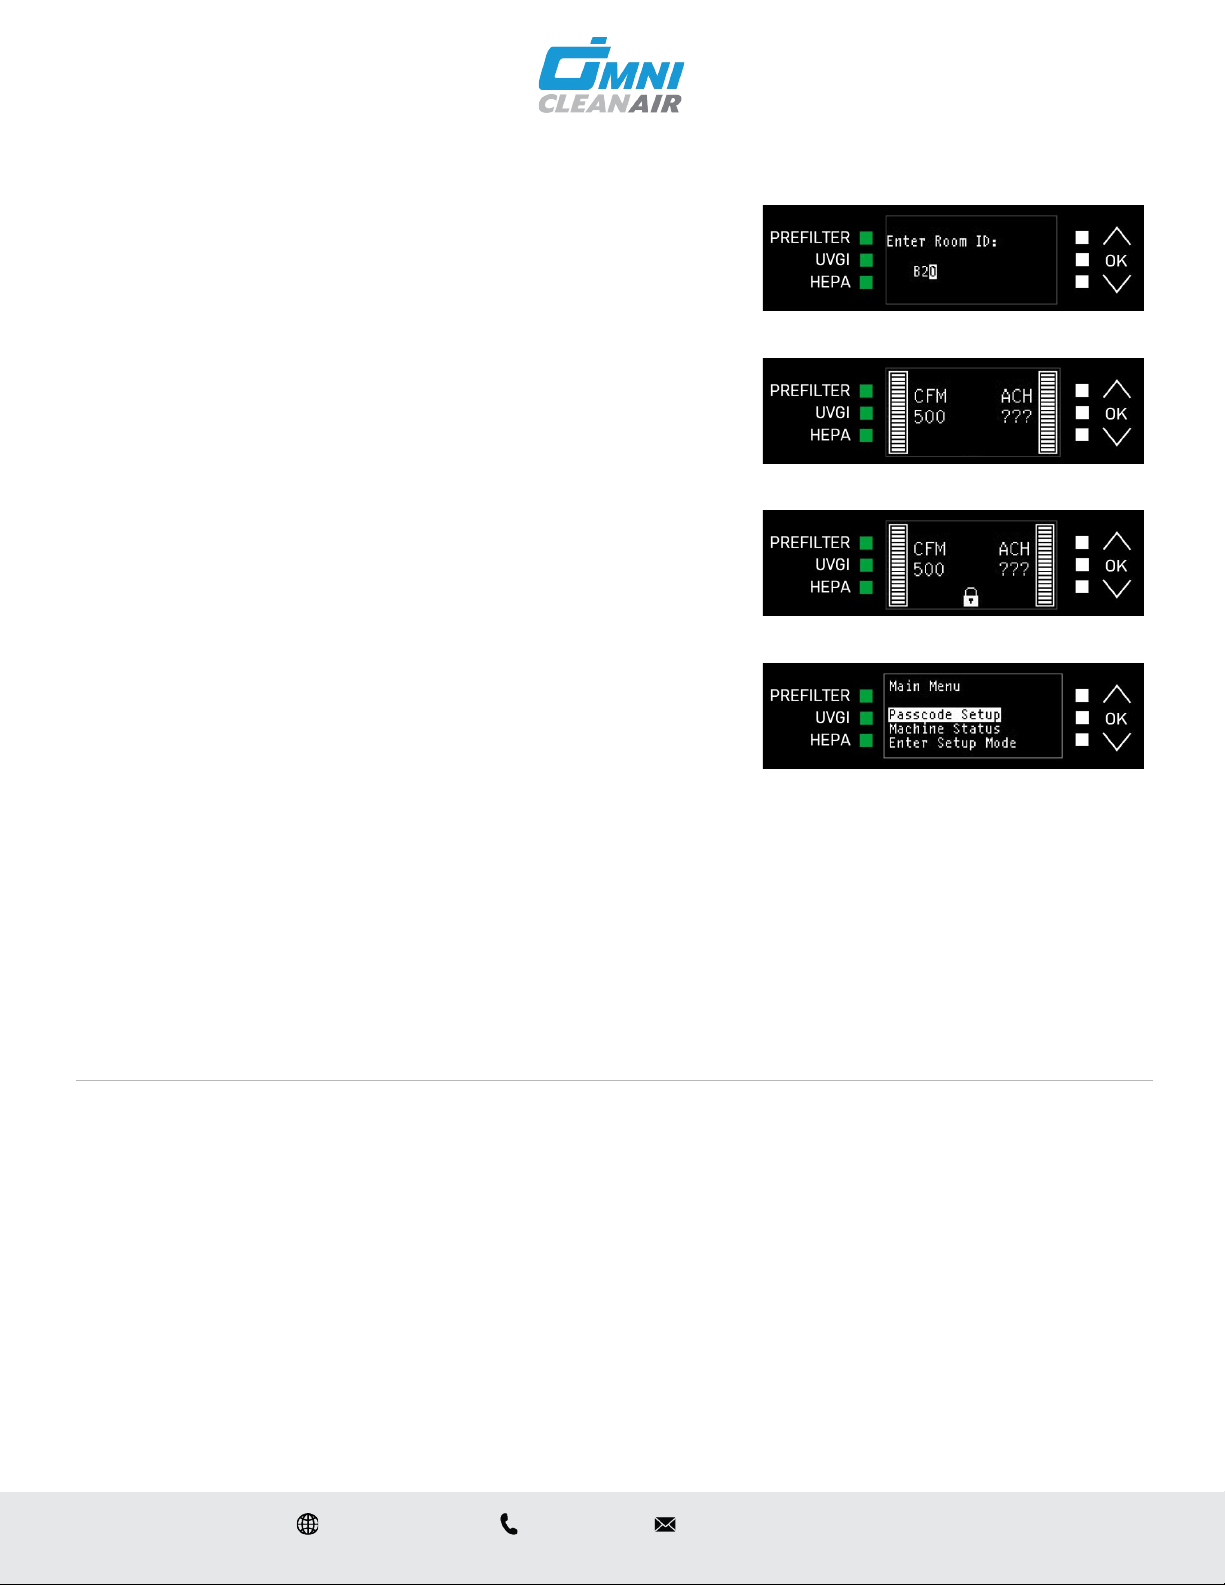
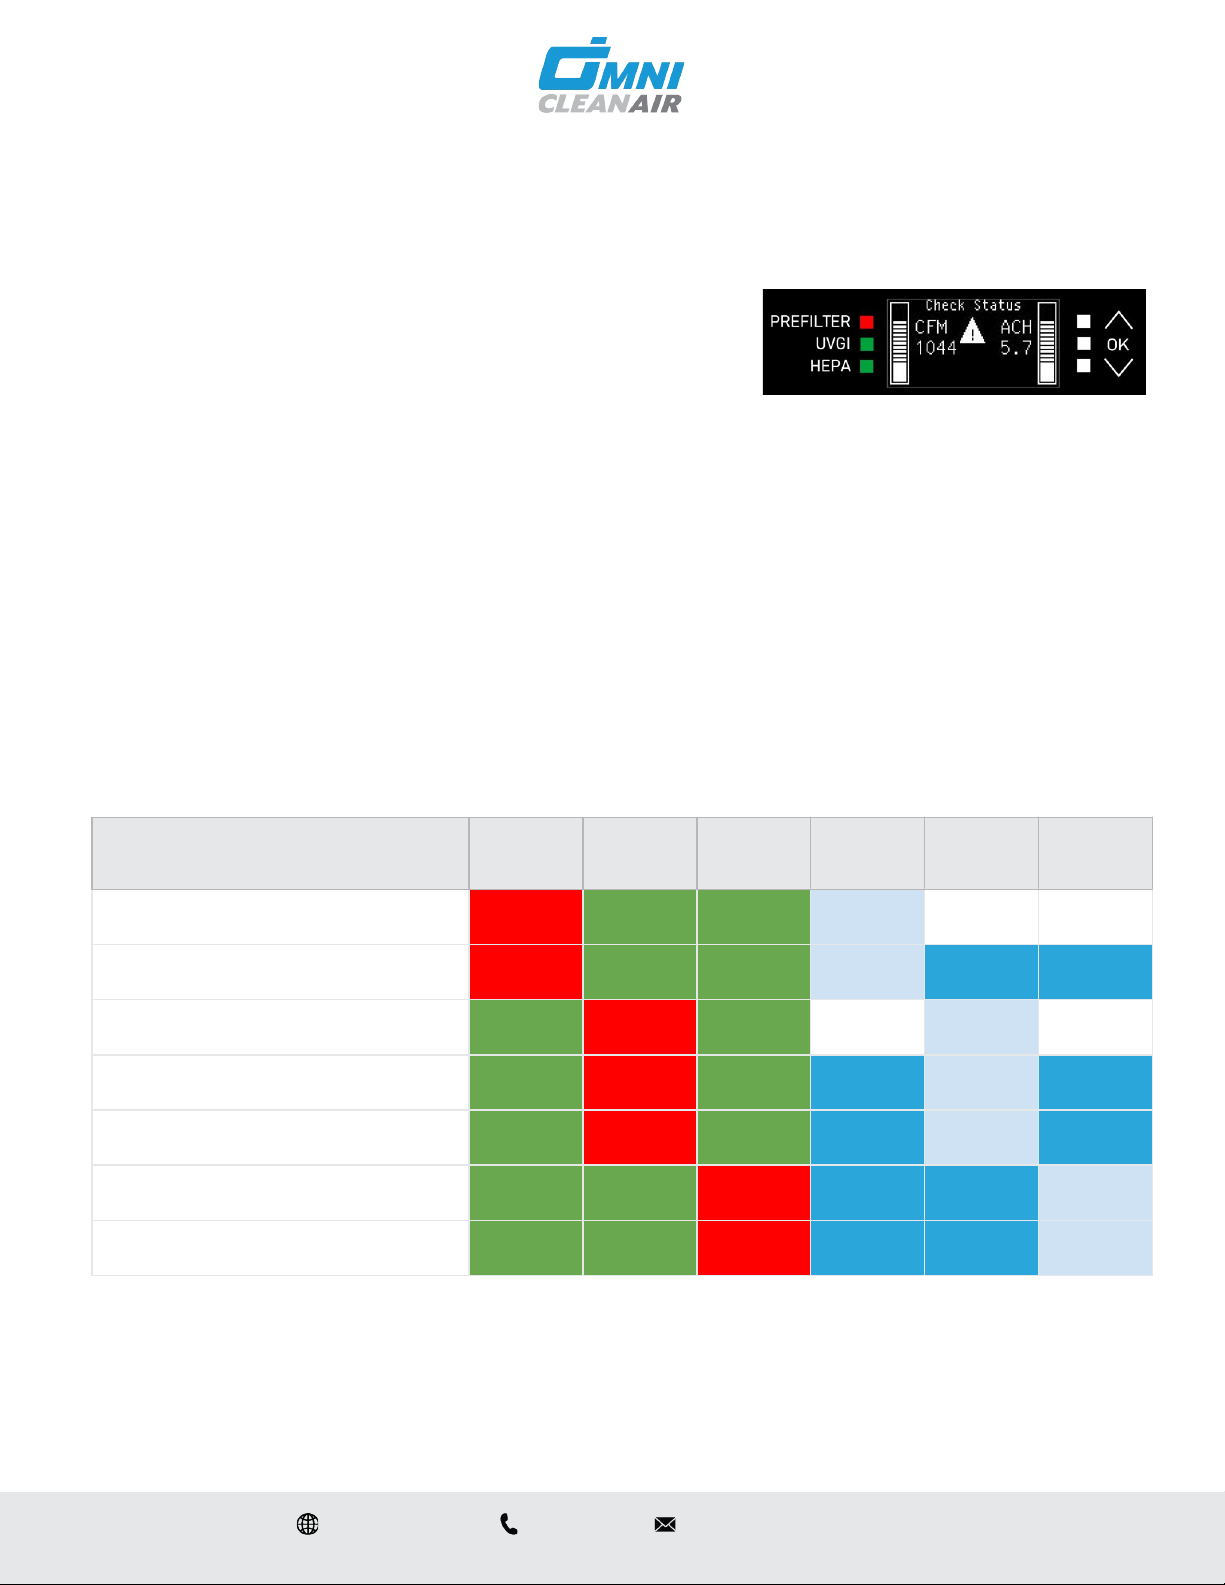
Machine Information Check
Information about your OCA machine can be reached
from the Main Menu by pressing OK; then using the
UP/DOWN arrows and selecting Show Machine Info. The
display will show Model Number, Serial Number,
Software Revision and Date of Manufacture. Press OK to
return, then UP/DOWN to Go Back to Main Menu.
Machine Status
You can check the status of the unit at any time from the
Main Menu by pressing OK; then using the UP/DOWN
arrows and selecting Machine Status. This will show the
number of days the unit has been in operation, as well as
the number of days of use for the HEPA filter, UV lamps
and PreFilter. The HEPA filter and UV bulbs each have a
usage life span of 365 days before replacement is
required; the PreFilter has a 90 day life span. The
example shows that the HEPA filter has been in use for
372 days, and therefore should be replaced.