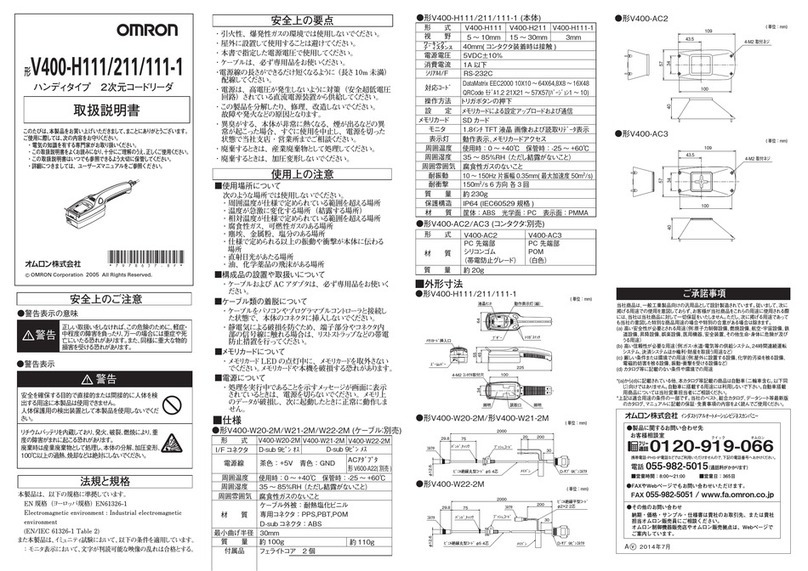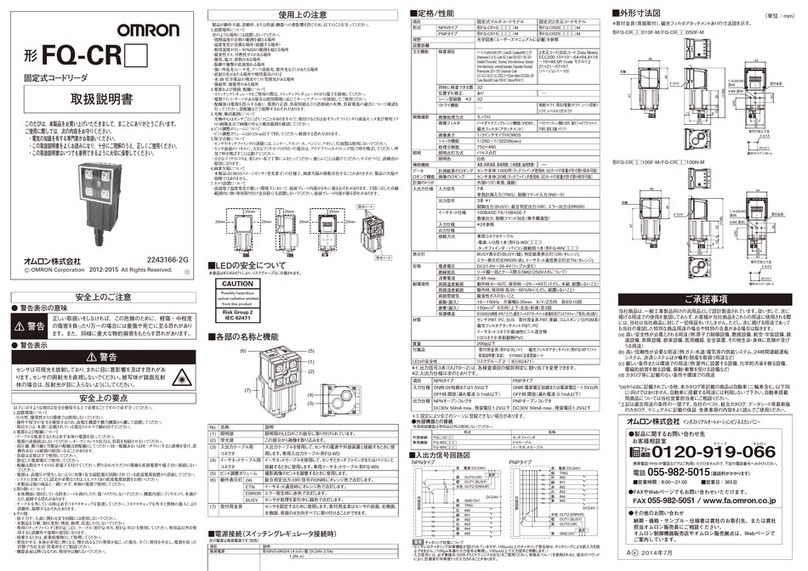
FQ□-D30/-D31
SAFETY PRECAUTIONS
Precautions for Safe Use
Precautions for Correct Use
●Keys to Warning Symbols
●Warning Symbols
Touch Finder for FQ□-S Smart Camera
FQ-CR Code Reader
FQ2-CH Optical Character Recognition Sensor
Indicates a potentially hazardous
situation which, if not avoided,
could result in death or serious
injury. Additionally, there may be
severe property damage.
The Touch Finder contains a lithium ion battery. There
is danger of severe injury due to fire, explosion, or
combustion. Never disassemble the Touch Finder,
deform it by pressure, or heat it to 100°C or higher.
■Dimensions
Always follow the rules below to ensure safety.
1. Installation environment
· Do not use in a location where there is flammable or explosive gas.
· To ensure safe operation and maintenance, install away from
high-voltage equipment and power equipment.
· Install the unit so that the vents are not blocked.
2. Power and cable connections
· Use the specified power supply voltage.
· Use the specified size of crimp terminals for wiring connections.
Do not connect wires that have been simply twisted together
directly to the power supply or terminal block.
· Use a separate power supply. Do not share the power supply with
other devices.
· Keep the power supply cable as short as possible.
· Do not use a voltage that exceeds the rated voltage, and do not use
an AC power supply.
· Do not reverse the polarity of the power connection.
· Wire this product separately from the wiring of high-voltage wires
and power wires. If wired together or in the same conduit, induction
may occur and cause malfunctioning or damage.
·
Supply power from a DC power supply for which measures have been
applied to prevent high voltages (e.g., a safety overvoltage circuit).
· If UL certification is required for the overall system, use a UL Class
II DC power supply.
· When using the FQ□-D31, do not use with the switching regulator
and AC adapter (FQ-AC□) simultaneously connected.
·
Tighten the mounting screws to the torque specified in these instructions.
· Use the specified size of crimp terminals.
· Always turn OFF the power supply before connecting or
disconnecting cables or the power supply wiring.
· Turn OFF the power supply immediately if the battery leaks or
produces an odor. Electrolyte leaked from the battery may ignite,
possibly causing smoke, rupture, or fire.
·
If, during usage, charging, or storage, the battery produces an odor, heats,
becomes discolored, becomes misshapen, or exhibits any other unusual
conditions, remove it and do not use it. Continuing to use such a battery
may result in the battery heating, smoking, rupturing, or igniting.
3. Other Rules
· Do not use in safety circuits for atomic energy or that are critical
for human life.
· Do not attempt to disassemble, deform by pressure, incinerate,
repair, or modify this product.
· When disposing of the product, treat as industrial waste.
·
Use the special sensor (FQ□-S, FQ-CR,FQ2-CH), battery (FQ-BAT1),
and AC adapter (FQ-AC□). Using other than the specified devices
may cause ignition, burning, malfunctioning, or failure.
· If you notice an abnormal condition, stop using the unit
immediately, turn off the power, and consult your dealer.
· Do not drop or subject to shock.
· If the FQ□-D31 will be secured, remove the battery (FQ-BAT1).
If the rated temperature is exceeded with the battery inserted, the
protective circuit may activate and stop the unit.
Observe the following to prevent failure, malfunctioning, and adverse
effects on performance and the device.
1. Installation site
Do not install in the following locations:
· Locations where the ambient temperature exceeds the rated
temperature range.
· Locations subject to sudden temperature changes (where
condensation will form).
·
Locations where the relative humidity is below or above 35 to 85% RH
.
· Locations where there are corrosive or flammable gases.
· Locations where there is dust, salt, or iron powder.
· Locations where the device will be subject to direct vibration or
shock.
· Locations where there is strong scattered light (laser light, arc
welding light, ultraviolet light, etc.)
· Locations exposed to direct sunlight or next to a heater.
·
Locations where there is splashing or spraying of water, oil, or chemicals.
· Locations where there is a strong electrical or magnetic field.
2. Power, connections, and wiring
· In environments subject to excessive noise, connect the specified
ferrite core.
· When using a switching regulator, ground the FG pin of the
switching regulator.
· If there are surges on your power line, connect a surge absorber as
appropriate for your conditions of use.
· Before turning on the power after the wiring is completed, verify that
the power is correct, that there are no incorrect connections such as a
shorted load circuit, and that the load current is suitable. Incorrect
wiring may cause damage and failures.
· In the following situations, do not turn off the power. Data being
saved will be corrupted.
-Various data are being saved to the internal memory.
-Various data are being saved to an SD card.
· The LCD display panel is manufactured by precision technology;
however, there may be a few faulty picture elements. This is due to
the structure of the LCD panel and is not a product failure.
* Applicable to the FQ-D31 only.
* This value is only a guideline. No guarantee is implied. The value will be affected by operating conditions.
*1 This is a guideline for the time required for the brightness to diminish to half the initial brightness at room temperature and humidity. No
guarantee is implied. The life of the backlight is greatly affected by the ambient temperature and humidity. It will be shorter at lower or
higher temperatures.
*2 This value is only a guideline. No guarantee is implied. The value will be affected by operating conditions.
*3 Charging is possible only when the power switch of the Touch Finder unit is OFF.
The following power supply is recommended (option)
Connecting the Power Supply
1. Loosen the two terminal screws using a Phillips screwdriver.
2. Attach crimp terminals to the power lines.
Secure the positive and negative lines as indicated using M3
screws. Power supply tightening torque: 0.54 N·m
3.
In environments where there is excessive noise, attach a ferrite core to
the power supply cable (ZCAT1730-0730 from TDK or the equivalent).
1. Press the slider on the Touch Finder to the top.
2.
Hook the clip at the top of the Touch Finder on to the DIN Track.
3. Press the Touch Finder onto the DIN Track until the bottom clip
clicks into place.
Remove the power switch cover from the side of the unit, and
switch the power switch to ON.
Removal Procedure
1. Pull down on the slider on the Touch Finder.
2. Lift the Touch Finder at the bottom and remove it from the
DIN Track.
· Attach End Plates (sold separately) on the sides of the Touch
Finder on the DIN Track.
· If other devices will be installed next to the Touch Finder on the
same DIN Track, make sure that sufficient space is kept
between the devices as indicated previously.
· Always hook the clip at the top of the Touch Finder on the DIN
Track first. If the lower clip is hooked on first, the Touch Finder
will not be mounted very securely.
1)Install the Touch Finder in the following orientation to allow sufficient heat
dissipation.
2) Do not mount it in the following orientations.
3)To improve ventilation, leave space on both sides of the Touch Finder. The
distance between the Touch Finder and other devices should be at least that
shown in the following diagram.
• To prevent interference by noise, do not mount the Touch Finder on panels
which contain high-voltage devices.
• To keep the level of noise from the surrounding environment to a minimum,
install the Sensor and Touch Finder unit at least 200 mm away from power
lines.
3. Settings for the Initial Startup
• When using the logging function or the date verification function in the
OCR, set the date settings in the initial startup.
(Unit: mm)
WARNING
WARNING
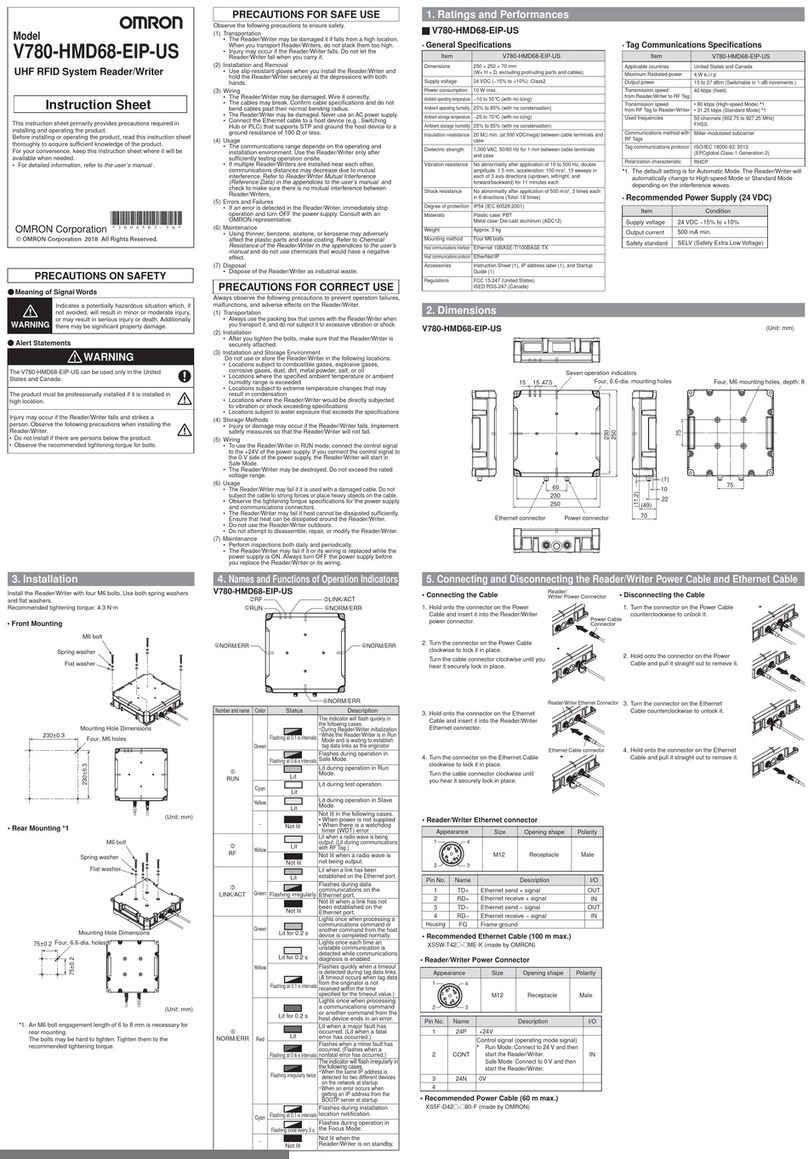
■Part Names and Functions
■Mounting to DIN Track
■Procedure for storing the touch pen
Remove the SD card cover from the top of the unit and insert
the SD card.
FQ□-D30 FQ□-D31
FQ□-D30 FQ□-D31
■Ratings/Performance
■Performance specifications
15 mm min.
1)
3)
2)
15 mm min.
(5)
(1) (12)
(2)
(6) (7)
(4)
(3)
ON
OFF
(11)
(8)
(9)
(10)
24 VDC
1
2
3
3
21
81111
95
44.5
70
52.9 20
35.5
85
35.5
1.1
27.912.1
19.2
17.3
3
15
13.5
23.8 14
27
The AC power connector is only on the FQ□-D31.
10
0.5
29
33
30
82
30
70
−1.5 h
Number of sensors that can be recognized (switched): 32, number of sensors that can displayed on monitor: 8
(1)
(2)
(3)
(4)
(5)
(6)
(7)
(8)
(9)
(10)
(11)
(12)
■
Procedure for switching on the power switch
■Power connection
(when a switching regulator is connected)
■Procedure for inserting an SD card
No.
Item
Item
Display
Operation
interface
Touch
screen
External
interface
Battery
LCD Display device 3.5-inch TFT color LCD
320 × 240
16,777,216
50,000 hours at 25°C
Provided (a function for changing the time setting is available)
Resistance film
1,000,000 operations
100Base-TX/10Base-T
SDHC-compliant, Class 4 or higher recommended
Power indicator (color: green): POWER
Error indicator (color: red): ERROR
SD card access indicator (color: yellow):
SD ACCESS
Power indicator (color: green): POWER
Error indicator (color: red): ERROR
SD card access indicator (color: yellow):
SD ACCESS
Charge indicator (color: orange): CHARGE
Provided
Pixels
Display colors
Screen saver
Method
Life expectancy*2
Life expectancy*1
Brightness
adjustment
Backlight
Indicators
Ethernet
SD card slot
Number of connectable sensors
Current consumption DC power connection: 0.2 A MAX
DC power connection: 0.2 A MAX Charging battery: 0.4A MAX
Between all lead wires and case: 0.5 MΩ(at 250 V)
Operating and storage: 35% to 85% (with no condensation)
10 to 150 Hz, single amplitude: 0.35 mm, X/Y/Z directions 8 min each, 10 times
270 g max. (without battery or hand strap)
95 × 85 × 32.5 mm
Case: ABS
Touch Pen, Instruction Manual (This Instruction Sheet)
IEC 60529 IP20
150 m/s23 times each in 6 direction (up, down, right, left, forward, and backward)
No corrosive gas
Insulation resistance
Ambient temperature Operating: 0 to 50°C
Storage: −25 to 65°C
(with no icing or condensation)
Operating: 0 to 50°C when mounted to DIN Track or panel
0 to 40°C when operated on a Battery
Storage: −25 to 65°C
(with no icing or condensation)
Ambient humidity
Ambient atmosphere
Vibration resistance (destruction)
Shock resistance (destruction)
Degree of protection
Weight
Dimensions
Materials
Accessories
Continuous operation on Battery*
Name Description
Lights green when power is supplied to the Touch Finder.
Lights red when an error occurs.
Lights yellow when an SD card is inserted. Flashes yellow when the SD card is being accessed.
Lights orange when the Battery is charging.
An SD card can be inserted.
The Battery is mounted behind this cover. Remove the cover when mounting or removing the Battery.
Used to turn the power supply to the Touch Finder ON and OFF.
The touch pen can be stored in here when it is not being used.
Used to operate the touch panel. Before using the Touch Finder, tie the touch pen strap to the strap holder.
Used to connect a DC power supply.
Used to mount the Touch Finder to a DIN Track.
Used when connecting the Touch Finder to the Sensor with an Ethernet cable.
This is a holder for attaching the strap.
Used to connect the AC adapter.
This displays the setting menu, measurement results, and the image captured by the camera. The touch panel
can be operated to configure camera and Touch Finder settings.
Operation
indicators
LCD/touch panel
SD card slot
Battery cover*
Power supply switch
Touch pen holder
Touch pen
DC power supply connector
Slider
Ethernet port
Strap holder
AC power supply connector*
POWER
ERROR
SD ACCESS
CHARGE *
Allowable power voltage range DC power connection: 20.4 to 26.4 VDC (including
ripple)
When a DC power supply is connected:
20. 4 V to 26.4 V DC (including ripple)
When the FQ-AC□AC adapter (manufactured by Sino-
American Japan Co., Ltd) is connected:
100 V to 240 V AC, 50/60 Hz
When a battery is connected:
FQ-BAT1 battery pack (1 cell, 3.7 V)
Item
Recommended
Power Supply
External power supply
terminal screws
Recommended power
line wire size
Description
S8VS-01524 (24 VDC, 0.65 A)
M3.5 (tightening torque: 1.0 N·m)
AWG16 to AWG22
(length of 5 m max.)
When you attach the ferrite core to the power
supply cable, wrap the cable only one time.
Model
California regulations concerning perchlorate:
This product is a lithium battery that contains perchlorate, which
is regulated by the State of California. Please comply with these
regulations. For details see the following URL:
www.dtsc.ca.gov/hazardouswaste/perchlorate/
© OMRON Corporation 2010-2016 All Rights Reserved.
The following notice applies only to products that carry the CE mark:
Notice:
This is a class A product. In residential areas it may cause radio
interference, in which case the user may be required to take adequate
measures to reduce interference.
INSTRUCTION SHEET
Thank you for selecting OMRON product. This sheet pri-
marily describes precautions required in installing and
operating the product.
Before operating the product, read the sheet thoroughly to
acquire sufficient knowledge of the product. For your con-
venience, keep the sheet at your disposal.
Manufacturer:
Omron Corporation,
Shiokoji Horikawa, Shimogyo-ku,
Kyoto 600-8530 JAPAN
TRACEABILITY INFORMATION:
Importer in EU:
Omron Europe B.V.
Wegalaan 67-69
2132 JD Hoofddorp,
The Netherlands
Charging function Not available Available*3
Suitability for Use
s
Omron Companies shall not be responsible for conformity with any standards,
codes or regulations which apply to the combination of the Product in the
Buyer’s application or use of the Product. At Buyer’s request, Omron will
provide applicable third party certification documents identifying ratings and
limitations of use which apply to the Product. This information by itself is not
sufficient for a complete determination of the suitability of the Product in
combination with the end product, machine, system, or other application or
use. Buyer shall be solely responsible for determining appropriateness of the
particular Product with respect to Buyer’s application, product or system.
Buyer shall take application responsibility in all cases.
NEVER USE THE PRODUCT FOR AN APPLICATION INVOLVING
SERIOUS RISK TO LIFE OR PROPERTY WITHOUT ENSURING THAT THE
SYSTEM AS A WHOLE HAS BEEN DESIGNED TO ADDRESS THE RISKS,
AND THAT THE OMRON PRODUCT(S) IS PROPERLY RATED AND
INSTALLED FOR THE INTENDED USE WITHIN THE OVERALL
EQUIPMENT OR SYSTEM.
See also Product catalog for Warranty and Limitation of Liability.
Oct, 2014
D
OMRON Corporation Industrial Automation Company
Contact: www.ia.omron.com
Tokyo, JAPAN
OMRON ELECTRONICS LLC
2895 Greenspoint Parkway, Suite 200
Hoffman Estates, IL 60169 U.S.A.
Tel: (1) 847-843-7900/Fax: (1) 847-843-7787
OMRON ASIA PACIFIC PTE. LTD.
No. 438A Alexandra Road # 05-05/08 (Lobby 2),
Alexandra Technopark,
Singapore 119967
Tel: (65) 6835-3011/Fax: (65) 6835-2711
OMRON (CHINA) CO., LTD.
Room 2211, Bank of China Tower,
200 Yin Cheng Zhong Road,
PuDong New Area, Shanghai, 200120, China
Tel: (86) 21-5037-2222/Fax: (86) 21-5037-2200
OMRON EUROPE B.V.
Sensor Business Unit
Carl-Benz-Str. 4, D-71154 Nufringen, Germany
Tel: (49) 7032-811-0/Fax: (49) 7032-811-199
Regional Headquarters
