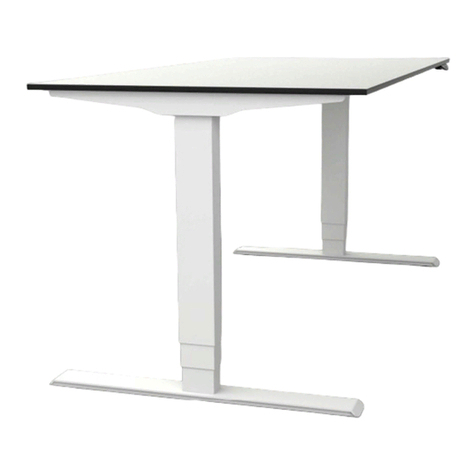
OMT FREE.STAND 9051 User manual

9051_Bedienungsanleitung_C1_Rev2_EN_UK 08.08.2018 TS / MB
Installation and operating instructions
Electrically height-adjustable
sit/stand work desks
System: FREE.STAND 9051
with motor controller STAND.CONTROL C1
( E-components 9910 )

9051_Bedienungsanleitung_C1_Rev2_EN_UK – Stand 08.08.2018 TS / MB 2
Table of Contents
1Preface ............................................................................................................................................................4
1.1 Use as intended...........................................................................................................................................4
1.2 Target group and previous knowledge........................................................................................................4
1.3 Symbols used in the safety instructions......................................................................................................5
1.4 Safety Instructions.......................................................................................................................................5
1.4.1 General safety instructions....................................................................................................................5
1.4.2 Before installation, deinstallation or troubleshooting.............................................................................7
1.4.3 Before initial operation ..........................................................................................................................7
1.4.4 During operation....................................................................................................................................7
1.4.5 Important information for resellers ........................................................................................................7
1.4.6 Indication service note ..........................................................................................................................8
1.5 Repairs ........................................................................................................................................................8
2Warranty..........................................................................................................................................................9
3Maintenance / Cleaning...............................................................................................................................9
4Assembly.......................................................................................................................................................10
4.1 Installing the longitudinal spars and table-top supports or the upper frame.............................................10
4.2 Fitting the skids..........................................................................................................................................11
4.3 Assembly of the desktop...........................................................................................................................11
4.4 Assembly of the controller and hand-switch..............................................................................................12
5Commissioning..............................................................................................................................................13
5.1 Connections to the STAND.CONTROL C1 motor controller.....................................................................13
5.2 Procedure during commissioning..............................................................................................................14
5.2.1 Connect the drives ..............................................................................................................................14
5.2.2Connect the hand-switch.....................................................................................................................14
5.2.3 Connect the power supply cable /mains cable....................................................................................15
5.2.4 Installing optional accessories ............................................................................................................15
5.3 Initialisation / Reset ...................................................................................................................................16
6Control...........................................................................................................................................................16
6.1 Normal operation (with all hand-switch variants) ......................................................................................16
6.2 Operation with STAND.MOVE M1.0 and M3.0.........................................................................................16
6.3 Operation with STAND.MOVE M1.1 hand switch with display and memory (optional) ............................17
6.3.1 How to save a position:.......................................................................................................................17
6.3.2 How to retrieve a saved position:........................................................................................................17
6.3.3 Calling the menu .................................................................................................................................18
6.3.4 Changing the unit of the height display (menu F1) .............................................................................18
6.3.5 Calibrating the height display (menu F2) ............................................................................................18
6.3.6 Factory reset (menu F3)......................................................................................................................19
6.3.7 Shelf- or Container Stop......................................................................................................................19
6.4 Optional function – safety zone.................................................................................................................20
7Cascading 2 Controllers................................................................................................................................20
8Troubleshooting.............................................................................................................................................21

9051_Bedienungsanleitung_C1_Rev2_EN_UK – Stand 08.08.2018 TS / MB 3
10 Error messages in the display of the hand switch (optional).........................................................................22
11 Click codes of the controller ..........................................................................................................................24
12 Technical Data...............................................................................................................................................25
13 Tests and certificates.....................................................................................................................................26
14 Address .........................................................................................................................................................27

9051_Bedienungsanleitung_C1_Rev2_EN_UK – Stand 08.08.2018 TS / MB 4
1 Preface
Dear customer,
We are pleased that you have decided to purchase our product. These instructions explain how to assemble,
use and maintain the sit/stand desk. All sit/stand desks are put through a thorough quality inspection before
leaving our factory. If you ever have any problems with our desk base, feel free to contact our service
department any time.
It is important to follow these instructions when assembling the desk base. Any changes on the desk base or an
improper usage can have an effect on the safety, functioning and service life!
These operating instructions are intended for all sit/stand desks from the 9051 FREE.STAND system with the
STAND.CONTROL C1 motor controller but, due to different versions/types, can deviate from the illustrations.
Oelschläger Metalltechnik GmbH
1.1 Use as intended
This sit/stand desk may be used solely as an office desk in the professional sector. Changes to the desk base
are prohibited. This sit/stand desk must be assembled, put into operation and functionally checked by skilled
personnel. The use of this sit/stand desk for any purpose other than the purpose stated above is only
permissible with the consent of Oelschläger Metalltechnik GmbH.
The basic function of the desk is the electromotive height adjustment of the desktop. This function can be
performed with all hand-switches that are available from us.
1.2 Target group and previous knowledge
These operating instructions are aimed at the following group of persons:
•The commissioning staff who assembles and commissions the sit/stand desks.
•Furniture installers, maintenance staff who commission the sit/stand desk in sales rooms or at the final
customer.
The following knowledge is required to commission and assemble the FREE.STAND sit/stand desk:
•Mechanical and electrical basic knowledge (corresponding illustration)
•Reading the instructions

9051_Bedienungsanleitung_C1_Rev2_EN_UK – Stand 08.08.2018 TS / MB 5
1.3 Symbols used in the safety instructions
Danger: These safety instructions point out an imminent danger for the life and health of persons!
Non-compliance with these warnings can result in danger to life, life-threatening injuries and
property damage.
Attention: These safety instructions point out possible dangers from electrical current!
Non-compliance with these warnings can result in injuries and property damage!
Note: These safety instructions point out important information which you must follow for the safe
operation of the FREE.STAND sit/stand desk.
Danger: These safety instructions point out a possible danger of crushing which exists in
exceptional cases.
Non-compliance with these warnings can result in danger to life, life-threatening injuries and
property damage.
Note: Warning on the obligation to read the operating instructions!
Note: Pull the power cord before going to the next step!
1.4 Safety Instructions
These operating instructions contain safety instructions which inform you about potential hazards and thus
facilitate the safe operation of the FREE.STAND sit/stand desk. Please be sure you comply with these safety
instructions!
This section provides you with general safety information that does not refer to any specific work step. You can
find the job-specific safety instructions in the respective section of the operating instructions. You will find
additional safety instructions on the individual parts of the FREE.STAND sit/stand desk.
1.4.1 General safety instructions
Note: Before assembly/commissioning, of the FREE.STAND sit/stand desk, you must read and
comply with the operating instructions!
Attention: Never open the STAND.CONTROL motor controller under any circumstances! There is
a danger of electric shock.
Attention: The FREE.STAND sit/stand desk is not designed for continuous duty. The desktop
height must not be adjusted without interruption for a time period longer than the operating time
stated on the rating plate.

9051_Bedienungsanleitung_C1_Rev2_EN_UK – Stand 08.08.2018 TS / MB 6
Attention: The STAND.CONTROL motor controller must only be operated with the mains voltage
specified on the rating plate!
Before commissioning, make sure the mains voltage on the rating plate of the motor controller
matches your mains voltage!
Danger: This unit can be used by children aged 8 years and above and by persons with reduced
physical, sensory or mental capabilities or lack of experience and knowledge when they are
supervised or instructed on the safe use of the device and understand the resulting risks.
Danger: Do not let children play with the device!
Danger: Cleaning and user maintenance must not be carried out by unsupervised children.
Attention: You must use the supplied power supply cable! Make sure that the power supply cable
is not damaged. Operating the FREE.STAND sit/stand desk with a damaged power supply cable is
prohibited!
Attention: You must disconnect the power supply cable from the mains supply before switching
drives, hand-switches or any other accessories on the motor controller on or off.
Attention: Use solely original FREE.STAND accessories from Oelschläger Metalltechnik GmbH.
Use of components and parts from third parties is prohibited!
Use of unsuitable accessories can lead to damage or the destruction of the desk base.
Attention: In case of a fault (e.g. accidental operation of the desktop such as if a button on the
hand-switch jams), please immediately pull the mains plug!
Danger: Protect the desk base and, in particular, all electrical components on the desk base from
moisture, dripping water and spray water!
Danger: There is a danger of being crushed when the desktop position is changed! For that
reason, make sure no objects and no persons are in the hazardous area and do not reach into the
hazardous area.
The optionally available corrosion protection normally detects solid objects, but there is still
continued danger of crushing for persons! The corrosion protection is a system safeguard and NOT
personal protection!
Attention: Alterations on the components of the desk base including the motor controller and
controls are prohibited!
Danger: The electromotive driven FREE.STAND sit/stand desk must not be operated in explosive
atmospheres!

9051_Bedienungsanleitung_C1_Rev2_EN_UK – Stand 08.08.2018 TS / MB 7
Danger: In case of faults it is possible that the desktop moves a bit during every start-up attempt
before the safety shut-down initiates. During this process, always watch out for the possible danger
of being crushed.
Danger: The optionally available corrosion protection is not activated during any reset process
(Section 5). During this process, always watch out for the possible danger of being crushed.
Attention: If the product is visibly damaged, never assembly it or continue to use it!
1.4.2 Before installation, deinstallation or troubleshooting
•Stop the sit/stand desk.
Note: Switch off the power supply and pull out the power cable!
•Remove all weights from the sit/stand desk.
•Only trained electricians are permitted to open or replace electrical equipment.
•Do not operate the desk in moist rooms such as bathrooms.
•Never use the desk in explosive environments.
1.4.3 Before initial operation
•Make sure the desk is assembled in accordance with these instructions.
•Make sure that the side panels are perpendicular to the table top, after the desk is set up.
•Check to see if the operating voltage of the desk matches the local power supply.
(See rating plate on the controller, standard = 230V)
•Connect the plug connectors from the actuator and the side panels to the controller.
•Connect the mains cable to the controller.
1.4.4 During operation
•If the drives or the controller make any unusual noises or cause any unusual odours during operation,
interrupt the power supply.
•Make sure that the cables are not damaged.
•When operating the sit/stand desk, make sure that no objects or body parts can get trapped.
•All moving parts of the desk base must have at least 25 mm clearance to the adjoining components.
1.4.5 Important information for resellers
We consider resellers companies that purchase the FREE.STAND sit/stand desk from Oelschläger
Metalltechnik GmbH and that resell it as their own product after adding a table surface.

9051_Bedienungsanleitung_C1_Rev2_EN_UK – Stand 08.08.2018 TS / MB 8
Note: For reasons of EU conformity and product safety, we recommend that the users provide their
products with operating instructions in the respective official EU language.
Warning: Be sure to enclose operating instructions in your finished product that include all safety
instructions required by the consumer for the safe handling of your product.
Note: The operating instructions for your finished product must include the following warning: You
must read these operating instructions before you start using the product (height-adjustable
workstation).
Point out to your consumer that the operating instructions must be kept near the product (height-
adjustable workstation).
Danger: It is mandatory that you put your product (height-adjustable workstation) through a risk
analysis so that you can react to any possible residual hazards (e.g. through structural measures or
warnings in the operating instructions and/or safety instructions on your product).
Warning: Make sure that no unauthorised persons (small children, persons under the influence of
medication, etc.) handle your product or the FREE.STAND sit/stand desk.
1.4.6 Indication service note
Danger: Use solely genuine original accessories! Only skilled personnel are permitted to perform
assembly work! Otherwise you will forfeit all claims for warranty or guarantee.
Danger: In case of a fault, please promptly contact your customer service representative! Only
original FREE.STAND sit/stand desk spare parts are approved for repairs. Only skilled/authorised
personnel are permitted to replace them! Otherwise you will forfeit all claims for warranty or
guarantee.
1.5 Repairs
In case of a technical defect on this device, please contact an authorised customer service representative. You
can find solutions for simple faults in Section 7!
Attention: In the interest of preventing malfunctions, only authorised service personnel are
permitted to make any repairs.
Attention: Opening any components of this desk base produces risks for the following
malfunctions.

9051_Bedienungsanleitung_C1_Rev2_EN_UK – Stand 08.08.2018 TS / MB 9
2 Warranty
We provide a 24-month warranty on this desk base. The warranty covers all material and production errors and
applies from the date of production (see rating plate). The warranty is only valid under the condition that the
desk base has been properly and professionally assembled and has been used within the scope of the
described parameters; that maintenance has been performed correctly and that repairs have been performed
solely by authorised service staff.
The sit/stand desk must not be improperly handled or used and no changes are permitted to be made on the
desk base; otherwise the warranty expires. Please refer to our General Terms and Conditions for additional
information.
3 Maintenance / Cleaning
Regularly remove dust and dirt from the desk base, in particular from the guide tubes, and make sure that there
are no damages and cracks.
Check all fastening screws to make sure they are securely fastened and check all plug connectors, cables and
plugs including proper functioning.
Danger: Clean the controller, actuator and the desk base only with a dry or slightly moist cloth.
Danger to life!
Attention: Aggressive cleaning agents can cause damage or discolourations on the product. Use
only agents with pH-values of 6-8.
Danger: Never let any fluids get into the system (controller, actuator, cable and base). Danger to
life!

9051_Bedienungsanleitung_C1_Rev2_EN_UK – Stand 08.08.2018 TS / MB 10
4 Assembly
Use only screws that correspond to the enclosed base drawing for the assembly of your desk base.
Attention: Incorrect screws can cause damage to the desk.
Danger: The power cable of the motor controller must be disconnected during assembly of the
desk base!
Attention: Before assembly and commissioning of the FREE.STAND sit/stand desk, make sure
the product is acclimatised for the temperature and relative humidity values stated in the technical
data!
4.1 Installing the crossbeams and table-top supports or the upper frame
Now fit the two longitudinal spars on the two side frames. Ensure that you have first positioned the lugs of the
table-top supports aligned to the crossbeams.
Use only the M6 screws according to the support frame drawing to do this.
The maximum tightening torque for these screws is 7.5 Nm.
The maximum screw-in depth into the motor housing is 10 mm.
Crossbeam
Screw M6
as per the support frame
drawing
Mounting leg
Table-top

9051_Bedienungsanleitung_C1_Rev2_EN_UK – Stand 08.08.2018 TS / MB 11
4.2 Fitting the skids
If the side frame has skids welded to it, please continue with point 4.2.
If the side frame has screwed-on skids, they must first be fitted to the mounting legs. To do so, use the screws
as given in the table-top support frame drawing.
The max. tightening torque is 10 Nm!
The max. screw-in depth of the screws M10 into the drive column is 12 mm.
With asymmetric skids (C-form), keep in mind that one left and one right side frame might be required.
4.3 Assembly of the desktop
Now fasten the desktop to the desk base in accordance with the base drawing. To accomplish that, ø7.0 mm
holes are provided on the desk frame; they are suitable for ø5.5 to ø6.5 mm bolts. Use all provided bolting
points.*1)
Run
Column
M10 bolt
as per base drawing
Optional pressure plate

9051_Bedienungsanleitung_C1_Rev2_EN_UK – Stand 08.08.2018 TS / MB 12
4.4 Assembly of the controller and hand-switch
First fit the two controller brackets into the keyholes in the longitudinal spar. Then turn them clockwise through
90 degrees.
Note: Ensure that the grooves for the cable guidance are on one side, so that the cables can be
later laid skirting by the STAND.CONTROL C1.
Now position the locking catches of the brackets on the two holes on the rear side of the motor controller and
click the brackets into place with moderate pressure on both the components on the controller.
Now fit the hand switch on the table top. There are holes of ø 5.2 mm provided on the hand switch. The
tightening torque depends on the material of the table-top but must not exceed 2 Nm. *1)
Moreover, the STAND.CONTROL C1 is equipped with threaded holes of ø 6.3 mm and can be optionally
screwed to the table-top. The tightening torque depends on the material of the table-top but must not exceed 2
Nm. *1)
*1) The screws are not included in the scope of delivery since they have to be selected depending on the
material and the thickness of the desktop.
90°

9051_Bedienungsanleitung_C1_Rev2_EN_UK – Stand 08.08.2018 TS / MB 13
5 Commissioning
Commissioning includes all jobs that are necessary for electrical height adjustment of the FREE.STAND
sit/stand desk with the aid of the STAND.CONTROL motor controller. The prerequisites for commissioning are:
•complete assembly of the desk base in accordance with Section 4.1-4.3
•and correct installation of the STAND.CONTROL motor controller and hand-switch in accordance
with Section 4.4!
Danger: Only expert/authorised personnel are allowed to commission the motor controller!
Expert/Authorised personnel have completed the required electrotechnical apprenticeship and are
familiar with these operating instructions.
Attention: Before assembly and commissioning of the FREE.STAND sit/stand desk, make sure
the product is acclimatised for the temperature and relative humidity values stated in the technical
data!
5.1 Connections to the STAND.CONTROL C1 motor controller
Attention: Only use 2-pole power supply cables/mains cables supplied by Oelschläger
Metalltechnik.
Using other power cables can cause damage to the controller.
Attention:All connectors are designed exclusively for working with the components supplied by us.
If components or cables not supplied by us are connected, the motor controller or the connected
component can get damaged.
Socket C7 for the mains cable, 2-pole (AC)
Connections 8-pole for the motors
Sockets RJ45 for hand switches (MS) and sensor

9051_Bedienungsanleitung_C1_Rev2_EN_UK – Stand 08.08.2018 TS / MB 14
5.2 Procedure during commissioning
Attention: Plug in the power supply cable/mains cable only after all other electrical connections
have been made! (All motors, the hand-switch and possibly additional accessories are connected
to the controller.)
To commission the FREE.STAND sit/stand desk, proceed as follows:
5.2.1 Connect the drives
Make sure that the connection cables of the drives reach from both sides up to the corresponding controller
connection. For extremely long desks, it might be necessary to assemble the controller off-centre. For especially
large desks, if necessary use an extension cable for the connection cable of the drives.
Connect the drives of the side element and the controller using the motor cable. The plug connectors on the 8-
pin motor sockets must firmly latch!
5.2.2 Connect the hand-switch
Set up the connection from the hand switch to the RJ45 socket (D1 or D2) at the controller.
Note: You can choose from a large number of hand-switches that fit the STAND.CONTROL motor
controller!
Please ask Oelschläger Metalltechnik for information on the available types!
ATTENTION: The connector (HS) serves only for operating hand switches. The RJ45 socket does
not have any other functions. If the wrong components or cables are connected, there is a danger
that the controller and the connected components can get destroyed.

9051_Bedienungsanleitung_C1_Rev2_EN_UK – Stand 08.08.2018 TS / MB 15
5.2.3 Connect the power supply cable /mains cable
Attention: Before you plug in the power supply cable, check again
•to see if the mains voltage matches the rating plate of your controller
•to see if all components are plugged into the correct sockets
The STAND.CONTROL motor controller is ready for operation as soon as the power supply cable
is plugged in!
Note: Initialisation of the desk base is required the first time the power supply cable is connected
(Reset). This is described in Section 5.
Use only the accompanying mains power cord. The controller STAND.CONTROL C1 mandatorily needs a
2-pole mains cable.
Attention: Fasten all cables to the desk base or the desktop so they cannot get damaged during
operation.
5.2.4 Installing optional accessories
There is a large number of optional accessories available for the FREE.STAND 9051 table-top support frame
(for example, CPU mounting, cable ducts, screens etc.).
These accessories are to be fitted after installing the actual table-top support frame. With some of the
accessories, it may be necessary to move the table up once, before they can be installed. In such a case,
assemble the table-top support frame as described up to point 5.2.3, and the carry out a reset in accordance
with point 5.
Thereafter, you can move the table to the required height. Isolate the table-top support frame from the mains
again and continue with the installation of the accessories.
Upon completion of the accessories installation, carry out point 5.2.3 and if required, point 5.3 (Reset) once
again.

9051_Bedienungsanleitung_C1_Rev2_EN_UK – Stand 08.08.2018 TS / MB 16
5.3 Initialisation / Reset
After the installation, or if there is a fault at the table, or after disconnecting the connection between the drives
and the controller, the controller of the table has to be initialised.
If the controller expects a fresh initialisation, the table can be moved only down, with a reduced speed. For hand
switch versions with a display, is displayed during the initialisation movement.
For initialising, move the table into the lowermost position. To that end, press the down key on the hand switch
till all the drives have reached the lowermost position. Now, when you release the key, the table moves into the
minimal position.
Releasing the button too early can result in a malfunction at the table. If that should happen, you must repeat
the procedure.
Attention: The top limit stop of the controller is preset. For this reason, use only controllers that
were supplied as suitable for the respective desk base.
Danger: The optionally available corrosion protection is not activated during any reset process.
During this process, always watch out for the possible danger of being crushed.
6 Control
6.1 Normal operation (with all hand-switch variants)
Use the "up" and "down" buttons to move the desk up or down in the direction of the arrow. The desk stops
when it reaches the limit positions. Keep the button pressed until the desired position has been reached.
6.2 Operation with STAND.MOVE M1.0 and M3.0
Hand switch Easy - M1.0 Hand switch Easy - M3.0
“Up”
“down”
“Up”
“Down”

9051_Bedienungsanleitung_C1_Rev2_EN_UK – Stand 08.08.2018 TS / MB 17
6.3 Operation with STAND.MOVE M1.1 hand switch with display and memory
(optional)
Hand switch Comfort - M1.1
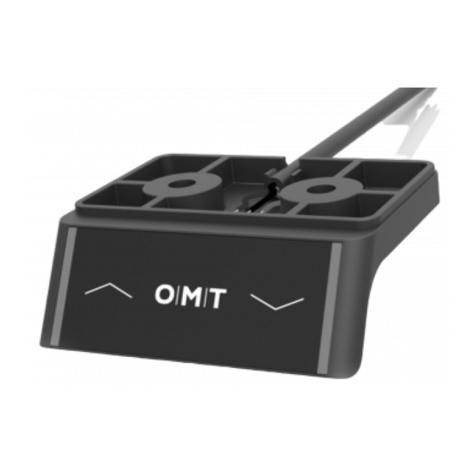
This hand-switch is additionally equipped with a display for indication of the current desk height in centimetres
or inches.
Error messages and the status of the table are shown on the display (see Table2).
If you stop pressing the hand-switch after a while, the display turns off if no important operating condition is
being displayed. As soon as you press a button, the display switches back on.
The “Up” and “Down” or “Table up” and “Table down” keys move the table as described in 6.1.
Previously stored positions can be taken up with the position keys 1-4.
Note: All hand switches are plug-&-play-capable and can be operated in parallel.
6.3.1 How to save a position:
Move the table to the desired height with the “Up” or “Down” keys.
Then press the “Logo” key ( is shown in the display) and then one of the position keys
1 to 4 (for example, appears in the display). The process of saving is now ended and after approx. 2
seconds, the current table height is once again shown in the display. 4 different positions can be saved in this
manner.
6.3.2 How to retrieve a saved position:
Keep the desired memory setting pressed (1, 2, 3 or 4). The desk independently moves from the current
position to the saved position. The button has to be pressed until the position is reached; if you let go
beforehand, the desk stops moving.
“Up”
“Down”
Pos. 1 + 2
Pos. 3 + 4
“Logo” key

9051_Bedienungsanleitung_C1_Rev2_EN_UK – Stand 08.08.2018 TS / MB 18
6.3.3 Calling the menu
The Comfort hand switch provides various possibilities for settings, which can be carried out by the operator
himself ( and are not always enabled).
To do so, press the “Logo” key for 6 seconds till the display changes to .
You can navigate with the arrow keys in the menu that is displayed thereupon.
Menu structure:
– Change the height display (inches – cm)
– Adjust the height display
– Factory reset
– Set shelf and container stop
– Delete shelf and container stop
To go to the sub-menu, confirm once with the “Logo” key.
6.3.4 Changing the unit of the height display (menu F1)
The height can be shown in centimetres or inches on the hand switch. The unit can be toggled in the menu.
To change the unit, proceed as follows:
1. Press the “Logo” key for 5 seconds.
2. Confirm menu option by once again pressing the “Logo” key.
3. Now, select with the
a. key “Up arrow” : inches, or
b. key “Down arrow” : cm.
4. Confirm the selection by once again pressing the “Logo” key.
To quit the menu without making a selection, wait for about 10 seconds till the height display appears again.
This setting is stored permanently.
6.3.5 Calibrating the height display (menu F2)
If the displayed height does not tally with the actual height of the table-top, the display can be corrected as
follows:
1. Press the “Logo” key for 5 seconds.
2. With the “Up” and “Down” keys, select the menu option . Confirm this selection by once again pressing
the “Logo” key. The display and the edge lighting now start to flash.
3. Measure the actual current table height and correct the height being currently shown in the display with the
“Up” or “Down” keys to the measured height.
4. Confirm the input by briefly pressing the “Logo” key.
To quit the menu without making a selection, wait for about 10 seconds till the height display appears again.

9051_Bedienungsanleitung_C1_Rev2_EN_UK – Stand 08.08.2018 TS / MB 19
6.3.6 Factory reset (menu F3)
If you wish to reset the controller to the factory settings because you do not wish to retain the changed settings,
or notice an error, or were asked by a Service employee from Oelschläger Metalltechnik GmbH to do so,
proceed as follows:
1. Press the “Logo” key for 5 seconds.
2. With the “Up” and “Down” keys, select the menu option .
3. Confirm the selection by once again pressing the “Logo” key.
4. The following is shown in the display
5. Press the “Logo” key once again so that all the settings are reset to the factory settings.
The program now quits the main menu and displays . To complete the operation, carry out a reference
movement.
6.3.7 Shelf- or Container Stop
The end positions of the table can be matched to the ambient conditions. The upper end position (shelf-stop)
can be defined by an incline of the roof or a ceiling light and the lower end position by a mobile file cabinet
(container stop).
6.3.7.1 Setting (menu F4)
To set a shelf- or container-stop, follow the procedure below:
1. Use the arrow keys to move to the desired position.
2. Press the “Logo” key for 5 seconds.
3. With the keys “Up” and “Down”, select the menu option .
4. There appears a display with one bar each at the top left and bottom right.
5. To save the upper limit position, select the “Arrow up” key.
6. To save the lower limit position, select the “Arrow down” key.
7. Confirm the input with the “Logo” key.
To quit the menu without making a selection, wait for about 10 seconds till the height display appears again.
6.3.7.2 Delete (menu F5)
To delete a shelf-stop or a container-stop, proceed as follows:
1. Press the “Logo” key for 5 seconds.
2. With the keys “Up” and “Down”, select the menu option .
3. There appears a display with one bar each at the top and bottom.
4. To delete the upper limit position, select the “Arrow up” key.
5. To delete the lower limit position, select the “Arrow down” key.
6. Confirm the input with the “Logo” key.
To quit the menu without making a selection, wait for about 10 seconds till the height display appears again.

9051_Bedienungsanleitung_C1_Rev2_EN_UK – Stand 08.08.2018 TS / MB 20
6.4 Optional function – safety zone
The safety stop works as follows:
1. Press the desk position button downwards / down (and keep it pressed).
The desktop moves to the start of the safety zone.
2. The movement of the desktop stops above the safety zone.
3. Press the desk position downwards / down again.
The desktop moves to the lowest desktop position.
Note: It is not possible to save desktop positions in the safety zone!
7 Cascading 2 Controllers
2 drives maximum can be connected to one controller. To increase this number to 4, two controllers can be
cascaded.
1. To do so, 2 controllers must be configured with a parameter set for 3 or 4 drives.
2. The two controllers are connected with the RJ45 connecting cable.
3. Insert the desired hand switch into a free port.
4. Now connect the mains cable to the sockets.
5. After a reset movement, the configured number of drives will move up and down synchronously.
Attention: Use suitably configured controllers without fail, since otherwise, the cascading is not
recognised and only two drives would move, which can result in jamming of the entire system.
Table of contents
Other OMT Indoor Furnishing manuals
Popular Indoor Furnishing manuals by other brands

modway
modway EEI-6349 Assembly instructions

Costway
Costway 8311 Assembly instructions

LDI Spaces
LDI Spaces SAFCO Entourage 2490 Assembly instructions

Furniture of America
Furniture of America CM7155D Assembly instructions

RUSTA
RUSTA NOEL manual

Home Decorators Collection
Home Decorators Collection TEAGEN 30 installation manual

SNEAKER THRONE
SNEAKER THRONE The Sneaker Throne manual

Steelcase
Steelcase c:scape Replacement guide

Coaster
Coaster 300261KE Assembly instructions

overstock
overstock WF289498 Assembly instructions

Outdoor Revolution
Outdoor Revolution ORBK0064 INSTRUCTIONS & PRODUCT CARE

Trendteam
Trendteam OLE 308 installation instructions