manuals.online logo
Brands
  1. Home
  2. •
  3. Brands
  4. •
  5. Mocka
  6. •
  7. Indoor Furnishing
  8. •
  9. Mocka Zara User manual

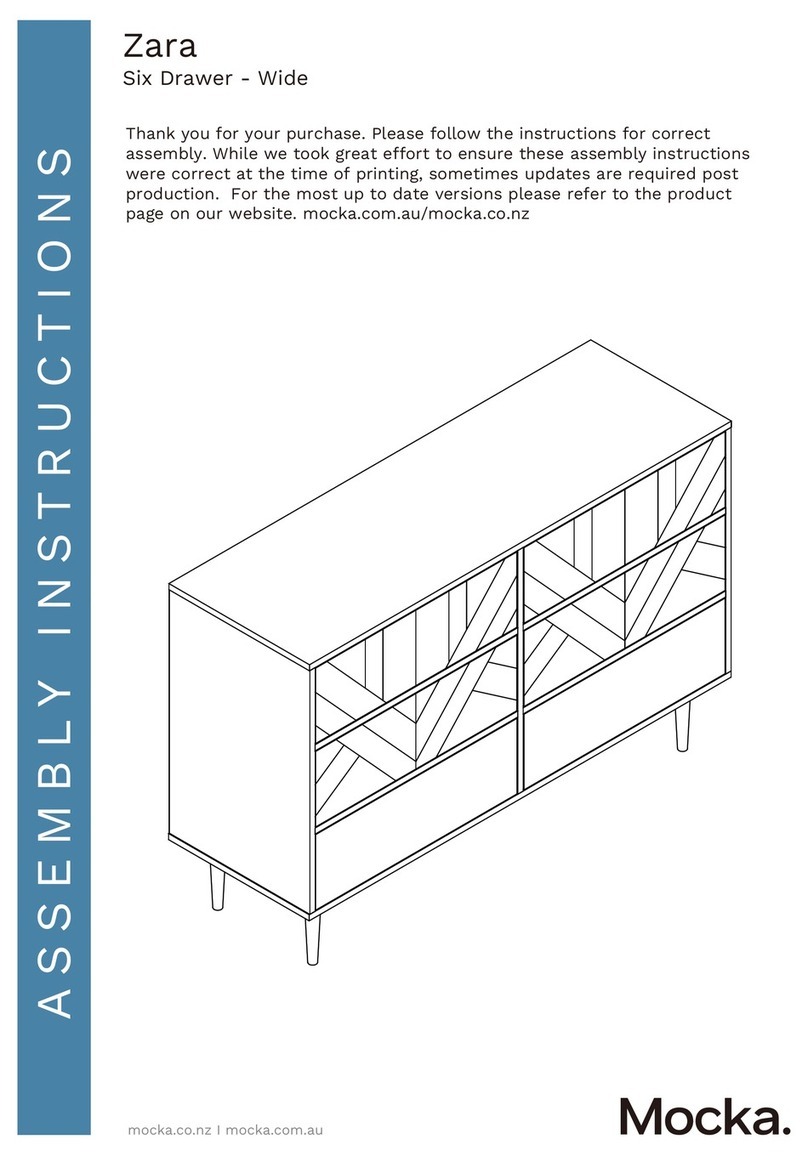
Mocka Zara User manual

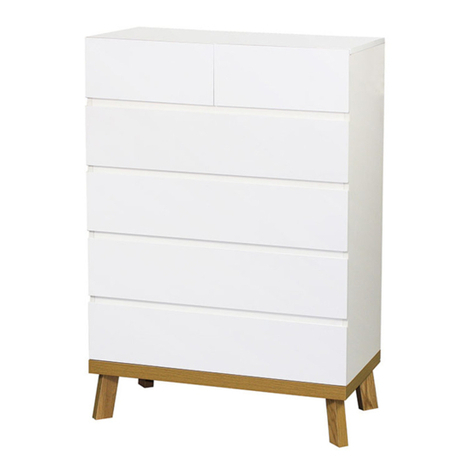
Zara Tallboy
Assembly Instructions
Thank you for your purchase.
Please follow the instructions below for correct assembly.
mocka.co.nz | mocka.com.au | PO BOX 6171, Maroochydore, QLD, 4558
1
Wall Strap
x2
washer
Z
Y
wall
anchor
x1
X
safety
strap x1
WV
screw
x1
wall
screw
x1
WARNING: Any furniture that is not anchored to a wall has the potential to tip over in certain
circumstances, i.e. if a child attempts to climb up on the furniture or in the event of an earthquake.
Accordingly, we recommend that all furniture is anchored to a wall. We supply a free safety wall anchor
with all furniture sold and we recommend these are used to prevent your product tipping. The fixing device
provided should fit most wall types, but please note that different wall materials may require different fixing
devices from those supplied.
For quicker assembly, we recommend the
use of a power drill on a low-speed setting.
bolt
x46
x8
A B C D EFGH
JKMN
I
O P
Hardware Supplied
dowel
x18
screw
x78
slide
rail x6
slide
rail x6
slide
rail x6
slide
rail x6
locking
nut x46
screw
x5
x8
wedge screw
x6
bracket
x4
bracket
cover
x6
seal
x6
Phillips & Flathead screwdrivers
L
felt
pad
x4
Q R S
bolt
x16
x1
Allen
key
screw
x36
Zara Tallboy
Assembly Instructions
mocka.co.nz | mocka.com.au | PO BOX 6171, Maroochydore, QLD, 4558
2
12
Insert 6x bolts (C) into panel [1] and tighten with a screwdriver. Attach 1x slide rail (G) to panel [5] as shown and secure
with 3x screws (E). Flip the panel [5], attach 1x slide rail (F)
to panel [5] as shown and secure with 3x screws (E). Tighten
with a screwdriver.
.
C
1
C
C
C
C
C
E
E
E
F
E
E
EG
FLIP
F
CL
E
G
CR
E
5
5
Zara Tallboy
Assembly Instructions
mocka.co.nz | mocka.com.au | PO BOX 6171, Maroochydore, QLD, 4558
3
3 4
Attach panels [5] to panel [1] with 2x dowels (A) and
secure with 2x locking nuts (D). Tighten with a screwdriver.
Attach 5x slide rail (F) and 5x slide rail (G) to panels [3] and [4] as
shown and secure with 30x screws (E). Tighten with a screwdriver.
Insert 12x bolts (C) into panels [3] and [4]. Tighten with a screwdriver.
A
D
DA
E
G
E
EE
G
E
EE
G
E
EE
G
E
EE
G
E
E
EF
E
E
E
F
E
E
E
F
E
E
E
F
E
E
E
F
E
E
C
C
C
C
CC
C
C
C
C
C
F
CL
E
G
CR
E
1
3
4
5
Zara Tallboy
Assembly Instructions
mocka.co.nz | mocka.com.au | PO BOX 6171, Maroochydore, QLD, 4558
4
65
Attach 5x bracket (M) to panels [6] and [7] and secure
with 10x screws (E). Tighten with a screwdriver. Place 5x
cover (N) over the bracket (M) as shown.
Attach panels [6], [7] and [8] to panel [3] with 4x dowels (A) and secure
with 6x locking nuts (D). Tighten with a screwdriver.
A
A
A
A
D
D
D
D
D
D
EE
N
MM
The round head
is aligned with the
direction of the arrow.
EE
M
EE
M
EE
M
x3
6
68
7
7
7
7
3
Zara Tallboy
Assembly Instructions
mocka.co.nz | mocka.com.au | PO BOX 6171, Maroochydore, QLD, 4558
5
7 8
Attach panel [4] to panels [6], [7] and [8] with 4x dowels (A)
and secure with 6x locking nuts (D). Tighten with a screwdriver.
Slide panels [9] down along the grooves between the panels [3]
and [4] to form the back of the unit as shown.
A
A
A
A
D
D
D
D
D
3
4
4
68
7
7
799
Zara Tallboy
mocka.co.nz | mocka.com.au | PO BOX 6171, Maroochydore, QLD, 4558
6
910
Assembly Instructions
Attach 1x bracket (M) to panel [2] and secure with 2x screws (E).
Tighten with a screwdriver. Place 1x cover (N) over the bracket (M)
as shown.
Attach panel [2] to the unit with 4x dowels (A) and secure with 4x
screws (B). Tighten with a screwdriver.
EE
EE
N
MM
The round head
is aligned with the
direction of the arrow.
M
2
B
B
A
A
B
B
A
3
4
2
Zara Tallboy
Assembly Instructions
mocka.co.nz | mocka.com.au | PO BOX 6171, Maroochydore, QLD, 4558
7
1211
Attach 4x leg brackets (P) to legs [10] using 8x screws (R). Tighten
with a screwdriver. Attach legs [10] to panel [2] using 16x bolts (Q)
as shown. Tighten with an Allen key (S). Attach 4x felt pads (L) to the
ends of the legs.
Slide panesl [9] along the grooves between the side panels [3] and [4].
Q
L
Q
L
Q
L
Q
L
R
P
10
10
Q
L
2
10
10
10
10
3
4
9
9
S
Zara Tallboy
Assembly Instructions
mocka.co.nz | mocka.com.au | PO BOX 6171, Maroochydore, QLD, 4558
8
14 Drawers x413
Attach panel [1] to panels [3] and [4] with 4x dowels (A) and
secure with 4x locking nuts (D). Tighten with a screwdriver.
Attach panel [5] to panels [6] and secure with 1x screws (B).
Tighten with a screwdriver.
Insert 5x bolts (C) into panels [11]/[12]. Attach 1x seal (O) to panels
[11]/[12] and secure with 1x screw (E). Tighten with a screwdriver.
CC
CC
C
E
O
x3
11
12
A
D
D
B
D
A
A
1
3
4
6
5
Zara Tallboy
Assembly Instructions
mocka.co.nz | mocka.com.au | PO BOX 6171, Maroochydore, QLD, 4558
9
16 Drawers x415 Drawers x4
Attach panels [13], [14] and [15] to panels [11]/[12] and secure
with 5x locking nuts (D). Tighten with a screwdriver.
Slide panel [16] along the grooves between the side panels [13] and [14].
DD
D
D
x3
11
12
13
16
14
D
13
14
15
x3
11
12
Attach slide rail (I) and slide rail (H) to the underside of the side panels
as shown. Secure with 4x screws (E) and tighten with a screwdriver.
H
E
E
Zara Tallboy
Assembly Instructions
mocka.co.nz | mocka.com.au | PO BOX 6171, Maroochydore, QLD, 4558
10
18 Drawers x417 Drawers x4
Attach panels [13], [14] and [17] as shown using 5x screws (R).
Tighten with a screwdriver.
RR
R
RR
E
E
I
17
13
14
14
13
x3
11
12
x3
11
12
Zara Tallboy
Assembly Instructions
mocka.co.nz | mocka.com.au | PO BOX 6171, Maroochydore, QLD, 4558
11
20 Drawers x219 Drawers x2
Attach panels [13] and [14] to panels [18]/[19] and secure with 4x
locking nuts (D). Tighten with a screwdriver.
Insert 4x bolts (C) into panels [18]/[19]. Attach 1x seal (O) to panels
[18]/[19] and secure with 1x screw (E). Tighten with a screwdriver.
C
C
E
O
C
C
D
D
D
D
18
19
18
19
13
14
Zara Tallboy
Assembly Instructions
mocka.co.nz | mocka.com.au | PO BOX 6171, Maroochydore, QLD, 4558
12
22 Drawers x221 Drawers x2
Attach panels [13], [14] and [21] as shown using 5x screws (R).
Tighten with a screwdriver.
R
R
R
R
18
19
18
19
13
14
20 21
13
14
Slide panel [20] along the grooves between the side panels [13] and [14] to
form the base of the drawer.
Zara Tallboy
Assembly Instructions
mocka.co.nz | mocka.com.au | PO BOX 6171, Maroochydore, QLD, 4558
13
2423 Drawers x2
Attach slide rail (I) and slide rail (H) to the underside of the side panels
as shown. Secure with 4x screws (E) and tighten with a screwdriver.
E
E
I
H
E
E
18
19
14
13 18
19
12
11
12
12
Insert the assembled drawers into the corresponding compartments
as shown. Ensure the drawers slide easily along the rails. If the drawer
is not catching or sitting flush, twist the end of the cover (N) until it
catches on the seal (O).
Zara Tallboy
Assembly Instructions
mocka.co.nz | mocka.com.au | PO BOX 6171, Maroochydore, QLD, 4558
14
2625
Once assembled lift furniture into place, do not drag. Use a drill to
create a small hole lining up with the top of the safety strap (V).
Fasten to the wall using 1x washers (Z), 1x wall anchor (X) and
1x screws (Y). Ensure unit is balanced and steady before use.
You’re done, enjoy!
V
Z
W
K
J
K
J
V
Z
W
X
Y
Z
wall
anchor
screw
strap
washer
1
9
9
9
9
1
Attach 8x wedges (J) into the corners of the back of the unit and secure
with 8x screws (K). Tighten with a screwdriver. Attach 1x safety straps (V)
to the top of the back side of the unit as shown using 1x washers (Z) and
1x screws (W). Tighten with a screwdriver.

Other manuals for Zara

17

Other Mocka Indoor Furnishing manuals

Mocka Kennedy Buffet User manual

Mocka

Mocka Kennedy Buffet User manual

Mocka Alps Bedside Table User manual

Mocka

Mocka Alps Bedside Table User manual

Mocka Eclipse User manual

Mocka

Mocka Eclipse User manual

Mocka Porto Desk User manual

Mocka

Mocka Porto Desk User manual

Mocka Porto Full Length Hanger User manual

Mocka

Mocka Porto Full Length Hanger User manual

Mocka Aspen Change Table User manual

Mocka

Mocka Aspen Change Table User manual

Mocka Oska Entertainment Unit User manual

Mocka

Mocka Oska Entertainment Unit User manual

Mocka Edmond User manual

Mocka

Mocka Edmond User manual

Mocka Milton 5 Shelf Plant Stand User manual

Mocka

Mocka Milton 5 Shelf Plant Stand User manual

Mocka Tahoe User manual

Mocka

Mocka Tahoe User manual

Mocka Aspen Four Drawer User manual

Mocka

Mocka Aspen Four Drawer User manual

Mocka Vigo Coffee Table User manual

Mocka

Mocka Vigo Coffee Table User manual

Mocka Rupert User manual

Mocka

Mocka Rupert User manual

Mocka Canyon User manual

Mocka

Mocka Canyon User manual

Mocka Nava Four Drawer User manual

Mocka

Mocka Nava Four Drawer User manual

Mocka Leon Dining Table User manual

Mocka

Mocka Leon Dining Table User manual

Mocka Under Cot Storage User manual

Mocka

Mocka Under Cot Storage User manual

Mocka Belinda User manual

Mocka

Mocka Belinda User manual

Mocka Zack User manual

Mocka

Mocka Zack User manual

Mocka Jolt Bedside User manual

Mocka

Mocka Jolt Bedside User manual

Mocka Replica Eames Lounge Chair & Ottoman User manual

Mocka

Mocka Replica Eames Lounge Chair & Ottoman User manual

Mocka Vermont Cot User manual

Mocka

Mocka Vermont Cot User manual

Mocka Urban Entertainment Unit User manual

Mocka

Mocka Urban Entertainment Unit User manual

Mocka Kirra Bookcase User manual

Mocka

Mocka Kirra Bookcase User manual

Popular Indoor Furnishing manuals by other brands

DREAMS San Diego TV Bedstead Assembly instruction

DREAMS

DREAMS San Diego TV Bedstead Assembly instruction

HoMedics EnviraScape Tabletop Relaxation Fountain... Instruction manual and warranty

HoMedics

HoMedics EnviraScape Tabletop Relaxation Fountain... Instruction manual and warranty

aspenhome I597-9100 Assembly instructions

aspenhome

aspenhome I597-9100 Assembly instructions

College Bed Lofts Storage Drawers Assembly guide

College Bed Lofts

College Bed Lofts Storage Drawers Assembly guide

Fontanot RING LINE Assembly instructions

Fontanot

Fontanot RING LINE Assembly instructions

boori Urbanе Metro Box BU-MTBX Assembly instructions

boori

boori Urbanе Metro Box BU-MTBX Assembly instructions

BDI MÜV 1252 quick start guide

BDI

BDI MÜV 1252 quick start guide

IKEA GOTTSKÄR manual

IKEA

IKEA GOTTSKÄR manual

Westwood Monterey Assembly instructions

Westwood

Westwood Monterey Assembly instructions

UDIZINE Vertik Assembly instructions

UDIZINE

UDIZINE Vertik Assembly instructions

eclisse MIMESI instructions

eclisse

eclisse MIMESI instructions

Bensons for Beds Hip Hop HUBHIP005 Assembly instructions

Bensons for Beds

Bensons for Beds Hip Hop HUBHIP005 Assembly instructions

Coaster 300525F Assembly instructions

Coaster

Coaster 300525F Assembly instructions

Relita SINA manual

Relita

Relita SINA manual

Desalto SKIN ALLUNGABILE Assembly instruction

Desalto

Desalto SKIN ALLUNGABILE Assembly instruction

BCP SKY 4655 Assembly instruction

BCP

BCP SKY 4655 Assembly instruction

OSP Designs CC25 operating instructions

OSP Designs

OSP Designs CC25 operating instructions

Space 25004 operating instructions

Space

Space 25004 operating instructions

manuals.online logo
manuals.online logoBrands
  • About & Mission
  • Contact us
  • Privacy Policy
  • Terms and Conditions

Copyright 2025 Manuals.Online. All Rights Reserved.