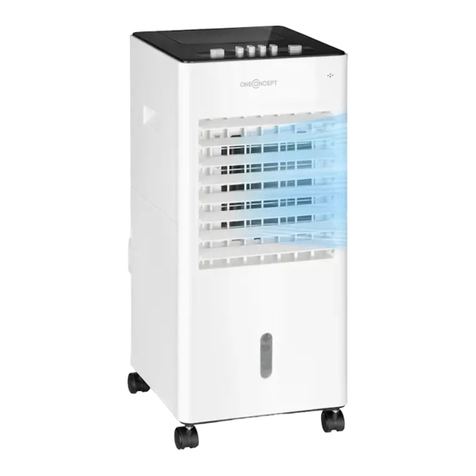
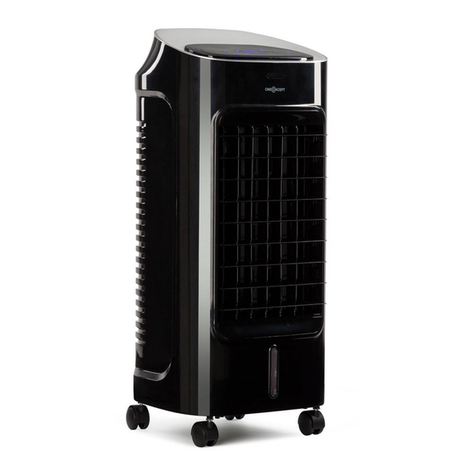
oneConcept Kingcool User manual

Kingcool
Luftkühler
Air Cooler
Enfriador de aire
Refroidisseur d‘air
Raffreddamento dell‘aria
10031341 10031342


3
DE
English 9
Español 15
Français 21
Italiano 27
Sehr geehrter Kunde,
wir gratulieren Ihnen zum Erwerb Ihres Gerätes. Lesen
Sie die folgenden Hinweise sorgfältig durch und befolgen
Sie diese, um möglichen Schäden vorzubeugen. Für
Schäden, die durch Missachtung der Hinweise und
unsachgemäßen Gebrauch entstehen, übernehmen wir
keine Haftung. Scannen Sie den QR-Code, um Zugriff
auf die aktuellste Bedienungsanleitung und weitere
Informationen rund um das Produkt zu erhalten.
INHALTSVERZEICHNIS
Sicherheitshinweise 4
Geräteübersicht 6
Inbetriebnahme und Bedienung 6
Reinigung und Pege 8
Hinweise zur Entsorgung 8
Hersteller 8
TECHNISCHE DATEN
Artikelnummer 10031341, 10031342
Stromversorgung 220-240 V ~ 50/60 Hz
Leistung 95 W
Maximales Luftvolumen 500 m³/h
Wassertank 8 L
Geräuschentwicklung <65 dB
Abmessungen 390 mm x 285 mm x 724 mm
Gewicht 5,8 kg

4
DE
SICHERHEITSHINWEISE
• Prüfen Sie vor der Benutzung die Spannungsangabe auf dem Typenschild.
Schließen Sie das Gerät nur an Steckdosen an, die der Spannung des
Geräts entsprechen.
• Halten Sie das Kabel fern von heißen Oberächen und scharfkantigen
Gegenständen.
• Verlegen Sie das Kabel nicht unter einem Teppich und decken Sie es auch
nicht mit anderen Gegenständen oder Stoffen ab. Verlegen Sie das Kabel
so, dass keiner darüber fällt oder daran hängen bleibt.
• Benutzen Sie das Gerät nicht, wenn das Netzkabel oder der Stecker
beschädigt sind.
• Falls das Netzkabel oder der Stecker beschädigt sind, müssen sie
vom Hersteller, einem autorisierten Fachbetrieb oder einer ähnlich
qualizierten Person ersetzt werden.
• Benutzen Sie das Gerät nur in Innenräumen.
• Decken Sie das Gerät nicht ab.
• Stellen Sie das Gerät auf einen ebenen, stabilen Untergrund. Achten Sie
darauf, dass das Gerät gerade steht.
• Versichern Sie sich, dass das Gerät ausgeschaltet ist, bevor Sie den Stecker
in die Steckdose stecken.
• Bedienen Sie das Gerät nicht mit nassen Händen und fassen Sie auch den
Stecker und das Kabel nicht mit nassen Händen an.
• Lassen Sie das Gerät während des Betriebs nicht unbeaufsichtigt. Schalten
Sie es aus und ziehen Sie den Stecker, wenn Sie es nicht benutzen.
• Ziehen Sie den Stecker aus der Steckdose, bevor Sie das Gerät reinigen
oder warten.
• Ziehen Sie den Stecker nicht am Kabel aus der Steckdose, sondern halten
Sie ihn beim Abziehen mit der Hand fest.
• Kinder ab 8 Jahren, psychisch, sensorisch und körperlich eingeschränkte
Menschen dürfen das Gerät nur benutzen, wenn sie vorher von einer für
sie verantwortlichen Aufsichtsperson ausführlich mit den Funktionen und
den Sicherheitsvorkehrungen vertraut gemacht wurden und die damit
verbundenen Risiken verstehen.
• Benutzen Sie das Gerät nur so, wie in dieser Anleitung beschrieben.
• Stecken Sie nicht Ihre Finger oder Gegenstände in die Lüftungsöffnungen.
• Stellen Sie das Gerät nicht in die Nähe von Vorhängen, Gardinen,
Tischdecken oder ähnlichen Textilien. Sie könnten in den Lüfter gezogen
werden und diesen beschädigen.
• Benutzen Sie das Gerät nicht in Feuchträumen wie Badezimmern.
• Benutzen Sie das Gerät nicht, bevor die Räder montiert sind oder wenn es
auf der Seite liegt.
• Wickeln Sie das Kabel vor dem Gebrauch komplett ab.

5
DE
• Während des Betriebs befeuchtet das Gerät die Umgebungsluft.
Vermeiden Sie jedoch zu hohe Luftfeuchtigkeit. Wir empfehlen Ihnen
eine Luftfeuchtigkeit zwischen 40-50%. Zu hohe Luftfeuchtigkeit kann zu
Schimmel oder gesundheitlichen Problemen führen.
• Stellen Sie das Gerät nur auf Untergründe, die unempndlich gegenüber
Nässe und hoher Luftfeuchtigkeit sind. Es kann immer mal vorkommen,
dass beim Ein- und Ausbau des Wassertanks ein paar Tropfen
danebengehen. Sollte das der Fall sein, wischen Sie die Wassertropfen
umgehend weg.
• Wechseln Sie das Wasser im Tank spätestens nach 3 Tagen.

6
DE
GERÄTEÜBERSICHT
1Tasten 9Synchronmotor
2Bedienfeld 10 Turbine
3Empfänger (Fernbedienung) 11 Feuchtes Gewebe
4Hintere Abdeckung 12 Motor
5Drehügel 13 Wasserpumpe
6Wassertankabdeckung 14 Anionen-Generator
7Vordere Abdeckung 15 Wassertank
8Rollen
INBETRIEBNAHME UND BEDIENUNG
Wasser einfüllen
• Öffnen Sie die Tür des Wassertanks und geben Sie maximal 8 Liter Wasser
in den Tank.
• Schließen Sie die Tür wieder.

7
DE
Bedienfeld und Tastenfunktionen
POWER
Stecken Sie den Stecker in die Steckdose und drücken Sie die POWER-
Taste. Das Gerät startet mit niedriger Geschwindigkeit. Wenn Sie das Gerät
ausschalten möchten, drücken Sie erneut auf die POWER-Taste.
TIMER
Drücken Sie mehrmals hintereinander auf die TIMER-Taste, um den einen der
folgenden Ausschalt-Timer einzustellen: 0,5 Stunden > 1 Stunde > 2 Stunden >
4 Stunden.
SWING
Drücken Sie auf die Taste, damit das Lüfterblatt hin und her schwingt.
COOL
Drücken Sie auf die Taste, um die Kühlung durch Verdunstung zu aktivieren.
ANION
Drücken Sie auf die Taste, um die Luft aufzufrischen.
SPEED
Drücken Sie mehrmals hintereinander auf die Taste, um eine der folgenden
Geschwindigkeiten auszuwählen: Langsam > Mittel > Schnell.
TYPE
Drücken Sie mehrmals hintereinander auf die Taste, um einen der folgenden
Modi auszuwählen: Normal > Natürlicher Wind > Nachtmodus.
Hinweis: Wenn Sie eine bestimmte Funktion auswählen leuchtet darüber
die entsprechen- de Kontrollleuchte. Die Tasten an der Fernbedienung
haben dieselbe Funktion, wie die Tasten auf dem Bedienfeld.

8
DE
REINIGUNG UND PFLEGE
• Ziehen Sie vor der Reinigung immer den Stecker aus der Steckdose.
• Wischen Sie das Gehäuse mit einem weichen Tuch ab. Benutzen Sie zur
Reinigung keine chemischen Reiniger oder Lösemittel.
• Verstauen Sie das Gerät an einen trockenen, sauberen und gut belüfteten
Ort.
• Gießen Sie vor dem Verstauen überschüssiges Wasser ab und reinigen
Sie das feuchte Gewebe. Öffnen Sie dazu den Stöpsel am Wassertank und
lassen Sie das Wasser ab. Gießen Sie mehrmals frisches Wasser nach und
lassen Sie es wieder ab, um den Tank zu reinigen.
• Entfernen Sie größeren Schmutz mit einem Lappen und etwas Spülmittel.
HINWEISE ZUR ENTSORGUNG
Bendet sich die linke Abbildung (durchgestrichene
Mülltonne auf Rädern) auf dem Produkt, gilt die
Europäische Richtlinie 2012/19/EU. Diese Produkte
dürfen nicht mit dem normalen Hausmüll entsorgt
werden. Informieren Sie sich über die örtlichen
Regelungen zur getrennten Sammlung elektrischer und
elektronischer Gerätschaften. Richten Sie sich nach
den örtlichen Regelungen und entsorgen Sie Altgeräte
nicht über den Hausmüll. Durch die regelkonforme
Entsorgung der Altgeräte werden Umwelt und
die Gesundheit Ihrer Mitmenschen vor möglichen
negativen Konsequenzen geschützt. Materialrecycling
hilft, den Verbrauch von Rohstoffen zu verringern.
Das Produkt enthält Batterien, die der Europäischen
Richtlinie 2006/66/EG unterliegen und nicht mit dem
normalen Hausmüll entsorgt werden dürfen. Bitte
informieren Sie sich über die örtlichen Bestimmungen
zur gesonderten Entsorgung von Batterien. Durch
regelkonforme Entsorgung schützen Sie die Umwelt
und die Gesundheit Ihrer Mitmenschen vor negativen
Konsequenzen.
HERSTELLER
Chal-Tec GmbH, Wallstraße 16, 10179 Berlin, Deutschland.

9
EN
Dear Customer,
Congratulations on purchasing this device. Please read
the following instructions carefully and follow them to
prevent possible damages. We assume no liability for
damage caused by disregard of the instructions and
improper use. Scan the QR code to get access to the
latest user manual and more product information.
CONTENT
Safety Instructions 10
Product Description 12
Operation 12
Cleaning and Care 14
Hints on Disposal 14
Producer 14
TECHNICAL DATA
Item number 10031341, 10031342
power supply 220-240 V ~ 50/60 Hz
Power consumtion 95 W
Max air volume 500 m³/h
Water tank 8 L
Noise <65 dB
Dimensions 390 mm x 285 mm x 724 mm
Weight 5.8 kg

10
EN
SAFETY INSTRUCTIONS
• Check the voltage on the rating plate before use. Only connect the
appliance to sockets which correspond to the voltage of the appliance.
• Keep the appliance and cable away from sources of heat, sharp objects or
anything that may cause damage.
• Do not place the cord under carpets. Do not cover the cord with small
clothes, shirts or other similar elements. Place the cord away from trafc
areas in order to avoid any risk of tripping over.
• Do not operate the appliance if the cable or plug is damaged.
• If the supply cord or plug is damaged, it must be replaced by the
manufacturer, its service agent or similarly qualied persons in order to
avoid a hazard.
• Indoor use only.
• Do not cover the machine during using.
• Place the appliance on a stable at horizontal surface. Make sure the
appliance is in an upright position during use.
• Ensure the appliance is switched OFF before connecting to the mains
power supply.
• Always ensure that hands are dry before operating or adjusting any switch
on the product or touching the plug and mains supply connections.
• Do not leave this appliance unattended when it’s in use. Turn off and
disconnect the appliance when you leave the room for an extended period.
• Switch off the appliance and unplug from the mains socket when not in
use, before lling, cleaning or other maintain.
• To disconnect the appliance, switch it “OFF”, and then remove the plug
from outlet. Do not pull the cord to disconnect the plug.
• This device may be only used by children 8 years old or older and persons
with limited physical, sensory and mental capabilities and / or lack of
experience and knowledge, provided that they have been instructed in
use of the device by a responsible person who understands the associated
risks.
• Use the appliance only as described in this manual.
• Do not insert your ngers in the openings of the guard.
• Do not leave hair, tissue, tablecloths, clothes or curtains near all openings
of the fan, they could be sucked into the fan and be taken within the
internal moving parts that could cause injury or damage.
• Do not use the appliance in wet or damp locations such as bathrooms.
• Do not operate the appliance when it’s not mounted on its wheels or if it’s
lying on the side.
• Make sure the cord is completely extended before use.

11
EN
• When in operation, evaporative coolers moisturize the ambient air. Over-
humidication of residential rooms should be avoided. Recommendation:
40-50% relative humidity. Excessive humidity of the air can damage the
home and cause health problems.
• The appliance may only be set up on water- and moisture-proof ooring
materials (spilling some drops of water is unavoidable when the content of
the tank is changed).
• With each and every change of tank content, completely remove residual
water from the equipment. To prevent nucleation, remove residual water
from the equipment and water tank every time after three days of use.

12
EN
PRODUCT DESCRIPTION
1Keys 9Synchronous motor
2Control panel 10 Turbines
3Receiver (Remote Control) 11 Wet curtain
4Back cover 12 Motor
5Rotary vane 13 Water pump
6Water cover 14 Anion Generator
7Front cover 15 Water tank
8Caster
OPERATION
Water Injection
• First opened the door of water injection, add water to the specied value.
• Then close the door of water injection.

13
EN
Control Panel and Keys
POWER
Plug the plug into the socket and press the POWER button. The device starts
at low speed. To turn the unit off, press the POWER button again.
TIMER
Press the TIMER button several times to set one of the following switch-off
timers: 0.5 hour > 1 hour> 2 hours> 4 hours.
SWING
Press the button to swing the fan blade back and forth.
COOL
Press the button to activate the cooling by evaporation.
ANION
Press the button to refresh the air.
SPEED
Press the button several times to select one of the following speeds: Slow>
Medium> Fast.
TYPE
Press the button several times to select one of the following modes: Normal>
Natural Wind> Night Mode.
Note: When you select a specic function, the appropriate indicator lights
up. The buttons on the remote control have the same function as the
buttons on the control panel.

14
EN
CLEANING AND CARE
• Before cleaning always remove the plug from the electrical socket.
• Please use a soft cloth to wipe the shell.Do not use water gasoline,or other
chemical solutions.
• Story and dry place to keep away from heat and sunlight.
• Loose scrow,You can clean wet curtain and lter after take out the back.
• Clean the body with a little mild detergent on a soft cloth..
• Cleaning the water tank add water into the water tank through water
inlet,open the rubber plug at the bottom of the water tank to drain the
water off,wash several times.
• Clean the body with a little mild detergent on a solf cloth.
HINTS ON DISPOSAL
According to the European waste regulation 2012/19/EU
this symbol on the product or on its packaging indicates
that this product may not be treated as household waste.
Instead it should be taken to the appropriate collection
point for the recycling of electrical and electronic
equipment. By ensuring this product is disposed of
correctly, you will help prevent potential negative
consequences for the environment and human health,
which could otherwise be caused by inappropriate waste
handling of this product. For more detailed information
about recycling of this product, please contact your local
council or your household waste disposal service.
Your product contains batteries covered by the European
Directive. 2006/66/EC, which cannot be disposed
of with normal household waste. Please check local
rules on separate collection of batteries. The correct
disposal of batteries helps prevent potentially negative
consequences on the environment and human health.
PRODUCER
Chal-Tec GmbH, Wallstraße 16, 10179 Berlin, Germany.

15
ES
Estimado cliente,
Le felicitamos por la adquisición de este producto.
Lea atentamente las siguientes instrucciones y sígalas
para evitar posibles daños. No asumimos ninguna
responsabilidad por los daños causados por el
incumplimiento de las instrucciones y el uso inadecuado.
Escanee el siguiente código QR para obtener acceso a
la última guía del usuario y más información sobre el
producto.
ÍNDICE
Indicaciones de seguridad 16
Descripción del aparato 18
Puesta en marcha y uso 18
Limpieza y cuidado 20
Retirada del aparato 20
Fabricante 20
DATOS TÉCNICOS
Número de artículo 10031341, 10031342
Suministro eléctrico 220-240 V - 50/60 Hz
Potencia 95 W
Flujo máximo de aire 500 m³/h
Depósito de agua 8 L
Generación de ruido <65 dB
Dimensiones 390 mm x 285 mm x 724 mm
Peso 5,8 kg

16
ES
INDICACIONES DE SEGURIDAD
• Antes de utilizar el aparato, compruebe la tensión en la placa técnica
del mismo. Conecte el aparato a tomas de corriente que se adecuen a la
tensión del mismo.
• Mantenga el cable lejos de las supercies calientes y de los objetos
alados.
• No coloque el cable de alimentación debajo alfombras ni lo cubra con otros
objetos o materiales. Coloque el cable de tal manera que nadie pueda
pisarlo ni tropezar con él.
• No utilice el aparato si el cable de alimentación o el enchufe está dañado.
• Si el cable de alimentación o el enchufe está dañado, deberá ser sustituido
por el fabricante, una empresa autorizada o una persona cualicada.
• Utilice el aparato únicamente en el interior.
• No cubra el aparato.
• Coloque el aparato en una supercie nivelada y estable. Asegúrese de que
el aparato está en posición vertical.
• Asegúrese de que el aparato está apagado antes de conectar el enchufe a
la toma de corriente.
• No opere el aparato ni toque el enchufe o el cable con las manos mojadas.
• No deje el aparato sin supervisión cuando está en marcha. Apague el
aparato y desconecte el enchufe de la toma de corriente si no lo utiliza.
• Antes de limpiar o inspeccionar el aparato, desconéctelo de la toma de
corriente.
• Para desconectar el aparato no tire del cable, sino del cuerpo del enchufe.
• Este aparato puede ser utilizado por niños mayores de 8 años y personas
con discapacidades físicas, sensoriales y mentales y/o con falta de
experiencia y conocimientos, siempre y cuando hayan sido instruidos
sobre el uso del aparato y comprendan los peligros y riesgos asociados.
• Utilice el aparato de acuerdo con lo descrito en estas instrucciones de uso.
• No introduzca los dedos ni ningún objeto en las rejillas de ventilación
• No coloque el aparato cerca de cortinas, manteles o textiles similares. El
ventilador podría tirar de ellos y romperlos.
• No utilice el aparato en estancias húmedas, como cuartos de baño.
• No utilice el aparato si aún no tiene las ruedas montadas o se encuentra de
lado.
• Desenrolle el cable completamente antes de utilizar el aparato.

17
ES
• Cuando el aparato está en marcha, humedece el aire ambiente. Evite que
la humedad del aire sea demasiado elevada. Recomendamos mantener
una humedad del aire entre 40-50 %. Una humedad del aire demasiado
elevada puede provocar la aparición de moho y problemas de salud.
• Coloque el aparato en una supercie resistente a la humedad y a la
humedad del aire elevada. Es posible que, al montar o desmontar el
depósito de agua, se derramen algunas gotas. Si es así, limpie las gotas de
inmediato.
• Cambie el agua en el depósito cada 3 días como máximo.

18
ES
DESCRIPCIÓN DEL APARATO
1Botones 9Motor síncrono
2Panel de control 10 Turbina
3Receptor (Mando a distancia) 11 Tejido húmedo
4Cubierta trasera 12 Motor
5Aldabilla 13 Bomba de agua
6Tapa del depósito de agua 14 Generador de aniones
7Tapa superior 15 Depósito de agua
8Rollen
PUESTA EN MARCHA Y USO
Rellenar agua
• Abra la puerta del depósito de agua y añada un máximo de 8 litros de agua
en el mismo.
• Cierre de nuevo la puerta.

19
ES
Panel de control y funciones de los botones
POWER
Introduzca el enchufe en la toma de corriente y pulse el botón Power. El
aparato comenzará a funcionar en el nivel de velocidad más bajo. Si desea
apagar el aparato, pulse de nuevo el boton POWER.
TIMER
Pulse varias veces consecutivas el botón TIMER para congurar el
temporizador con uno de los siguientes valores. 0.5 hora > 1 horas > 2 horas >
4 horas.
SWING
Pulse el botón para que las lamas oscilen de un lado a otro.
COOL
Pulse el botón para activar la refrigeración mediante evaporación.
ANION
Pulse el botón para refrescar el aire.
SPEED
Pulse varias veces el botón de manera consecutiva para seleccionar uno de los
siguientes
niveles de velocidad: Lento > medio > rápido
TYPE
Pulse varias veces el botón de manera consecutiva para seleccionar uno de los
siguientes modos: Normal > natural > modo noche.
Advertencia: si selecciona una determinada función, se ilumina su
indicador luminoso cor- respondiente. Los botones del mando a distancia
tienen la misma función que los del panel de control.

20
ES
LIMPIEZA Y CUIDADO
• Desconecte el enchufe antes de limpiar el aparato.
• Limpie la carcasa con un paño suave. No utilice limpiadores ni disolventes
químicos para la limpieza.
• Guarde el aparato en un lugar seco, limpio y bien ventilado.
• Antes de guardar el aparato, deseche el agua sobrante y limpie el tejido
húmedo. Para ello, abra el tapón del depósito de agua y drene el agua.
Rellene varias veces agua fresca y drénela para limpiar el depósito.
• Retire la capa de suciedad con un paño y algo de lavavajillas.
RETIRADA DEL APARATO
Si el aparato lleva adherida la ilustración de la izquierda
(el contenedor de basura tachado) entonces rige
la normativa europea, directiva 2012/19/UE. Este
producto no debe arrojarse a un contenedor de basura
común. Infórmese sobre las leyes territoriales que
regulan la recogida separada de aparatos eléctricos y
electrónicos. Respete las leyes territoriales y no arroje
aparatos viejos al cubo de la basura doméstica. Una
retirada de aparatos conforme a las leyes, contribuye
a proteger el medio ambiente y a las personas a su
alrededor frente a posibles consecuencias perjudiciales
para la salud. El reciclaje ayuda a reducir el consumo de
materias primas.
Este producto contiene pilas que según la Normativa
europea 2006/66/CE no deben ser arrojadas al cubo
de la basura común. Infórmese sobre la legislación de
su país que regula la retirada y eliminación de las pilas
y baterías. La retirada y eliminación de pilas conforme
a la ley, protege el medio ambiente y a las personas
frente a posibles riesgos para la salud.
FABRICANTE
Chal-Tec GmbH, Wallstraße 16, 10179 Berlín, Alemania.
This manual suits for next models
2
Table of contents
Languages:
Other oneConcept Air Conditioner manuals
oneConcept
oneConcept CarribeanBlue Series User manual

oneConcept
oneConcept Freshboxx Pro User manual

oneConcept
oneConcept Freshboxx User manual

oneConcept
oneConcept 10031341 User manual

oneConcept
oneConcept CTR-1 User manual
oneConcept
oneConcept 10029741 User manual
oneConcept
oneConcept CTR-1 User manual

oneConcept
oneConcept CTR-1 User manual

oneConcept
oneConcept 10032346 User manual

oneConcept
oneConcept IceCube User manual