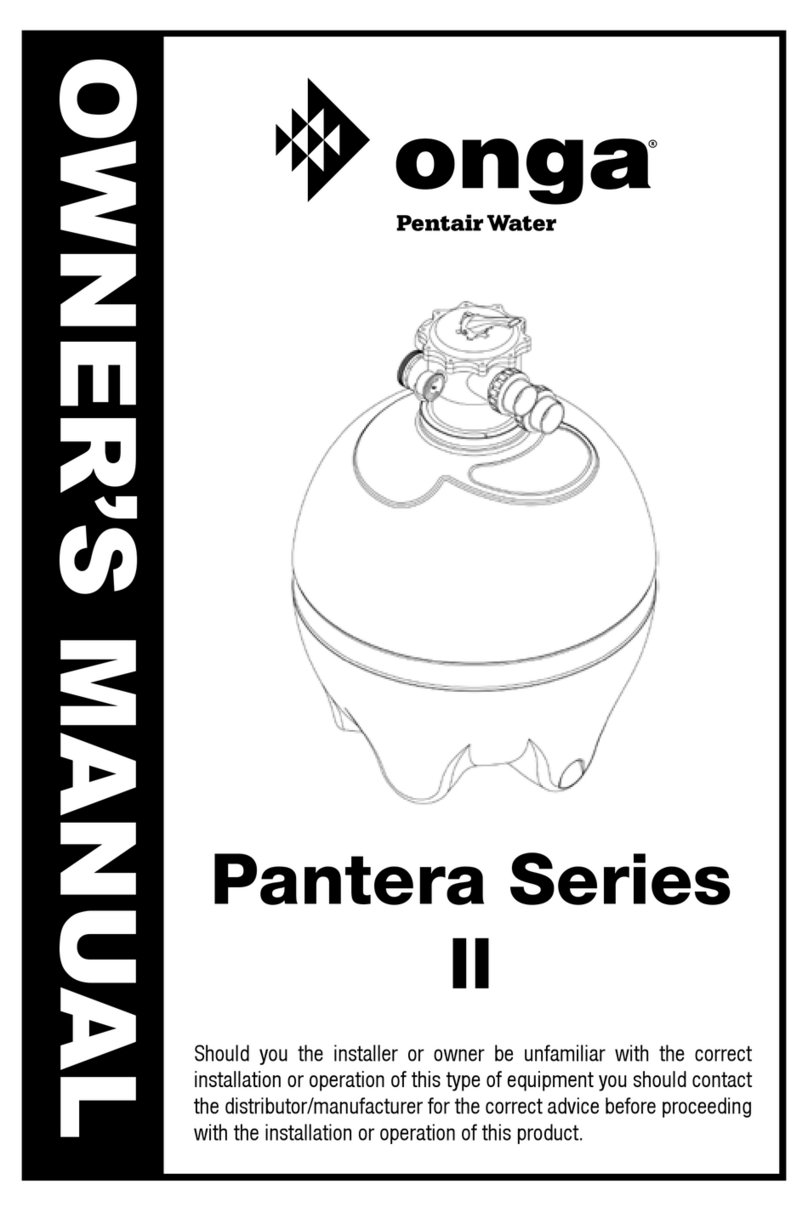
onga Pantera PCFII-075 User manual

OWNER’S MANUAL
Should the installer or owner be unfamiliar with the correct
installation or operation of this type of equipment you should contact
the distributor/manufacturer for the correct advice before proceeding
with the installation or operation of this product.
Pantera
Cartridge Filter II
PCF-II

Technologically advanced solutions for
moving and treating water in the Home,
Garden, Pool and Spa.
Innovative Stock and Crop water
management solutions for Primary
Industries.
Water movement products for Building
services, Emergency services and
Original Equipment Manufacturers.
Relax - you’ve bought an ...
Congratulations on your decision to purchase an Onga product.
Onga is one of the best know brands in its field, with a proud local
and international reputation.
Onga is a brand for reliability, value for money and technological
innovation. You will find Onga product wherever people need to
move water in 3 broad markets covering:
1

1. Continual Product Improvement
We employ the best engineers both in Australia and
around the world to develop new and better ways to
take water further.
2. Operational Excellence
There is only one standard that we set ourselves for both
product quality and the quality of our service. That standard
is excellence... to have no-one better than us at what we
do... nothing short of that is acceptable. Our commitment to
quality is reinforced with our ISO 9001:2000 accreditation.
3. A Fair Price
Onga products are neither the cheapest nor the most
expensive in their field. Our products do, on the other hand,
always represent very good value for money; they always
have and they always will.
4. Our Team of Dealers
The hand picked authorised Onga dealer network throughout
Australia and worldwide are second to none. We invest
considerable time and resources training and supporting
them through the Onga Training Academy.
2

Table of Contents
Page
Model Data 4
Filter Application 5
Installation 6
Installation & Assembly of Filter 7
Startup 8
Operation 9
Cartridge Maintenance 10
Tank Assembly 11
Troubleshooting 12
Warranty 13
3

4
Model Data
The operator must be provided with the owner’s manual. This must be read
before operation and followed during operation.
These instructions are a guide only. Users not familiar with pool equipment
should seek advice for suitably qualified persons with experience in pool
equipment installation.
Manufactured in New Zealand, the Onga Pantera Cartridge filter is made from
UV stabilised PVC. The reputation of durability and performance makes the
Pantera cartridge filter a great choice for pools of all sizes.
Model PCFII-075 PCFII-100 PCFII-150 PCFII-200
Filter Area (sq.ft/sq.m) 75/7.0 100/9.3 150/13.9 200/18.6
Design Flow Rate (lpm) 300 370 410 600
Max Working Pressure (psi/kPa) 40/280 40/280 40/280 40/280
Clearance
Cartridge Diameter 185mm 185mm 185mm 185mm
Cartridge Height 495mm 495mm 745mm 745mm
Filter Height 690mm 690mm 940mm 940mm
Filter Width 285mm 285mm 285mm 285mm
Replacement Element Part No. PCFII-
RC075
PCFII-
RC100
PCFII-
RC150
PCFII-
RC200
*Pool sizes given as a guide only- in general, a larger filter is better as it has a lower
pressure drop, and requires less maintenance.
Due to excessive cycling, This filter is not suitable for use
on the pressure circuit of inbuilt in-floor cleaning systems.

5
This filter is designed for use in domestic/residential swimming pool
installations with correctly sanitised fresh or salt chlorinated water.
1. Locate the filter system as close to the pool as practical.
2. Place the filter on a level stable foundation, preferably a concrete pad
or paving.
3. Position all equipment to provide ease of access for future servicing
4. Protect the filter and pump from weather and direct sunlight by ensuring
that they are properly housed.
5. Ensure there is sufficient space to provide adequate ventilation to the
electric pump motor
6. Clean a new pool as well as possible before filing pool and operating filter.
Excess dirt and large particles of foreign matter in the system can cause
serious damage to the filter and pump.
7. Ensure pump is compatible with filter specifications
Filter Application - General Information

6
Hazardous Pressure
Incorrectly installed or tested equipment may fail, causing
severe injury or property damage. Read and follow instructions
in owner’s manual when installing and operating equipment.
Have a trained pool professional perform all pressure tests.
All glued fittings and pipe work should be allowed to dry to
atmosphere for 24 hours before closing installation. Failure to
do so could cause injury or installation failure.
The filter owner and operator must be provided with this
owner’s manual by the installer. This must be read before
installation and followed during operation. Users not familiar
with pool equipment should seek advice from suitably
qualified persons.
Installation
WARNING
Filter pumps require
hazardous voltage
which can shock, burn,
or cause death.
BEFORE WORKING ON
THE PUMP OR MOTOR:
Disconnect power to
motor.
Hazardous Pressure!
Can cause severe
injury or major property
damage from tank
explosion.
BEFORE WORKING ON
THE FILTER:
1. Stop Pump
2. Release all pressure from
system, by turning valve
handle to waste.

7
Installation of filter should be carried out by qualified personnel.
1. Select the filters location. Ensure that the filter does not restrict the airflow
from the pump’s motor, and ensure that there is enough room above the
filter to enable the cartridge to be removed.
2. Select whether 40mm or 50mm PVC is required. Blank off the one inlet and
one outlet that will not be used with the supplied bungs/reducers.
3. Glue PVC from the pump to the inlet of the filter.
4. If a chlorinator is to be used, glue a PVC line from the filter outlet to the
chlorinator cell. Ensure that a gas trap is installed in accordance with the
chlorinator manufacturer’s instructions. Failure to install a gas trap may
mean that chlorine gas accumulates inside the filter housing, with risk of
explosion or asphyxiation.
5. Ensure cartridge is in place, the lid is properly seated, and the clamp is
securely fastened.
Installation & Assembly of Filter

8
1. Ensure pool is filled to three quarters of the way up the skimmer opening.
2. Open manual air bleed on the lid of the filter, so that the filter fills with
water from the pool. Air will be expelled as it fills. Close the manual air
bleed when it starts to release water.
3. Open all valves and start the pump. Ensure that water is flowing from the
skimmer or other pool outlet and is returning into the pool. Ensure there
are no leaks in the system.
4. Record the startup pressure. This reading will be used to decide when to
clean the cartridge.
5. If you notice a leak around the clamp area after 15-30 minutes of running,
stop the pump. Release system pressure using the manual air bleed, and
remove the lid. Ensure all valves are closed to ensure that the pool water
does not flow out through ther filter housing. Clean the seal area and the
o-ring and replace.
Startup

9
The filter operator or owner must be provided with this owner’s
manual. This must be read before operation, and followed
during operation.
Incorrectly installed or tested equipment may fail, causing
severe injury or property damage. Read and follow instructions
in owner’s manual when installing and operating equipment.
Have a trained pool professional perform all pressure tests.
Hazardous pressure to avoid explosion and possible severe
or fatal injury, filter system pressure must not exceed 40psi
(280kPa) under any circumstances. NEVER test this filter
system with compressed air; never operate system with water
temperature above 350C.
To prevent equipment damage and possible injury, turn pump
OFF before adjusting or opening filter.
Do not add chemicals directly into the pool skimmer. Adding
undiluted chemicals may damage equipment and void
warranty.
1. The filter should require no intervention during operation, except to clean
or replace the cartridge.
2. When the pressure gauge shows a reading 70kPa higher than the startup
reading taken in item (4) above, the cartridge requires cleaning. See below
for cleaning procedure.
3. If the time period between filter cleans gets progressively shorter, it may
be necessary to soak the filter in a proprietary cleaner. See your pool shop
or technician for advice. This is because the build up of debris that cannot
be washed away with normal methods.
4. If the filter material is torn, it will be necesary to replace the cartridge.
Operation

10
General: Wash outside of filter with a mild detergent and water.
Rinse off with hose.
DO NOT use solvents to clean filter, solvents may
damage components in system.
1. On a weekly basis, check pressure during operation. When pressure is
70kPa higher than clean operating pressure, clean the filter cartridge.
2. Except during hot weather with heavy skimmer loads, operating filter 6 to
12 hours per day should be sufficient. Carefully monitor water chemical
balance and follow recommendations of your local pool professional.
Cartridge Cleaning
1. Switch off pump, release system pressure using the air bleed on the filter
lid. Close all valves, remove clamp from filter lid, remove lid.
2. Lift the cartridge out of the filter housing.
3. Inspect for damage (rips in the filter material). Replace if ripped.
4. Using a garden hose with a high pressure nozzle sweep debris from the
cartridge pleats. When all pleats are clean, the cartridge is ready to be
placed back in the filter.
5. Replace filter. Ensure that it is correctly seated. Replace lid, ensuring that
the o-ring and sealing surface are clean, and correctly in place. Replace
the locking ring. Open all valves and bleed the air from the housing.
6. Restart the pump.
Water Maintenance
Keep water level at least 2” (50mm) above bottom of skimmer opening.
Failure to do so can allow air to enter system, causing pump to lose prime
and air to enter filter.
Maintain pH between 7.2 and 7.6 in pool.
To prevent damage to system components, keep water
temperature below 45OC at all times.
Cartridge Maintenance

11
Tank Assembly
Item Title Quantity
1 Tank Base 1
2 Element 1
3 Lid O-Ring 1
4 Lid 1
5 Lock Ring 1
6 Air Bleed O-Ring 1
7 Air Bleed 1
8 Pressure Gauge 1
9 Mac Union Nut 1
Item Title Quantity
10 Mac Union Tail 2
11 Mac Union O-Ring 2
12 Drain Bung O-Ring 1
13 Drain Bung 1
14 Blank cap 1
15 Safety Lock Lever Screw 1
16 Safety Lock Lever Washer 1
17 Safety Lock 1

12
Symptom Cause Remedy
No Water Discharge Pool water level too low Fill pool to correct level
Air leaks in inlet fittings to
pump.
Check and tighten all connections.
Teflon tape fittings
Short Filter cycles Filter Dirty Clean filter cartridge
Replace filter cartridge
Algae present in Pool water. DON’T RUN FILTER WITH LIVE
ALGAE IN POOL. Check the
chemical condition of pool water
and refer to Pool Water Chemical
Treatment. Note: Incorrect
chemical treatment will greatly
shorten filter cycle.
Filter startup pressure high and
water flow low
Filter requires cleaning Follow filter cleaning procedure in
this manual
Return line restricted Check for flow at return
Filter startup pressure low and
water flow high
Skimmer basket full of
leaves or debris
Clear Skimmer Basket of all
foreign matter and debris
Pump strainer lid not sealed
correctly
Refer to pump owners manual
for correct procedure for sealing
strainer lid correctly
Pool water level too low Fill pool correct level
Pump impeller blocked Call an authorised service agent to
service pump
Blockage in suction line
Air leak in suction line
Leaking from filter tank joint Tank 0-ring dirty Call an authorised service agent to
service pump
O-ring incorrectly fitted
O-ring damaged (pinched)
Should problems persist, contact your nearest Pentair Water Service Agent.
Trouble Shooting

13
Pentair Water Product Warranty
Pentair Water warrants that, when this product is used for the purpose it was designed, is correctly housed and vented against
weather, vermin, dust etc., that it will be free of material and manufacturing defects at the time of the original purchase.
This warranty is limited to the cost of the product and does not cover third party costs including the costs of
electricians, plumbers, etc. unless authorised by Pentair Water.
TERMS AND CONDITIONS APPLICABLE INTERNATIONALLY
How long the warranty is effective Internationally
1) This Pentair Water product is warranted for 12 months for all parts from the date of the first consumer purchase.
Should any parts fail as a result of such defects within the specified period, the part will be replaced free of charge.
(This does not include travel charges, removal and reinstallation charges.)
TERMS AND CONDITIONS APPLICABLE IN AUSTRALIA AND
NEW ZEALAND
1) YOU SHOULD CAREFULLY READ THE INSTRUCTIONS SUPPLIED PRIOR TO USING THIS PENTAIR
WATER PRODUCT.
This product is to be installed and operated in accordance with the instructions provided.
This warranty will not apply if it is used in a manner other than in accordance with the instructions.
What the warranty covers:
Pentair Water warrants its products to be free of defects in material and workmanship during the warranty period.
If a product proves to be defective in material or workmanship during the warranty period, then Pentair Water will,
at its sole option repair or replace the product with a like product. Replacement product or parts may include
re-manufactured or refurbished parts or components.
How long the warranty is effective:
1) This Pentair Water product is warranted for 36 months for all parts from the date of the first
consumer purchase.
2) Authorised workshop labour will be free of charge for the first 12 month period from date of the first
consumer purchase when unit is found to have failed due to defective workmanship or material supplied by
Pentair Water Australia.
Infield service by an authorised Pentair Water Service Agent will incur a travel, removal & reinstallation fee
payable by customer.
3) Where this Pentair Water product is sold for commercial application as defined in the relevant Trade
Practices and Consumer Protection legislation the warranty shall be for a period of six months from
the date of purchase by the end user.
Who the warranty protects:
This warranty is valid only for the consumer purchaser.
What the warranty does not cover:
1) Damage, deterioration or malfunction resulting from:
a) accident, misuse, negligence, fire, water, lightning, or other acts of nature, unauthorised product
modification or failure to follow instructions supplied with the product;
b) repair or attempted repair by anyone not authorised by Pentair Water;
c) any damage to the product due to shipment;
d) removal or installation of the product;
e) causes external to the product such as electric power fluctuations or failure;
f) use of supplies or parts not meeting Pentair Water specifications;
g) normal wear and tear;

14
h) water ingression or exposure to abnormal corrosive conditions or “run dry” conditions;
i) any other cause which does not relate to a product defect.
2) Damage caused to the product as a consequence of use of another manufacturer’s product used in conjunction
with Pentair Water and affiliate companies.
3) Ingress of insects into the unit causing electrical malfunction is not warranted, care should be taken to avoid
this occurrence.
Spare Parts:
Spare parts are usually stocked for a reasonable period of time following last production.
Pentair Water does not warrant that spare parts will be made available for the whole of the reasonable period and
reserves its right to cease supplying spare parts or providing facilities for repair of spare parts in circumstances
which are beyond its control including the requirement to remove spare parts from sale as a consequence of
changes in the law or otherwise as it deems fit.
How to get service:
In Australia please contact 1800 664 266 In New Zealand please contact 0800 664 269
Claims under this warranty must give evidence of date of purchase, model and serial number of the product and the
claimants name, address and telephone number.
1) To obtain warranted service, you will be required to provide to either Pentair Water state office
or recommended service agent:-
a) the product;
b) confirmation in writing specifying the nature of your claim;
c) proof providing date of original purchase;
d) full contact details including name and address;
e) the serial number of the product if any.
2) The product is to be forwarded by the customer freight paid to an Authorised Pentair Water service agent.
3) Warranty service work will be denied or suspended, on equipment not readily accessible to service personnel,
that is products that are behind barriers, tiled or bricked in, installed in roofs or second story external walls
including inaccessible power points.
4) Any service of any product which is found to be faulty due to abuse, fair wear & tear, misuse or improper
installation will be charged to the owner at the service agents current servicing hourly rate.
Limitation of implied warranties:
THEREARE NO WARRANTIES, EXPRESSED OR IMPLIED, WHICH EXTEND BEYOND THE DESCRIPTION CONTAINED
HEREIN INCLUDING THE IMPLIED WARRANTY OF MERCHANTABILITYAND FITNESS FORAPARTICULAR PURPOSE.
Exclusion of damages:
PENTAIR WATER’S LIABILITY IS LIMITED TO THE COST OF REPAIR OR REPLACEMENT OF THE PRODUCT.
ONGA SHALL NOT BE LIABLE FOR:
1) DAMAGE TO OTHER PROPERTY CAUSED BY ANY DEFECTS IN THE PRODUCT, DAMAGES BASED UPON
INCONVENIENCE, LOSS OF USE OF THE PRODUCT, LOSS OF TIME, LOSS OF PROFITS, LOSS OF BUSINESS
OPPORTUNITY, LOSS OF GOODWILL, INTERFERENCE OF BUSINESS RELATIONSHIPS, OR OTHER
COMMERCIAL LOSS, EVEN IF ADVISED OF THE POSSIBILITY OF SUCH DAMAGE.
2) ANY OTHER DAMAGES, WHETHER INCIDENTAL, CONSEQUENTIAL OR OTHERWISE.
3) ANY CLAIM AGAINST THE CUSTOMER BY ANY OTHER PARTY.
Effective law:
This warranty gives you specific legal rights, and you may also have other rights which vary from state to state.
Nothing in this warranty limits or restricts, or is intended to derogate from, any right or remedy which the purchaser
or ultimate user of the product may have pursuant to Australian state and/or Australian federal consumer protection
legislation, New Zealand Sale of Goods Act, Consumer Guarantees Act, Fair Trading Act or any other relevant and
applicable New Zealand legislation or authority and where necessary shall so be read and construed.
Pentair Water Product Warranty (Continued)

IMPORTANT
Please attach your sales invoice/docket here as proof of purchase should warranty service
be required.
Please do not return Warranty - Retain for your records.
Purchased From ......................................................................................................................
Purchase Date..................................... Serial No.............................. Model No........................
L300137A 1109
Disclaimer: Every endeavour has been made to publish the correct details in this data sheet.
No responsibility will be taken for errors, omissions or changes in product specifications.
Pentair Water reserves the right to change specifications
Pacific Head Office
Australia Pentair Water Australia Pty Ltd
Notting Hill Victoria, Australia
Tel: +61 3 9574 4000 Fax: +61 3 9562 7237
Email: Sales@pentairwater.com.au
www.pentairwater.com.au
Pentair Water New Zealand Ltd
Penrose Auckland New Zealand
Tel: +64 9579 6254 Fax: +64 9579 6497
Email: auckland@pentairwater.com.au
North, Central 1620 Hawkins Avenue Sanford, North Carolina, 27330
& Latin America Phone: 1-800-831-7133
www.pentaircommercial.com
Europe, Toekomstlaan 30, 2200 Herentals, Belgium
Middle East Phone: +32-14-25-99-11 Fax: +32-14-25-99-73
and Africa Email: poolemea@pentair.com
Asia China
www.pentairwater.com
India
www.pentairwater.com
This manual suits for next models
3
Table of contents
Other onga Water Filtration System manuals
Popular Water Filtration System manuals by other brands

Pond Boss
Pond Boss FUV9 manual

Pentair
Pentair FULLFLOXF Q Series Installation and user guide

Fass
Fass Titanium Series installation manual

Hydac
Hydac Wombat Filter WBF Installation and maintenance instructions

NatureWater
NatureWater 50801 Operation manual

Excalibur Water Systems
Excalibur Water Systems Value Zentec Hybrid Air Capsulate installation manual