11 12 13 14 15 16 17 18 19 20
BASIC OPERATION
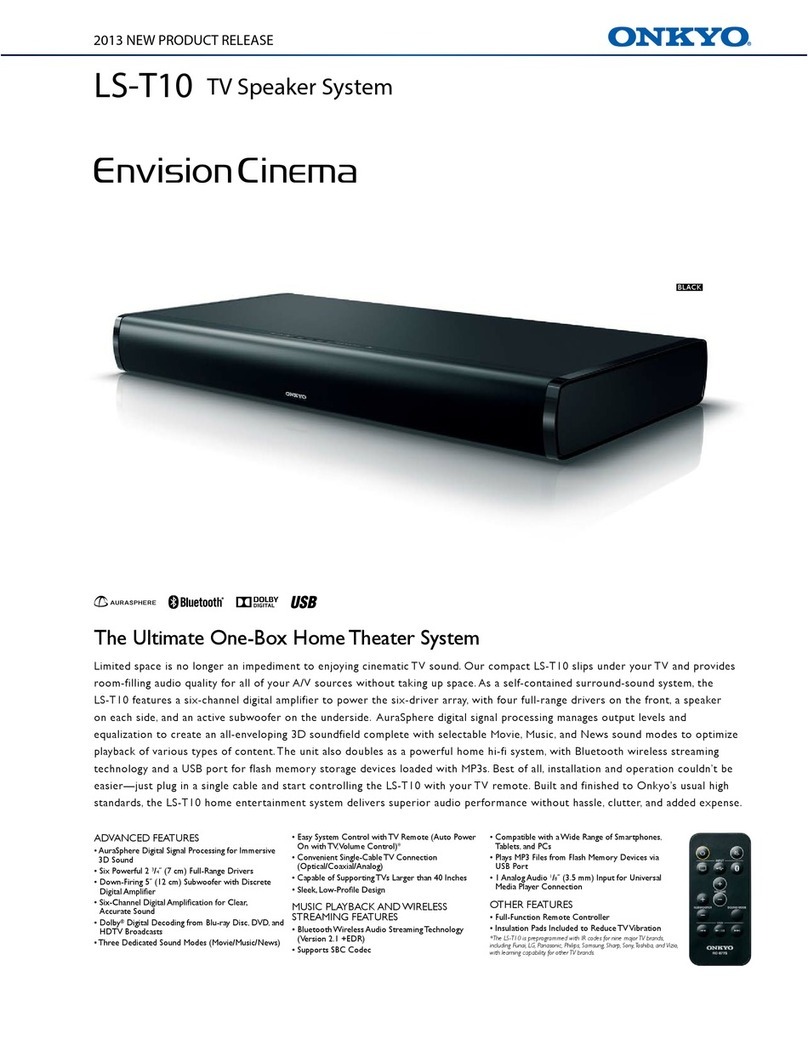
Using Main Unit Controls
134
687
25
Regarding the buttons on the main unit:The buttons on this unit are touch
sensitive switches.Therefore, they may respond poorly depending on how they are
pressed or not respond when pressed fast and consecutively.
3. INPUT buttons
Switches the input source.
Toplay the TV sound: Turns the TV on and press the button.
Toplay music from a USB flash drive: Connect the USB flash drive and
press the button.
Toplay music from a Bluetooth device: Press the button. Refer to
page 16 for connecting.
4. VOLUME +/– buttons
Allows to adjust the volume by 1 step in the 0 to 30 range.
5. SUBWOOFER +/– button
Allows to adjust the subwoofer level by 1 step in the –10 to +10 range while
listening to the sound. The default setting is 0.
6. SOUND MODE button
Switches the sound mode of input sound as desired. The mode switchesin the
order of MUSIC oNEWS oMOVIE oMUSIC oeach time the button is pressed.
You can select the mode for each input source (TV, USB and Bluetooth).
MUSIC Mode: Gives concert hall-like sound effect.
NEWS Mode: Allows to comfortably listen news programs.
MOVIE Mode: Creates powerful 3D sound effect suitable for enjoying movies.
7. USB operation buttons
Allows operation when the input source is USB.
button: Pressing once returns the audio to the beginning of the file being
played. Pressing twice continuously returns it to the previous file.Then the
audio will skip back to the previous file each time the button is pressed.
button: Pressing during stop starts playback. Pressing during playback
temporarily stops the audio.
button: The audio skips to the next file each time the button is pressed.
12
3
4
6
5
7
1. z (ON/STANDBY)button
Switches the power on/standby.
2. (Mute) button
Turns the audio off temporarily. Pressagain to cancel muting.
The Status indicator flashes when the audio is muted.
Muting will also be canceled when the volume is changed or the power is
turned off and on.
1. (ON/STANDBY)button/INPUT button
Switches the power on/standby. Also, switches the input source.
Toturn the power on: Press once when this unit is turned off.
Toturn the standby: Press and hold for 3 seconds. The indicators go off.
Toinput the source: Press once to switch. Switches in the order of TV oUSB o
Bluetooth each time the button is pressed.
Auto PowerOn function: The unit automatically turns on when audio signal
is output from the TV.To switch on/off this function, press and hold first ,
and then for about 3 seconds. When this function is set to on, the
indicator flashes once. It flashes twice when this function is set to off.
Auto Standbyfunc tion:
The unit automatically enters the standby mode if the
status with no operation and sound continues 5 minutes. Toswitch on/off this function,
press and hold first , and then for about 3 seconds. When this function is
set to on, the indicator flashes once. It flashes twice when this function is set to off.
2. INPUT source indicators
Lights when the source is TV.
Lights when the source is USB.
Lights when the source is Bluetooth.
3. VOLUME –/+ buttons
Allows to adjust the volume by 1 step in the 0 to 30 range.
Pressing the buttons together will mute audio. The status indicator on the
front of the main unit will flash. Press theVOLUME-/+ button again to cancel mute.
4. SOUND MODE button
Switches the sound mode of input sound as desired. The mode switchesin the
order of MUSIC oNEWS oMOVIE oMUSIC oeach time the button is pressed.
You can select the mode for each input source (TV, USB and Bluetooth).
MUSIC Mode: Gives concert hall-like sound effect.
NEWS Mode: Allows to comfortably listen news programs.
MOVIE Mode: Creates powerful 3D sound effect suitable for enjoying movies.
5. SOUND MODE indicators
Lights according to the selected sound mode.
MUSIC Lights in the music mode.
NEWS Lights in the news mode.
MOVIE Lights in the movie mode.
Lights when the input signal is Dolby Digital.
6. Left channel speaker
7. Status indicator
Lights white when the power is on. It keeps flashing during mute. It flashes just
once every time volume is adjusted or the input or sound mode is changed. It
goes off during standby.
8. Right channel speaker
Using Remote Controller
How to Use Remote Controller
20°
20°
30°
30°
Remote control sensor
Approx.16 ft
(5 m)
How to Replace Remote Controller Battery
13
4
2
Positive (+) side
(Back side) (Back side) Use only a batter y
of the same type
(CR2025).
Playing via Bluetooth Connection
Within 33 ft (10m)
1
2
Steps 3 and 4 need to be performed
on the Bluetooth device.
1. Turn the unit on.
2. Press .
The indicator flashes faster,and
the pairing starts.
The pairing will end in about 30 seconds
and the indicator starts flashing slowly.
3. On the Bluetooth device, select
the unit (Onkyo LS-T10)to
make a connection.
For details on operation, see the instruction
manual of the Bluetooth device.
If the operation does not start as
normal within the 33 feet (10 m)
range, get the Bluetooth device closer
to the unit and retry the operation.
If a passcode (password, passkey or
PIN code) is requested, enter "0000".
When the pairing is completed, the
indicator lights.
4. Start playback.
Using TV Remote Controller
Preprogrammedfunc tions:
This unit has been preprogrammed so that it can be
operated with your existingT V remote controller.The functions that can be operated are volume
control (+/–) and muting ( ). If you want to use other functions or cannot operate with your
TV remote controller, you can use the learning function as below to enable the operation.
The mute statecan be tur ned overeach time you press the Mute button on your TV
remote controller.In such case, you can synchronize the mute status of the unit and the
TV by pressing and holding the Mute button on your TV remote controller.
Todisable the preprogrammed function, press and hold first ,and then for about
10 seconds. When the preprogrammedfunction is successfully disabled, indicator
flashes 3 times, then anyT V remote controller cannot be used to operatethe unit. When
you want to re-enable the preprogrammed function, perform the same operation. When
the preprogrammed function is successfully re-enabled, indicator flashes once, then
you can use any remote controller using preprogrammedfunction.
Tocontrol the preprogrammed functions: Varieties of TV remote controllers have been
preprogrammedon this unit, which may lead to unintended operation from the other remote
controller than yourT V remotecontroller. In such case, press and hold first andthen , and then
press either volume or mutebutton on your TV remote controller 2 or 3 times to turn on the controlling
function.When the controlling function is set to on, the indicator flashes twice, and then, the
other remote controllercannot be operated.
Controllingfunction may not be set to some TV remote controllers.
Tocancel the controlling function, press and hold first ,and then forabout 10 seconds. When
the controlling function is successfully cancelled, indicator flashes once, then you can use any
remote controllerusing preprogrammed function.
Learning function: You can operate the unit with aT V remote controller by assigning
the functions to the buttons of the remote controller.Perform the following button
operation, when the indicator starts flashing, direct your TV remote controller to remote
control sensor of this unit and press the button to assign on theT V remotecontroller 3 times.
When the Learning function is successfully set, indicator flashes twice.
* Press button first when pressing and holding the buttonstogether.
Learning function Button operation (Presssimultaneously for 3 seconds)
ON/STANDBY o
VOLUME + o
VOLUME – o
Troubleshooting
Check the items below if you have any problem.
Beforerequesting repair: I f the unit does not work or accept control,tr y resetting the unit to its
factory defaults and check if your problem is solved. Perform the following resetprocedure.
1. Press and hold the button on the main unit and the buttons for10 seconds.
When reset is complete,the three INPUT source indicators flash and the unit automatically enters the
standby mode.
Power
Can’tturn on the unit
Make sure that the power cord is properly
plugged into the wall outlet. (oP.8)
Unplug the power cordfrom the wall
outlet, wait 10 seconds or more, then
plug it in again.
The unit turns off unexpectedly
The unit will automatically enterstandby
mode when Auto Standby launches.
(oP.12)
The unit turns off and after restoring
the power,it turns off again
The protection circuithas been
activated. Remove the power cord from
the wall outlet immediately. Make sure
that all cables and input sources are
properly connected, and leave the unit
with its power cord disconnected for 1
hour. After that, reconnect the power
cord and turn the power on. If the unit
turns off again, unplug the power cord
and contact your Onkyo dealer.
If smoke, smell or abnormal noise is produced
by the unit, unplug the power cord fromthe
wall outlet immediately and contact your
Onkyo dealer.
Audio
There’sno sound, or it’s very quiet
Make sure that all audio connecting plugs
are pushed in all the way.(oP.7, 8)
Make sure that the input of device is
connected properly. (oP.7
, 8
)
When the Status indicator flashes in
white, the muting is enabled. Press
or Volume–/+ on the remote
controller or the Volume+/– buttons
simultaneously on the unit to disable
the muting. (oP.14)
Make sure that none of the connecting
cables are bent, twisted, or damaged.
The base sound cannot be heard
The protection circuitin the subwoofer
may have tripped due to a rise in
temperature. Disconnect the power
cord from the outlet and reconnect after
a while.
Noise can be heard
Do not bind the power cord, connection
cables and other audio cables with a band.
An audio cable may be picking up
interference.Try repositioning your
cables.
Make sure that there is no obstacle or
reflection between the unit and the
subwoofer.
Remote Controller
The remote controllerdoesn’t work
Make sure that the battery is installed
with the correct polarity. (oP.13)
Make sure that the remote controller
is not too far away from the unit, and
that there’sno obstruction between the
remote controller and the unit’sremote
control sensor.(oP. 1 3 )
Make sure that the unit is not subjected
to direct sunshine or invertertype
fluorescent lights. Relocate if necessary.
Playing USB Memory
The unit supports USB memory formatted
using FAT12,FAT16and FAT32 file system.
The unit is compatible with MP3
playback and following audio format is
supported.
-MPEG1Audio Layer3 format with a
sampling rate of 32, 44.1 or 48 kHz and
32 to 320 kbps bit rate
-MPEG2Audio Layer3 format with a
sampling rate of 16, 22.05 or 24 kHz
and 8 to 160 kbps bit rate
-MPEG2.5Audio Layer3 format with a
sampling rate of 8, 11.025 or 12 kHz
and 8 to 64 kbps bit rate
Youcan play MP3 files stored on the
root folder only.MP3 files stored on
the other folders cannot be played on
this unit.
The unit supports USB flash drives only.
Note, however,that playback may not
be possible with some USB flash drives.
The unit contains a microcomputer
for signal processing and control
functions. In very rare situations,
severe interference, noise from an
external source, or static electricity
may cause it to lockup. In the unlikely
event that this happens, unplug the
power cord from the wall outlet, wait
at least five seconds, and then plug
it back in.
If it doesn’t work properly,please tr y
resetting (oP.18).
Onkyo is not responsible for damages
(such as CD rental fees) due to
unsuccessful recordings caused by
the unit’s malfunction. Before you
record important data, make sure
that the material will be recorded
correctly.
If you reset Bluetooth of this unit or removed the registrationof this unit from the
Bluetooth device, perform pairing (see above) again.
Toconnect any other Bluetooth device, press and hold the button of the main
unit to start pairing.
Learning function Button operation (Presssimultaneously for 3 seconds)
MUTE o+
INPUT o+
SOUND MODE o+
It is recommended to select buttons that do not preventT V operation when assigning
the functions to your remote controller.
Signal of some types of remotecontroller may not be received by the unit. In that case,
use the remote controller supplied with the unit.

