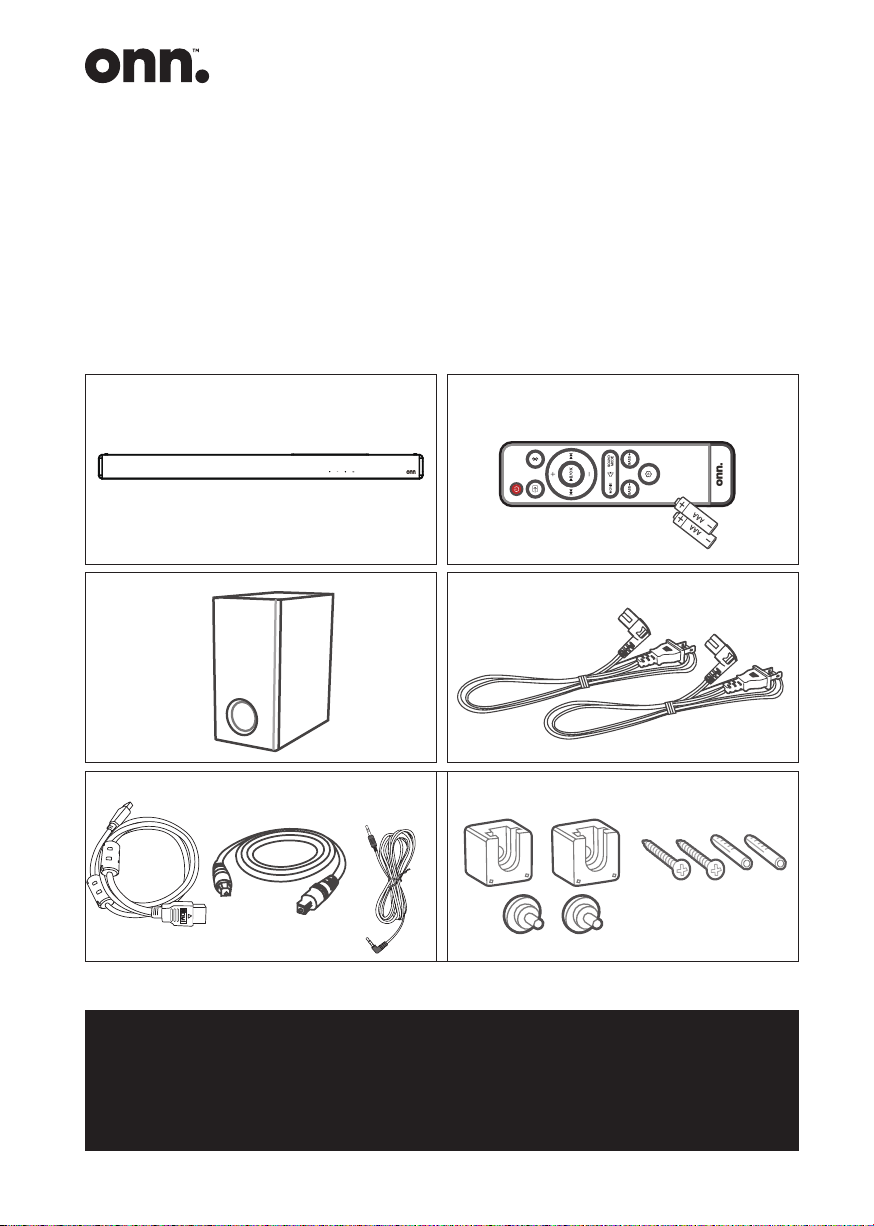
7
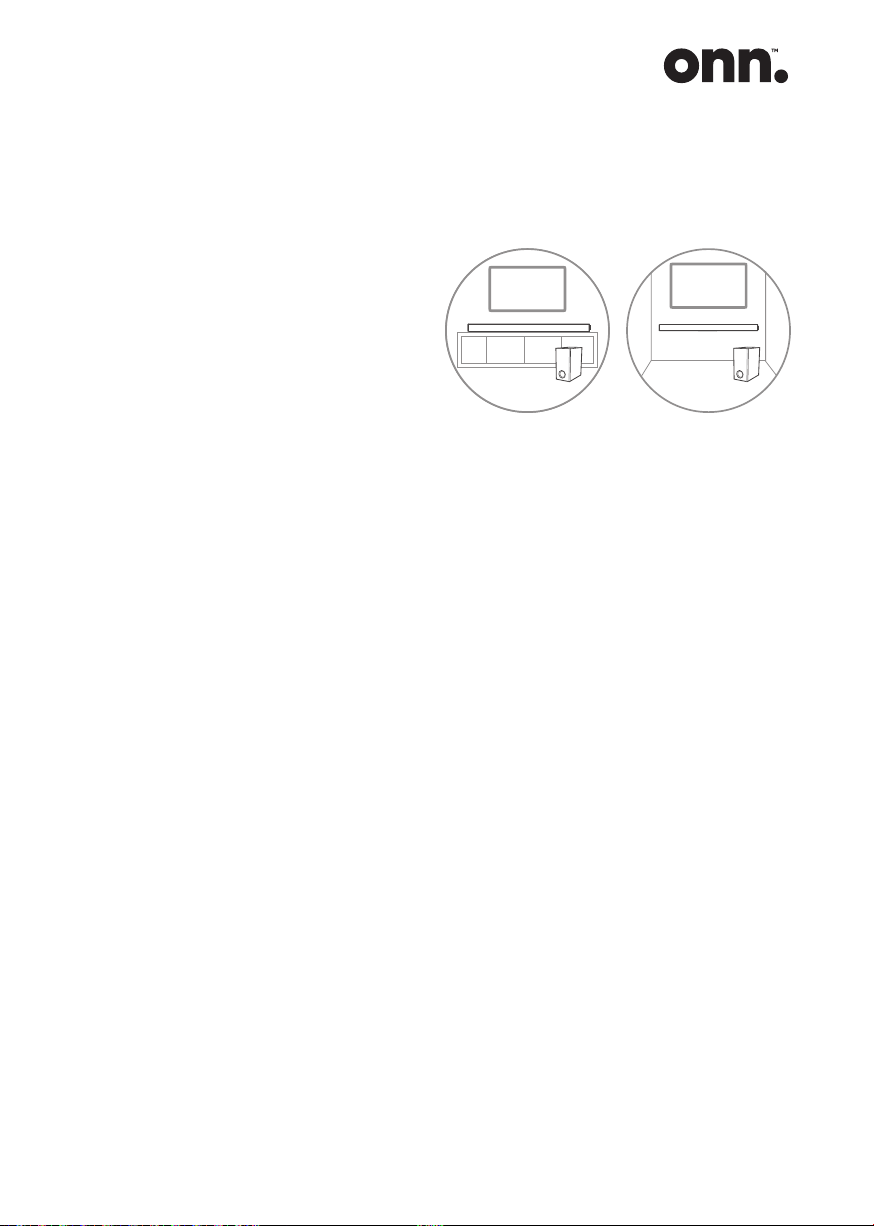
Position your Sound Bar
The correct position of the Sound Bar
Placed on a stand: If your TV is placed
on a table, you can place the unit on
the table directly in front of the TV
stand, centered with the TV screen.
Wall mounted: If your TV is attached
to a wall, you can mount the unit on
the wall directly below the TV screen.
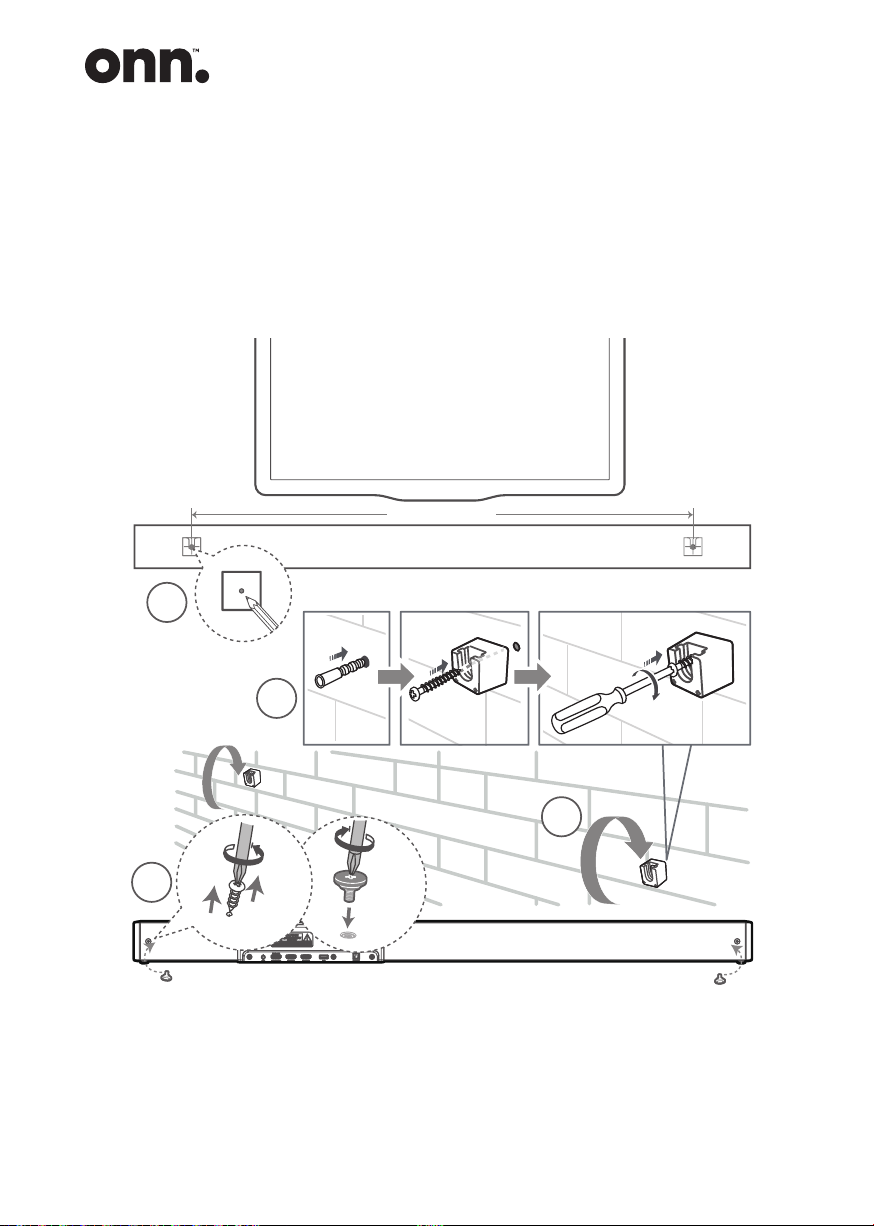
How to mount your Sound Bar on a wall
IMPORTANT: Before installing your
Sound Bar please read the information
below.
• Improper wall mounting may result
in accident, injury or damage.
If you have any query, contact
Consumer Care in your country.
• Before wall mounting, make sure
the wall can support the weight of
your Sound Bar.
• Before wall mount, you need
not remove the rubber feet at
the bottom of the Sound Bar,
otherwise the rubber feet cannot
be xed back.
• Depending on the type of wall
mounting your Sound Bar, make
sure that you use screws of a
suitable length and diameter.
• Please check whether the USB
port on the back of the Sound Bar
is connected to a USB device. If it
is found that the connected USB
device affects the wall-mount, you
need to use another USB device
of the appropriate size.
• To prevent injury, this apparatus
must be securely attached to the
oor/wall in accordance with the
installation instructions.
• Suggested wall mounting height:
≤ 1.5 meters.
WARNING: Before attempting to
t the Sound Bar to the wall, if you
are in any way unsure about how
or where to t the Sound Bar you
should employ a qualied person to
install your Sound Bar.
IMPORTANT: The ttings supplied
with your Sound Bar may not be
suitable for all types of wall. Please
consult a professional for advice
before drilling any holes if you are in
any doubt.
IMPORTANT: Mark the position on
the wall that you want the Sound Bar
to be tted to and check that they
align with the holes in the brackets
before drilling any holes.