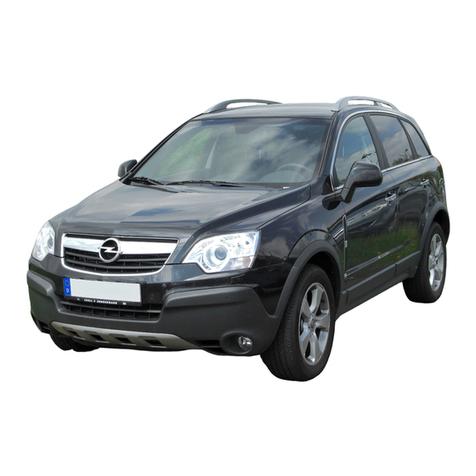
Opel Antara Operation User manual

OPEL Antara
Operation, Safety, Maintenance

2
Data specific to your vehicle
Pleas e enter you r veh icle ’s data he re to ke ep it ea sily acces sible.
This information is available under the section "Technical data" as well as on the identification plate.
Fuel
Designati on
Engine oil
Gra de
Viscosity
Tyre pressure
Ty re si ze for loa d of up to 4 persons for full load
Summer tyres Front Rear Front Rear
Winter tyres Front Rear Front Rear
Weights
Permissible Gross Vehicle Weight
– ECkerbweight
=Loading

3
Your Antara
is an intelligent combination of forward-
looking technology, impressive safety,
environm ental friendliness and economy .
It now lies with you to drive your vehicle
safely and ensure that it performs
perfectly. This Owner's Manual provides
you with all the necessary informa tion to
that end.
Ma ke sure your passeng ers are aware of
the poss ible risk of acciden t a nd injury
which may result from improper use of the
vehicle.
You must a lways comply with the specific
law s of the country tha t you are tra velling
through. Thes e la ws may diffe r from the
information in this Owner’s Manual.
W hen instructed to seek the assis tance of a
workshop, we recommend that you consult
an Opel Service Pa rtner. All Opel S ervice
Partners offer first-class service at
reasonable prices.
Experienced mecha nics, trained by Opel,
work according to specific Opel
instructions.
The Owner's Manual should always be kept
together with the Service and Warranty
Booklet in the vehicle: Ready to hand in the
glov e comp artment.
Make use of the Owner's Manual:
zIts "In brief" section will give you an initial
overview.
zThe table of contents at the beginning of
the Ow ner’s Manual and within the
individ ual chapters will show you where
everything is.
zIts index will help you find what you
want.
zIt will familiarise you w ith the
sophisticated technology.
zIt will increase your pleasure in your
vehicle.
zIt will help you to hand le your v ehicle
expertly.
The Owner’s Manual is designed to be
clea rly laid-out and easily understood.
This symbol signifies:
6Continue reading on next page.
3The asterisk signifies equipment not
fitted to all vehicles (model variants,
engine options, m odels specific to one
country , optional eq uipm ent, O pel
genuine parts and accessories).
Yellow arrows in the illustrations serve as
points of reference or indicate some action
to be p erformed.
Bla ck arrows in the illustrations indicate a
reaction or a second a ction to be
performed.
Directional data, e.g. left or right, or front
or back, in the descriptions always rela tes
to th e d i r ec ti o n o f t r a ve l .
We wish you many hours of pleasurable
driv ing
Your O pel Tea m
9Warning
Text marked 9Warning provides
information on risk of accident or injury.
Disregard of the instructions may lead to
injuries or endanger life.
Inform your passengers acc ordingly .
4

5
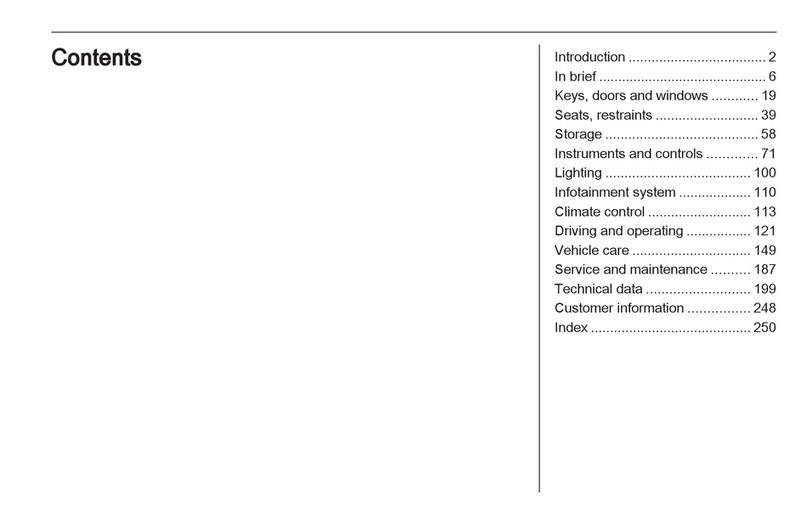
Contents In b rie f .. ..... .... ..... .... .... ..... .... ..... .... ..... .... .... ..6
Locks , doors, windows ... .... ..... .... ..... .... ... 2 1
S eats, in terior ..... .... .... ..... .... ..... .... ..... .... ... 3 6
Ins trum ents, controls . ..... .... ..... .... ..... .... ... 7 0
Lighting ..... .... ..... .... .... ..... .... ..... .... ..... .... ... 9 4
Info tainment sys tem .. ..... .... ..... .... ..... .... . 102
C lim ate c on trol .. .... .... ..... .... ..... .... ..... .... . 104
Driving and op eration ... .... ..... .... ..... .... . 116
S elf-help, vehicle care .... .... ..... .... ..... .... . 172
S ervice , mainte na nce ..... .... ..... .... ..... .... . 207
Te chnical data .. .... .... ..... .... ..... .... ..... .... . 219
Inde x . .... ..... .... ..... .... .... ..... .... ..... .... ..... .... . 232

In b ri e f6
In brief
To unlock and open the vehicle:
Press button q, pull door handle
6Door locks - see pages 30, 72,
keys - see page 21,
electronic im mobiliser - see page 22,
radio frequency remote control -
see p age 23,
central locking system - see page 25,
anti-theft lock ing sy ste m - see pag e 27,
anti-theft alarm system - see page 27.
To unlock and open the tailgate:
Press button qon remote control,
operate button above
license plate
6Tailgate - see page 26,
radio frequency remote control -
see page 23,
ce ntral loc king sy ste m - se e pa ge 2 5,
anti-theft alarm system - see pag e 27.

In brief 7
Fro nt seat ad justment:
Pull handle, slide seat,
release handle
6Seats - see pa ge 36,
seat position - see page 38.
Adjusting front seat backrests:
Lift release lever on outboard side
of seat
Move seat backrest to suit seatingposition.
Do not lean on seat b ackrest whilst
adjusting it.
6Seats - see page 36,
seat position - see pa ge 38.
A djus ting the lu mba r s upp ort 3:
Turn handwheel
Adjust lum bar support to suit personal
requirements.

In b ri e f8
Adjusting seat height 3:
Raise or lower lever on outboard
side of seat
Lever pumping ac tion
6Seats - see pa ge 36,
seat p osition – see page 38.
Adjusting head restraint height:
Press release button,
adjust height, then release
6Head restraints - see page 39,
head restraint position – see page 39.
Fitting seat belt:
Drawseat belt smoothly from
inertia reel, guide over shoulder
and engage in buckle
The belt must not be twisted at any point.
The lap belt must lie snugly against the
body.
The backrests must not be tilted back too
far (rec om mended ma ximum tilting angle
app rox . 25° ).
To release b elt, p ress red button on belt
buckle.
6Seat belts – see pages 43 to 47,
airbag sy ste ms – see pag e 52,
seat position – see pag e 38.
upward: raises seat
downward: lowers seat

In brief 9
To adjust interior mirror:
Swivel mirror housing
Swivel lever on underside of mirror housing
to red uce daz zle a t nig ht.
Take care when driving with interior mirror
adjusted for night vision. Rear view may be
slightly distorted in this position.
6Mirrors - see page 31,
automatic anti-dazzle interior mirror -
see page 32.
Electrically adjustable exterior
mirrors:
Four way switch in driver’s door
Move selector switch to L or R; four way
switch ad ju s ts co rre sp on din g m i rror.
6Further information,
autom atic anti-dazzle exterior mirrors -
see p age 31,
heated exterior mirrors - see p age 106.
Fold in exterior mirrors:
Manually: press lightly.
Electrically 3: with ignition sw itch in
positions ACC or ON, press button nand
both mirrors will fold in.
Press button na g ain; both mirrors willfold
to the driving position.
If a f old ed-in e lectric mirro r has be en
folded out manually, pressing button n
only folds the other mirror out. Pressing
button na gain folds both m irrors back in.
Fold mirrors b ack into driving position
before driving the vehicle.

10 In brief

In brief 11
Page
1Side air v ents .... ..... .... ..... .... .... ..... .... 10 5
2Door window defroster v ents ..... .... 105
3Headlamp flash and m ain bea m ....14
turn signal lam ps .. .... ..... .... .... ..... .... .. 14
Periph era l lighting . .... ..... .... .... ..... .... ..9 8
cruise control 3..... .... ..... .... .... ..... .... 141
4Infotainment system
rem ote control buttons.. .... .... ..... .... 102
Trip computer 3.... .... ..... .... .... ..... 81, 88
5Horn . .... .... ..... .... ..... .... ..... .... .... ..... .... ..1 5
6Ins trume nts... .... ..... .... ..... .... .... ..... .... .. 7 0
7Windscreen and tailgate
wipe rs a nd was he rs .. ..... .... .... ..... 15, 16
headlamp washers 3..... .... .... ..... .... .. 1 6
8Central information display for time,
date, outside temperature,
Infotainment system,
check control 3..... .... ..... .... .... ..... .... .. 9 1
Trip computer 3.... .... ..... .... .... ..... 81, 88
Pa ge
9Ce ntre air ve nts .... ..... .... .... ..... .... ..... 105
10 Hazard w arning ... ..... .... .... ..... .... ..... .. 14
Pa rk pilot 3. ..... .... ..... .... .... ..... .... ..... 143
Des cent C on trol Sy ste m (DCS ).. ..... 1 39
Electronic Stability Control (ES C)... 137
Front passenger’s
se at be lt remin de r 3. .... .... ..... .... ..... .. 46
Fold in exterior m irrors 3. ..... .... ..... .. 30
Control indica tor for
anti-theft alarm system 3..... .... ..... .. 2 9
11 Infotainme nt sy ste m . .... .... ..... .... ..... 1 02
12 Front pas se nger’s airbag . ..... .... ..... .. 52
13 Glov e com partment.. .... .... ..... ... 64 , 1 06
14 Fus e box .. .... ..... .... ..... .... .... ..... .... ..... 183
15 Climate control . .... ..... .... .... ..... .... ..... 1 04
16 Ignition s witch .. .... ..... .... .... ..... .... ..... .. 13
Page
17 Acce lerator pe dal .... .... ..... .... ..... .... . 12 8
18 Drive r’s airbag .... ..... .... ..... .... ..... .... ... 52
19 Brake pe dal . .... .... ..... .... ..... .... ..1 28, 147
20 Clutch pedal 3.... ..... .... ..... .... .. 1 28, 12 9
21 S te ering w he el a djustme nt .. ..... .... ... 1 3
22 Bonnet re lease .... ..... .... ..... .... ..... .... . 172
23 C oin storage .... .... ..... .... ..... .... ..... .... ... 6 7
24 C ard holder . .... .... ..... .... ..... .... ..... .... ... 67
25 S id elights ..... .... .... ..... .... ..... .... ..... .... ... 9 4
dipp ed b eam .. .... ..... .... ..... .... ..... . 14, 9 5
automatic dip ped beam
activation 3.... .... ..... .... ..... .... ..... .... ... 95
headlamp range adjustment 3.... ... 9 7
fron t fog lamps ... ..... .... ..... .... ..... .... ... 9 6
fog tail lam p ... .... ..... .... ..... .... ..... .... ... 9 6
instrume nt illum ination .... .... ..... .... ... 98

In b ri e f12
Control indicators
uABS (Anti-lock Brak e S ystem):
se e p ag e 14 9.
gTra iler indic ator 3:
see p age 70.
4Brake system:
see pages 70, 146.
rPa rk pi lot 3:
see pages 71, 143.
5DCS (Descent Control System):
see pages 71, 139.
BAWD (All Wheel Drive) 3:
see pages 71, 122.
7ESC Activ e & Wa rning
(E lectronic S tabil ity C ontrol):
see p age 137.
AESC Not Read y:
see p age 137.
JESC OFF:
see p age 137.
qAutomatic headlamp range
adjustment 3:
see pages 71, 98.
WCoolant t em perature:
see pages 71, 196.
oE lec tronic im mobil iser:
see pages 22, 72.
9Door open:
see page 72.
3Engine electronics,
tra n sm is si on e le ctr on i cs 3:
see pages 72, 135.
vAirbag systems 3,
belt tensioners:
see pages 44, 52.
1Tailgate open:
see page 72.
XDriver’s seat b el t reminder:
see page 72.
OTurn signal lamps:
see pages 14, 72, 95.
YLow fuel level:
see pages 72, 76, 133, 229.
>Front fog lamps:
see pages 73, 96.
rFog tail lamp:
see pages 73, 96.
PHeadl amp m ain beam :
see pages 14, 73, 95.
GLow windscreen washer fluid:
see page 73.
NWater in diesel fuel filter 3:
see pages 73, 195.
CChange engine oil 3:
see page 73.
NPr ehe atin g fo r die s el en gi n es 3:
see pages 19, 73.
IDPF (Diesel pa rticle filt er ) 3:
see pages 73, 136.
mCruise control 3:
see page 141.
SEngine oil lev el 3:
see page 73.
2Pow er steering:
see page 73.
aAnti-theft ala rm system ac tiva tion
without monitoring of passenger
compa rtment and vehicle tilt 3:
see page 28.
IEngine oil pressure:
see page 74.
pAlternator:
see page 74.
ZExhaust emissions:
see pages 74, 135.
0Wi nter program :
see pages 74, 118.

In brief 13
Steering column lock and ig nition:
Turn key to position ACC.
To release lock,
rotate steering wheel slightly
Positio ns:
6Starting - see page 19,
electronic immobiliser - see page 22,
parking the vehicle - see page 20.
Steering wheel adjustment:
Mo ve lever d own,
adjust height and distance,
move lever up and engage
Adjust steering wheel only with vehicle
stationary and steering column lock
re lea se d.
Push the lever firmly upwards to ensure
that the steering wheel is locked in position.
6Airbag system s - see page 52.
Exterior lamps
Turn ligh t sw itch:
Press button:
6Head lamp warning device - see page 92,
further inform ation - see p age 94,
headlamp range adjustment 3-
see page 97,
hea dlamps when d riving abroad -
see page 101,
daytime running lamps 3- see page 94.
LOCK = Ignition off
ACC = Steering unlocked, ignition off
O N = Ignition on, with diesel engine:
preheating
START = Start (transm ission in neutra l)
J=Off
8= Sidelights
9= Dipped bea m or
main beam
AUTO = Automatic dipp ed
beam activation 3
>=Frontfoglamps
r= Fog tail lamp

In b ri e f14
Headlamp flash, main and
dipped bea m:
6Main beam , headlamp flash -
see page 95.
Turn signal lamps:
Lev er in rest po sitio n
6Turn signal la mps - see page 95.
Hazard warning lamps:
6Hazard warning la mps - see page 97.
Headlamp
flash
=Pulllever
towards
steering wheel
Main beam = Push lever
forwards
Dipped beam = Pull lever back
towards
steering wheel
Upwards = Right turn
Downwards = Left turn
On = Press ¨
Off = Press ¨again

In brief 15
Activate horn j:
Press either side of the
steering wheel
The horn will sound regardless of ignition
switch position.
6Airbag systems - see page 52,
remote control on steering wheel -
see page 102.
Windscreen wipers:
Mo ve lever upward s
Press lever down from position J:
Single swipe.
6Windscreen wipers - see page 92,
adjustable wiper interval - see p age 92,
further information - see pages 199, 203,
206.
Automatic wiping with rain
sensor 3:
Move lever to automatic wiping
with rain sensor position $
The rain sensor detects the amount of
water on the windsc reen and automatically
regulates the windscreen wipers.
6Windscreen wipers - see p age 92,
further inform ation - see p ages 199, 203,
206.
J=Off
$=Timedintervalwipe
%=Slow
&=Fast

In b ri e f16
Operating windscreen and
headlamp washer systems 3:
Pull lever towards steering wheel
6Windscreen and headlamp washer
systems - see page 93,
further information - see pages 200, 203,
206.
Tailgate wiper and washer
systems:
6Tailgate wiper and washer systems -
see p age 93,
further information - see pages 199, 200,
203, 206.
Heated rear window,
heated exterior mirrors 3:
6Air cond itioning - see page 110,
heated rear window, heated exterior
mirrors - see page 106.
Wipers on = Push lever forward
Wipers off = Pull lever back
towards steering
wheel
Wash = Press and ho ld
button
Press Ü=On
Press Üagain = Off

In brief 17
Drying misted up or iced up
windows:
Set air distribution to position l,
set the temperature rotary knob
to red and fan to position 4,
switch on heated rear windo w Ü
Close centre air vents, open side air vents
and direct them towards the door windows.
6Heating, ventilation a nd air conditioning
system - see pages 107, 110.
To set automatic mode of
Electronic Climate Control 3:
Press AUTO button,
set temperature using
ro tary kno b
Open all air vents.
6Electronic Climate Control (ECC) -
see p age 112.
Man ual tra nsmi ssi on:
Only engage reverse gear when the vehicle
is sta tionary.
1 to 5 = 1st to 5th gear
R = R everse gear

In b ri e f18
Automatic transmission 3:
Starting is only possible in Por N. To move
from PorN, switch on ignition, depress foot
brake and press selector lever button.
Enga ge Por R: press selector lever button.
6Automatic transmission - see page 11 6 .
Manual mode:
6Further information - see pag e 118.
Before starting-off, check:
zTyre pressures and condition.
zEngine oil level a nd fluid levels in engine
compartment (see pa ge 193).
zAll windows, mirrors, exterior lighting
and license plates are free from dirt,
snow and ice a nd are ope rationa l.
zObje cts are securely located and will not
be thrown forward in the event of
sudden braking.
zSeats, seat belts and mirrors are
correctly a djusted .
zAll gauges and control indicators.
zBrake operation.
P=Parkposition
R=Reverse
N=Neutral(idle)
D = Automatic gear selection
P: Only with vehicle stationary,
first apply hand brake
R: Only with vehicle stationary.
<= Shift to higher gear
]= Shift to lower gear

In brief 19
Starting the engine:
Manual transmission in neutral,
Depress clutch and foot brake,
Automatic transm ission in P or N,
Do not accelerate
Petrol engines:
Turn key to START and release it
Diesel engines:
Turn key to ON, when preheating
control indicator N
extinguishes1), turn key to START
an d release it
Key returns automatically to ON position
wh en re leas ed .
Start attempts should not last longer than
15 seconds. If engine does not start, wait
10 seconds before repeating starting
proc edure.
The increased engine speed automatically
returns to normal idling speed as the
engine temperature rises.
Driv e at a moderate speed, especially in
cold weather, until normal engine
op eratin g te mperatures h ave be en
re ac h ed .
6Electronic immobiliser - see pa ge 22,
diesel fuel system - see page 172,
further information - see pages 128, 130,
132. R eleasing the hand brake:
Raise lever slightly,
press release button,
lower lever fully
To reduc e ope rating forc es, de press foot
brak e at the same time.
Do not drive with hand brake on, to avoid
dam age to brakes on the rear w heels. Do
not apply hand brake while vehicle is in
motion or as a substitute for the foot brake.
Drive carefully, economically and with the
env ironment in mind . While driving, do not
do a nything that c ould distract you.
6Hand brake - see pa ge 148.
1) Preheating system switches on only if outside
temperature is low.

In b ri e f20
Parking the vehicle:
Apply hand brake firmly,
close win dows,
switch off engine, remove key,
engage steering column lock,
lock vehicle
6Further inform ation - see pages 22, 129,
radio frequency remote c ontrol -
see page 23,
central lock ing system - see pag e 25,
anti-theft alarm system - see page 27.
Advice when parkin g:
zAlways apply hand brake firmly and as
firmly a s possible on slopes.
zPush key into ignition sw itc h before
removing (vehicles with autom atic
transmission 3: depress foot brake and
shift into Pbefore removing key). Turn
steering wheel until lock is felt to eng age
(anti-theft protection).
zIf the vehicle is parked on a level surfa ce
or a hill, select 1st gear before switching
ignition off (vehicles with automatic
transmission 3: move selector lever to P).
Also turn front wheels aw ay from ke rb if
parked on an uphill slope.
If the vehicle is parked on a downhill
slop e, select reverse gear before
switching ignition off (vehicles with
automatic tra nsmission 3: move selector
lever to P). Also turn front wheels
towards kerb.
zSwitch off exterior lam ps, otherwise the
hea dlamp wa rning device will sound
when the driver’s door isopened.
zCooling fa ns may run on after the engine
has been switched off.
zDo not park on easily ignitable surfaces
as hot exha ust system temperatures
could cause the surface to ignite.
That was the most important
information for your first drive in
y our A ntara in b rief.
Your vehicle has still more
instruments and controls,
possibly also optionalequipment.
The re ma in ing ch apters of the
Owner’s Manual contain
important information on
operation, safety and
maintenance as well as a
complete index.
Other manuals for Antara Operation
2
Table of contents
Other Opel Automobile manuals

Opel
Opel 2003 Insignia User manual

Opel
Opel VIVARO User manual

Opel
Opel Meriva User manual

Opel
Opel 2010 Astra User manual

Opel
Opel Automobile User manual

Opel
Opel 2011 Insignia User manual

Opel
Opel OPEL INSIGNIA User manual

Opel
Opel 2011 Corsa User manual

Opel
Opel 2016 Meriva User manual

Opel
Opel 2013 Corsa User manual