OPENTEXT Tableau TX1 User manual

OpenText Tableau
Forensic TX1 Imager
User Guide
Copyright © 2022 Open Text. All rights reserved. Trademarks owned by Open Text.

Contents
1Preface ......................................................................................................... 5
1.1 Drive capacity and transfer rate measurement conventions.................... 5
2Overview ...................................................................................................... 5
2.1 TX1 kit contents..................................................................................... 8
2.2 Navigating TX1 .................................................................................... 10
2.2.1 Home screen ............................................................................. 10
2.2.2 Side navigation menu................................................................. 12
2.2.3 Jobs tab..................................................................................... 12
2.2.4 Job status .................................................................................. 14
2.2.5 Quick Reference Guide.............................................................. 16
2.3 Reading the status LEDs ..................................................................... 17
2.4 Interpreting audio feedback.................................................................. 17
2.5 On-screen warnings............................................................................. 17
2.6 USB keyboard support......................................................................... 18
2.7 Configuring TX1................................................................................... 18
2.8 Startup sequence................................................................................. 18
3Configuring TX1......................................................................................... 18
3.1 Startup sequence................................................................................. 18
3.2 Configuring TX1................................................................................... 18
3.2.1 System settings ......................................................................... 19
3.2.2 Network settings ........................................................................ 22
3.2.3 Default settings .......................................................................... 28
3.2.4 User management ..................................................................... 30
3.2.5 Locking the system .................................................................... 32
3.2.6 Updating TX1 firmware .............................................................. 33
3.3 Media utilities....................................................................................... 37
3.3.1 Content breakdown.................................................................... 37
3.3.2 Wiping destination or accessory drives....................................... 40
3.3.3 Formatting destination and accessory drives .............................. 46
3.3.4 Tableau encryption management ............................................... 47
3.3.5 Encryption unlock....................................................................... 48
3.3.6 Disabling drive capacity limiting configurations ........................... 51
3.3.7 Blank checking........................................................................... 55
3.3.8 Browse filesystem...................................................................... 56
3.3.9 SMART data .............................................................................. 57
3.3.10Export........................................................................................ 58
3.3.11Eject .......................................................................................... 60
3.4 Connecting drives ................................................................................ 61
3.4.1 Source drives............................................................................. 61
3.4.2 Destination drives ...................................................................... 61
3.4.3Accessory drives........................................................................ 62
3.4.4 Drive detection........................................................................... 62
4Using TX1................................................................................................... 63
4.1 Navigating TX1 features and options.................................................... 63
4.1.1 Home screen ............................................................................. 64
4.1.2 Jobs screen ............................................................................... 64
Copyright © 2022 Open Text. All rights reserved. Trademarks owned by Open Text.

OpenText Tableau Forensic TX1 Imager
The Information Company 3
4.1.3 Side navigation menu................................................................. 64
4.2 Preconditions checking ........................................................................ 64
4.3 Duplicating........................................................................................... 64
4.3.1 Cloning ...................................................................................... 65
4.3.2 Imaging...................................................................................... 65
4.3.3 Performing a duplication............................................................. 66
4.3.4 Using automated acquisition ...................................................... 74
4.3.5 Duplication over a network ......................................................... 82
4.3.6 Pausing and resuming a duplication job ..................................... 94
4.4 Hashing ............................................................................................. 102
4.5 Logical imaging.................................................................................. 105
4.5.1 Performing a logical image acquisition ..................................... 106
4.5.2 Include/exclude criteria ............................................................ 117
4.5.3 About the logical imaging process ............................................ 123
4.5.4 File extensions......................................................................... 127
4.5.5 Folders .................................................................................... 128
4.5.6 Source file metadata ................................................................ 129
4.6 Verifying ............................................................................................ 130
4.7 Browsing............................................................................................ 134
4.7.1 Viewing text and image files..................................................... 135
4.8 Restoring ........................................................................................... 137
4.9 Viewing sources and destinations ...................................................... 142
4.9.1 Encryption detection................................................................. 146
4.9.2 RAID detection......................................................................... 151
4.10 Logs module ...................................................................................... 154
4.10.1HTML logs ............................................................................... 157
4.10.2Sample logs............................................................................. 157
4.10.3Filtering logs ............................................................................ 162
4.11 Remote web interface ........................................................................ 163
4.11.1SSL certificate setup and installation........................................ 164
4.11.2Accessing TX1 remotely........................................................... 166
5Adapters .................................................................................................. 169
5.1 PCIe SSD adapters ........................................................................... 170
5.2 PCIe IDE adapter (TDA7–5)............................................................... 170
5.2.1 Using the TDA7-5 .................................................................... 170
5.3 PCIe FireWire adapter (TDA7–9) ....................................................... 171
5.4 Apple Target Disk Mode acquisition adapters..................................... 171
5.4.1 USB-C to USB-A adapter cable................................................ 172
5.4.2 FireWire adapter cable............................................................. 172
5.4.3 Thunderbolt 2 adapter cable..................................................... 173
6Specifications and troubleshooting ....................................................... 173
6.1 Specifications .................................................................................... 173
Copyright © 2022 Open Text. All rights reserved. Trademarks owned by Open Text.

4 The Information Company
6.2 Troubleshooting common problems ................................................... 175
6.2.1 Power supply issues ................................................................ 175
6.2.2 Thermal issues ........................................................................ 176
6.2.3 Problems with drive detection................................................... 176
6.2.4 Problems detecting Apple devices in target disk mode ............. 177
6.2.5 Long time to complete locally initiated firmware update ............ 179
6.2.6 Real-time clock data retention issue......................................... 179
About OpenText........................................................................................ 180
Copyright © 2022 Open Text. All rights reserved. Trademarks owned by Open Text.

OpenText Tableau Forensic TX1 Imager
The Information Company 5
1 Preface
This guide presents a wide range of technical information and procedures for using the
Tableau Forensic TX1 Imager, a product of OpenText. It is divided into the following
chapters:
•Overview: Provides general information about TX1 as well as unpacking, starting up,
and navigating TX1 menus and reading the LEDs.
•Configuring TX1: Provides system overview information about TX1 as well as
procedures for configuring and connecting it.
•Using TX1: Provides detailed information and procedures for TX1 operation.
•Adapters: Describes the adapters that extend the drive acquisition options and
destination drive capabilities of TX1.
•Specifications and troubleshooting: Provides a brief list of potential problems and
solutions. For more complete and current troubleshooting information as well as
answers to frequently asked questions (FAQ), visitOpenText My Support
(https://support.opentext.com/).
1.1 Drive capacity and transfer rate
measurement conventions
The computer industry generally adheres to two different conventions for definitions of
the terms megabyte (MB) and gigabyte (GB). For computer RAM, 1 MB is defined as
2^20 = 1,048,576 bytes and 1 GB is defined as 2^30 = 1,073,741,824 bytes. For drive
storage, 1 MB is defined as 10^6 = 1,000,000 bytes and 1 GB is defined as 10^9 =
1,000,000,000 bytes. These two conventions are known as powers of two and powers of
ten respectively. Microsoft deviates from the hard drive capacity measurement
convention and uses the powers of two convention for its operating systems.
Tableau products report drive capacities and transfer rates according to the industry
standard powers of ten convention. In TX1 screens, reports, and documentation, a 4 GB
hard drive stores up to 4,000,000,000 bytes; a hard drive with a 150 MB/sec transfer rate
transfers 150,000,000 bytes per second.
2 Overview
Tableau TX1 is a powerful, yet intuitive, forensic imager that offers superior local and
networked imaging performance with no compromises. The touch screen user interface is
easy to use and provides a familiar user experience similar to modern tablets and
smartphones. TX1 is custom built for forensics and provides many standard and
advanced features that serve the specialized needs of digital forensics and incident
response practitioners, including:

6 The Information Company
•Acquisition of PCIe, USB 3.0, SATA, SAS, FireWire, IDE, and network shares (iSCSI
and CIFS). Note: PCIe and IDE adapters (sold separately) are required to image
these drive types.
•Output to USB 3.0, SATA, SAS, and network shares (iSCSI and CIFS).
•The ability to target file-based evidence with a powerful logical imaging function,
including an intelligent, easy to use search engine with wildcard support and industry
standard file outputs (lx01 and metadata csv files).
•The ability to save, import, and export logical imaging search criteria.
•The ability to automatically acquire any drives connected to the source ports on TX1
based on predefined job settings.
•The ability to enable and configure 802.1X network authentication to strengthen
network access security.
•The ability to export locally attached media as an iSCSI share for remote, network-
based acquisition.
•Support for cableless, toolless, SATA or SAS destination drive connections via the
optional drive bay (TX1-S1), which also provides drive cooling.
•The ability to duplicate a source drive to up to four destination drives.
•Destination drives that can be a mix of directly connected drives and network shares.
•The ability to run multiple jobs in parallel of any type (clone, physical image, or logical
image) to any available destination media.
•The ability to run up to two forensic jobs simultaneously at full speed, and to add
additional jobs to the queue and reorder them.
•The ability to pause and resume imaging jobs, including resumption from power loss
and certain types of job failures.
•The ability to prevent damage to disk drives by spinning them down when they are
ejected from TX1 prior to physical removal.
•Browser based remote user interface to any number of network connected TX1s, with
the ability to directly download selected files to the remote system.
•User management – create, delete, and manage user profiles.
•Superior network imaging performance through a 10 gigabit Ethernet interface, with
auto-negotiation for use with slower 1 gigabit Ethernet networks.
•Superior data transfer rates, even while performing calculations of MD5, SHA-1, and
SHA-256 hash values on two active jobs.
•Viewing extensive drive detail, including partition and filesystem information and raw
hex data.
•Detection and notification of many popular encryption types (whole disk and volume
based), RAID types, proprietary self-encrypting drives, and Apple device Core
Storage volumes.
•The ability to unlock Opal-compliant self-encrypting drives (SEDs) and BitLocker-
encrypted drives/partitions to enable unencrypted source media acquisition, and as
an alternative to Tableau encryption for destination/accessory port media.
•The ability to unlock APFS-encrypted volumes to enable unencrypted source media
acquisition (source ports only).
•Browsing drive filesystems, with the ability to view image and text files directly in TX1
user interface.
Copyright © 2022 Open Text. All rights reserved. Trademarks owned by Open Text.

OpenText Tableau Forensic TX1 Imager
The Information Company 7
•Extensive filesystem support - APFS, ExFAT, NTFS, EXT4, FAT(12/16/32), and
HFS+.
•Whole disk, open standard, destination drive encryption using XTS-AES.
•Automatic blank checking of source and destination drives.
•Comprehensive destination/accessory drive wiping capabilities, including NIST 800-
88 compliant wipes and the ability to specify a custom wipe pattern.
•HPA, DCO, and AMA support for the detection and handling of hidden/protected data
areas on source drives. This includes standalone HPA/DCO/AMA disablement,
DCO/AMA “shelving”, and trim support for the creation of a destination DCO or AMA.
•The ability to update system time via an NTP server.
•Detailed forensic logs for case documentation in text and HTML formats.
•The ability to filter the forensic log list to only show logs of interest based on specific
case and/or drive information. The filtered logs can also be exported or deleted.
•Always free firmware update support via Tableau Firmware Update (TFU) on a host
system, via TX1 file browsing of any mounted filesystem (local drive or network
share), or via the remote user interface.
•Clearly labeled and color-coded source (write blocked) and destination (read/write)
ports.
•User interface localization support for German, English, Spanish French, Korean,
Portuguese, Turkish, and Chinese languages, including virtual keyboard support for
user inputs.
Copyright © 2022 Open Text. All rights reserved. Trademarks owned by Open Text.

8 The Information Company
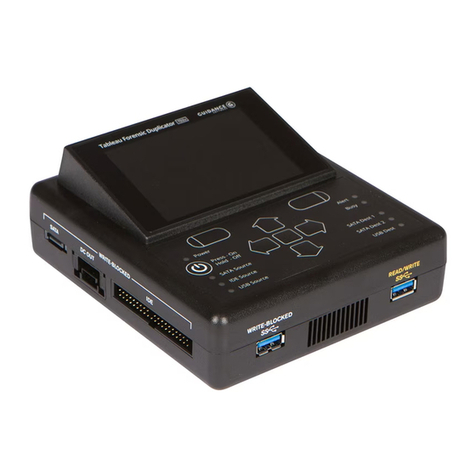
TX1 can operate as a standalone device, as shown above.
Optionally, TX1 can operate with the destination imaging bay (TX1-S1), as shown above.
The left source (write blocked) side of TX1.
The right destination (read/write) side of TX1.
2.1 TX1 kit contents
TX1 ships in a boxed kit with custom foam that includes the following items:
Copyright © 2022 Open Text. All rights reserved. Trademarks owned by Open Text.

OpenText Tableau Forensic TX1 Imager
The Information Company 9
Item
Model #
Description
TX1
TX1 Forensic Imager
TX1-S1
Optional destination drive bay for
up to two 2.5” or 3.5” SATA or SAS
drives
TP6
Provides power to TX1, the
optional TX1-S1 Drive Bay, and
most common combinations of
source and destination drives.
Uses a universal 3-prong style AC
line cord and is compatible with
100-240V AC line voltages
worldwide.
TC4-8-R3
Unified SATA/SAS signal and
power to 8” SATA/SAS signal and
8” 3M power cable (4 pieces).
TC-PCIE-8
8” PCIe adapter cable. Must be
used with a Tableau PCIe adapter.
TPKG-VCT-5
Five piece Velcro cable tie kit
TPKG-CLOTH
Microfiber screen cleaning cloth
Copyright © 2022 Open Text. All rights reserved. Trademarks owned by Open Text.

10 The Information Company
Item
Model #
Description
Quick Reference Guide
Do not discard the TX1 foam packaging, as it is designed to fit several industry-standard
hard sided carrying cases (for example, the Pelican 1500). If you received the TX1 kit in
the cardboard box shipped by OpenText, you can reuse the stacking foam inserts in your
own hard sided case.
2.2 Navigating TX1
Use the TX1 touchscreen display to navigate from module to module and choose or
modify options. Use the touchscreen keyboard or a USB keyboard to enter alphanumeric
text when prompted. See “USB keyboard support” on page 5.
2.2.1 Home screen
The Home screen of TX1 displays icons for initiating the following functions:
•Duplicate
•Logical
•Verify
•Hash
•Browse
•Restore
Copyright © 2022 Open Text. All rights reserved. Trademarks owned by Open Text.

OpenText Tableau Forensic TX1 Imager
The Information Company 11
Tap one of these icons to begin a job and enter the job setup screen. A job setup screen
provides a stepper-based flow from which you can view default settings, enter job notes
for your case, change settings, and start the job. Tap the left arrow in the job setup tab to
navigate back to the previous screen or to the Home screen.
Across the top navigation bar there are buttons to quickly access the side navigation
menu , the Home screen, and view the current time. The TX1 model name in the top
navigation bar links to the Home screen.
Note: In the event of abnormal cooling conditions, a warning triangle will be shown in the
top navigation bar, to the right of the time. Such a warning will never be seen under
normal operating conditions. Please refer to “Troubleshooting common problems” on
page 175 for more information.
There are two tabs on the main screen: Home and Jobs. The Home tab shows the
Home screen or one of the many other screens. The Jobs tab always shows the Jobs
summary screen and the current number of total active and queued jobs.
The three buttons at the bottom of the Home screen are for Sources, Accessory drives,
and Destinations. The number in each area represents the number of attached and
detected drives (including mounted network shares). In addition to providing the drive
Copyright © 2022 Open Text. All rights reserved. Trademarks owned by Open Text.
12 The Information Company
count, these buttons can be tapped to display a summary list of available drives and
allow access to further drive details, screens, and operations.
Note: The middle area of the bottom row of the Home screen (for USB Accessory drives)
is only shown when a USB Accessory drive is connected.
2.2.2 Side navigation menu
The menu icon in the upper left corner of the top navigation bar displays the side
navigation panel that provides a menu of additional options and information. For
additional information on the items in this menu, see “Configuring TX1” on page 18.
2.2.3 Jobs tab
The Jobs tab, which is found on the right side of the tab navigation bar, provides a
convenient way to keep track of queued jobs, active jobs, and recent work done by TX1.
It includes a counter in the top tab area. When TX1 is first powered on, the jobs counter
is at 0. Once jobs are underway, each active or queued job will increment the counter.
The Jobs screen has four areas: Automated Acquisition, Active Jobs, Queued Jobs,
and Recent Jobs.
Copyright © 2022 Open Text. All rights reserved. Trademarks owned by Open Text.
OpenText Tableau Forensic TX1 Imager
The Information Company 13
The Automated Acquisition area will indicate if that mode is enabled. When enabled,
the count of any duplication jobs run during that automated session will be displayed. See
“Using automated acquisition” on page 74 for more details on this valuable, time-saving
feature.
Any active jobs will be shown in the Active Jobs area. After two active jobs are running,
additional job requests are placed into the queue. Queued Jobs start as soon as one of
the two active jobs is complete, or when the source or destination resource the job is
waiting for becomes available. Likewise, as jobs are completed, they are moved to the
Recent area, so that a user can see what has already completed.
Jobs are queued in the order they were entered. You can reorder queued jobs by
dragging individual jobs to place them in the order you prefer. On the TX1 screen, press
and hold the drag icon of the job you want to select, then drag the job to the desired
position in the queue and release.
A fifth area, Media Utilities, displays media utility operations and only appears when a
media utility operation is active. Media utility operations will move to the Recent area
when they are complete. Media utilities cannot be queued like forensic jobs.
Here are two examples of the Jobs tab in action:
Copyright © 2022 Open Text. All rights reserved. Trademarks owned by Open Text.

14 The Information Company
In the first example on the left, there are two active jobs – a hash and an automated
duplication job. There are two automated duplication jobs queued and waiting for
resources to be able to start. Note the textured grab areas in the queued job tiles which
can be used for drag-and-drop job reordering. In the Recent area there are three jobs,
each of which completed successfully. Since jobs pending includes both active and
queued jobs, the Jobs tab counter reads 4.
In the second example, Job 26 has moved from the Active Jobs area down to Recent
(due to being paused), which allowed Job 28 to start as shown in the Active Jobs area.
See “Pausing and resuming a duplication job” on page 94 for more information regarding
that feature.
There are several actions that can be taken on jobs from the Jobs tab, depending on
both the state and type of the job. Queued Jobs and jobs shown in the Recent area can
be deleted by tapping the Delete button on the right side of the job row. Jobs in the
Active Jobs area can be canceled by tapping the Cancel button . Imaging jobs in the
Active area that are capable of being paused and resumed (of type e01, ex01, dd, and
dmg) can be paused by tapping on the Pause button , at which point the job will be
moved to the Recent area with a status of Paused. Tapping the Play button or
tapping the Resume Job button in the header of the Job Status screen will display a
Resume Duplication screen. See See “Pausing and resuming a duplication job” on page
94 for more information about pause and resume.
2.2.4 Job status
After a job starts, its Job Status screen is automatically displayed. This status screen
shows the details of a given job, including a header with its status, overall data rate, time
remaining, and percent complete. The lower area of the Job Status screen shows
additional job details, including sub-step progress (for example, Duplication separate
from Verification in a duplication/verification job), a settings summary, and a listing of the
drives involved in the job. Tapping a drive tile opens a drive details screen, which
provides a quick view of all the information available for the drive. An example of an
active Job Status screen is shown below.
Copyright © 2022 Open Text. All rights reserved. Trademarks owned by Open Text.

OpenText Tableau Forensic TX1 Imager
The Information Company 15
Note: The solid orange triangle in the upper right corner of the drive tiles indicates that
the drive is currently being used as part of an active job. This is shown regardless of the
location of the drive tile and makes it easy to spot drives that are in use. Similarly, drives
that are part of a queued but not yet active job will show as an orange border triangle with
white in the middle.
Once a job has completed, the Job Status screen is displayed and shows the final status
of that job. Completed jobs have a link to the log file for that job on the right side of the
header area at the top of the status screen.
Copyright © 2022 Open Text. All rights reserved. Trademarks owned by Open Text.

16 The Information Company
Clicking the View Log link immediately displays the detailed text log for that job. You can
easily click back to the Job Status screen or close the log and return to the Home
screen. The link back to the Job Status screen works regardless of the method used to
get into the log details window. For example, if you had navigated to the log details for a
given job through the side navigation menu Logs view, there will be a link at the bottom
of the log to view the Job Status screen (View Job).
Note that the Job Status screen can also be viewed for completed jobs that are shown in
the Recent area of the Jobs tab. Simply tap on the job row from the Recent jobs area and
the final Job Status screen for that completed job is shown, including a link to the job
log.
2.2.5 Quick Reference Guide
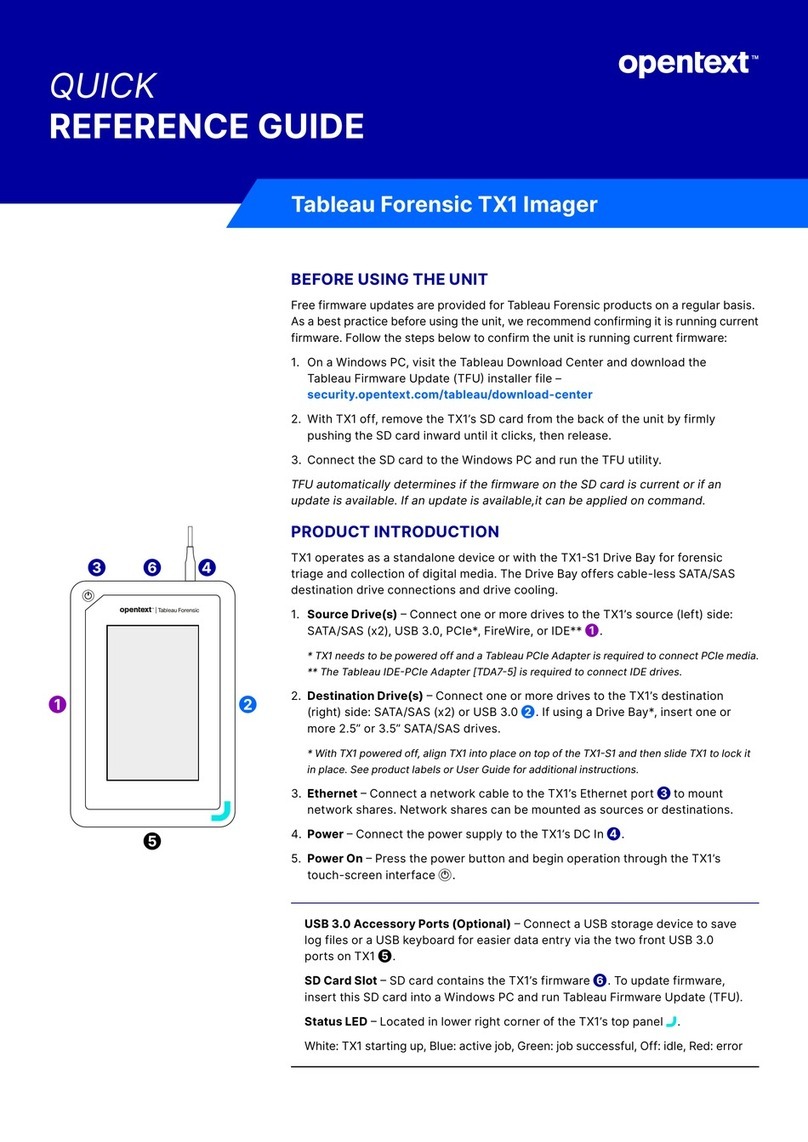
TX1 ships with a Quick Reference Guide that illustrates the drive connections, Status
LED, power button, cable recommendations, and tips for getting started. Keep this card
with TX1 as you familiarize yourself with its operation.
Copyright © 2022 Open Text. All rights reserved. Trademarks owned by Open Text.

OpenText Tableau Forensic TX1 Imager
The Information Company 17
2.3 Reading the status LEDs
On/Off indicator LED: The illuminated power switch is located in the top-left corner of
TX1 and it displays a white LED when the unit is on.
DC In LED: The TP6 power supply cable has a blue LED ring near the end of the barrel
connector that indicates the TX1 power supply is receiving adequate DC input power.
Activity LED: The multi-color activity LED is located in the lower-right corner of TX1. It is
white when the unit is booting up, blinking white when a power issue is detected, off
when the unit is idle, blue when an operation is in progress, blinking green when an
operation completes successfully, and blinking red when an operation fails.
Network Interface LED: The 10 gigabit Ethernet connector is located on the back of TX1
and it has two LEDs. The table below provides details for interpreting the status of these
network interface LEDs.
Status
Green LED
(Indicates link status
and blinks for activity)
Green/Yellow LED
(Indicates link speed)
No Link
Off
Off
100 Mbps Link
On / Blink
Off
1 Gbps Link
On / Blink
Yellow
10 Gbps Link
On / Blink
Green
2.4 Interpreting audio feedback
TX1 plays one of two sounds that indicate status at the end of a job. A chime sound plays
for a successful job, and a buzzer sound plays for a failed job. You can change the
volume of the sounds or disable them from the System Settings submenu in the side
navigation menu.
2.5 On-screen warnings
TX1 will provide, as necessary, on-screen warnings within various settings and
operations screens of the user interface. Yellow warnings call the user’s attention to a
potential risk, but do not impede operations. Red warnings mean either that a selected
setting cannot be accommodated, an operation has failed, or a potential exists for
forensic evidence to be missed, such as when a DCO or AMA is detected and not
removed. Users are encouraged to pay attention to and read any displayed warnings
when they appear and proceed accordingly.
Copyright © 2022 Open Text. All rights reserved. Trademarks owned by Open Text.

18 The Information Company
2.6 USB keyboard support
You can plug a standard USB keyboard into either USB accessory port on the front of
TX1. Some users find it more convenient to use an external keyboard to enter data
instead of using the virtual touchscreen keyboard. Language localized keyboard support
is limited to the virtual keyboard only.
Note: Wireless keyboards will also work with TX1. To use a wireless keyboard, simply
plug the USB wireless adapter into either of TX1’s front USB accessory ports, and it
should automatically pair with the keyboard and start working. Note that there are many
vendors of wireless keyboards and some may not be compatible with TX1. If you prefer
to use a wireless keyboard and yours is not working with TX1, please contact Customer
Support for keyboard recommendations.
2.7 Configuring TX1
This chapter describes the steps to configure TX1 prior to using it on a regular basis.
2.8 Startup sequence
When turned on, TX1 displays an initialization screen during the boot sequence. Once
booted, TX1 displays the Home screen and then sequentially powers on connected
drives.
3 Configuring TX1
This chapter describes the steps to configure TX1 prior to using it on a regular basis.
3.1 Startup sequence
When turned on, TX1 displays an initializatoin screen during the boot sequence. Once
booted, TX1 displays the Home screen and then sequentially powers on connected
drives.
3.2 Configuring TX1
TX1 default settings are defined using sensible, best-practice values. There are many
options and settings you can configure and customize to your specific needs. Tap the
Side Navigation menu icon in the upper left corner to access the following options:
•Home: Return to the Home screen.
•Logs: Access the forensic Logs screen.
•System Settings: Access the System Settings screen.
Copyright © 2022 Open Text. All rights reserved. Trademarks owned by Open Text.

OpenText Tableau Forensic TX1 Imager
The Information Company 19
•Network Settings: Access the Network Settings screen.
•Defaults: Access the Operations Defaults screen.
•Users: Access the administrator level User Management screen.
•Lock System: Lock the screen with a PIN to prevent access while unattended.
•About: Access the About screen to view additional information such as the firmware
build Id, serial number, network MAC address, copyright, and licensing information.
•User: Access the User Management screen for the current user.
3.2.1 System settings
Tap System Settings to display the System Settings page.
The System Settings page provides selections to configure basic TX1 system options
including Date & time, 24-hour clock, Set time via NTP server, Timezone, Language,
LCD brightness, Audio notification volume, and LED notifications. You can also
perform a factory reset.
Note: A factory reset will restore all system settings to their factory defaults and delete all
existing job logs. Exporting all logs to an external device is recommended before initiating
a factory reset.
Copyright © 2022 Open Text. All rights reserved. Trademarks owned by Open Text.

20 The Information Company
Tap the toggle buttons to enable or disable a setting such as the 24-hour clock. To
define a slider setting value, such as the LCD brightness, tap and hold the slider
selector, then slide to the desired value. For the Timezone setting, a multi-value
selection box will be displayed to allow selection from a predefined list of settings.
Tap the setting row to reveal additional settings such as Date & Time (as shown in the
screenshot below). Once the area expands, tap a setting value to reveal and select from
a drop-down menu.
To enable setting the TX1 system time via an NTP server, a valid network connection
and at least one NTP server source is required. The default NTP server is a public
internet option (pool.ntp.org (http://pool.ntp.org/)). This can be changed to one of the
other public internet options or a local network NTP server. Tapping on Set time via NTP
server displays a list of options for NTP server connectivity. Note that the UPDATE TIME
VIA NTP button is inactive if there is no network connectivity or no working NTP server
available. Contact your local network administrator for assistance in setting up your NTP
server.
Note: Due to the forensic implications of changing TX1’s system time during an active
job, the ability to use an NTP server to set the time has intentionally been limited to a
manual call to the NTP server that is only available when no jobs are in progress. Also,
Copyright © 2022 Open Text. All rights reserved. Trademarks owned by Open Text.
Table of contents
Other OPENTEXT Laboratory Equipment manuals
Popular Laboratory Equipment manuals by other brands

Thermo
Thermo Luminoskan Ascent user manual

Philips
Philips SCF287 manual

Cardinal Health
Cardinal Health CAX1230LA Installation and operation manual

UVITEC Cambridge
UVITEC Cambridge FIREREADER MAX User & service manual

Apera Instruments
Apera Instruments LabSen 821 user manual

NuAire
NuAire LabGard NU-581-400 Operation and maintenance manual

biodex
biodex 850-000 Instructions for use

VERDER
VERDER Carbolite Gero HTMA 4/28 Installation, operation and maintenance instructions

Intellinet
Intellinet 561495-UK instructions

VWR
VWR PerfectBlue Maxi S instruction manual

BRIGHT
BRIGHT OTF 5000 instruction manual

erlab
erlab Captair Flex S Series user manual