Oppo BDP-95EU User manual

USER MANUAL
READ CAREFULLY BEFORE OPERATION
Blu-ray Disc Player BDP-95EU


i
Table of Contents
I portant Infor ation ....................................................................................................... 1
I portant Safety Instructions ............................................................................................... 1
Trade arks............................................................................................................................. 2
Co patible Disc Types ......................................................................................................... 3
Discs that cannot be played...................................................................................................... 3
Disc care and handling.............................................................................................................. 3
Notes about BD-ROM compatibility........................................................................................... 4
Copyright protection.............................................................................................................. 4
Region management information .............................................................................................. 4
INSTALLATION .................................................................................................................. 5
Front Panel Controls.............................................................................................................. 5
Front Panel Display Window................................................................................................. 5
Rear Panel Connectors ......................................................................................................... 6
Re ote Control ...................................................................................................................... 7
Remote Control Buttons............................................................................................................
Back Side.................................................................................................................................. 8
Battery Installation..................................................................................................................... 8
Using the Remote Control......................................................................................................... 8
Changing the Remote Code...................................................................................................... 9
Connecting to a Display (Reco ended Methods)......................................................... 10
HDMI Connection to a single TV............................................................................................. 10
HDMI Connection to Two (2) TVs ........................................................................................... 11
DVI Connection....................................................................................................................... 12
Component Video Connection ................................................................................................ 13
Connecting to an Audio Syste ......................................................................................... 14
Connecting to a Receiver/Amplifier with HDMI Input/Output................................................... 14
Connecting to a Receiver/Amplifier with .1ch/5.1ch Audio
Input........................................................................................................................................ 15
Connecting to a Receiver/Amplifier with Dolby Digital or
DTS Decoder .......................................................................................................................... 16
Connecting to a Stereo Audio System through RCA-style
Cable....................................................................................................................................... 1
Connecting to a Stereo Audio System through XLR
Balanced Cable....................................................................................................................... 18
Connecting to a Display and Audio Syste using Dual HDMI........................................ 19
Connecting to the Internet .................................................................................................. 20
Internet connection through Ethernet cable ............................................................................ 20
Internet connection through wireless adaptor ......................................................................... 21
Custo Installation.............................................................................................................. 22
External IR (Infrared Remote) Installation............................................................................... 22
RS232 Control ........................................................................................................................ 22

ii
Setting up the player – Easy Setup Wizard ....................................................................... 23
Access the Easy Setup Wizard ............................................................................................... 23
Choose the Primary Video Output........................................................................................... 23
Select the Best Output Resolution .......................................................................................... 24
Determine the Display Aspect Ratio........................................................................................ 25
Select the Audio Setting.......................................................................................................... 2
Complete the Easy Setup Wizard ........................................................................................... 2
BASIC OPERATIONS....................................................................................................... 28
Disc Playback ....................................................................................................................... 28
Fast Playback ....................................................................................................................... 28
Pause and Fra e-by-Fra e................................................................................................ 29
Slow Playback ...................................................................................................................... 29
Blu-ray Disc Menu Playback ............................................................................................... 30
DVD Menu Playback............................................................................................................. 30
On-Screen Display ............................................................................................................... 30
Volu e Control .................................................................................................................... 31
Mute....................................................................................................................................... 31
Audio Language/Track Selection ....................................................................................... 31
Subtitle Selection ................................................................................................................. 32
Angle Selection .................................................................................................................... 32
Picture-in-Picture and Secondary Audio........................................................................... 32
BD-Live.................................................................................................................................. 33
ADVANCED OPERATIONS.............................................................................................. 34
TV Syste Selection............................................................................................................ 34
Output Resolution................................................................................................................ 34
Zoo ing and Aspect Ratio Control.................................................................................... 35
Zoom Levels for HDMI 1 Output ............................................................................................. 35
Zoom Levels for HDMI 2 & Analog (Component) Video
Output ..................................................................................................................................... 3
Subtitle Shift ......................................................................................................................... 38
Repeat Playback................................................................................................................... 38
Repeat a Selected Section .................................................................................................. 39
Shuffle and Rando Playblack .......................................................................................... 39
Playback by Chapter or Track Nu ber.............................................................................. 39
Playback fro a Specific Location..................................................................................... 40
DVD and Blu-ray Discs ........................................................................................................... 40
CD and SACD discs................................................................................................................ 41
Me ory and Auto atic Resu e ........................................................................................ 42
Viewing Pictures on DVD-Audio Discs .............................................................................. 42
Pure Audio Mode.................................................................................................................. 42
MEDIA FILE PLAYBACK ................................................................................................. 43
Playback fro a USB or e-SATA Drive .............................................................................. 43

iii
The Ho e Menu ................................................................................................................... 44
Playing Music Files.............................................................................................................. 45
Playing Movie Files.............................................................................................................. 46
Viewing Photo Files ............................................................................................................. 47
Adding Background Music ................................................................................................. 47
SETUP MENU OPTIONS .................................................................................................. 48
Using the Setup Menu Syste ........................................................................................... 48
Playback Setup..................................................................................................................... 51
Video Setup .......................................................................................................................... 53
Picture Adjustment.................................................................................................................. 56
HDMI Options ......................................................................................................................... 59
Audio For at Setup............................................................................................................. 61
Audio Signal Reference Chart................................................................................................. 64
Recommended Audio Format Options.................................................................................... 65
Audio Processing Setup ..................................................................................................... 67
Speaker Configuration ............................................................................................................ 6
Other Audio Processing Settings ............................................................................................ 1
Device Setup......................................................................................................................... 73
Network Setup ...................................................................................................................... 76
REFERENCES.................................................................................................................. 80
Useful Notes ......................................................................................................................... 80
Troubleshooting................................................................................................................... 80
Specifications....................................................................................................................... 82
User Manual Updates Online .............................................................................................. 82
Language Code List............................................................................................................. 83
LIMITED WARRANTY ...................................................................................................... 84
OPPO BD UK Ltd. – Li ited Two Year Warranty .............................................................. 84


1
I portant Infor ation
The lightning flash with arrowhead symbol, within an equilateral
triangle, is intended to alert the user to the presence of uninsulated
“dangerous voltage” within the product’s enclosure that may be of
sufficient magnitude to constitute a risk of electric shock to persons.
The exclamation point within an equilateral triangle is intended to
alert the user to the presence of important operation and
maintenance servicing) instruction in the literature accompanying
the appliance.
WARNING:
TO REDUCE THE RISK OF FIRE OR ELECTRIC SHOCK, DO
NOT EXPOSE THIS APPLIANCE TO RAIN OR MOISTURE.
DANGEROUS HIGH VOLTAGES ARE PRESENT INSIDE THE
ENCLOSURE. DO NOT OPEN THE CABINET. REFER
SERVICING TO QUALIFIED PERSONNEL ONLY.
THE APPARATUS SHALL NOT BE EXPOSED TO DRIPPING OR
SPLASHING AND THAT NO OBJECTS FILLED WITH LIQUIDS,
SUCH AS VASES SHALL BE PLACED ON THE APPARATUS.
CAUTION:
DANGER OF EXPLOSION IF BATTERY IS INCORRECTLY
REPLACED. REPLACE ONLY WITH THE SAME OR EQUIVALENT
TYPE.
THIS PRODUCT UTILIZES A LASER. USE OF CONTROLS OR
ADJUSTMENTS OR PERFORMANCE OF PROCEDURES OTHER
THAN THOSE SPECIFIED HEREIN MAY RESULT IN
HAZARDOUS RADIATION EXPOSURE. DO NOT OPEN COVERS
AND DO NOT REPAIR YOURSELF. REFER SERVICING TO
QUALIFIED PERSONNEL.
This label is located on the laser protective housing inside the
product.
Important Safety Instructions
1) Read these instructions.
2) Keep these instructions.
3) Heed all warnings.
4) Follow all instructions.
5) Do not use this apparatus near water.
6) Clean only with dry cloth.
7) Do not block any ventilation openings. Install in accordance with
the manufacturer’s instructions.
8) Do not install near any heat sources such as radiators, heat
registers, stoves, or other apparatus including amplifiers) that
produce heat.
9) Do not defeat the safety purpose of the polarized or grounding-
type plug. A polarized plug has two blades with one wider than
the other. A grounding type plug has two blades and a third
grounding prong. The wide blade or the third prong is provided
for your safety. If the provided plug does not fit into your outlet,
consult an electrician for replacement of the obsolete outlet.
10) Protect the power cord from being walked on or pinched,
particularly at plug, receptacle, and the point where it exits from
the apparatus.
11) Only use attachments/accessories specified by the
manufacturer.
12) Use only with the cart, stand, tripod, bracket, or table specified
by the manufacturer, or sold with the apparatus. When a cart is
used, use caution when moving the cart/apparatus combination
to avoid injury from tip-over.
13) Unplug this apparatus during lightning storms or when unused
for long periods of time.
14) Refer all servicing to qualified service personnel. Servicing is
required when the apparatus has been damaged in any way,
such as power-supply cord or plug is damaged, liquid has been
spilled or objects have fallen into the apparatus, the apparatus
has been exposed to rain or moisture, does not operate
normally, or has been dropped.
15) Batteries battery pack or batteries installed) shall not be
exposed to excessive heat such as sunshine, fire or the like.

I M P O R T A N T
I N F O R M A T I O N
2
Precautions
• Before connecting the AC power cord to the appliance, make
sure the voltage designation of the appliance corresponds to
the local electrical supply. If you are unsure of your power
supply, contact your local power company. The acceptable
power input range is AC ~ 100V-240V, 50/60Hz.
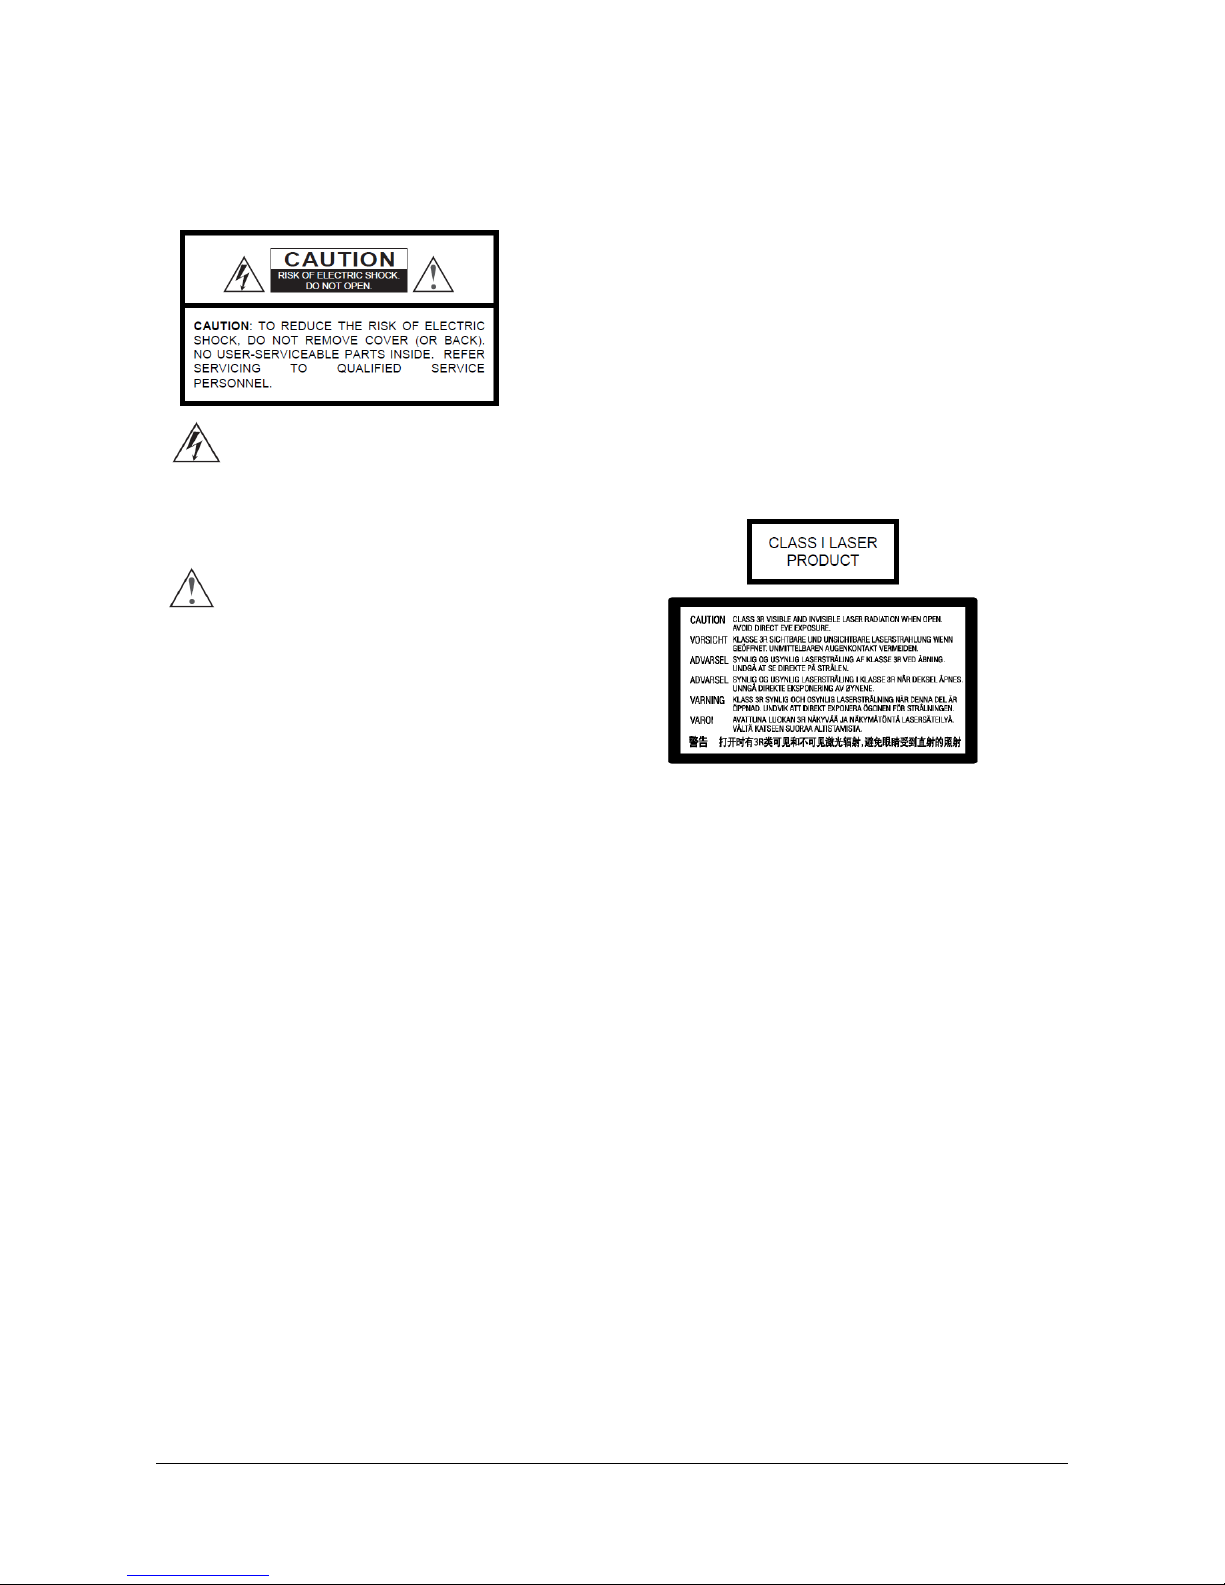
• The apparatus with CLASS I construction shall be connected
to a MAINS socket outlet with a protective earthing connection.
• The player is still receiving power from the AC power source
as long as it is connected to the wall outlet, even if the player
itself has been turned off.
• Unplug the power cord if you are not going to use the product
for an extended period of time. Hold the power plug when
unplugging. Do not pull on the cord.
• The main plug is used as the mechanism for cutting off power,
therefore make sure it is easy to unplug.
• To ensure proper ventilation around this product, do not place
this product on a sofa, bed or rug. When installing this product
on a wall or bookshelf, you need to provide appropriate space.
• High temperature will lead to abnormal operation of this unit.
Do not expose this unit or batteries to direct sunlight or near
other heating objects.
• When moving the player from a cold location to a warm one, or
vice versa, moisture may condense on the laser pickup unit
inside the player. Should this occur, the player may not
operate properly. In such a case please turn the unit on for 1-2
hours without a disc) to facilitate moisture evaporation.
CE mark
This product complies with European Low Voltage 2006/95/CE),
Electromagnetic Compatibility 2004/108/EC) and Environmentally-
friendly design of Energy-related Products 2009/125/EC) Directives
when used and installed according to this instruction manual.
WEEE symbo
Correct Disposal of This Product. Waste Electrical & Electronic
Equipment) Applicable in the European Union and other European
countries with separate collection systems.
This marking on the product, accessories or literature indicates
that the product and its electronic accessories e.g. remote
handset) should not be disposed of with other household waste at
the end of their working life. To prevent possible harm to the
environment or human health from uncontrolled waste disposal,
please separate these items from other types of household waste
and recycle them responsibly to promote the sustainable reuse of
material resources. Users should contact either the retailer where
they purchased this product, or OPPO BD UK Ltd, for details of
where and how they can arrange for environmentally safe recycling.
Trademarks
• “Blu-ray Disc”, “Blu-ray 3D”, “BONUSVIEW” and “BD-Live” are
trademarks of Blu-ray Disc Association.
• Java and all Java-based trademarks and logos are trademarks
or registered trademarks of Sun Microsystems, Inc. in the
United States and other countries.
• DVD logo is a trademark of DVD Format/Logo Licensing
Corp., registered in the U.S., Japan and other countries.
• Super Audio CD, SACD and the SACD logo are joint
trademarks of Sony Corporation and Philips Electronics. N.V.
Direct Stream Digital DSD) is a trademark of Sony
Corporation.
• “AVCHD” and the “AVCHD” logo are trademarks of Panasonic
Corporation and Sony Corporation.
• Designed for Windows Media, Microsoft, HDCD, and the
HDCD logo are trademarks or registered trademarks of
Microsoft Corporation in the United States and/or other
countries.
• “480p/720p/1080i/1080p” up-converting arrow logo, “Source
Direct” and “True 24p” logos are trademarks of OPPO Digital,
Inc.
• “Qdeo” and “QuietVideo” are trademarks of Marvell or its
affiliates.
• “SABRE
32
Reference DAC
TM
” is a trademark of ESS
Technology, Inc.
• Manufactured under license under U.S. Patents #’s:
5,451,942; 5,956,674; 5,974,380; 5,978,762; 6,226,616;
6,487,535; 7,392,195; 7,272,567; 7,333,929; 7,212,872 and
other U.S. and worldwide patents issued & pending. DTS is a
registered trademark and the DTS logos, Symbol, DTS-HD
and DTS-HD Master Audio | Essential are trademarks of DTS,
Inc. © 1996-2008 DTS, Inc. All Rights Reserved.
• Manufactured under license from Dolby Laboratories. “Dolby”
and the double-D symbol are trademarks of Dolby
Laboratories.
• HDMI, the HDMI logo and High-Definition Multimedia Interface
are trademarks or registered trademarks of HDMI Licensing
LLC.
• “DivX®” is a trademark of DivX, Inc.
•
All other trademarks are the properties of their respective
owners.

I M P O R T A N T
I N F O R M A T I O N
3
Compatib e Disc Types
Type/ Logo Features Manua Icon
High Definition HD) movie and music discs
BD-ROM and BD-RE/BD-R discs in BDMV and BDAV mode, including 8cm discs
single layer) and DL discs.
Blu-ray 3D – Discs supporting 3D Blu-ray contents playback. 3D-compatible
displays and active shutter glasses are required for full 3D movie experience.
BONUSVIEW - Discs supporting BONUSVIEW that allows Virtual packages or
Picture-in-Picture functions to be used.
BD Live – Discs supporting BD-Live BD-ROM version 2 Profile 2) that provides
interactive features when the player is connected to the Internet.
High quality movie and music discs
Commercially released DVD discs, DVD+RW/DVD+R/DVD-RW/DVD-R in
DVD-Video format, finalized.
Multi-channel or stereo high resolution audio with compressed digital video or still
pictures. Some DVD-Audio discs also contain a DVD-Video portion.
SACD: High resolution audio-only disc with stereo and/or multi-channel audio.
Hybrid disc with both high resolution and CD-compatible layers.
Compact Discs CD) that contain audio tracks.
High-definition digital video camera format using efficient data compression coding
technology.
Discs that cannot be p ayed
• BDs with cartridge
• DVD-RAMs
• HD-DVDs
• Data portions of CD-Extras
• BD-Video/DVD-Video with a different region code
• Some DualDiscs: a DualDisc A DualDisc is a two sided disc
with DVD on one side and digital audio on the other side. The
digital audio side does not meet the technical specifications of
the Compact Disc Digital Audio CD-DA) format so playback is
not guaranteed.
• Music discs encoded with copyright protection technologies: if
the discs do not conform to the CD standard, they may not be
playable on this player.
Disc care and hand ing
• To keep the disc clean from scratches or fingerprints, handle
the disc by its edge. Do not touch the recorded surface.
• Blu-ray Discs record data in very high density and the
recorded layer is very close to the disc surface. For this
reason, Blu-ray Discs are more sensitive to dust and
fingerprints than DVD. Should you encounter playback
problems and see dirty spots on the disc surface, clean the
disc with a cleaning cloth. Wipe the disc from the center out
along the radial direction. Do not wipe the disc in a circular
motion.
• Do not use record cleaning sprays or solvents such as
benzene, thinner and anti-static spray.
• Do not attach labels or stickers to discs as this may cause the
disc to warp, become imbalanced or too thick, resulting in
playback problems.
• Avoid exposing the discs to direct sunlight or heat sources.
• Do not use the following discs:
o Discs with exposed adhesive from removed stickers or
labels. The disc may get stuck inside the player.
o Warped or cracked discs.
o Irregularly shaped discs, such as heart or business card
shapes.

I M P O R T A N T
I N F O R M A T I O N
4
Notes about BD-ROM compatibi ity
Since the Blu-ray Disc specifications are new and evolving, some discs may not play properly depending on the disc type, version and encoding. It
is possible that a Blu-ray disc manufactured after the player was manufactured uses certain new features of the Blu-ray Disc specifications. To
ensure the best possible viewing experience, the player may need a firmware or software update from time to time. Please visit OPPO BD UK Ltd
web site www.oppo-bluray.co.uk to check if updates are available.
Copyright protection
This product incorporates copyright protection technology that is protected by U.S. patents and other intellectual property rights. Use of this
copyright protection technology must be authorized by Macrovision Corporation, and is intended for home and other limited viewing uses only
unless otherwise authorized by Macrovision Corporation. Reverse engineering or disassembly is prohibited.
Region management information
This player is designed and manufactured to respond to the region management information. If the region number of a BD-Video or DVD disc does
not correspond to the region number of this player, this player cannot play the disc.
BD-Video: This player plays BD-Video with marks containing the region code B.
DVD-Video: This player plays DVD-Video with marks containing the region code 2 and ALL.

I N S T A L LA T I O N
5
INSTALLATION
Front Panel Controls
1. POWER Button
2. POWER Status Indicator
3. Front Panel Display
Window
4. Disc Tray
5. OPEN/CLOSE Button
6. IR Sensor Window
. Playback Control and
Navigation Buttons
8. USB 2.0 Port
Front Panel Display Window
1. Audio Type Indication – Indicates the type of
audio tracks being played
2. Mute Icon – Indicates that the audio is muted
3. Title – When illuminated, the displayed time
applies to a title
4. Group – When illuminated, the displayed
time applies to a group
5. Chapter – When illuminated, the displayed
time applies to a chapter
6. Track – When illuminated, the displayed time
applies to a track
. Total – When illuminated, the displayed time
is the total play time
8. Remaining – When illuminated, the
displayed time is the remaining play time
9. Audio Channel Indication – Indicates
whether the audio being played is 2ch stereo
or multi-channel surround
10. Playback Status – Indicates playback status
such as Play, Pause, Repeat, Repeat All,
Random/Shuffle, and A-B Repeat
11. Internet – Indicates the internet is being
accessed
12. Ethernet – Indicates that an active Ethernet
cable is attached
13. Wireless – Indicates a Wireless hotspot is
connected
14. HDMI Indication – Indicates the active HDMI
output(s)
15. Angle Icon – Indicates that the scene
contains additional camera angle(s)
16. Disc Type – Indicates the type of the disc
that is playing
1 . Main Display – Text messages and numeric
display

I N S T A L LA T I O N
6
Rear Panel Connectors
1. Ethernet LAN Port
2. HDMI 2 Output (3D-
compatible)
3. Balanced Stereo Audio
Output
4. Composite Video Output
5. Component Video Outputs
6. IR IN Port
. USB 2.0 Port
8. Stereo Audio Output
9. e-SATA Port
10. HDMI 1 Output (3D-
compatible)
11. Coaxial and Optical Digital
Audio Output
12. RS-232C Port
13. .1CH/5.1CH/ Stereo Audio
Output
In addition to the above connectors, the AC power inlet and the AC voltage switch are also located on the rear
panel. The inlet is the IEC60-320 C14 type. The AC voltage switch can be manually adjusted to work at 100V ~
120V (labeled as ‘115’) or 200V ~ 230V (labeled as ‘230’), please flip the switch according to your power line AC
voltage. Only the included AC power cord or an approved power cord with an IEC60-320 C14 type plug should be
used.

I N S T A L LA T I O N
7
Re ote Control
Re ote Control Buttons
1. POWER: Toggle power
STANDBY and ON
2. ON/OFF: discrete on/off
power buttons
3. PURE AUDIO: turn on/off
video
4. NUMBER Buttons: Enter
numeric values
5. CLEAR: Clear numeric input
6. TOP MENU: Show BD top
menu or DVD title menu
. ARROW and ENTER
Buttons: Navigate menu
selection
8. SETUP: Enter the player
Setup Menu
9. COLOUR Buttons: Function
varies by content
10. PLAY: Start playback
11. STOP: Stop playback
12. REV: Fast reverse play
13. PREV: Skip to previous
14. SUBTITLE: Change subtitle
language
15. AUDIO: Change audio
language or channel
16. SAP: Turn on/off Secondary
Audio Program
1 . A-B REPLAY: Repeat play
the selected section
18. RESOLUTION: Switch output
resolution
19. SOURCE: Select the internet
media or application source
20. OPEN: Open/close the disc
tray
21. P/N: Switch output TV
system: NTSC, PAL or
MULTI
22. DIMMER: Dim the front panel
display
23. VOLUME +/-: Increase/
Decrease volume
24. MUTE: Mute audio
25. HOME: go to Home Menu to
select media source
26. PAGE UP/DOWN: Show the
previous/next page
2 . GOTO: Play from a specified
location
28. DISPLAY: Show/hide the On-
Screen Display
29. POP-UP MENU: Show BD
pop-up menu or DVD menu
30. RETURN: Return to the
previous menu or mode
31. PAUSE: Pause playback
32. FWD: Fast forward play
33. NEXT: Skip to the next
34. ANGLE: Change the camera
angle
35. ZOOM: Zoom in/out and
adjust aspect ratio
36. PIP: Show/hide the Picture-
in-Picture
3 . REPEAT: Repeat play
38.
LIGHT: Activate back light for
the remote control
NOTE
When a button is pressed but its function is invalid or unavailable at the moment, the TV screen displays a
circle with a diagonal line.

I N S T A L LA T I O N
8
Back Side
1. Index Finger Notch 1: When your index finger is
placed at this notch while holding the remote
control, your thumb is within easy reach of the
navigation buttons (ARROW, ENTER, TOP MENU
and POP- UP MENU).
2. Index Finger Notch 2: When your index finger is
placed at this notch while holding the remote
control, your thumb is within easy reach of the
playback control buttons (STOP, PLAY, PAUSE,
PREV, NEXT, REV, FWD).
3. Battery Cover: Remove to replace batteries or set
remote code.
4. Batteries: : Use (2) size AA or LR6 batteries.
5. Re ote Code Switch: Adjust the position of the
switch to set the remote control to use the indicated
remote code (see details on page 9).
With battery cover Battery cover removed
Battery Installation
1. Remove the battery
compartment cover
2. Insert batteries
3. Replace the battery
compartment cover
Using the Re ote Control
When using the remote control, the front window of the remote control should be pointed to the infrared sensor on
the front panel within an angle of ±30° and a range of about 26 ft.

I N S T A L LA T I O N
9
Changing the Re ote Code
The remote control supports one of three remote codes. The default is “Code 1”. If you have other OPPO products
placed close to the BDP-95EU, they may inadvertently respond to the BDP-95EU remote control. In this case you
can select a different remote code to avoid conflicts.
To select a new remote code, open the battery compartment cover of the remote control, and then use a ball point
pen to flip the switch to one of the positions marked as “1”, “2”, or “3”. Close the battery compartment cover. Make
sure that the BDP-95EU player is turned on and the disc tray is ejected. Aim the remote control at the player.
Press and hold the ENTER button for 5 seconds. The player will start using the new remote code.
CAUTIONS
• Never drop the remote control or expose it to moisture.
• Never expose the infrared remote sensor on the front panel to direct sunlight or other strong light sources.
• Remote may not operate consistently when batteries become low. Replace them if operation deteriorates.
• If the remote control will not be used for a long time, please remove the batteries.
• Use the batteries correctly to avoid possible leakage and corrosion. Do not leave the batteries exposed to
direct sunlight or high temperature environment for a long period of time. Do not heat or expose to flame.
Do not mix old and new batteries. Do not use batteries of different types at the same time. Do not attempt
to recharge the batteries.
•
In case battery leakage occurs, do not touch the liquid with bare hands. Wipe out any liquid inside the
battery compartment and insert new batteries.

I N S T A L LA T I O N
10
Connecting to a Display (Reco ended Methods)
HDMI Connection to a single TV
Method 1 – HDMI Connection directly to a single TV
• If your TV has an HDMI (High-Definition Multimedia Interface) input, you can use the included HDMI cable to
connect the player to the TV. This connection method delivers both video and audio in a pure digital format via
a single cable. The HDMI video output of the player allows for the highest possible video quality and
resolution.
• There are two HDMI output terminals (HDMI 1 and HDMI 2) on the rear panel of BDP-95EU, both of which can
be connected to your TV. We recommend to use HDMI 1 since it benefits from the dedicated Marvell QDEO
video processor, and set the “Pri ary Output” option in the setup menu to “HDMI 1” (please refer to page 53
for more details).
• You may connect the composite video cable (not included) to the TV for troubleshooting purposes, in the
event that there is a problem with HDMI video. However it is not recommended to use the composite video as
the primary method of video delivery to the TV, because it only produces a standard definition video signal
and forfeits the advantage of high definition video.

I N S T A L LA T I O N
11
HDMI Connection to Two (2) TVs
Method 2 – HDMI Connection directly to two TVs
• The two HDMI outputs (HDMI 1 and HDMI 2) available on the rear panel of BDP-95EU can connect to two
TVs at the same time, and each output can deliver the digital video and audio signals.
• We recommend to connect your main TV (the one with larger screen size or the one that you would watch
more often) to HDMI 1 thus to benefit from the dedicated video processor, and set the “Pri ary Output”
option in the setup menu to “HDMI 2” to make sure that the HDMI 2 can output high bit rate audio signals
(please see more details on page 53).
• You may connect the composite video cable to one of your TVs for trouble-shooting purpose, please refer to
page 10 for more details.

I N S T A L LA T I O N
12
DVI Connection
Method 3 – DVI Connection to TV
• If your TV has a DVI input that supports HDCP*, you can purchase an HDMI-DVI adapter cable to connect the
player to the TV. This connection method delivers digital video to the TV without any signal degradation. The
HDMI video output of the OPPO Blu-ray Disc player presents the highest possible video quality and resolution.
We recommend to use HDMI 1 since it can benefit from the dedicated video processor, and set the “Pri ary
Output” option in the setup menu to “HDMI 1” (please see more details on page 53).
• Please use the Red/White audio cables (not included) to connect the STEREO AUDIO OUT terminals of the
player to the TV. Make sure the audio cables are connected to the same input terminal group on the TV as the
DVI input. Usually the input terminals are marked as “DVI Audio” or “PC Audio”. On some TVs you may need
to use an RCA-3.5mm Mini-Jack adapter cable to connect the audio.
• You may connect the composite video cable to the TV for trouble-shooting purpose, please refer to page 10
for more details.
NOTE
HDCP stands for High-bandwidth Digital Content Protection. The HDMI output of the OPPO Blu-ray Disc player
uses HDCP to encrypt the digital audio and video content. The TV needs to support HDCP so it can decrypt
the content and properly display it.

I N S T A L LA T I O N
13
Co ponent Video Connection
Method 4 – Component Video Connection to TV
• If your TV has no digital video input but has component video inputs, please use a set of component video
cables to connect the component video output of the player to the TV, and remember to set the “Pri ary
Output” option in the setup menu to “Analog” (please see more details on page 53). The connectors are
Colour coded, so please make sure the cable connections match on both ends. The component video
connection will produce a very clear picture with high Colour accuracy.
• Please use the Red/White audio cables to connect the STEREO AUDIO OUT terminals on the rear panel of
the player to the TV. Make sure the audio cables are connected to the same input terminal group on the TV as
the chosen component video input.
• If the “Pri ary Output” option in the “Video Setup” section of the Setup menu is set to “HDMI 1” or “HDMI 2”
(see page 53 for details), the component video connection will not output video when playing a Blu-ray Disc
with 1080p 24Hz content, or will only output video with a low resolution (480i/5 6i) when playing a DVD. This
is not a malfunction. You must set “Pri ary Output” to “Analog” in order to properly use the component video
connection.
• When playing a Blu-ray Disc, video resolution over the component output can be up to 1080i. 1080p content
will be interlaced into 1080i signal for the component output.
• Video up-conversion over the component output is only available for unencrypted discs such as home video
and consumer-created contents. Most commercially pressed DVD discs are CSS-encrypted and will be limited
to 480i/480p resolution. This restriction applies to the component output only. The HDMI output is protected
with HDCP and has no such restriction.
• You may connect the composite video cable to the TV for trouble-shooting purpose, please refer to page 10
for more details.

I N S T A L LA T I O N
14
Connecting to an Audio Syste
Connecting to a Receiver/A plifier with HDMI Input/Output
Method 5 – HDMI Connection to Receiver and TV
• If you have an HDMI-capable receiver that can support HDMI audio, you can simply run an HDMI cable from
the player to your receiver and enable HDMI audio on the receiver (see your receiver’s owners’ manual for
more information). The receiver usually has an HDMI output that you can connect to your TV to pass the video
signal.
• Either of the HDMI output terminals (HDMI 1 and/or HDMI 2) on the rear panel of the BDP-95EU can be
connected to your receiver. Preference should be given to HDMI 1 for video since it’s the only output on the
machine to benefit from the superior Marvell QDEO video processing solution, and set the “Pri ary Output”
option in the setup menu to “HDMI 1” (please refer to page 53).
NOTE
HDMI is a single cable that can transport both audio AND video from your player to your display. Be aware,
however, that HDMI is an evolving standard, and there could be compatibility issues. A receiver that supports
audio input over HDMI is required. Some receivers offer HDMI ports solely for video switching. If your receiver
does not have audio input capability, please read the following sections regarding other connection methods.
In order to play multi-channel audio for all formats, the receiver must support HDMI v1.1 or later. For Blu-ray
Disc, a receiver that supports HDMI v1.3 with decoding capability for Dolby TrueHD and DTS-HD Master
Audio is preferred. Please check the specifications of your receiver to ensure that it meets the requirements.
The HDMI outputs on the BDP-95EU are HDMI v1.4, which is compatible with HDMI v1.3 and earlier versions.
Table of contents
Other Oppo Blu-ray Player manuals