OrangeCam Orange Box 800 User manual

Orange Box 400/800
User Manual
My handy Smart CCTV
SMART
CAM

01
■ Legend
● When this manual is lost, you can visit http://myorangecam.com for download.
(In order to see PDF documents, your PC has to be with Adobe Reader installed available at http://kr.adobe.com.)
● The appearance designs and dimensions of the product may be subject to change without notice to consumers,
to ensure product quality.
● Non-authorized use or duplication of all or parts of this User Manual without permission is prohibited by law.
● We do not guarantee any accident caused by data loss, and it is recommended to back up your important user data.
● Some parts of this User Manual contains the specifications of a product you have not purchased,
including this product.
● As a video recording device, this product may be used to help case resolution as supplementary means,
but not as main. And we are not obliged for any responsibility for malfunctions or other insufficient functions of
this device at any accident or crime.
● This product is equipped with shock-sensitive HDD. External shock or movement may cause malfunctions. So, make
sure to disconnect the power when you transport it.
● This product may generate heat from itself. Staking more than two products or placing this product on other device
with heat generated, it may cause failure or malfunction. Avoid direct sun light and install it at a well-ventilated place.
For further questions or warranty service, visit http://myorangecam.com or http://orangecam.net.
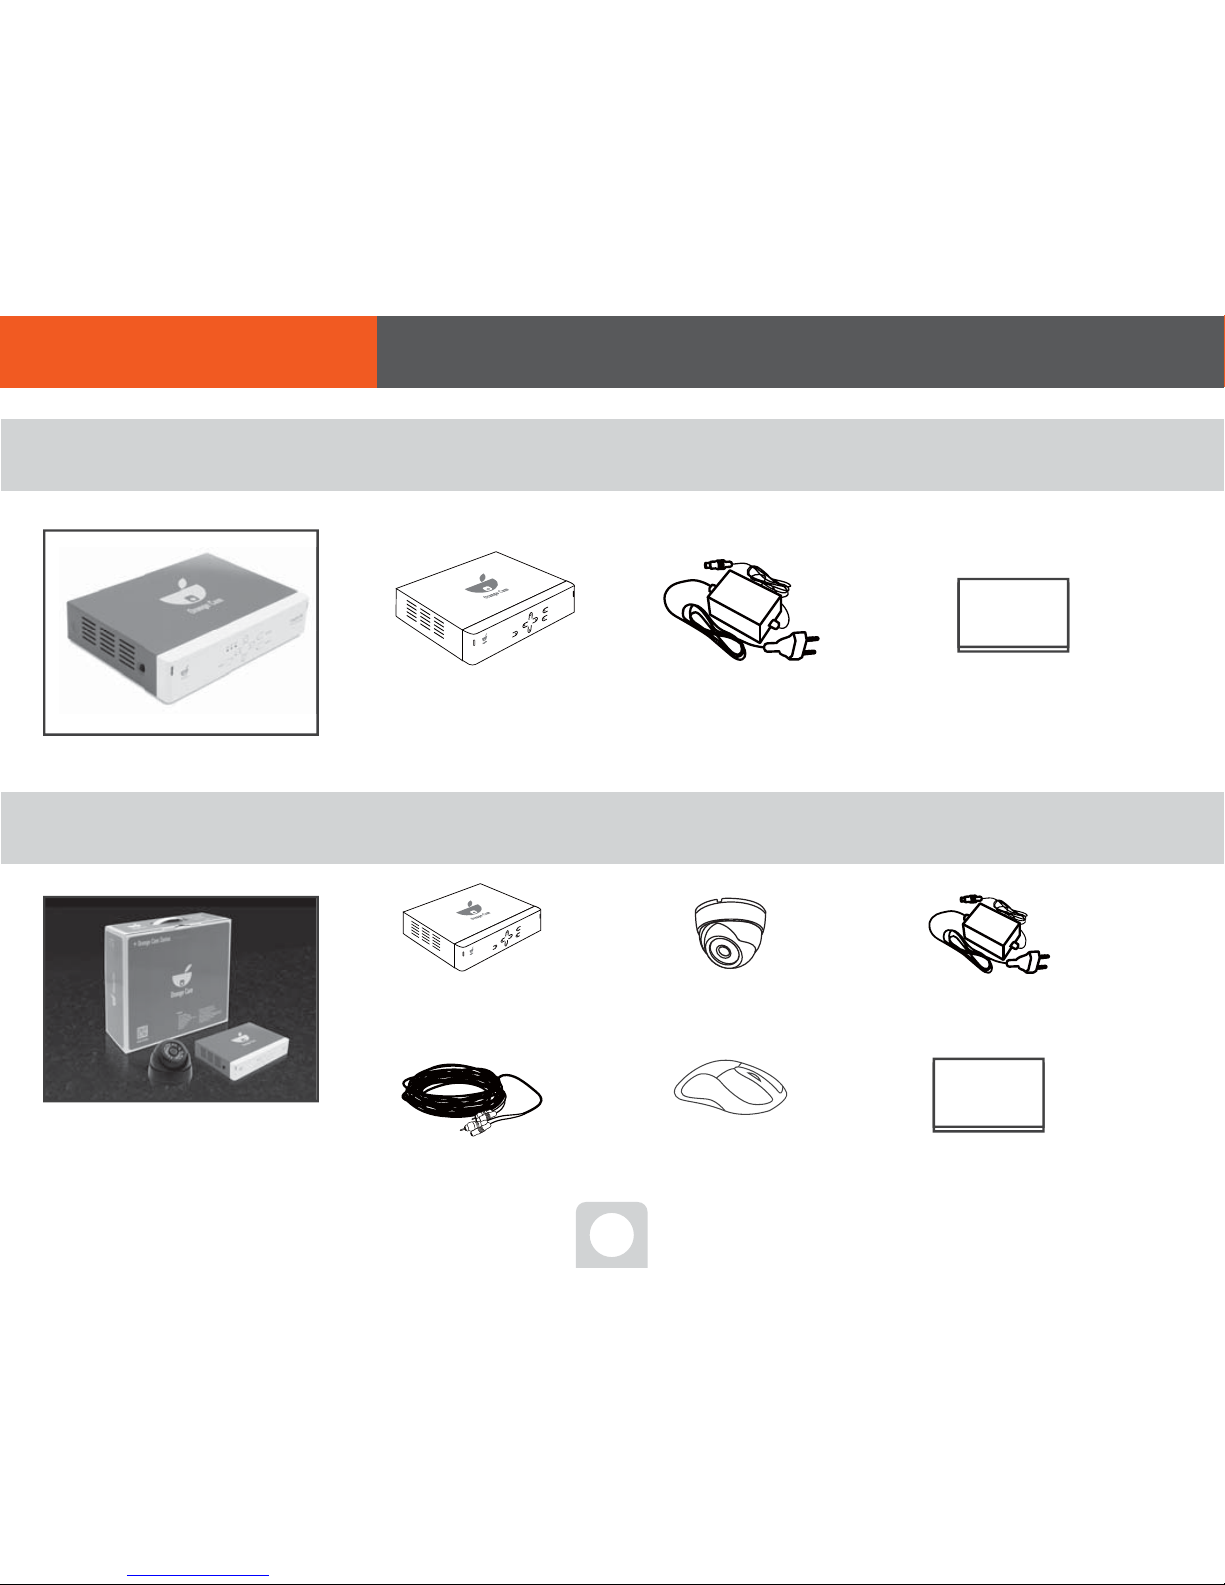
Part.01 Before you start

02
* Orange Box 400/800 Basic components (Camera separately sold)
* Orange Cam SET package (Orange Cam 400/800) components
Basic set package including camera
DVR body box
(Camera separately sold)
Product body(DVR) User Manual
(This Manual)
USB Mouse
Dome infrared camera
Video & power
Connecting cable
Power adapter
2 power adapters
Product body(DVR)
User Manual
(This Manual)
01. Before you start ■ Components checking

03
■ How to install - Simple view
Power
Power Adopter
ip Share
USB Mouse
Monitor
TV
Power Adopter
Video/Power
Connecting Cable
Product body(DVR)
Camera
Part.02 To start

04
power Connect with the
adapter to power
socket, and plug it to
the position as shown in
the Fig., and power will
automatically turn on.
As DVR is connected with
Internet, you may now use
the web service and mobile
phone service.
(However, to connect with
Internet, you need to call
Internet service provider to
apply for the service.)
Turn on power
1Connect with Internet
2
Power
Internet share
software
Connect LAN port
Power Adopter
● Connect with power adapter,
and power will turn on
Connecting the LAN cable and it will be
connected with Internet.
1. Run DVR and connect with Internet
02. To start ■ Order of connect

05
Connect with the mouse.
1Connect with monitor.
2
USB Mouse Monitor
● Now, you can control the screen with the mouse. ● With monitor, you can watch the screen
2. When you use monitor
Plug in the USB terminal of mouse into
position shown as in Fig., you can control DVR
with mouse. With a mouse, you can use VGA
monitor (D-SUB) or TV display.
Plug in the VGAmonitor(D-SUB)
cable position shown as in Fig., you
can display the screen with
monitor and you can directly
control real-time monitoring and
DVR. (Even without a computer, a
monitor will do for this purpose.)
* Monitor cable for sales separately
02. To start ■ Order of connect

06
Connect with TV.
1Change Output
2
TV
● You can watch screen with TV. ● Shift VGA and TV
3. If you use TV
Plug in the video cable to the TV external
input terminal and the DVR TV display
terminal as shown in Fig., you can display
the screen with TV and directly control the
real-time monitoring and the DVR.
However, as the VGA display is basic setting, you
have to, when connecting with TV, shift VGA and TV,
in order to apply TV display.
ENTER
CANCEL
MENU
TV or VGA Moniter
+
CANCELMENU
PWR HDD NET
02. To start ■ Order of connect

07
Check the components to connect with camera
1
4. Connect with camera
Video & power Connecting cable
Power Adopter
Video terminal(yellow)
Power terminal(red or black)
High-strength adhesive sticker
Camera
02. To start ■ Order of connect

08
video/power cable connection
One! Two! Attach the high-strength adhesive
sticker onto the bottom of camera. Hint. Wait a minute!
Did you install the Orange Cam app?
카메라
전원아답터
Video terminal(yellow)
Power terminal(red or black)
Assemble the components to connect with camera
2
4. Connect with camera
02. To start ■ Order of connect
According to matching colors, connect
[video/power cable] to camera and power
adapter both, for assembling.
Attach high-strength adhesive sticker on
to the bottom of camera and then stick the
camera to the position you want to install.
If you have connected the DVR
with Internet,
It is recommended to first install
the Orange Cam app for smart-
phone before you install the
camera.
Connecting DVR to Orange Cam
app enables you to easily install
a camera, watching the
appeared parts and angles during
the installation.

09
If you have purchased Orange Cam package or bought a
camera separately, use the [video/power cable] enclosed
together to plug in the video terminal(yellow) to the position
shown as in Fig. power terminal(black). Then, connect the
power adapter to give power to the camera, to send the
video to DVR body starting monitoring service.
Wait a minute!
A camera will be in normal operation status,
by only connecting the camera to [video/
power cable] and using the separately
provided power adapter for a camera for
power supply.
Connect the camera to DVR
3
Power Adopter
Video/Power Connecting Cable
Camera
Connect the video/power cable to camera and DVR, both
4. Connect with camera
02. To start ■ Order of connect

10
When you connect the multiple sets of cameras,
you may use all the power adapters by camera.
The power adapter provided with this product, is
high-performance adapter that can be
connected with up to 4 cameras. So, you can use
the only one adapter through the separately sold
product [1/4power distributor].
When you connect the multiple sets of cameras to DVR
4
Power Adopter
1/4 of power distributor
(separately sold)
1/4 of power distributor
(separately sold)
Video/Power Connecting Cable
Camera 3
5.
connect the multiple sets of cameras
Camera 2
Camera 1
02. To start ■ Order of connect

11
Part.03
스마트폰 보기
■ Main
function
My Cam
Emergency. Friends
Cam. Friends
Your registered smartphone(mobile) real-time monitors the purchased Orange Cam,
supporting up to 60 users’s access to smartphone simultaneously.
At dark night, what if you are followed by stranger? Or what if you faced intrusion
at home alone? In such dangerous situations, this service is like your guardian angel
who protects you
You can share your registered real-time video(Orange Cam CCTV video) with your friends.
This is a service differentiated, the real-time LIVE CAM social community,
compared to conventional recorded UCC.
Part.03 View via smartphone

12
Start
Android Market
1Orange Cam
search
2Select
Orange Cam
3
Install app4Agree & download5App installation
completed
6
● Start Play Store from your smartphone
● Press on search button to input Orange Cam and
search.
● When results related to search word appear,
continue by pressing on “Orange Cam” app.
● When the app information screen appears, press on
the Install.
● When you are asked again about whether to install,
install by pressing Accept and Download.
● The app is downloading and installation. Please wait.
Normally, the download processing takes different
time depending on communication status. If it is not
WiFi mode, data communication fee may occur.
Automatic update is permitted as basic settings. If
you do not want it, unselect it and update manually
as necessary.
03. View via Phone
■ To install the App - Android phone

13
Start Appstore1OrangeCam search2
install app3Log-in4
● Start App Store from iPhone
● Press on the search button to input the Orange Cam
and start the search.
● When the results related to search word, press on
the “Orange Cam” app to start it.
● When the app information screen appears, press
Install.
● Enter your account information to log in.
● The app is downloading and installation. Please wait.
Normally, the download processing takes different
time depending on communication status. If it is not
WiFi mode, data communication fee may occur.
Automatic update is permitted as basic settings. If
you do not want it, unselect it and update manually
as necessary.
03. View via Phone
■ Installation of App - iPhone

14
Start app
1screen loading...
2Accept the Terms of
Use and policy
3
● Start the icon on the Orange Cam App from your smartphone.
● Agree to Terms of Use and privacy policy and press on Continue.
03. View via Phone
■ When you first run

15
two fingers
This feature is not currently implemented.
Long touch and press
starts the hidden func-
tions. Long touch and
press on the registered
MyCam list enables you to
modify or delete infor-
mation
Touch motion is prepara-
tive motion mainly to
select a button or a
screen, or to enter text
With your two fingers,
you can Zoom in+Zoom
Out a screen, or do the
same things via a camera
with zoom-out functions,
by pinching open and
close motions.
Touch Long touch
Finger motions
Finger motions are used
mainly change channels to
other screen when you
move between screens or
video screens.
For video replay, you can
make use of it as
rewind/forward func-
tions.
03. View via Phone
■ Learn about basic functions

16
MyCam(CCTV) registration
1From View More, Register
2Enter your DVR ID+Password
3
● Start by pressing on Register MyCam from ‘Register CCTV registration’ button on empty screen
or ‘View More’ Menu.
● DVR name : Make your own unique name to enter. (This is modifiable after registration
completed.)
● DVR ID : Enter the product’s unique serial number (10-digit).
● Password : Enter the password. The initial password is recorded on the bottom of DVR. (6-digit)
(Password is modifiable on the DVR management screen.)
Touch
누르기
누르기
03. View via Phone
■ When you first run

17
Select MyCam
1Connect Orange Cam
2View All
3view Zoom in
4
● Press your registered MyCam to see “Connecting to Orange Cam…” message, and then
Orange Cam you installed will appear. (4 screens for 4-channel product, 8 screens for
8-channel product.
● ‘Hold your touch on the registered MyCam list, you can modify or delete information.
● Press one of the 4 screens, and it will zoom in to big screen.
Touch Long Touch
03. View via Phone
■ MyCam(CCTV) registration

18
Shift between screens
1Control from Zoom in view screen
2View screen in bigger size
3
● Hold pressing on the appeared screen and move your fingers to the left
and right to other screen.
● Lay smartphone horizontal to view screen in bigger size.
(To the contrary, in order to select other lists, make the 폰 stand again.)
Finger Motion
03. View via Phone
■ Shift between screens

19
Zoom in
1Screen Zoom
2
● With your two fingers, you can Zoom in+Zoom Out a screen, or do the
same things via a camera with zoom-out functions, by pinching open
and close motions.
Two Finger
03. View via Phone
■ Zoom in/out This feature is not currently implemented.
Table of contents