ORBECO SensoDirect pH 200 User manual

SensoDirect pH 200
pH-/Redox-/Temperature Meter
Operating instructions
%
°C
MEAS
HOLD
°F
°C

2

3
Table of Contents Page
1. Scope of delivery ..............................................................4
2. System description ............................................................4
3. Connections ......................................................................5
4. Display ..............................................................................7
5. Keypad .............................................................................7
6. Start up .............................................................................8
7. Measurement.....................................................................9
8. Configuration of the unit...................................................11
8.1 Selection of measuring function [pH] – [mV] – [Rel mV].....11
8.2 Calibration: selection of calibration...................................12
8.3 Display of electrode status ..............................................12
8.4 Selection of temperature unit °C /°F ................................14
8.5 Power off: automatic unit switch-off.................................14
9. Calibration of pH measurement........................................14
9.1 Starting calibration: Press [CAL] key ................................16
9.2 Selecting buffer solutions .................................................16
9.3 Calibration point 1: ‘CAL. 1’.............................................17
9.4 Calibration point 2: ‘CAL. 2’ ............................................18
9.5 Calibration point 3: ‘CAL. 3’.............................................20
10. Result memory ................................................................21
10.1 Storing results..................................................................21
10.2 Displaying stored results ..................................................21
10.3 Deleting stored results .....................................................22
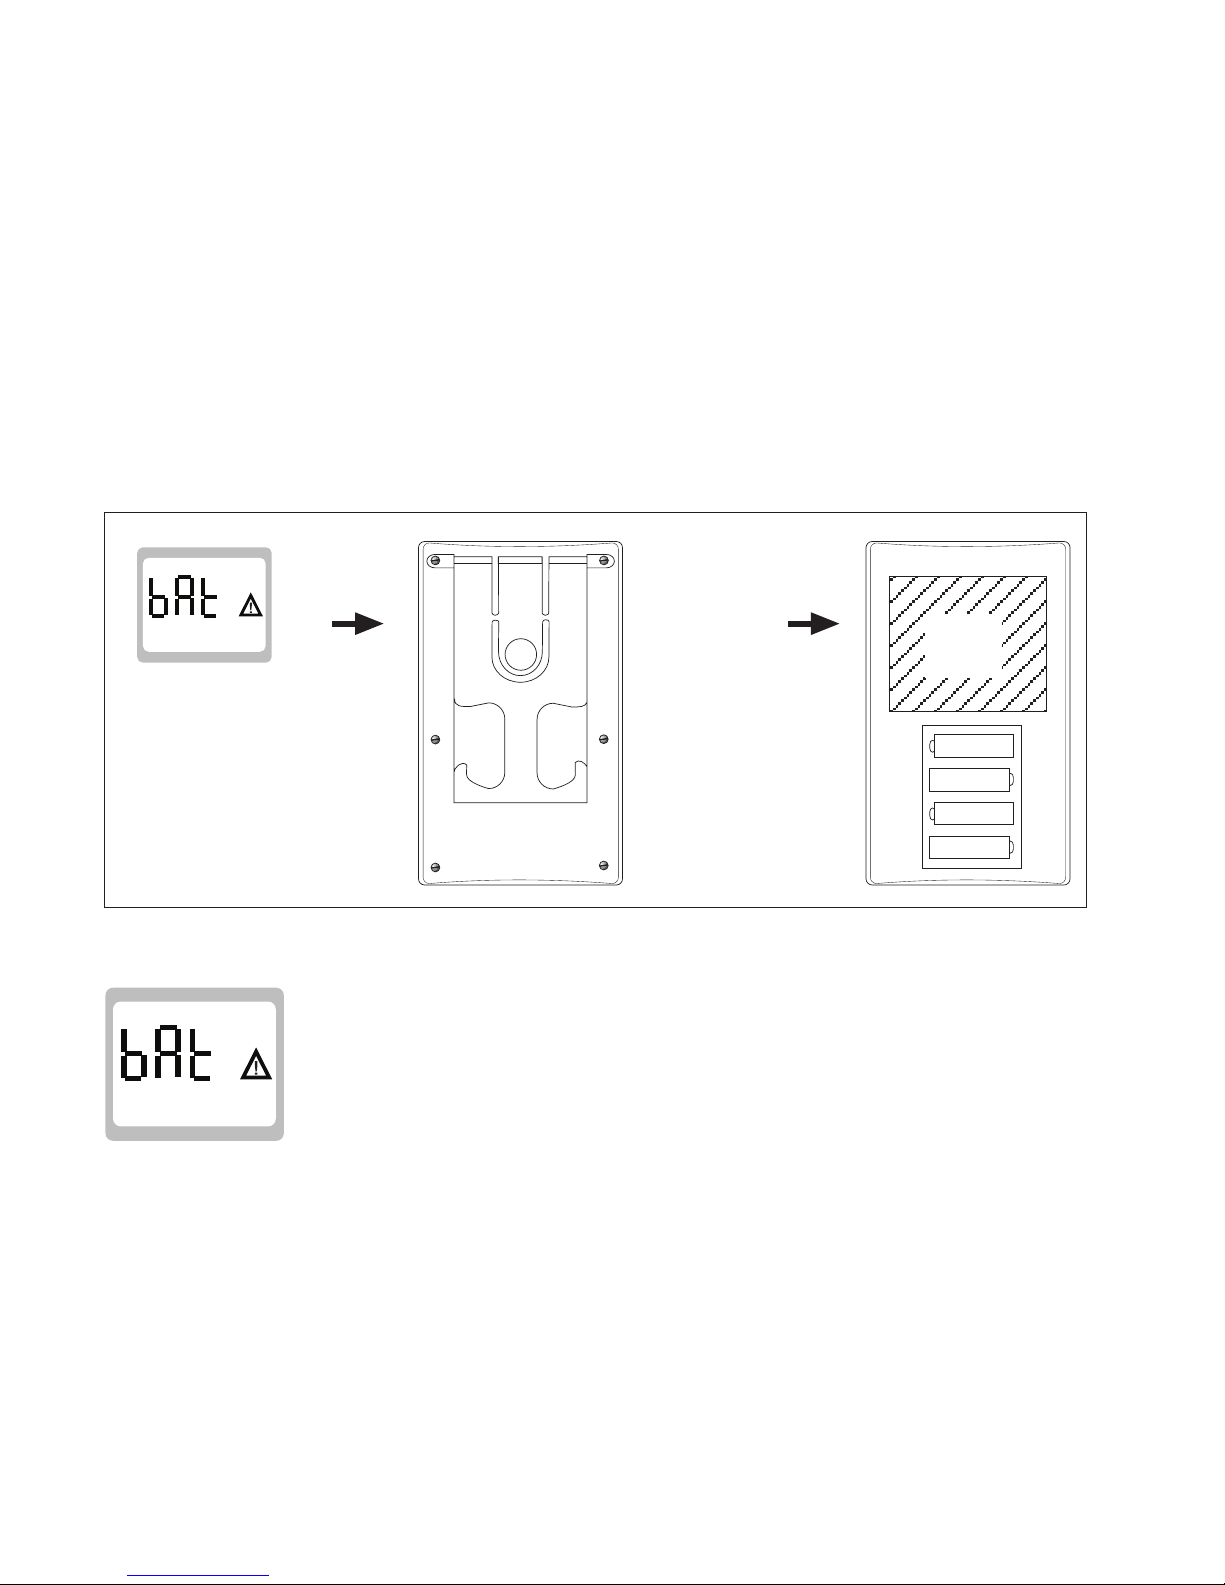
11. Error messages and troubleshooting................................22
12. Technical data .................................................................25
13. Accessories .....................................................................27
14. Assembling Carrying strap ...............................................27

4
1. Scope of delivery
Standard:
•Orbeco-HelligeSensoDirectpH200
•Batteries,4*AA1,5Vcells
•Operatinginstructions
•Carryingstrap
Set:
•Orbeco-HelligeSensoDirectpH200
•Batteries,4*AA1,5Vcells
•pH/Temperaturesensor
•Standardbuffersolutions,each90mlpH
4.00/7.00/ 10.00
•Carryingcase
•Operatinginstructions
•Carryingstrap
2. System description
The system is a sturdy, water-tight handheld meter
designed for daily measurements in the area of field
or laboratory analysis.
It is used to measure redox voltage and temperature
in the field of environmental analysis as well as for
applications in the food and chemical industries.
The system complies with the requirements in EN
60529 relating to protection class IP67 and water-
proof/dustproof properties.

5
The permanent protective plating on the unit serves not
just as impact protection but also as a storage com-
partment for the electrode and as an anti-slip device
when the meter is used in an upright position.
Microprocessortechnologyand4xAA1,5Vbatteries
allowunitoperationwithoutbatterychangefor15,000
hours or more.
A„LowBat”indicatorinthedisplayshowstheuser
when it is time to change the batteries.
The required temperature compensation for the system
is performed automatically (ATC) following connection
of a temperature sensor or via manual input via the
touch-sensitive film keypad. The unit automatically
identifies Pt1000 and NTC 30 kOhm sensors.
The AUTO HOLD feature enables the user to identify
stable results and call them up on the display.
The MEAS function is the standard continuous measu-
ring mode for pH levels or redox voltages.
pH calibration of the system is via an integrated auto-
matic buffer recognition feature.
The temperature characteristics of the Tintometer
standard buffer solutions and the reference buffer
solutions specified in DIN 19266 are stored in the unit
and are used for automatic calibration of the system
when selected.
It is additionally possible to enter some of the buffer
data into the unit manually.
Calibrationisperformedoptionallyat3points,2points
or 1 point.
A sensor evaluation is automatically shown in the
display (or can be called up via the menu) after each
calibration.
An internal memory for 20 results is integrated in the

6
unitasstandard.Thememorystoreslocation,result
and temperature.
The memory is called up via the display.
3. Connections
Temperature sensor “T”, 4mm
1-pin
Temperaturesensor“REF”
and separately routed
reference electrode, if present,
4mm 1-pin
pHorredoxelectrode,HF
socket in acc. with DIN 19262
T REF
%
°C
mmHg hPa mg/l %O2
SAL OK CAL hPa
MEAS
HOLD
°F
°C
123
456
789
%
°C
pH
Rel mV
mV
AT C OK CAL
MEAS
HOLD
°F
°C
Meas Continuousmeasurement,
(standard setting)
Hold Auto Hold: automatic retaining
of stable result
on/off On/Off
[▲] [▼]Leafthroughmenuormemory,
manual temperature setting
Rcl Display of stored results
Cal Calibration mode
Store Storage of current
result or acceptance of
unit configuration
Menu Unit configuration
Main display: Result or user prompt
[mV] Redoxvoltage,absolute
[RelmV] Redoxvoltage,relativetothe
hydrogen electrode (DIN 38404)
[pH] pH level
Secondary display: Result - temperature
or user prompt
[%] Percent (sensor evaluation)
[∆
!
] Warning index - battery/ one-point calibration
[°C,°F] Temperatureunit
[ATC] Automatic temperature compensation
[OK] Stable measuring signal
[CAL] Calibration mode
[MEAS] Measuring mode - standard
[HOLD] Measuring mode - AUTO-HOLD

7
%
°C
pH
Rel mV
mV
ATC OK CAL
MEAS
HOLD °F
°C
Meas Cal
Hold Rcl Store
On
Off Menu
4. Display
5. Keypad
Meas Continuousmeasurement,
(standard setting)
Hold Auto Hold: automatic retaining
of stable result
on/off On/Off
[▲] [▼]Leafthroughmenuormemory,
manual temperature setting
Rcl Display of stored results
Cal Calibration mode
Store Storage of current
result or acceptance of
unit configuration
Menu Unit configuration
Main display: Result or user prompt
[mV] Redoxvoltage,absolute
[RelmV] Redoxvoltage,relativetothe
hydrogen electrode (DIN 38404)
[pH] pH level
Secondary display: Result - temperature
or user prompt
[%] Percent (sensor evaluation)
[∆
!
] Warning index - battery/ one-point calibration
[°C,°F] Temperatureunit
[ATC] Automatic temperature compensation
[OK] Stable measuring signal
[CAL] Calibration mode
[MEAS] Measuring mode - standard
[HOLD] Measuring mode - AUTO-HOLD

8
6. Start up
The unit is supplied with integrated batteries as stan-
dard and is therefore ready for immediate use.
You have to unscrew the unit to insert or change the
batteries.Wheninsertingthebatteries,ensurecorrect
polarity!
Screw the unit back together carefully without exerting
too much pressure on the gasket seal.
If the ∆
!
symbolappearstogetherwith“bAt”inthelower
sectionofthedisplay,thismeansthatthebatteriesare
nearly empty and need replacing.
However,theunitwillcontinuetofunctionforacertain
periodoftime.If“bAt”appearsintheuppersection
ofthedisplay,thismeansthatthebatteriesarecom-
pletely empty.
Displayed values in the event of cable break or if no
pH or redox electrode is connected:
If no electrode is connected or if the connecting cable
isdefective,thedisplaystillshowspHormVresults.
However,theseresultsarenotvalidresults!
Remove
6 screws
4 x AA 1,5 V
Don`t
touch
Display

9
The electrode or temperature sensor must be plugged
in before the unit is switched on.
Switch the unit on via the [On/Off] key.
The system must be calibrated when the system is
started up (see Calibration).
Following measurement, please switch the unit off
using the [On/Off] key.
See the enclosed Operating Instructions for more
detailed information on storage and care of the elec-
trodes.
7. Measurement
Measuring mode MEAS
Aftertheunitisswitchedon,itisautomaticallyinthe
standard measuring mode MEAS.
You can switch to the standard MEAS measuring mode
by pressing the [Meas] key.
Thedisplayshowsthecurrent,possiblystilluctuating
resultandMEAS.Iftheresultisstable,the[ok]arrow
appears in the display.
Measuring mode HOLD
Pressing the [Hold] key takes you into the AUTO HOLD
measuring mode.
Inthismode,therecordedresultischeckedbythe
system in line with the predefined stability criteria until
these criteria are met.
The display shows Auto/Hold in alternating mode
together with the result.
On
Off
Meas
Hold

10
Onceastablereproduciblevalueispresent,theresult
isshownpermanentlyinthedisplay(“frozen”).
The display also shows HOLD and the automatically
set or manually entered temperature.
Ifyoupressthe[Hold]keyagain,themeasuringcycle
starts anew and runs until the stability criteria are
met.
Temperature measurement, automatic temperature
compensation (ATC)
During pH measurement and redox measurement
(relativetothehydrogenelectrode[RelmV]),itisne-
cessary to compensate for the temperature effect of
the electrode.
If a temperature sensor is connected, temperature
compensation is performed automatically (ATC =
automatic temperature compensation).
The unit can automatically distinguish between a
Pt1000 and an NTC30kOhm temperature sensor.
The sensor type is displayed if you simultaneously
press the [Meas] and [Hold] keys.
Ifatemperaturesensorisnotconnected,youmust
manually enter the temperature of the medium to be
tested using the [▲] [▼]keys after switching on the unit
and confirm the value by pressing the [Store] key.
Duringthemeasurementprocess,youcanchangethe
temperature value at any time using the [▲] [▼]keys.
In the HOLD measuring mode, a new Auto Hold
measurement is started automatically every time a
change is made.
Hold
Hold
Meas
+

11
8. Configuration of the unit
Toconguretheunit,pressthe[Menu]key.Therst
menu item appears.
Ifyoupressthe[Menu]keyagain,thedisplayjumps
to the next menu item.
You can set the various parameters using the [▲] [▼]
keys.
Press the [Store] key to store and conclude configu-
ration.
The unit then switches back to measuring mode.
You can terminate the configuration process by pres-
sing the [Meas] or [Hold] key.
Settings made up to this point are not stored.
The unit retains the previous settings.
8.1 Input: selection of measuring function
[pH] – [mV] – [Rel mV]
Select the desired measuring function using the [▲]
[▼]keys. The arrow in the display shows the selected
function.
•pH: pHmeasurementwithpHelectrode
•mV: redoxmeasurementwithredoxelectrode
•RelmV: redoxmeasurementwithredoxelectrode.
The displayed value is converted to the
normal hydrogen system in temperature-
dependent mode (DIN 38404).
Store
+
Hold
Meas
Menu
+

12
8.2 CAL = Calibration: selection of
calibration (only with pH function)
Youcanchoosebetween1,2and3-pointcalibrati-
on.
1-point calibration:
Calibration of the pH electrode is performed at a
random point.
The electrode slope is always based on the theoretical
slope of -59.2mV/pH.
2-point calibration:
Calibration of the pH electrode is performed at two
points.
3-point calibration:
Calibration of the pH electrode is performed at three
points.
8.3 Display of electrode status
(only with pH function)
Indication of the electrode status that is computed
internally during every calibration depending on the
electrode used.
•100% Theelectrodeisinexcellentcondition.
•30...90% Theconditionoftheelectrodeisadequate.
•<30% Theelectrodeisoldorsoiled.
If there is no improvement after you have cleaned and
recalibrated the electrode (see operating instructions
forelectrode),youneedtoreplacetheelectrode.
Percentage calculation of the electrode status is based
both on asymmetry potentials and on slopes (gradient
%

13
of the pH characteristic) of the electrode. The electrode
condition is then determined by the worst result. The
admissible characteristic data of the pH electrodes are
as follows:
Asymmetry potential of the electrode at 25°C in mV
Max. admissible range: +30...-30 mV
Optimum: 0 mV
Soiling of the electrode can have a major adverse effect
on asymmetry.
[SL] = Slope of the electrode signal at 25°C in mV/pH
Admissible range: -62...-50 mV/pH
Optimum: -59,2 mV/pH
1-point calibration is always based on the optimum
theoretical value of –59.2mV/pH. The slope is not
shown in the menu.
For2-pointcalibration,theslopeisspeciedforthe
entire measuring range.
For3-pointcalibration,theslopeisrstdisplayedfor
thelower,acidmeasuringrange[SL.1]andthenfor
theupper,basicrange[SL.2].

14
8.4 Selection of
temperature unit °C /°F
•°CAlltemperaturevaluesindegreesCelsius
•°FAlltemperaturevaluesindegreesFahrenheit
(°C=0.556*°F-17.8or°F=1.8*°C+32)
8.5 Power off: automatic
unit switch-off
Ifnokeyispressedduringtheswitch-offdelayperiod,
the unit switches off automatically after the selected
time has run down.
The desired delay time is entered in minutes.
IfP.oFF=oFF,automaticunitswitch-offisinactive.
9. Calibration of pH measurement
The individual sensor characteristics of pH electrodes
areaffectedbyageingwhichcausesuctuations.
Thisiswhy,priortomeasurement,itisimportantto
check the current system calibration using buffer so-
lutions to ensure optimum measuring results.
If the calibration deviates from the ideal setting by
morethanacertainamount,youneedtorecalibrate
the system.
Buffer solutions are liquids that possess an exact,
reproducible pH level.
Calibration can be performed using buffers in the:

15
• Tintometerstandardseries(25°C):pH4.00,pH
7.00 and pH 10.00
• DIN19266series(25°C):
pH1.68(A),pH4.01(C),pH6.87(D),pH9.18(F)
and pH 12.45 (G)
• orusinganyuser-selectablebuffers
The shelf life of buffer solutions is limited and is shor-
tened further by, among other things, inadequate
cleaning and drying of the electrode prior to insertion.
This can lead to incorrect calibration! You should
therefore always use fresh buffer solutions for calibra-
tion wherever possible and clean the electrode using
deionised or distilled water!
Automatic temperature compensation for calibration
BoththepHelectrodesignalsandthepHbuffervalues
are temperature-dependent. If a temperature sensor
isconnected,thetemperatureeffectoftheelectrode
is compensated automatically during measurement
and calibration.
Otherwise,youneedtoentertheactualtemperatureof
the buffer as accurately as possible during calibration.
If you use the Tintometer standard buffer series or the
DINbufferseries,thetemperatureeffectsofthebuffers
are additionally compensated.
To ensure maximum precision of calibration in the
event of manual buffer selection, you should enter
the pH values of the buffers at the corresponding
temperature.

16
Performing calibration
Ifyouhavenotalreadydoneso,selectthemeasuring
mode ‚pH‘ (see Configuration) and ensure that (depen-
dingonyourrequirements),1-point,2-pointor3-point
calibration is active in the configuration setting
Carefully remove the protective cap from the elec-
trode.
Clean the electrode using deionised water and
dry carefully.
9.1 Starting calibration: Press [Cal] key.
‘CAL’ appears momentarily in the display.
You can terminate calibration at any time by pressing
the[Meas]keyor[Hold]key.Inthisevent,theprevious
calibration setting is retained.
9.2 Selecting buffer solutions
‘buFF’ is shown in the main display.
You can choose between the various buffer series
using the [▲] [▼]keys.
You then confirm the selected buffer set by pressing
the [Store] key.
The following inputs are possible:
Tintometer standard series
Valuesat25°C:4.00pH,7.00pH,10.00pH
Store
+

17
DIN 19266 series
Values at 25 °C: 1.68pH(A), 4.01pH(C), 6.87pH(D),
9.18pH(F),12.45pH(G)
Manual buffer setting
If you want to use buffers other than those in the
TintometerstandardorDINseries, you canchoose
ma-nual buffer adjustment here.
9.3 Calibration point 1: ‚CAL. 1‘
Insert the electrode and the temperature sensor (if
present) in buffer solution 1 (e.g. Tintometer standard
buffer solution pH 7.00) and swirl carefully.
Inthecaseofmanualbuffersetting,[Pt.1]appearsin
the secondary display.
You enter the pH value of the buffer solution using the
[▲] [▼]keys.
You then confirm the input by pressing the [Store]
key.
When Tintometer standard and DIN series solutions
are used, the system automatically detects the pH
value of the solution.
[CAL.1] appears in the secondary display until the va-
lue is stable; the detected value is then automatically
stored .
You are then requested to perform the next calibration
step.
Store
+

18
Without temperature sensor:
manual input of temperature of solution 1
You can enter the actual temperature of the buffer
solution using the [▲] [▼]keys.
Thevalueisstoredwhenyoupressthe[Store]key,and
the system shows the next calibration step.
In the case of 1-point calibration, the status of the
electrodeisthendisplayed(onlyasymmetrypotential,
slope optimal = 59.2 mV/pH); the unit then switches
to the standard measuring mode MEAS.
After1-pointcalibration,the∆
!
signal is permanently
shown in the display.
The user should be aware that measuring errors can
occurwith1-pointcalibration,particularlywithresults
that are a long way from the calibration point.
2-point calibration is therefore always advisable.
Clean the electrode using deionised water
and dry carefully.
9.4 Calibration point 2: ‚CAL. 2‘
(only with 2-point and 3-point calibration)
Insert the electrode and the temperature sensor (if
present) in buffer solution 2 (e.g. Tintometer standard
buffer solution pH 4.00).
Inthecaseofmanualbuffersetting,[Pt.1]appearsin
the secondary display. You enter the pH value of the
respective buffer solution using the [▲] [▼]keys. You
then confirm the input by pressing the [Store] key.
When Tintometer standard and DIN 19266 series
°C
Store
+
Store
+

19
solutionsareused,thesystemautomaticallydetects
the pH value of the solution.
Ifthedisplayashesandswitchesbetweendifferent
buffers, this means that no valid buffer has been
detected.
[CAL.2] appears in the secondary display until the value
is stable; the detected buffer value is then automatically
stored.
You are then requested to perform the next calibration
step.Inthecaseof2-pointcalibration,thestatusof
the electrode is then displayed (asymmetry potential
and slope); the unit then switches to the standard
measuring mode MEAS.
Without temperature sensor: manual input
of temperature of solution 2
You can enter the temperature of the second buffer
solution using the [▲] [▼]keys.
Thevalueisstoredwhenyoupressthe[Store]key,
and the status of the electrode is displayed.
clean the electrode using deionised water
and dry carefully.
°C
Store
+

20
9.5 Calibration point 3: ‚CAL. 3‘
(only with 3-point calibration)
Insert the electrode and the temperature sensor (if
present) in buffer solution 3 (e.g. Tintometer standard
series pH 10.00).
Inthecaseofmanualbuffersetting,[Pt.1]appearsin
the secondary display. You enter the pH value of buffer
solution 3 using the [▲] [▼]keys. You then confirm the
input by pressing the [Store] key.
When Tintometer standard and DIN 19266 series
solutionsareused,thesystemautomaticallydetects
the pH value of the solution.
Ifthedisplayashesandswitchesbetweendifferent
buffers, this means that no valid buffer has been
detected.
[CAL.3] appears in the secondary display until the
value is stable; the detected buffer value is then au-
tomatically stored.
In the case of 3-point calibration, the status of the
electrode is then displayed (asymmetry potential and
slope); the unit then switches to the standard measu-
ring mode MEAS.
Without temperature sensor: manual input
of temperature of solution 3
You can enter the temperature of the third buffer
solution using the [▲] [▼]keys.
Store
+
°C
Table of contents
Other ORBECO Measuring Instrument manuals
Popular Measuring Instrument manuals by other brands

Molecular Devices
Molecular Devices SpectraMax 340PC384 installation guide

Hanna
Hanna HI 96745 instruction manual

Xylem
Xylem WTW LabStation LS Flex/430 operating manual

Bürkert
Bürkert 8222 ELEMENT NEUTRINO operating instructions

SEFRAM
SEFRAM MW 3950 user manual

Global Industrial
Global Industrial 412586 instruction manual