2
1.1 For your safety
- Before beginning your program of exercise, consult your doctor to ensure that you are fit enough to
use this equipment. Base your program of exercise on the advice given by your doctor.
Incorrect or excessive exercise may damage your health.
- The elliptical should be used only for its intended purpose, i.e. for physical exercise by adult persons.
- Any other use of the equipment is prohibited and may be dangerous. The manufacturer cannot be
held liable for damage or injury caused by improper use of the equipment.
- This elliptical has been designed in accordance with the latest standards of safety. Any features
which may have been a possible cause of injury have been avoided or made as safe as possible.
- Incorrect repairs and structural modifications (e.g. removal or replacement of original parts) may
endanger the safety of the user.
- Damaged components may endanger your safety or reduce the lifetime of the equipment. For this
reason, worn or damaged parts should be replaced immediately and the equipment taken out of use
until this has been done. Use only original spare parts.
- If the equipment is in regular use, check all its components thoroughly every 1 – 2 months.
Pay particular attention to the tightness of bolts and nuts. This is particularly true for all
attached parts.
- To ensure that the safety level is kept to the highest possible standard, determined by its
construction, this product should be serviced regularly (once a year) by specialist retailers.
- Instruct persons using the equipment (in particular children) on possible sources of danger during
exercise.
- Any interference with parts of the product that are not described within the manual may cause
damage or endanger the person using this machine. Extensive repair must only be carried out
by specialist retailers or qualified personnel trained by manufacturer.
- Use only the supplied power cord.
- Your elliptical is an electric product. Therefore it must be guaranteed during use that it is grounded.
Please make sure that the power cord is connected with a suitable power outlet. This guarantees a
reduced risk of electric shock caused by malfunction.
- A malfunction can cause an electric shock if the grounding has an improper
connection. If you are not sure if your power outlet is suitable, please contact
a qualified electrician.
- Never leave your elliptical without supervision. If you leave the room, please
disconnect the power cord from the power outlet.
-
Never use the elliptical if it is standing on a wet surface, if the power cord is
defect or a 100% function of the elliptical cannot be guaranteed.
Pay attention on enough distance of the power cord or the elliptical from hot
sources. In case of enquiry, please contact your dealer.
1.2 Handling the equipment
- Before using the equipment for exercise, check carefully to ensure that it has been correctly
assembled.
- Before beginning with your first session, familiarize yourself thoroughly with all the functions and
settings of the unit.
- It is not recommended to use or to store the unit in a damp room as this may cause it to rust.
- This machine is designed for use by adults and children should not be allowed to play with it.
Children at play behave unpredictably and dangerous situations may occur for which the
manufacturer cannot be held liable. If, in spite of this, children are allowed to use the equipment,
ensure that they are instructed in its proper use and supervised accordingly.
- This elliptical is a speed – dependent training equipment which complies with the DIN EN 957 – 1/9,
class HB. It is therefore not suitable for therapeutic use.
- The maximum user weight is 130 kg.
- A slight production of noise on the belt or brake system is due to the construction and has no
negative effects upon operation.
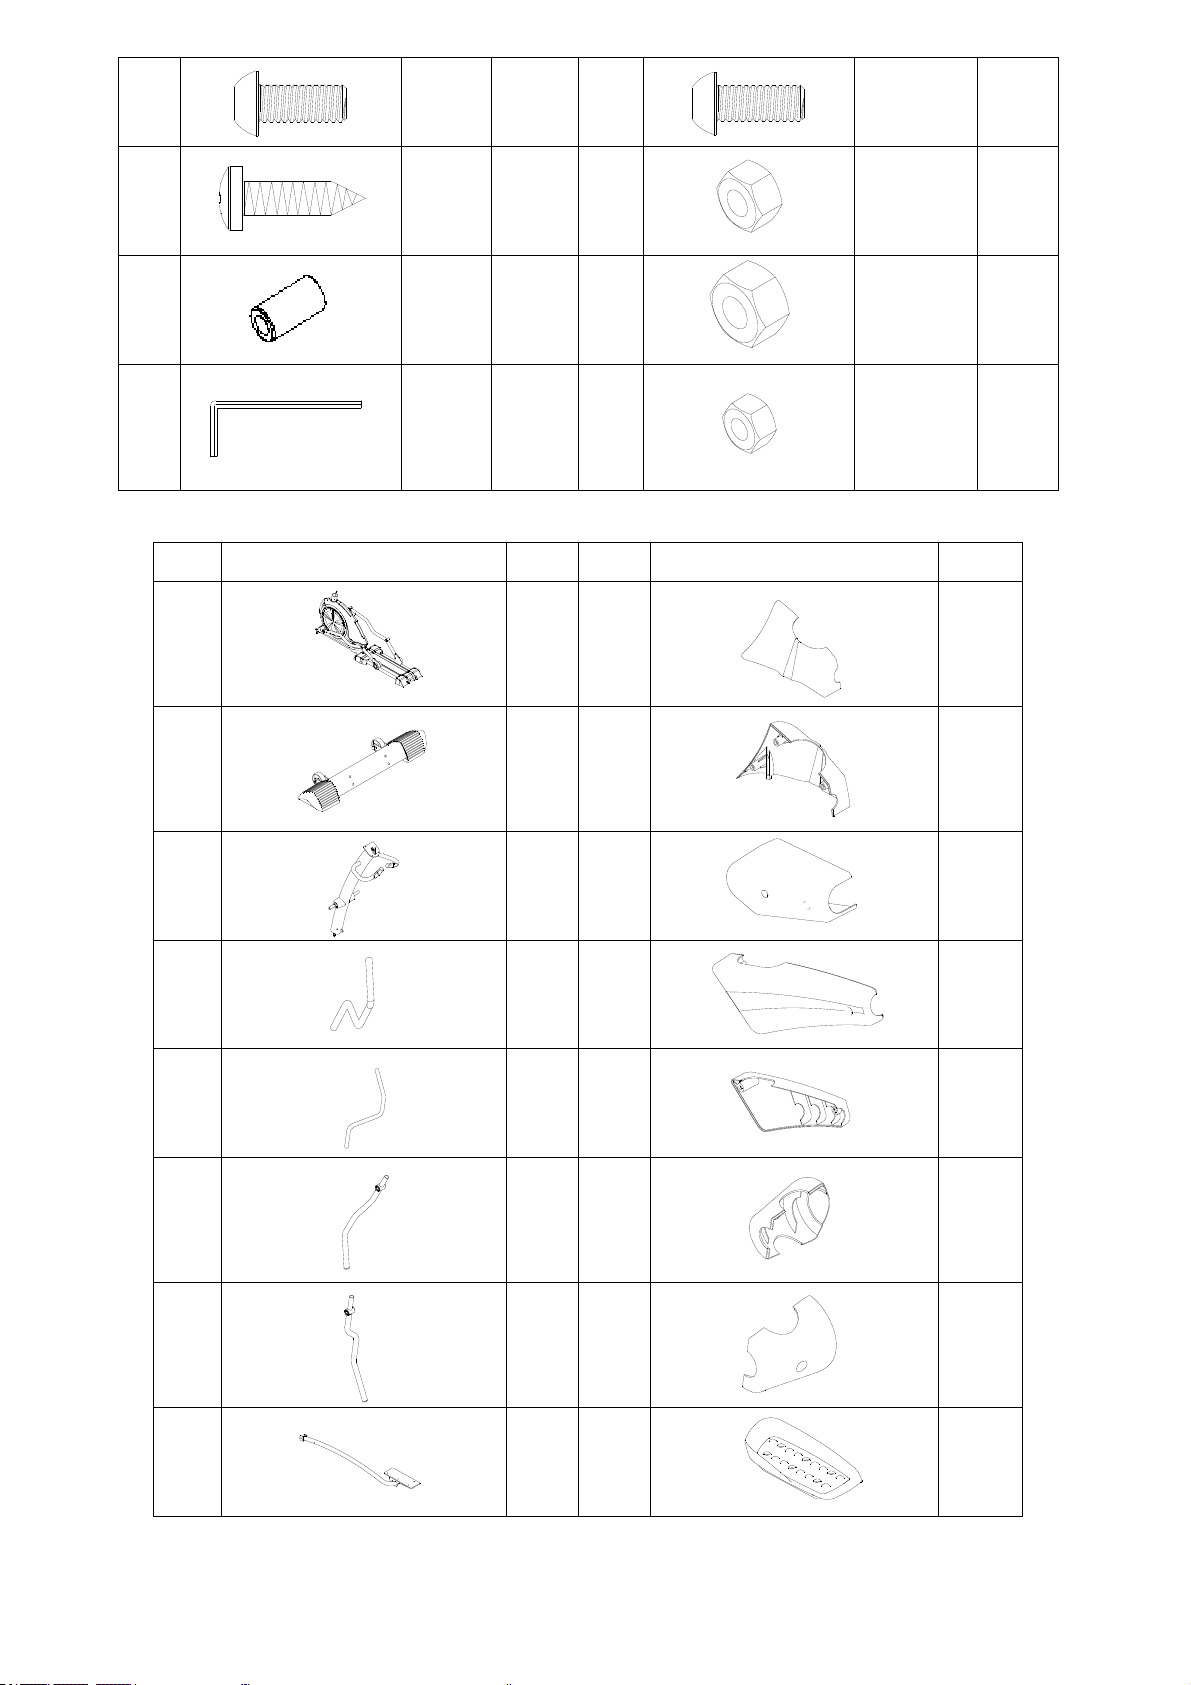
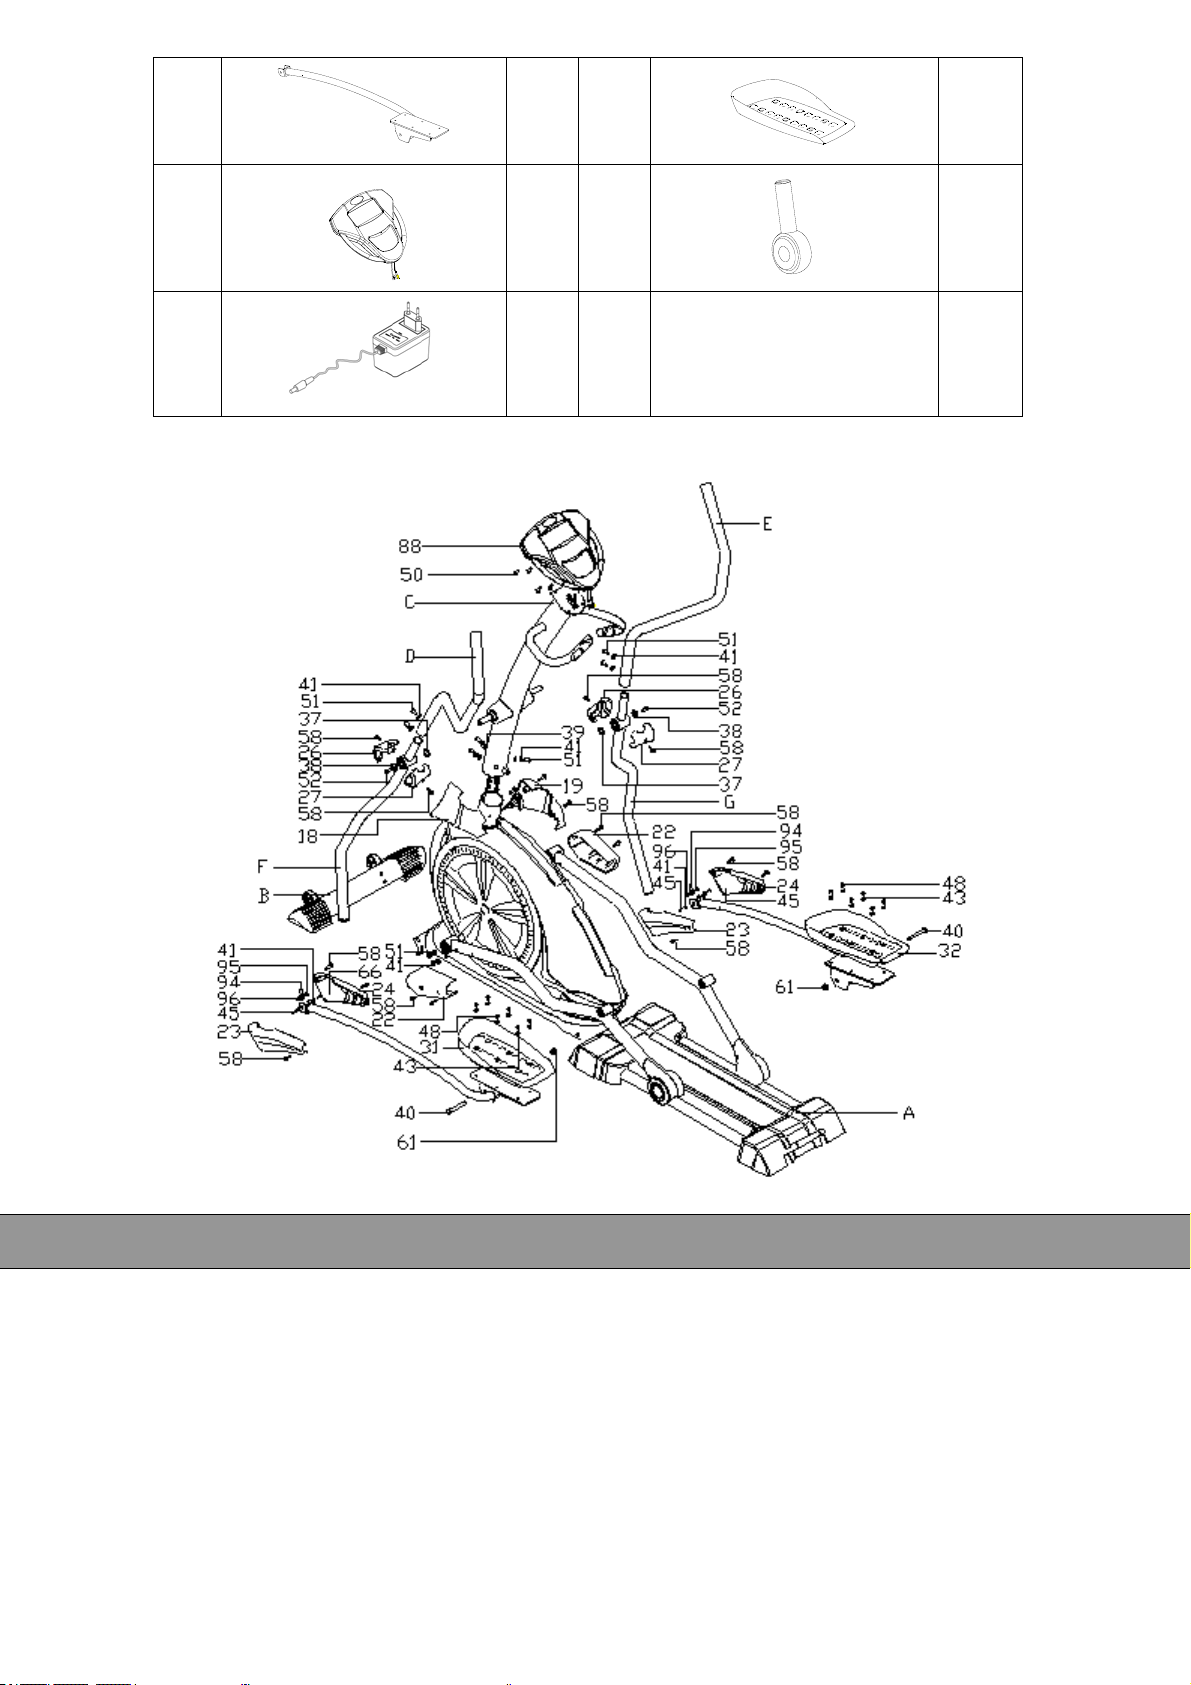
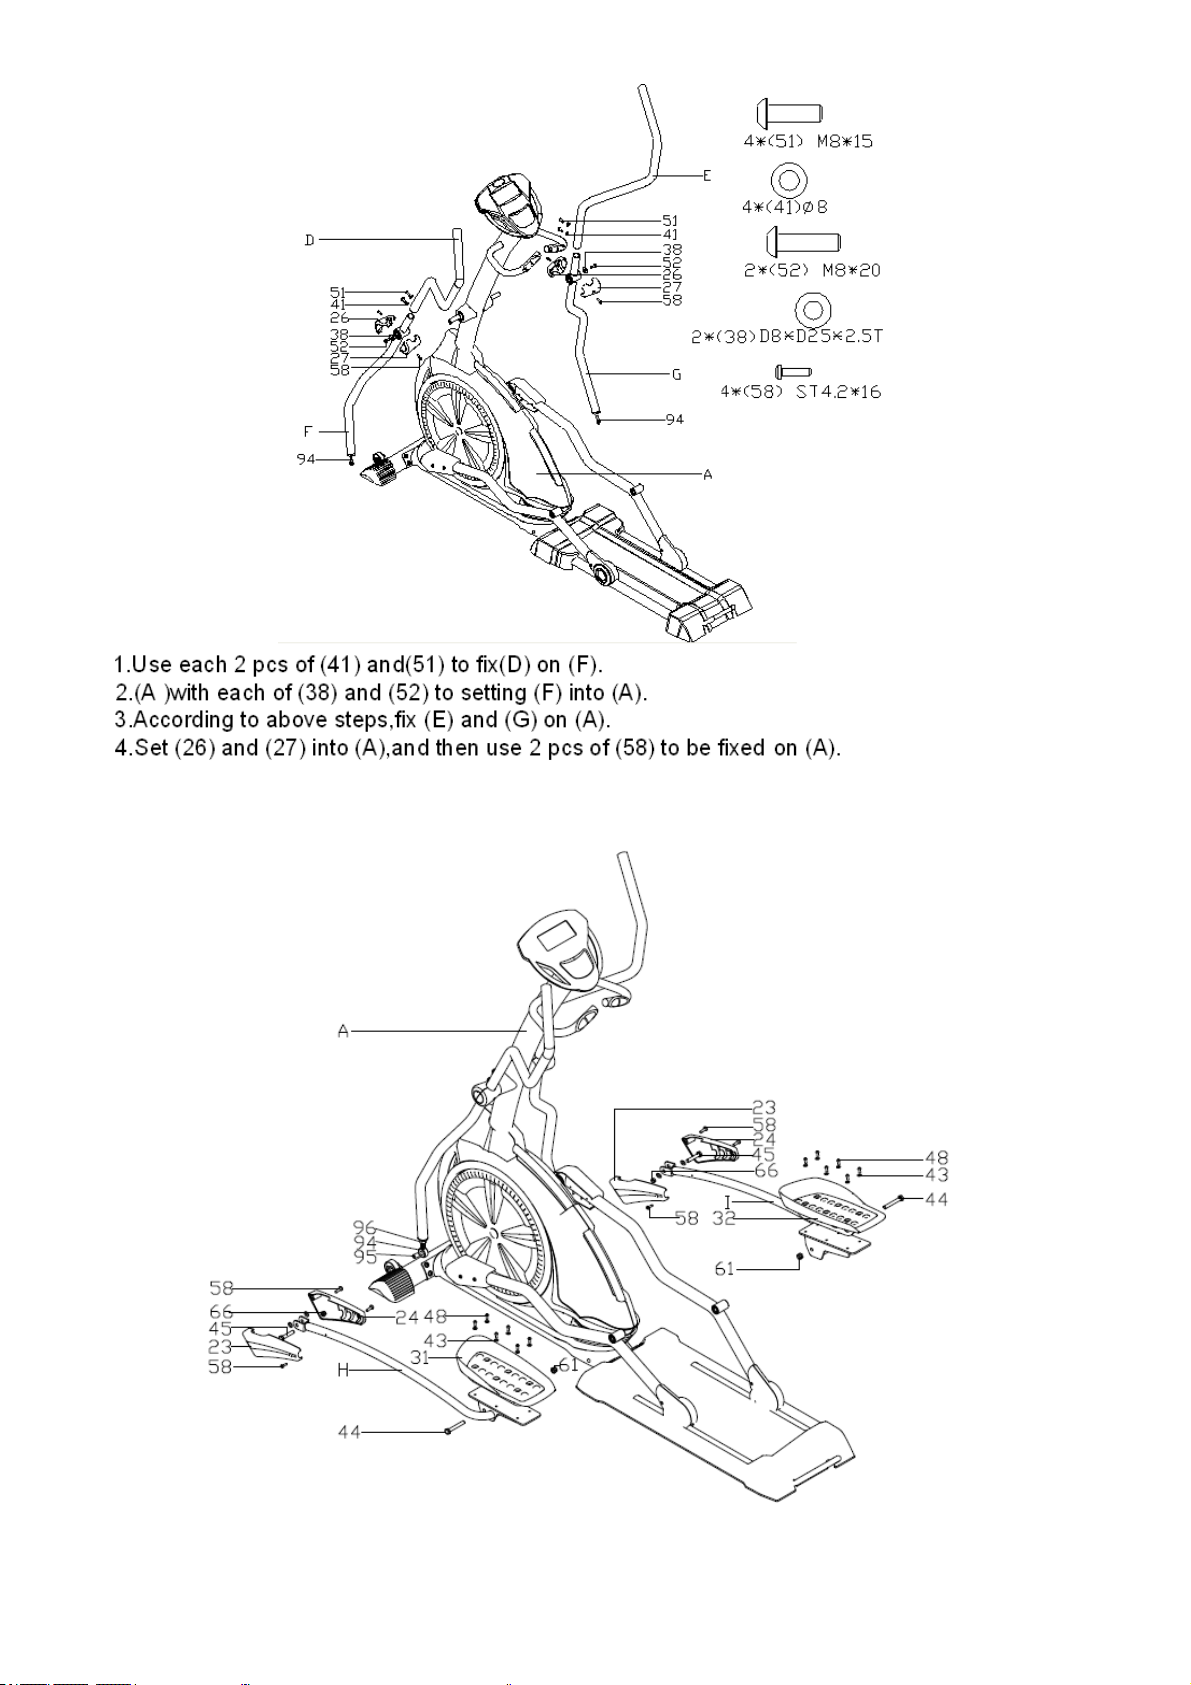
1.Assembly Instructions
Before assembling or using this elliptical, please read the following instructions carefully. They
contain important information for use and maintenance of the equipment as well as for your
personal safety. Keep these instructions in a safe place for maintenance purposes or for