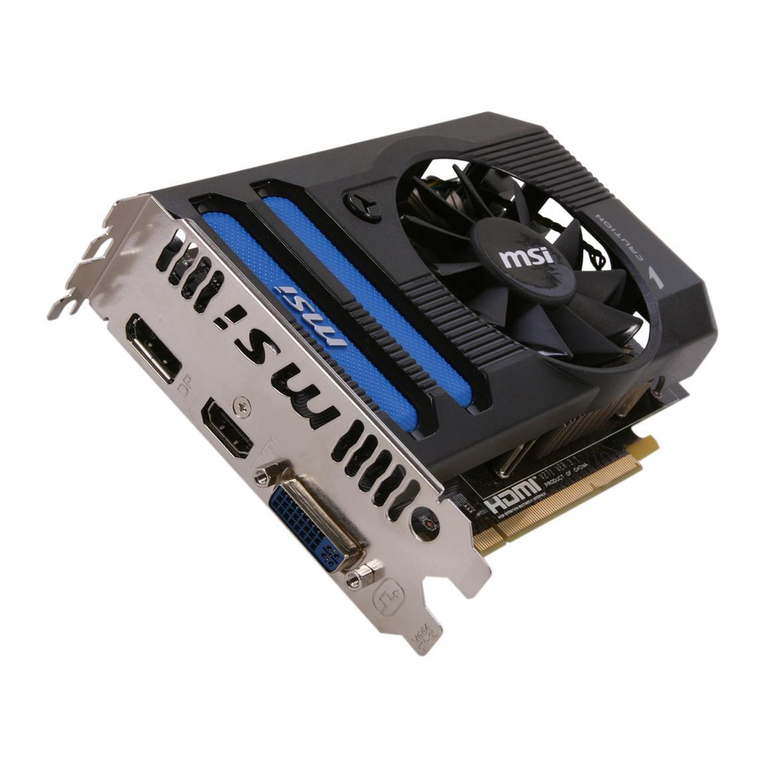
Orchid Fahrenheit ProVideo 64 User manual

Fahrenheit ProVideo 64
User's Manual
ORCHID

Fahrenheit ProVideo 64 User's Manual
2
1995, Orchid Technology. This manual is copyrighted. All rights reserved. This
document may not, in whole or part, be copied, reproduced, reduced or translated
byanymeans,eithermechanicalorelectronic,withoutpriorconsentinwritingfrom
Orchid Technology, Incorporated.
Fahrenheit ProVideo 64 is a trademark of Orchid Technology. All other products
mentioned in this manual are trademarks of their respective manufacturers.
Orchid Technology
45365 Northport Loop West
Fremont, CA 94538-9973

Fahrenheit ProVideo 64 User's Manual
TABLE OF CONTENTS
Introduction 4
About This Manual 5
SECTION 1 - HARDWARE 9
Installing Fahrenheit ProVideo 64 7
Hardware Installation 7
Fig. 1.1: Fahrenheit ProVideo 64-PCI Diagram 8
Fig. 1.2: Fahrenheit ProVideo 64-VLB Diagram 9
Adding Memory 10
SECTION 2 - SOFTWARE 11
Software Overview 11
Software Installation 11
Fig. 2.1: Main Menu Screen 11
Network Considerations 12
Windows Utilities 13
Orchid Control Panel 13
Fig. 2.2: Orchid Control Panel Menu 13
Display Setup 13
Fig. 2.3: Display Setup Screen 14
Virtual Desktop Feature 14
Fig. 2.4: Virtual Desktop Screen 15
Switch-on-the-Fly Magnify Feature 16
Fig.2.5:Switch-on-the-FlyMagnify Screen 16
Monitor Setup 17
Fig. 2.6: Monitor Setup Menu 17
1

Fahrenheit ProVideo 64 User's Manual
2
Power Management 17
Fig. 2.7: Power Management Menu 18
Fig. 2.8: Screen Saver Menu 18
Display Centering 19
Fig. 2.9: Centering Menu 19
System Information 19
Fig. 2.10: System Information Menu 20
DOS Utility 21
MONSET Monitor Setup 21
Fig. 2.11: MONSET Main Menu 21
Your Monitor 22
Testing Your Selection 22
APPENDIX A - TECHNICAL HELP 23
CompuServe 23
Troubleshooting Fahrenheit ProVideo 64 23
Technical Specifications 28
Memory Address Setting 30
VESA Support 30
Resolutions and Refresh Rates 31
Table A.1: IBM VGA Graphics Modes 31
Table A.2: Video Text Modes 31
Feature Connector Pin-Outs 32
Table A.3: VESA Feature Connector Pin-outs 32
VAFC Feature Connector Pin-Outs 32
VGA Pin-Out Specifications 33
Fig. A.1: Fahrenheit ProVideo 64 15-pin Connector 33
APPENDIX B - POWER MANAGEMENT 35
Power Management Feature 35

Fahrenheit ProVideo 64 User's Manual
INTRODUCTION
FahrenheitProVideo64™ isa64-bitgraphicsaccelerator
with digital video scaling and acceleration,all on one card!
The merging of graphics and video acceleration provides
smoothdisplayoffull-screenimages,digitalmoviefilesor
digital moving images. You can complement your high-
speed graphics with high-fidelity audio by adding an
Orchid sound card to your system.
Withupto 4MBofVRAMmemory, FahrenheitProVideo
supports 386, 486, VL-Bus, PCI and Pentium systems.
Operating at resolutions up to 1600x1200 and refresh
ratesupto120Hz,FahrenheitProVideo64providestrue
high resolution graphics and full VESA compliance.
The video acceleration feature of Fahrenheit ProVideo
64 can perform horizontal and vertical digital video
scaling, colorspaceconversionanddithering.Fahrenheit
ProVideo 64 also features the Xing Software MPEG
codec for full-screen, full-motion playback of MPEG
digital video.
The Fahrenheit ProVideo 64 uses your computer's CPU
for MPEG decoding. MPEG playback performance is
directly related to processor speed, the current screen
resolution and color depth. The MPEG decoding soft-
warecanbeusedinallresolutionsexcept16colormodes
and 1600x1200 resolutions.
Othersoftware enhancementsinclude Orchid’scustom-
izedWindowsHyperdriver thatincorporates videoscal-
ing,SuperZoom™,VirtualDesktopandSwitch-on-the-fly
Magnify. The Hyperdriver and SuperZoom features are
always active while in Windows, providing transparent
system and video acceleration. You can also save energy
withyourmonitorbyusingtheGreenPCPowerManage-
ment utility.
Thank you for purchasing Fahrenheit ProVideo 64. Care
has been taken to ensure that it will provide you with
years of trouble-free operation. We believe you will be
pleased with your purchase.
4

Fahrenheit ProVideo 64 User's Manual
ABOUT THIS MANUAL
This manual presumes that you are already familiar with
your IBM PC compatible computer. While Fahrenheit
ProVideo 64 has been designed to be easy to install, we
recommend that you refer to your computer’s reference
manualwhenterminologyor installationsteps areunfamil-
iartoyou.Eachsectionisdivided intoshort, easyto follow
steps, to help you understand the installation and function
of Fahrenheit ProVideo 64.
Section 1: Hardware Installation
Whether you are a beginner or an experienced user, this
section will give you important information on the proper
installation of Fahrenheit ProVideo 64.
Section 2: Software Installation
Here you will be given the information needed to install
device drivers and utilities.
Appendix A: Technical Help and Information
If you are experiencing installation difficulties or require
troubleshootinginformation,thisappendixgivesyoucheck-
points to look at to ensure that your Fahrenheit ProVideo
64 is operating properly. The technical specifications are
also included.
Appendix B: Power Management
Appendix B provides details on the VESA DPMS Power
Management technology.
Appendix C: Digital Video Scaling
This appendix gives you information on the digital video
scaling feature of Fahrenheit ProVideo 64.
Appendix D: MPEG Video
Here you are given information on the playback of MPEG
digital video files.
5

Fahrenheit ProVideo 64 User's Manual
This manual will familiarize you with the features, installation
and use of your Fahrenheit ProVideo 64. There are several
symbols and conventions used throughout this manual which
will help to draw your attention to a feature or to focus on
important information:
WhenyouseetheMagnifyingGlass,itmeans
thetextisreferringtosomethingyoushould
take a closer look at before proceeding
further.
WhenyouseetheExclamationMark,itgives
important information on avoiding damage
to property.
Common Names
AVI Audio Video/Interleaved
CODEC Compression/Decompression Algorithm
DCI Display Control Interface
DPMS Display Power Management Signaling
MPEG Motion Picture Experts Group
PCI Peripheral Component Interconnect
VAFC VESA Advanced Feature Connector
VESA Video Electronics Standards Association
VFC VESA Feature Connector
VGA Video Graphics Array
VL-Bus VESA Local Bus
VRAM Video Random Access Memory
6

Fahrenheit ProVideo 64 User's Manual
1
Section INSTALLING FAHRENHEIT PROVIDEO 64
Installationof Orchid'sFahrenheit ProVideo64 issimpli-
fied by its innovative design, requiring no jumpers or
switchestoset.YoucanupgradeFahrenheitProVideo64
from2MBto4MBofmemory.Ifyouwanttoaddmemory
now or later, see "Adding Memory" in this section.
Follow the simple installation steps below to install your
Fahrenheit ProVideo 64 card.
Hardware Installation
1. Turnoffthepowertoyourcomputeranddisconnect
all power cords and cables from the computer.
2. Remove the screws and slide the cover off.
3. Select an expansion slot for Fahrenheit ProVideo 64.
Dependingonwhatcardyouhave,selectaPCIslotforthe
PCI version, or a VL-Bus slot for the VLB version.
4. Removetherearslotcoverbracketifitispresentand
keep the screw for future use.
5. Carefully hold Fahrenheit ProVideo 64 by the top
edgesandloweritintoitsexpansionslot.Ensurethat
Fahrenheit ProVideo 64 seats firmly into the slot.
6. Secureit inplacebyfasteningitsmetalbracketto the
computer backplane.
7. Reconnect previously removed cables and power
cords and replace the cover of the computer.
8. Connect your monitor cable to the 15-pin monitor
connector on the Fahrenheit ProVideo 64 (see Fig-
ure 1.1).
The hardware installation is complete.
7
Forpin-out
information
onthe15-pin
VGA
connector,
see
AppendixA.
STATIC!
Before
handlingthe
Fahrenheit
ProVideo64,
beproperly
groundedby
touchingthe
powersupply
housing,or
youmay
want to buy a
Groundstrap
fromyour
local
computer
store.
Section 1: Hardware

Fahrenheit ProVideo 64 User's Manual
Section 1: Hardware
8
VAFCFeature
Connector 8-bitFeature
Connector
15-pinVGA
Connector
Figure1.1:FahrenheitProVideo64PCIDiagram
BIOS

Fahrenheit ProVideo 64 User's Manual 9
Figure1.2:FahrenheitProVideo64VLBDiagram
8-bitFeature
Connector
VAFCFeature
Connector
Orchid Technology (c) 1994 Fahrenheit Pro64-VLB
BIOS
15-pinVGA
Connector
Section 1: Hardware

Fahrenheit ProVideo 64 User's Manual
Section 1: Hardware
10
Adding Memory
The Fahrenheit ProVideo 64 supports up to 4MB of
VRAM memory. VRAM memory ensures higher color
depths and high refresh rates without sacrificing speed.
The 2MB version of Fahrenheit ProVideo 64 is easily
upgradeable to 4MB of VRAM memory. Install the new
memory chips into the available memory sockets. The
additional memory is automatically detected and must
meet the following specifications:
Fahrenheit ProVideo 64
• 256K x 8 VRAM
• Recommended memory:
Samsung KM428C256J-7
• Operate at 70 nanoseconds access time or faster.
NOTE: The access time is indicated on the chip as
follows:
-7 = 70 nanoseconds access time

Fahrenheit ProVideo 64 User's Manual
SOFTWARE OVERVIEW
Fahrenheit ProVideo 64 comes with software device
drivers for popular software applications and a compre-
hensive range of software enhancements. The Fahren-
heit ProVideo 64 provides register-level VGA mode
compatibility.Software programscanbeoperatedin this
mode using drivers supplied by the software manufac-
turer. The high resolution drivers that come with Fahr-
enheit ProVideo 64 are:
Windows 3.11 Windows for Workgroups
AutoCAD WordPerfect
Microstation 3D Studio
Other drivers are available through Orchid Technical
Support, or may be downloaded from the Orchid Bulle-
tin Board System or CompuServe.
Software Installation
You can automatically install the Fahrenheit software
drivers and utilities to your hard drive from the DOS
command line. Follow the steps below:
1. Insertthe FahrenheitProVideo 64software diskinto
your floppy drive and type:
A:\INSTALL
The following menu appears:
2
Section
11
Some
software
programs
mayalready
include
software
drivers for
Fahrenheit
ProVideo64.
Checkwith
themanufac-
turerfor
verification.
Section 2: Software
Figure 2.1: MainMenuScreen
Allreferences
toWindows
applytoboth
Windows
3.11and
Windowsfor
Workgroups.

Fahrenheit ProVideo 64 User's Manual
2. Select your option and proceed through the installa-
tion as prompted by the program.
3. Once you return to the main menu, you can make
another selection or quit the installation program.
The Fahrenheit ProVideo 64 software is now installed.
Once you launch Windows, the Fahrenheit Hyperdriver
Control Panel icon is installed in the Orchid program
group.
Network Considerations
The installation program offers standard and network
installationoptionsforWindowsgraphicsdrivers. When
using Windows in a Novell (or compatible) network,
select the Network Server Installation option.
The installer will ask for a directory name to install the
drivers to. You must install the Fahrenheit ProVideo 64
Windows drivers to the shared Windows directory on
thenetworkserver.Oncethedriversareinstalledonthe
networkserver,theOrchidiconappearsintheWindows
Control Panel on each workstation, for individual driver
customization.
Section 2: Software
12
Theinstaller
musthave
privilegesto
adddrivers to
theshared
Windows
subdirectory.
Checkwith
your System
Administrator.

Fahrenheit ProVideo 64 User's Manual
WINDOWS UTILITIES
Orchid Control Panel
Thismenuiseasytouse andallowsyoutoconfigureyour
Windows video display driver, configure your monitor,
enable the power management feature and center the
display. The Orchid Control Panel can be accessed from
the Orchid program group or the Windows Control
Panel.
1. Double-clickon theFahrenheit HyperdriverControl
Panel icon and the following menu appears:
2. Make your desired selections. Use this utility for any
futurechangestotheFahrenheitProVideo64configu-
ration.
Display Setup
Use this utility to select the resolution, text font size,
colors for your display and to enable or disable the 8-bit
featureconnector fordigitalvideo. Whencertain combi-
nations of resolutions and colors are chosen, the menu
displaystheVirtualDesktoporSwitch on-the-flyMagnify
Section 2: Software
13
Figure 2.2: Orchid ControlPanelMenu

Fahrenheit ProVideo 64 User's Manual
features (see the following sections for more information on
these features).
1. From the Orchid Control Panel click on Display
Setup. The following screen appears:
2. Make your desired selections and click on the Save
button to store your new values.
Virtual Desktop Feature
Youcanuse theVirtualdesktopfeature tocreate alarger
desktop workspace. With Virtual Screen, your mouse
movement automatically pans the desktop to give you
access to any part of your document or window without
resizing or using scroll bars.
It's an ideal solution for spreadsheet or desktop applica-
tions.Alarge areaof displaycanbepannedandviewed by
simplymovingyourmouse.VirtualDesktopdoublesyour
workspace by transforming your standard VGA monitor
into a virtual display with the maximum resolution avail-
able.
Virtual Desktop supports the 640x480x256 and
800x600x256 resolutions. When these are selected, the
Orchid Display Setup screen appears as follows:
Section 2: Software
14
The"Enable
8-bit
Feature
Connector"
selection
must be
disabled
(unchecked)
fordigital
videoand
scaling.
Figure 2.3: DisplaySetup Screen

Fahrenheit ProVideo 64 User's Manual
To enable Virtual Desktop:
1. ClickontheVirtualDesktopboxtoenabletheoption
(the selections are grayed out until you do so).
2. Choose a Pan Lock (Hot-Key) combination from the
pull-down menu to lock the display (prevent it from
moving when your mouse reaches the edge).
3. Choose a Desktop Size from the pull-down menu.
4. Aftermaking yourselections clickon theSave button
to store your new values.
Switch-on-the-fly Magnify Feature
Switch-on-the-fly Magnify can enlarge a portion of your
document to its maximum size. This is ideal when you
need a closer view of your screen. It supports the
1024x768x256 resolution. When this resolution is se-
lected, the Orchid Display Setup screen appears as
follows:
Section 2: Software
15
Figure 2.4: VirtualDesktop Screen

Fahrenheit ProVideo 64 User's Manual
You can also configure a Hot-Key sequence to activate
the following options:
Pan Lock. Use the Pan Lock command to turn off
panning, which prevents the Window from moving even
if you move your mouse. You can unlock the Window by
using the Hot-Key combination.
Zoom In. Use the Zoom In command to magnify a
portion of your document.
Zoom Out. Use the Zoom Out command to see all of
your document at one time.
To enable Switch-on-the-fly Magnify:
1. Click on the Switch-on-the-fly Magnify box to enable
theoption(theselections aregrayedout untilyoudo so).
2. Choose a Hot-Key combination from the pull-down
menus for the Pan Lock, Zoom In and Zoom Out
options.
3. Aftermakingyourselections,clickontheSavebutton
to store your new values.
Section 2: Software
16
Figure2.5: Switch-on-the-FlyMagnifyScreen

Fahrenheit ProVideo 64 User's Manual
Monitor Setup
UsetheMonitor Setuputility
to select the display param-
eters for your monitor. A list of video resolutions are
displayed. The vertical refresh rates available are select-
able from the drop-down menu of each resolution.
Make your monitor selection simply by clicking on the
drop down list, or by selecting the Custom option and
insertingyourownvalues.Ifyourdisplayappearsdistorted,
it is likely that the values you selected are inappropriate for
your monitor. Select other values.
1. From the Orchid Control Panel click on
Monitor
Setup
. The following screen appears:
2. Make your desired selections and click on the Save
button to store your new values.
Power Management
Use this utility for power savings on your Green PC
monitor while your monitor is inactive. When you use
this utility with a Green PC monitor or other type of
monitor, the screen saver will appear as a blank screen.
You can access the Power Management utility from the
Orchid Control Panel or from the Windows Control
Panel Desktop utility.
Section 2: Software
To correct a
distorted
display,exit
Windowsto
the DOS
promptand
runthe
MONSET
utility
programto
resetyour
values.
WARNING!
Selectingthe
incorrect
valuesmay
damageyour
monitor.
Consultyour
monitor's
reference
guideforthe
vertical
refreshrates
available.
Formore
information
onthePower
Management
feature,refer
toAppendix
B.
17
Figure2.6: MonitorSetupMenu

Fahrenheit ProVideo 64 User's Manual
Section 2: Software
18
To configure Power Management:
1. From the Orchid Control Panel click on Power
Management. The following menu appears:
2. From this menu you can configure your power man-
agement settings and test the settings selected. Click
on Configure and the following screen appears:
3. Click on the Screen Saver box to enable the option
(the selections are grayed out until you do so).
4. SetdelaysforthedifferentPowerManagementmodes.
Selectthedelaysbyclickingonthearrowstoincrease
or decrease the number.
5. Test the delays you set for each mode.
6. Ifyou desirea passwordforthe screensaver, clickon
the Password Protected box.
7. ClickonSetPasswordandenteryourpassword.Click
on OK to save the settings.
Figure2.7:PowerManagementMenu
Figure 2.8: ScreenSaverMenu
Makesure
yourmonitor
supportsthe
GreenPC
standard
before
selectingthe
options.
Consultyour
monitor's
reference
guideor
monitor
manufac-
turer.
Table of contents
Other Orchid Video Card manuals
Popular Video Card manuals by other brands

ATI Technologies
ATI Technologies X3-256 - 100-505096 FireGL 256MB AGP 4x/8x Dual DVI Graphics... user guide

3Dlabs
3Dlabs Wildcat II 5000 user guide

Gigabyte
Gigabyte GV-R92128TE user manual

NEC
NEC MultiSync P521 Specifications

VideoLogic
VideoLogic Proteus-V user manual

AMD
AMD Radeon RX 6000 Series Quick setup guide