ENGLISH
INSTRUCTION MANUAL
INTRODUCTION
- Thank you for your purchase of this Travel Barometer.
- Your Travel Barometer is an example of superior design and
craftsmanship.
- In order to optimize its function, be sure to read this manual carefully
and keep it for future reference.
FEATURES
- LCDdigitalbarometerwithweatherforecasticonsshowSunny,Slightly
Cloudy, Cloudy, Rainy or Stormy
- Barometric pressure trend display
- Built-in storm weather warning with audible and visual alarm
- Displays indoor temperature
- Maximum and minimum temperature memory
- Clockdisplay shows thehour and minute: Alternating calendardisplay,
shows the month and date
- Dailyalarm
- User selectable 12/24 hour time format
- Strong back light
- Built-in low battery indicator
- Water resist case deisgn
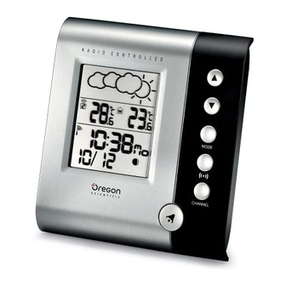
DESCRIPTION OF PARTS
. LCD DISPLAY
. ALARMBUTTON
. MODE BUTTON
. MEMORY BUTTON
.LIGHT/UP BUTTON
. VENTILATION
. BATTERY DOOR
[SEE FIG. 1]
. RESET BUTTON
. WALL MOUNT BRACKET
. HANGER HOLE
[SEE FIG. 2]
INSTALLING AND REPLACING BATTERIES
TheTravel Barometer uses two CR2032Lithium batteries andit is shipped
withthesebatteriesinstalled. To activatethe unit,you mustfirst removethe
protectivebattery tabs whichkeepthe batteries freshand ready foruseafter
shipment. You have to use a screw driver to remove the 4 back screws to
pull up the battery cover to expose the batteries. Remove the small plastic
tab and the Travel Barometer begins to work.
REPLACE EXHAUST BATTERIES
If the ‘ BATT ’ indicator appears, removes the exhausted batteries and
follow below steps to replace the batteries:
1. Onthebackofthe unit, use a screw drivertoremovethefourbackscrews
and then lift up the battery cover.
2. Insert the batteries as indicated by the polarity symbols ( + and - )
marked inside the battery compartment.
3. Replace the battery cover and fasten the four screws.
[SEE FIG. 2]
Note:
After replacing the batteries, the whole display will be turned on for about
3 seconds and then show the following:
- Indoor temperature shows the current measurement
- Weatherforecast shows slightlycloudy(a sun showswiththe cloud
indicator )
- Clock shows 12:00 (AM).
TheTravelBarometer takes about24hours to storethebarometric pressure
data. Until that time has elapsed, the weather forecast symbols may not
reflect actual weather forecast for your area.
DISPLAY AND FUNCTIONS
. CLOCK/ALARM OR CALENDAR DISPLAY
. WEATHER FORECAST INDICATOR
. INDOOR TEMPERATURE
[SEE FIG. 3]
GENERAL OPERATION
The display on your Travel Barometer has several functions, other than
thosefirst displayed when the unitis turned on.The temperature area of the
screen has additional memory displays for the indoor temperatures. The
clockdisplay,inadditiontodisplayingthecurrenttime, also acts as the alarm
andcalendar display. You can access the other functions by pressing
the [ MODE ] or the [ MEMORY ] button.
Press the []button once for light-up the display for 3 seconds, so
for you to see the barometer in the dark.
HOW TO VIEW THE TEMPERATURE MEMORY
Pressthe[MEMORY] button once. The temperature displaywillshowthe
maximumtemperature.
(Thisreadingindicatesthemaximumtemperaturerecordedsince it was last
reset. ) Press [ MEMORY] button again and you’ll see the minimum
temperature. Pressing [MEMORY ] button a third time returns you to the
current temperature.
HOW TO CLEAR THE TEMPERATURE MEMORY
To clear temperature memory and begin recording new high and low
temperatures, press and hold the [MEMORY ]button forabout 2seconds
until the unit beeps once.
MAINTENANCE
The following suggestions will helpyou care for the Travel Barometer so
you can enjoy it for years.
1. Avoid dropping the Travel Barometer into water as it is designed
for weather proof.
2. Use and store the Travel Barometer only in normal temperature
environments. Temperature extremes can shorten the life of electronic
devices, damage batteries, and distort or melt plastic parts.
3. Handle the Travel Barometer gently and carefully. Dropping it can
damage circuit boards and cause the Barometer to work improperly.
4. Keep the Travel Barometer away from dust and dirt, which can
cause premature wear of parts.
5. Wipe the Travel Barometer with a damp cloth occasionally to keep
itlooking new.Do notuse harsh chemicals, cleaning solvents, or strong
detergents to clean the Barometer.
6. Useonlyfreshbatteriesof the required size andtype.Alwaysremoveold
or weak batteries. They can leak chemicals that can destroy electronic
circuits.
7. Modifying or tampering with the Travel Barometer internal com-
ponents can cause a malfunction and might invalidate its warranty.
SPECIFICATIONS
Operating temperature : 0°C to +50°C
( +32°F to + 122°F)
Temperature measuring range : 0°C to +50°C
( unit : Internal sensor ) ( +32°F to + 122°F )
Temperature display resolution : 0.1°C ( 0.2°F )
Temperature sampling cycle : 9 seconds
Pressure sampling cycle : 15 minutes
Clock accuracy : ± 0.5 secs per day
Power source : Two pieces
CR2032 Lithium Battery
Battery life : Approx. 1 Year
Dimension : 98 x 65 x 21mm
(H x W x D)
Weight : 100gms
(with batteries)
CAUTION
- The content of this manual is subjected to change without
further notice.
- Due to printing limination, the displays shown in this manual
may differ from the actual displays.
- Themanufacturer and itssuppliers heldno responsibility toyou
orany other person for any damages, expenses, lost profits,
or any other damages arise by using this Travel Barometer.
- The contents of this manual may not be reproduced without the
permit of the manufacturer.
Note:
If you are in MIN or MAX temperature display screens, and you do not
press any other button, the screen will return to the current temperature
readings after 20 seconds.
HOW TO VIEW THE ALARM TIME AND THE
CALENDAR
To view your alarm time press the [ ALARM ] button once. The alarm
indicator will appear with an alarm time. Press the [ ALARM ] button a
second time to return to the normal clock display.
To view the current date, press the [ MODE ] button once, the month and
the date will be displayed. Pressing [MODE ] button again will return you
to the normal clock display.
Note:
If you are in the calendar/alarm display, and you do not press any other
button, the screen will return to the normal clock display after 20 seconds.
HOW TO SET THE CLOCK AND THE CALENDAR
When you first start up your Travel Barometer ( or after you replace the
batteries or reset the unit ) use the following steps to set your clock and
calendar:
1. Press and hold the [ MODE ] buttoninthe currentTime Mode for about
2 seconds. The month digits will flash. Press the [ ] button to in-
crease the setting in 1 month increments until the desired month is dis-
played.
2. Once the month is correct, press [ MODE ] button again to display the
date digits. The date digits will be flashing. Use the [ ] button to
increase the date in 1 day increments until the desired day is played.
3. Once the dayis correct,press [ MODE ] button. You'll see12hr or24hr
flashing.Pressing the [ ] buttonwill toggle between the12 and 24 hour
settings.
4. Oncetheclock format is correct,press[MODE ]button.Thehourdigits
willbeflashing.Pressthe[ ]buttonagaintoincreasetheclockin1hour
increments until the desired hour is displayed.
5. Once the hour is correct, press [ Mode ] button again to create the
flashingminute digits. Pressing the[ ] button will increasethe minutes
one at a time, until the correct time is displayed.
6. Finally press the [ Mode ] button to confirm all the settings you
just entered. The unit will return to the clock display.
HOW TO SET THE DAILY ALARM
1. Press and hold the [ ALARM ] button in Alarm Time Mode for
about 2 seconds. The indicator and the hour digits will be
flashing. Press the [ ] button to increase the alarm time in 1 hour
increments, until the desired hour is displayed.
2. Press [ ALARM ] button again and the indicator and the minute
digitswill flash. Press the [ ]button to increase in 1minute increments
until the correct time is displayed.
3. Press [ALARM ]button a thirdtime and press the [ ]button totoggle
thealarm betweenACTIVATED ( displayed) and deactivated (
disappear ).
4. Press the [ALARM ]button again. The daily alarm is now set, and
your Travel Barometer will resume its normal time.
Note:
If you get interrupted at any point in the alarm setting sequence, the
clock will return to its normal time display, if no buttons are pressed
for 20 seconds.
HOW TO READ THE BAROMETIC PRESSURE
TREND
The Barometer gives you the pressure trend for the last hour, indi-
cated by the arrow displayed in the upper left corner of your display,
next to the weather icon. The weather will be improving if this trend
(arrow)is rising, orgetting worseif thetrend (arrow)is falling. Here's
what it can look like:
[SEE FIG. 4]
HOW TO READ THE ILLUSTRATED WEATHER
FORECAST SYMBOLS AND THE STORM ALARM
Your Travel Barometer automatically detects the barometric pressure
changes in your area. Based on this changing pressure, it displays an
illustrated weather symbol indicating the weather forecast. The displayed
weather marks are indicating a forecast 12 to 24 hours ahead, for a radius
of approximately 30-50km (20 to 30 miles).
If the Travel Barometer detects stormy conditions, the storm indicator
(lightningbolts)willflashandanalarmwillbeep. The alarm sound will stop
automaticallyafter 1minute toconserve power.If you’renot present when
these alarms begin, the audible beep will sound every 3 minutes as a
continued storm warning until the weather forecast improves.
To stop the sounding storm alarm, press any button. The storm icon will
continue to flash until the weather forecast improves.
[SEE FIG. 5]
IMPORTANT:
1. The accuracy of weather forecasting when using pressure trend alone is
about70 to 75percent and, therefore, we cannotheld the responsiblefor
any inconveniences caused by an inaccurate weather forecast.
2. The weather forecast symbols may not reflect the current weather con-
dition. The symbols are forecasting the future.
3. A ‘ Sunny‘ forecastcovering thenight-time reflects fine clear weather.
THE RESET BUTTON
If the unit does not operate properly, use a pointed object to push the
[ RESET ] button once, which is located on the battery compartment.
LOW BATTERY SIGNAL INDICATION
If the voltage of the batteries becomes low, the ‘ BATT ’ indicator will be
displayed. Please replace the batteries when the ‘ BATT ’ indicator is
displayed.
ELECTRONIC TRAVEL BAROMETER
WITH BACKLIGHT
WEATHER FORECAST INDICATION
AND TEMPERATURE READING
Model EB312E
FIG. 3
FIG. 1
FIG. 2
FIG. 5
FIG. 4
SLIGHTLY
CLOUDY RAINYCLOUDY STORMYSUNNY
FORECASTFORECAST
FORECASTFORECAST
FORECAST
LCDLCD
LCDLCD
LCD
DISPLAYS ONDISPLAYS ON
DISPLAYS ONDISPLAYS ON
DISPLAYS ON
THE UNITTHE UNIT
THE UNITTHE UNIT
THE UNIT
LCDLCD
LCDLCD
LCD
DISPLAYSDISPLAYS
DISPLAYSDISPLAYS
DISPLAYS
ON THEON THE
ON THEON THE
ON THE
UNITUNIT
UNITUNIT
UNIT
PRESSUREPRESSURE
PRESSUREPRESSURE
PRESSURE
TRENDTREND
TRENDTREND
TREND RISING STEADY FALLING
INSTALLATION ET REMPLACEMENTS DES PILES
Le barom tre de Voyage utilise deux piles au lithium CR2032 (fournies).
Pour activer l’unité, ôtez l’étiquette protégeant les piles.
Al’aided’untournevis, ôtezlesquatrevisfixantlecouvercleducompartiment
à piles. Retirez la protection en platique pour utiliser l’appareil.
Remplacer les piles usagées
Changezlespileslorsqu’apparaît lemessage‘BATT’puis suivez les étapes
suivantes:
1) A l’aide d’un tournevis, ôtez les quatre vis du fond puis soulevez le
couvercle du compartiment à piles.
2) Insérez les piles en respectant les polarités
3) Replacez le couvercle et resserrez les vis
(cf fig. 2)
Après avoir remplacer les piles, les indications suivantes apparaîtront à
l’écran pendant trois secondes:
- La température ambiante
- Prévision d’un temps nuageux
- Horloge indiquant 12:00
Il faut à peu près 24h au barom tre de Voyage pour stocker la pression
atmosphérique. Avant ce délai, les prévisions météorologiques risquent de
ne pas correspondre à la réalité.
FONCTIONS DÆAFFICHAGE
. Affichage Horloge/alarme ou calendrier
. Indicateur de prévisions météorologiques
. Température ambiante
(cf fig. 3)
OPERATIONS COURANTES
L’affichagecomprendplusieursfonctionsdifférentesdecellesapparaissant
lors de la mise en marche (modes température et horloge). Pour accéder à
ces fonctions, pressez les touches [MODE] ou [MEMOIRE].
L’écran restera éclairé trois secondes en enfonÛant les touches ...
CONSULTER LES ECARTS DE TEMPERATURES
Enfoncez une fois la touche [MEMORY] et la température maximale
(depuis la derni re remise à zéro de l’appareil) s’affichera. Appuyez une
nouvelle fois sur cette même touche et la température minimale apparaîtra.
Pour revenir à la tempéture ambiante, pressez la touche une trois me fois.
EFFACER LES TEMPERATURES EN MEMOIRE
Pourremplacerlestemp’raturesenm’moire par d’autres extrema, maintenez
latouche[MEMORY]enfonc’ependant quelquessecondesjusqu’àentendre
un bip sonore.
Remarque:
Sivous êtesen positiond’affichage de température maximale ou minimale
et en ne touchant à rien, la température ambiante s’affichera au bout de 20
secondes.
CONSULTER LÆHEURE ET LE CALENDRIER
Enfoncezunefoislatouche[ALARM] pourconnaîtrel’heureàlaquelle elle
se déclenchera. Pour retourner au menu initial, appuyez à nouveau.
Pouraccéderàladate,appuyez sur [MODE]. Lemoisetlejours’afficheront.
Pressez à nouveau [MODE] pour obtenir l’heure.
Remarque:
Sivousêtesenpositiond’affichagealarme/calendrier,ennetouchantàrien,
l’heure sera affichée au bout de 20 secondes.
COMMENT REGLER LE CALENDRIER ET
L’ALARME
Dèslamiseenmarchedevotrebarom tredeVoyage(ou apr sremplacement
des piles ou mise à zéro) suivez les étapes suivantes pour régler horloge et
calendrier:
1) Gardezenfoncée latouche [MODE] pendant 2 secondesen mode heure
courante.Lechiffredumoisclignotera.Enfoncezlatouche[ ]jusqu’au
moisdésiré.
2) Renouvelez l’opération pour sélectionner le jour à l’aide de la touche
[].
3) Confirmez le jour avec la touche [MODE]. 12/24h clignoteront.
Sélectionnez la position voulue à l’aide de la touche [ ].
4) Unefoisque le formatest correct, pressezla touche [MODE].Le chiffre
de l’heure va se mettre à clignoter. Appuyez sur la touche [ ] pour
obtenir l’heure désirée.
5) Unefois quel’heure est correcte,pressezla touche [MODE].Lechiffre
des minutes va se mettre à clignoter. Appuyez sur la touche [ ] pour
obtenir la minute désirée.
6) Appuyez une derni re fois sur la touche [MODE]pour confirmer toutes
les entrées. L’heure se réaffichera.
COMMENT REGLER L’ALARME JOURNALIERE
1) Maintenez enfoncée la touche [ALARM] EN MODE alarm time. Le
temoin ainsi que le chiffre de l’heure se mettront à clignoter.
Appuyez la touche [ ] pour obtenir l’heure désirée.
2) Renouvelezl’opération poursélectionner lesminutesde jour àl’aidede
la touche [ ].
3) Enfoncez la touche [ALARM] une troisiême fois puis [ ] pour activer
[] ou désactiver [ ].
4) Enfoncez à nouveau la touche [ALARM] pour confirmer. Votre
barom tre r’affichera l’heure.
Remarque: Si vous interrompez le réglage à un endroit ou à un autre,
l’horlogereprendrasonaffichagenormal siaucuneopération n’esteffectuée
pendant 20 secondes.
COMMENT LIRE LA PRESSION BAROMETRIQUE
Le barom trevous informe del’évolution de lapression atmosphérique des
derni res heures.Elle estindiquée par uneflèche situéeenhaut àgauche de
l’écran, près des symboles météo.
FRANÇAIS
GUIDE D’UTILISATION
INTRODUCTION
- Merci pour l’achat de ce barom tre de Voyage.
- Des efforts tout particulier en mati re de conception et de design ont été
apportés à ce barom tre de Voyage
- Afind’enaméliorer sonfonctionnement,assurez-vousdelireattentivement
ce guide à garder pour référence.
CARACTERISTIQUES
- Barom tre à affichage digital à cristaux liquides avec les indications:
ensoleillé/nuageux/couvert/pluvieux/orageux
- Affichage de la pression barométrique
- Avertisseur d’orage sonore et visuel
- Affichage de la température extérieure
- Mémoire des minima et maxima
- En mode horloge, affichage de l’heure et calendrier
- Alarme de jour
- Sélecteur 12/24h
- Indicateur de l’état des piles
- Design conçu pour résister à tous les temps
DESRIPTIONS DES ÉLÉMENTS
. Affichage digital à cristaux liquides
. Touche d’alarme
. Touche mode
. Touche mémoire
. Touche lumi re
. Ventilation
. Compartiment à piles
(cf figure 1)
. Touche de remise à zéro
. Sonde exérieure
. Support pour montage mural
(cf figure 2)
- Eingebaute Sturmvorwarnung mit hörbarem und sichtbarem Alarm
- Anzeige der Luftdrucktendenz
- Anzeige der Innentemperatur
- Speicherfür Maximal-und Minimaltemperatur
- Uhrzeitdisplay mit Anzeige von Stunde und Minute; wechselweise mit
Kalenderdisplay mit Anzeige von Monat und Tag
- TäglicherWecker
- Benutzer kann zwischen 12-Stunden-Format und 24-Stunden-Format
wählen
- Display-Beleuchtung
- Batterie-Anzeige
LAGE UND FUNKTION DER TEILE UND
BEDIENELEMENTE
. LCD-ANZEIGE
. WECKTASTE
. MODUSTASTE
. SPEICHERTASTE
. TASTE FÜR DISPLAY-BELEOCHTUNG
. SENSOR-ÖFFNUNG
. BATTERIE-ABDECKUNG
[SIEHE ABB. 1]
. RESET-TASTE (ZUR NEUEINSTELLUNG)
.WANDHALTERUNG
. AUFHÄNGELÖCHER
[SIEHE ABB. 2]
EINSETZEN UND AUSTAUSCHEN DER
BATTERIEN
Ihr Reisebarometer wird mit 2 Lithiumbatterien CR2032 betriebeü, die im
Lieferumfang enthalten sind. Zur Inbetriebnahme des Geräts mnssen Sie
zuerstdieBatterieschutzplättchenentfernen,die,garantierensollen,daßdie
BatterienbeiderAnlieferung unverbraucht undbetriebsbereitsind.Entfernen
Sie die 4 rückwärtigen Schrauben mit einem Schraubenzieher, und öffnen
Sie das Batteriefach, um Zugriff zu den Batterien zu haben. Entfernen Sie
das kleine Schutzplättchen, und das Reisebarometer kann in Betrieb
genommenwerden.
AUSTAUSCHEN VON VERBRAUCHTEN
BATTERIEN
Sobald die Anzeige ‘BATT’ aufscheint, nehmen Sie die verbrauchten
Batterien heraus, und befolgen die nachfolgend angeführten Schritte zum
Einsetzen und Austauschen der Batterien:
1. Ziehen Sie mit Hilfe eines Schraubenziehers die vier rückwärtigen
Schrauben heraus, und entfernen Sie dann die Batterieabdeckung.
2. SetzenSiedieBatteriengemäßderimBatteriefachangegebenen Polarität
(+ und -) ein.
3. Schließen Sie die Batterieabdeckung und ziehen Sie die vier Schrauben
an.
[SIEHE ABB. 2]
Anmerkung:
Nach dem Austauschen der Batterien leuchtet die Anzeige ungefähr drei
Sekunden lang auf und zeigt dann folgendes an:
- Aktuellen Stand der Innentemperatur.
- Wettervorhersageauf “leichtbewölkt”(Sonnemit angedeutetenWolken).
- Uhrzeit auf 00:00.
Das Reisebarometer benötigt ungefähr 24 Stunden zum Speichern der
Luftdruckdaten. Bis zum Ablauf dieser Zeitspanne ist es möglich, daß die
Symbole der Wettervorhersage nicht dem aktuellen Stand in Ihrer Gegend
entsprechen.
DISPLAY UND FUNKTIONEN
. ANZEIGE VON UHRZEIT/DATUM ODER WECKZEIT
. ANZEIGE FÜR WETTERVORHERSAGE
. INNENTEMPERATUR
[SIEHE ABB. 3]
GRUNDFUNKTIONEN
Das Display auf Ihrem Reisebarometer hat verschiedene Funktionen, die
vonjenenabweichen,welchebeimEinschaltendesGerätsaktiviertwerden.
DasTemperaturfeld auf dem Bildschirm hat zusätzliche Speicheranzeigen
für die Innentemperatur. Das Uhrzeitdisplay kann nicht nur die Uhrzeit,
sondern auch die Weckzeit und das Datum anzeigen. Diese zusätzlichen
Funktionen können durch das Drücken der Taste [MODE] oder
[MEMORY] aktiviert werden.
WennSie die Taste [ ] einmaldrücken, wird dasDisplay ungefähr
drei Sekunden lang beleuchtet, so daß Sie das Barometer auch in der
Dunkelheitablesen können.
SO PRÜFEN SIE DEN TEMPERATURSPEICHER
Drücken Sie einmal die Taste [MEMORY]. Auf der Temperaturanzeige
erscheint die Maximaltemperatur.
(Dieser Wert entspricht der Maximalmessung, wie sie bei der letzten
Neueinstellung verzeichnet wurde.) Beim erneuten Drücken der Taste
[MEMORY] können Sie die Minimaltemperatur ablesen. Wenn Sie die
Taste [MEMORY] ein drittes Mal drücken, erscheint wieder die
gegenwärtige Temperatur.
SO LÖSCHEN SIE DEN TEMPERATURSPEICHER
Wenn Sie den Temperaturspeicher löschen und neue hohe maximale und
minimale Temperaturwerte aufzeichnen wollen, drücken Sie die Taste
[MEMORY], und halten Sie diese zwei Sekunden lang gedrückt, bis Sie
einen Ton hören können.
Anmerkung:
Wenn auf dem Bildschirm die Minimal- oder Maximaltemperatur (MIN
DEUTSCH
BEDIENUNGSANLEITUNG
EINLEITUNG
- Vielen Dank für den Kauf dieses Reisebarometers.
- Ihr Reisebarometer ist ein Beispiel für überlegene Konstruktion und
vollendete Wertarbeit.
- Lesen Sie diese Anleitung sorgfältig durch, und bewahren Sie die
Anweisungen zum späteren Nachschlagen gut auf, damit Sie lange
ungetrübte Freude an Ihrem Gerät haben.
EIGENSCHAFTEN
- LCD-Digitalbarometer mit Symbolen für die Wettervorhersage, die
folgende Wetterzustände anzeigen: sonnig, leicht wolkig, wolkig,
regnerisch oder stürmisch
Letempss’améliorerasilafl cheestorientéeverslehautetréciproquement.
(cf fig. 4)
COMMENT LIRE LES SYMBOLES ILLUSTRES DE
PREVISION METEO ET ALARME ORAGES.
Votrebarom tre deVoyage détecteraautomatiquement leschangements de
pressionbarométriques dansl’endroit oùvous voussituez. Lesindications
météorologiques portent sur une prévision allant de 12 à 24 heures dans un
rayon de 30-50kms.
Sivotrebarom tre deVoyage détectedes conditionsorageuses,l’indicateur
d’orage s’affichera accompagné d’un bip sonore. L’alarme s’arrêtera
automatiquement au bout d’une minute et sans intervention de votre part
ellese déclenchera toutesles 3minutes jusqu’à ceque letemps s’améliore.
L’alarme s’arrêtera en pressant n’importe quel bouton. Le signal d’orage
clignotera jusqu’à ce que les conditions météo deviennent meilleures.
(cf fig 5)
IMPORTANT
1) La fiabilité en terme de mesure de la pression atmosphérique est de
l’ordre de 70 à 75 pour cent. Aussi, nous ne pouvons nous porter
responsables en cas de prévision incorrectes.
2) Les symboles météorologiques peuvent ne pas refléter les conditions
présentes car il s’agit bien de prévision pour les heures à venir.
3)Laprévisiond’untempsensoleillépendantlanuitindiqueuncieldégagé.
LA TOUCHE DE REMISE A ZERO
Si une fonction venait à ne pas se réaliser normalement, remettez à zéro
l’appareilen appuyantà l’aided’une pointe latouche [RESET] situéesur
le compartiment des piles.
INDICATEUR DE LÆETAT DES PILES
Lorsque le voltage des piles devient insuffisant, l’indicateur ‘BATT’
s’affichera nécessitant un remplacement rapide des piles.
ENTRETIEN
Les indications qui suivent vous aideront à profiter de votre barom tre de
Voyage pendant de nombreuses années.
1) Evitez de laisser tomber le barom tre de Voyage dans l’eau.
2) Evitezd’utiliser etde placervotre barom trede Voyageà destempératures
extrêmes qui pourraient raccourcir la durée de vie des composants,
endommager les piles, déformer ou faire fondre les pi ces plastiques.
3) Utilisez le barom tre de Voyage avec précaution. Une chute pourrait
endommager les circuits rendant impossible le fonctionnement de
l’appareil.
4) Gardez l’appareil éloigne de la poussi re et de la saleté.
5) Essuyezdetempsentempsl’appareilàl’aided’un chiffon sec et doux afin
de mieux préserver le barom tre de Voyage. Ne pas utiliser de produits
corrosifsetautressolvantspuissantspouvantfaire disparaître l’affichage.
6) Utiliser uniquement des piles neuves et adaptées. Otez les piles usagées
cardesfuitesoccasionnellespourraientdétruire les circuits électroniques.
7) Modifier ouremplacer lescomposants dubarom tre deVoyage peuvent
provoquer un malfonctionnement et annuler de surcroît la garantie.
CARACTERISTIQUES
Variation de températures : O°C à 50°C
Etendue de la mesure : O°C à 50°C
Précisiond’affichage : O.1°C
Intervalle de prise de température : 9 secondes
Intervalle pour la mesure de la pression : 15minutes
Précision de l’horloge : ± 0.5sec/jour
Alimentation : 2 piles au lithium CR 2032
Durée de vie des piles : environ un an.
Dimensions : 98 x 65 x 21mm (H x l x L)
Poids : 100g (avec piles)
PRECAUTIONS
- Le contenu de ce guide peut changer avec ou sans préavis
- Suite à des erreurs d’impression, il se peut que les disposition
présentées dans ce guide diff rent de la réalité.
- Lefabricantetsesfournisseurssedégagent de toute responsabilité
encasde dommages ou pertesoccasionnéslorsde l’utilisation de
l’appareil.
- Le contenu de ce manuel ne peut être reproduit sans l’accord du
fabricant.
