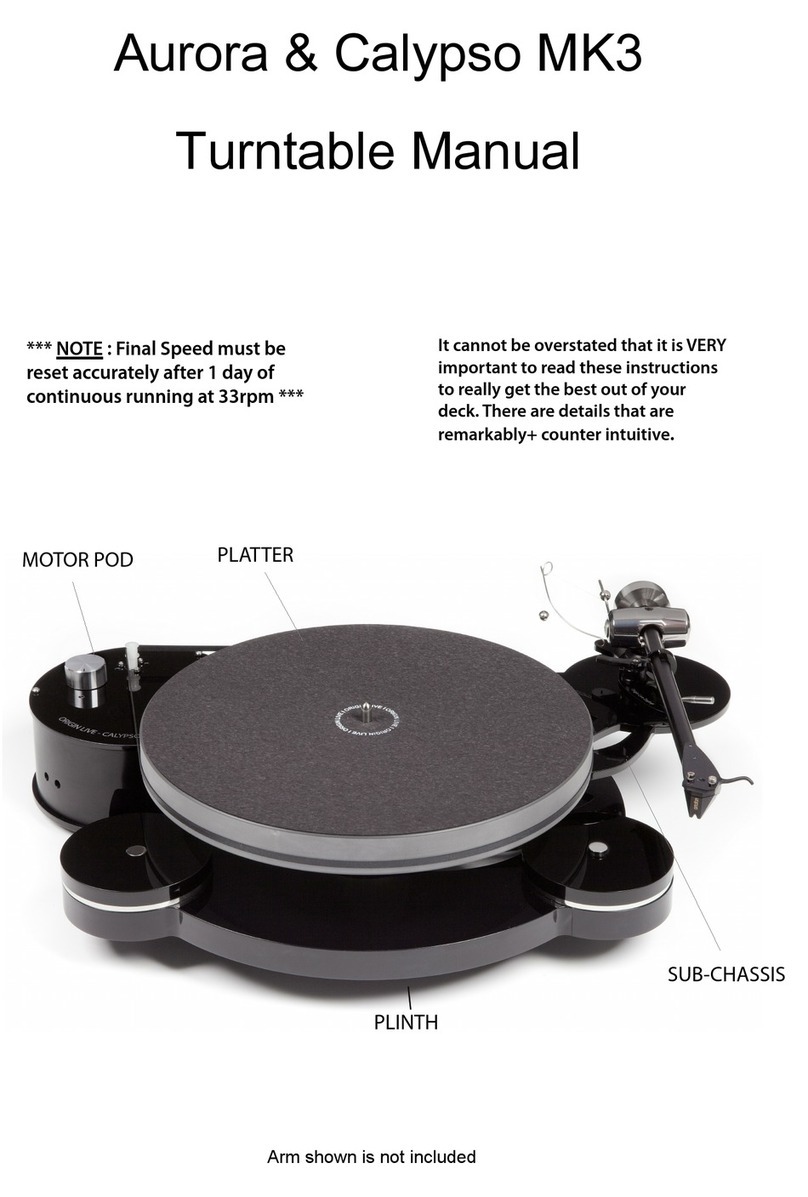
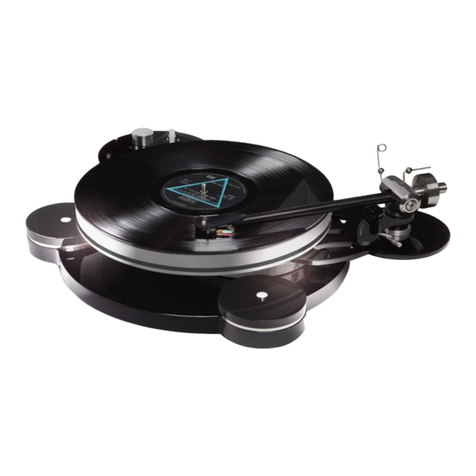
Origin live Turntable kit ALL VERSIONS User manual

BUILDING OR INSTALLING THE ORIGIN LIVE
TURNTABLE KITS –ALL VERSIONS
Instructions by Origin live ©
Turntable kit
Instructions

2
VIEW OF ULTRA KIT MINUS SUB-PLATTER AND PLATTER
VIEW OF ASSEMBLED ULTRA KIT FROM UNDERSIDE

3
Contents
CCOONNTTEENNTTSS33
List of Diagrams 4
IINNTTRROODDUUCCTTIIOONN((RREEAADDCCAARREEFFUULLLLYY))66
PPAARRTTSSLLIISSTT&&TTOOOOLLSSRREEQQUUIIRREEDD77
Parts supplied 7
Optional Parts 7
Tools you will need ideally 7
IINNSSTTAALLLLIINNGGTTHHEESSTTAANNDDAARRDDKKIITTOOFFPPAARRTTSS88
Introduction 8
Origin Live Standard Plinth 8
Custom Plinths 11
Sub-chassis design 11
Main Bearing attachment 12
Motor Attachment 13
Wiring13
UULLTTRRAAKKIITTTTUURRNNTTAABBLLEEAASSSSEEMMBBLLYY1144
Preparation Error! Bookmark not defined.
Plinth and lid assembly Error! Bookmark not defined.
Fit the rubber feet Error! Bookmark not defined.
Fit the Lid Error! Bookmark not defined.
Fit the switch and dc regulator board to the plinth. Error! Bookmark not defined.
Fit the 3 threaded support bolts Error! Bookmark not defined.
Install the sub-chassis Error! Bookmark not defined.
Fit Bearing house Error! Bookmark not defined.
Fit the motor Error! Bookmark not defined.
Install Sub-chassis & Fit springs Error! Bookmark not defined.
Connect the motor wires Error! Bookmark not defined.
Install the arm Error! Bookmark not defined.
If you do not have a VTA adjuster Error! Bookmark not defined.
If you have the Origin live threaded VTA adjuster (which fits all decks) Error! Bookmark not defined.
If you have the Origin Live VTA sliding adjuster Error! Bookmark not defined.
Fit the arm cable Error! Bookmark not defined.
Fit the cartridge Error! Bookmark not defined.
Install the Sub-platter & Platter Error! Bookmark not defined.
Troubleshooting Error! Bookmark not defined.
SSEETTUUPPOOFFMMOOTTOORRAANNDDPPOOWWEERRSSUUPPPPLLYYEERRRROORR!!BBOOOOKKMMAARRKKNNOOTT
DDEEFFIINNEEDD..
SSEETTUUPP&&MMAAIINNTTEENNAANNCCEEOOFFTTUURRNNTTAABBLLEEEERRRROORR!!BBOOOOKKMMAARRKKNNOOTT
DDEEFFIINNEEDD..

4
Set up Error! Bookmark not defined.
Notes & Maintenance Error! Bookmark not defined.
Notes Error! Bookmark not defined.
Maintenance Error! Bookmark not defined.
SSEETTUUPPOOFFTTOONNEEAARRMMSS2222
Final arm set up and notes 22
Fit the cartridge (if not fitted already) 22
Set tracking force & side force bias 22
Use of Stylus force guage 22
Set the VTA (vertical tracking adjustment) 22
Set the arm fastening tightness 23
Notes 23
HHII--FFIICCAARRTTIIDDGGEESS--SSEETTTTIINNGGUUPPPPRROOCCEEDDUURREESS2244
Introduction 24
General comments 24
Importance of cartridge set up 24
Levelness 24
Hi-Fi cartridges alignment 24
Hi-Fi cartridge aligning tools 24
Check hi-fi cartridge clip connections and mounting 24
Setting up hi-fi cartridges 25
Mounting 25
Tracking Force 25
Tangency Alignment 25
Azimuth(for experts only) 25
Vertical Tracking Angle (VTA) 26
Antiskate Force (pivoting arms only) 26
Fine Tuning 26
PPRROOPPEERRCCAARREEAANNDDMMAAIINNTTEENNAANNCCEEOOFFHHII--FFIICCAARRTTRRIIDDGGEESS&&RREECCOORRDDSS2277
Care of hi-fi cartridges 27
Record care and cleaning 27
LIST OF DIAGRAMS
View of Ultra Kit minus sub-platter and platter................................................................................................................2
View of assembled Ultra kit from underside.....................................................................................................................2
Cross section of suspended sub-chassis.............................................................................................................................6
Diagram of Plinth layout dimensions for non-suspended design(Origin Live Standard Plinth).................................9
Diagram of Plinth layout for suspended sub-chassis design..........................................................................................10
Diagram of free form plinth example...............................................................................................................................11
Diagram of Sub-chassis assembly ..................................................................................Error! Bookmark not defined.

5
Diagram of lid assembly and rubber feet ......................................................................Error! Bookmark not defined.
Top view of wiring layout & connections.....................................................................Error! Bookmark not defined.
Diagram of support bolts and spring arrangement......................................................Error! Bookmark not defined.
Diagram showing bearing house fastening arrangement.............................................Error! Bookmark not defined.
Diagram showing spring positions Error! Bookmark not defined.
Rear end view of counterweight 23

6
Introduction (read carefully)
Congratulations on choosing the Origin Live turntable kit. You now have the potential to build one of the finest
sounding turntables available at any price -not only will this kit provide an extraordinary level of performance but also
excellent reliability and low maintenance.
This manual covers the following options:
Installing the Standard kit of parts into an existing turntable plinth
Installing the Standard kit of parts into a custom turntable built to your own design.
Building the kit using an Origin live Standard plinth.
Building the Complete Ultra turntable kit -These instructions are included to show what is involved if you wish to
upgrade at a later stage –They are also included to serve as guidance for the assembly of a typical turntable.
To achieve the full level of performance it is critical that this instruction manual is followed and read fully. There are
aspects of this turntable kit which run contrary to what you may be expect so before altering anything it is important to
have fully read the manual or degradation will result. For example some people expect all bolts to be fully tightened but
testing has shown this to have a significant degrading effect in certain situations.
Building a turntable will be relatively easy for some and achallenge for others. If at first things appear difficult, give
yourself time to think clearly and you will invariably find ways of accomplishing the objective. Most of the kit does not
demand expertise –if you think anything is beyond your capability then you can either ask a friendly dealer to do the job
for a small fee or get a friend to do it.
These instructions are written to cater for everyone from beginners to experts in kit assembly and vinyl replay. Some
sections may therefore appear lengthy as they need to cater for all potential questions and levels of expertise. When
reading the instructions refer to the various diagrams for part names and clarity.
The complete turntable kits will take between 1 to 4 hours to assemble. The dc regulator electronics initially encounter
speed drift when first started and sowill need at least 4 hours to run in before the speed can be finally set with accuracy.
We wish you an enjoyable time not only in the building but most of all in the end result.
Cross section of suspended sub-chassis

7
Parts list & tools required
Parts supplied
Standard kit of parts
Platter & Sub-platter
Main bearing house bottom nut & ¾” UNF top nut + bearing house plate (fitted on complete standard kit)
Standard Motor & fitted short pulley -3 off M2 x 6mm motor screws in bag, 2mm A/F Allen key
Power supply 230 volt or 110 volt (delete one)
Standard DC regulator board / switch
Bearing house plate, rectangular motor plate, Oil, STANDARD BAG OF PARTS –Belt, 2 off cable clips, 10 off No6
x ¾” screws, 3 off no6 x ½”, 4 off M5 brass washers, Optional Parts
Complete Standard kit (added to kit of parts)
Standard Plinth, 3 off large rubber feet + 3 screws & washers + bearing house plate & armboard
Lid, 2 off Lid hinges, 4 off M4 screw & M4 nuts
Optional parts
Ultra plinth, 4 off small rubber feet & 4 nails
Sub-chassis ( MDF damper arm & spring plates, glued washers)
Spring kit Bag -3 springs / 3 long M5 bolts / 3 spring seats / 3 rubber washers / 6 off M5 brass washers / 9 off M5
serrated washers / 6 off M5 nuts
Advanced DC regulator board / switch
Upgrade Transformer
Sliding VTA adjuster, Aluminium sleeve, M6 x 16 allen set screw, 3mm A/F Allen key
Threaded VTA adjuster and packing washer
Arm (optional)
Paperwork
Turntable instructions
Strobe card
Upgrade transformer sheet (optional)
Tools you will need ideally
Ruler or measuring tape & Marker pen.
Small hacksaw or powerful snips
Cross head screwdriver
3mm or 3.5mm drill
Pliers or molegrips
Hammer
Soldering iron (not essential)
Spirit level

8
Installing the standard kit of parts
Introduction
The standard kit of parts includes all that is required to build a turntable apart from a Plinth. Once one starts thinking
about what sort of plinth to design, one is faced with the question of suspended or non-suspended?Non-suspendedis
certainly the easiest but suspended designs are more popular as they arguably produce superior results. The Standard kit
of parts can be used for both types of design. If you choose to start with a non-suspended designyoucanalwaysupgrade
the design to a suspended type at a later stage. We supply a number of optional parts to cater for upgrading and
alternative ideas. This section provides guidance on the installation of the standard kit of parts into
The plinth of an existing turntable
A custom made deck to your own design.
The Origin Live standard plinth
Whichever of the above options you have chosen it is important to refer to the instructions found in the section-“Ultra
kit turntable assembly”. This covers a typical installation and should be read thoroughly and referred to for guidance.The
section you are reading now is designed to complement these instructions by describing alternatives. This may seem a
little confusing at first but is necessary due to thehuge number of options available and the need for a flexible approach
to cover all eventualities.
Because of the enormous range of possibilities for the first two of the above three types of installation, this section can
only cover general principles. It is important on a project of this nature to think through all the steps in detail before
starting (i.e. read all the instructions first). For a suspended sub-chassis model it is wise to check that no fouls exist in
your design by the use of a hardboard full scale template or drawings.
If you have ordered the Origin Live standard plinth for a non-suspended design then you will be able to sift out the
relevant information to build the kit in this section with additional reference to the later sections.
Origin Live Standard Plinth
If you have the Origin Live Standard Plinth then most of the hard work is already carried out -dimensions for the plinth
are shown on a following page. Assembly is best carried out in the following sequence:
Fit the 3 large rubber feet first by screwing them into the predrilled holes on the underside of the plinth. Only tighten the
screws sufficiently to hold the rubber feet on–do not keep tightening as there is no purpose in doing so and they will
go through the rubber.
Install the motor and switch assembly (see attached sheets and diagram in this section).
Fit the lid if you have one -as described in the Ultra kit section.
Screw on the main bearing plate and install the main bearing (as described later in this section).
Fit the sub-platter, belt, platter and tonearm as described in the Ultra kit section.

9
Diagram of Plinth layout dimensions
for non-suspended design(Origin Live Standard Plinth)
350mm
75mm
170mm
53mm
Belt
Note
Onlydimensionsmarked“c”
arecritical
Alldimensionsareinmm
88mm
276mm
326mm
223mm Rega©
211mm Linn ©
Motor
4
7
2
m
m
Switch
123mmc
Forswitchhole-firstcounterbore1”diafromunderside
ifnecessarytoleave6mm (1/4”)thickness.Thendrill 9.5mm diaholethrough
35degree
35mm elongated
holeformotor

10
Diagram of Plinth layout for
suspended sub-chassis design
350mm
75mm
170mm
53mm
Belt
Note
Onlydimensionsmarked“c”
arecritical
Alldimensionsareinmm
88mm
276mm
326mm
223mm Rega©
211mm Linn ©
Motor
4
7
2
m
m
Switch
123mm©
Forswitchhole-firstcounterbore1”diafromunderside
ifnecessarytoleave6mm (1/4”)thickness.Thendrill 9.5mm diaholethrough
35degree
35mm elongated
holeformotor
Thickspring
position
Rodpositionfor
thinspring
Mediumspring
position

11
Custom Plinths
If you are designing your own custom plinth (and sub-chassis if included) –arrange it such that the sub-platter and
motor pulley will be level. You will also need to consider adequate depth for thebearing house and suspension if used-
See previous diagram on “cross-section of suspended sub-chassis”. The dimensions of the plinth layout diagrams are
suited to accept the lid option, however if you dispense with the lid you can go for something free ofshape constraints.
An example of such a design is shown below. The advantage of such a design is that it cuts out excess material and thus
stores less energy. Suggested materials are MDF, veneered chipboard, acrylic (i.e. perspex), PVC, Marble, Granite or
Hardwood surround. It should be noted that the plinth is nowhere near as critical as the sub-chassis design.
Diagram of free form plinth example
Foot
Note:- the above outline can also be used as a one piece non sub chassis design
Sub chassis shape (plate)
Can be above or below plinth
Plinth shape
Non lid example
Suggested plinth cross-section for suspended subchassis design
Suggested height dimensions of Ultra kit
Plinth top plate 18mm
Plinthsurround
80mm
Foot usually nailed into plinth (or if possible screwed)
The holes and geometry of the arm mounting holes on arms other than the Rega are best worked out using the arm itself
or manufacturers instructions (The first plinth layout diagram shows the critical dimensions for Linn and Rega
mounting). Ensure beforehand that the depth of holes etc will accept the arm in question.
The preceeding diagrams show plinth layout dimensions for guidance.
If you have ordered the Origin Live sub-chassis and wish to make your own plinth then you can use the sub-chassis
itself as a template to mark the positions for the spring support rod holes (which are 5mm dia).
Sub-chassis design
If it is desired to use a sub-chassis there are various options listed for suspension or de-coupling as follows.
Springs
Spikes
Rubber bands
Cantilever strut

12
Example D
Cantilever struts
PostCarbon fibre rod Sub-chassis
Plinth
Example C
Rubber bands 1-10 off
Sub-chassis
Plinth
Example A
Rod
Plinth top plate
Sub-chassis
Spring
Example B
Sub-chassis
Cupped insert
(optional)
Plinth
The sub-chassis design is highly critical for performance. Conceptually the ideal solution is a rigid frame of low resonance
supported at a point half way between the arm base and platter spindle (this point is ultimately the centre of force
between the cartridge and bearing). Both the bearing house and arm base should be rigidly decoupled from the sub-
chassis. To achieve this we suggest an open frame of steel angle bar bolted together with Allen bolts-Seebelow(welding
or gluing does not appear to work well). A sheet of aluminium plate cut with a jig-saw is simpler and can be stiffened by
bolting on steel angle bar. Whatever your final design, it is recommended that you decouple the arm andbearing house
by means of plates bolted separately to the main sub-chassis assembly. A bearing plate is supplied with the kit for this
purpose.
25 mm Angle bar
Arm board plate
Bearing house plate
If you are using the spring kit please see “Diagram of support bolts and spring arrangement” in the section describing the
Ultra kit assembly. This shows how the springs are fitted and seat into a sub-chassis.
Main Bearing attachment
The main bearing is attached as shown in diagram below or in a similar manner.
Bearing House
Plinth
De-coupling brass washer
Nut
Bearing plate
Hole 1.5” Dia or larger

13
Motor Attachment
For top surface mounting of the motor, make an elongated hole for the motor of 35 mm width or 40 mm diameter as
shown on the layout diagrams. When using the dc motor with a sub-chassis design it is preferable to mount the motor
on the sub-chassis. This is different to ac motor philosophy because the motor runs so smoothly that it is better to isolate
the belt transmission from the environment. The pulley should not be tampered with as it is a press fit on the shaft and
attempting to shift it can damage the motor.
A
p
p
r
o
x
13mm
18mm
Press fitted precision pulley
(do not move)
Motor
Plinth
top plate
Motor in elongated hole to allow position adjustment
see layout diagrams
Screw
Motor Plate
Wiring
The wiring instructions are contained in the section describing the Ultra kit assembly. It is vital that all high voltage
electrics are covered and safely insulated to CE regulations to prevent any possibility of contacting any potentially lethal
live mains voltage. This should not be a problem as all the high voltages only exist from the mains plug up to the fully
enclosed pre-built power supply box. The maximum 12 Volts output of this box (leading to the regulator board) is safe
but always check first. Various methods of mounting the dc electrics are suggested in the dc kit mounting instructions.

14
Ultra kit Turntable assembly
Preparation
When you unpack the deck, check that you have all the parts listed in the parts list.
Undo the 2 transit bolts which hold the sub-chassis onto the topboard of the turntable plinth–see diagram below to
identify the transit bolts.
Diagram of Sub-chassis assembly
Plinth and lid assembly
Fit the rubber feet
Fit the 4 rubber feet to the underside of the plinth–one foot at each corner. Use the 4 nails provided for this purpose –
they only need to be hammered in till they are just below the surface of the rubber so as not to mark the surface the deck
rests on.
Diagram of lid assembly and rubber feet
PLINTH SIDE WALL
LID
Washer
HINGE
HINGESUPPORT
HOUSING
M4 HINGE BOLTS
PLINTH RUBBER
FOOT
Fit the Lid
Fit the hinges onto the lid first using the four M4 bolts and nuts (see “diagram of lid assembly and rubber feet”. There is
a "hinge" portion that is fairly obvious to identify -this bolts to the rear outer side of the rear lid face -the bolts pass
through the “hinge” then the lid and then a washer positioned on the inner face of the lid. The nuts then clamp the
whole assembly together with the lid sandwiched in the middle.
Place the lid on the plinth and mark the positions of the screw holes for the hinge support housings using the lid as a jig.
Ensure that the housing positions locate the lid centrally on the deck and at the correct height. The correct height is

15
when the tops of the plastic housings are absolutely level with the top edge of the plinth.
Drill the holes for the hinge screws in the plinth using a 3mm or 3.5mm drill. -. The two hinge housings can now be
screwed into position on the plinth–Re-insert the lid hinges to check the fit of the lid.
Pull the lid off the turntable to allow you to build the rest of kit –you can re-fit the lid once the deck is complete.
Fit the switch and dc regulator board to the plinth.
Cut the switch shaft so that 10mm is left of it’s smooth portion-use a hacksaw or powerful pair of wire snips. Remove
the serrated washer from the switch and do not use it at all. The switch can then be fitted in position in the pre-drilled
hole at the front left hand side of the plinth. You need only tighten the top clamping nut to the point that the switch
body won’t rotate when the shaft is clicked through it’s 3 positions. Be careful not to cross-threadthenutwhenyouput
it on.
Fit the knob and tighten up the set screw in it’s side to clamp it onto the switch shaft. A 2mm allen key is provided to
tighten this set screw.
If you have the advanced dc regulator board then position it on the left underside of the plinth top-board (closetothe
walls of the plinth front corner). Mark the position of the centre hole in the board onto the underside of the plinth top-
board –drill a shallow 3mm dia hole and screw the board into position with a No 6 x ½” screw. See diagram “Top view
of wiring layout & connections” for position.
Ifyou have the standarddc reguator board then position it on the left underside of the plinth topboard (close to the
walls of the plinth front corner). Mark the position onto the underside of the plinth topboard for holes right on the edge
of 2 opposite sides of the strip board–drill these shallow holes using a 3mm dia drill and screw the board into position
with two No 6 x ½” screws and the brass washers such that the washers catch on the edge of the board and hold it on.
See diagram “Top view of wiring layout & connections” for position.
Top view of wiring layout & connections
Please read the following section before handling the dc regulator board
The boards are always tested and working when they leave Origin live however there is a failure rate that occurs at the
point of
installation and which we replace freely. Some of the components on the dc regulator board are highly
sensitive to static discharge -so please observe the following -
once the board is installed it is extremely reliable but
installing does need care or
the board may not work. The reason for this is that your clothing can generate well over
5000 Volts just by moving -this voltage is then discharged to whatever you touch.
When picking up the board always touch the surface it is standing on first before t
ouching the board or any associated
wires etc. This way you are then “earthed to the same potential as the board.
When holding the board and placing it anywhere, always touch the work top with one hand as you place the board onto
it. The same principle should be applied for all other movements of the board-
e.g. when you install it to the turntable
always touch the turntable as you touch the board down into it.
Lastly be careful not to allow the output red and black wires to contact one another -especial
ly after power has been
applied to the circuit.
If you need to remove the board at any stage switch off the power supply first.
Lastly -it is unlikely that you will damage your board even if you ignore the precautions above -one thing you
can be certain of is that if the board works correctly via the switch and speed control the performance is fine
and it is not damaged.

16
INPUT WIRES
MOTOR WIRES
CABLE CLIP
CABLE CLIP
DC REGULATOR
BOARD
ARM LEADS
DETAIL OF
DC REGULATOR
BOARD FIXING
STANDARD
TOPBOARD
SCREW
REGULATOR
BOARD
CLAMPING
WASHER
PLINTH SIDE WALL
Fit the 3 threaded support bolts
Fit the three M5 x 80mm threaded machine screw bolts (which support the springs) to the plinth top board as shown
below. Only “nip” the nuts tight by a maximum of 1/8 th of a turn after finger tightness has been achieved and they
start to clamp onto the wood. You will probably need to check these have not slackened off after about 2 months as they
tend to “bed into the wood initially.
Diagram of support bolts and spring arrangement
Serrated washer
Plain washer
Serrated washer
5mm Dia support Bolt
Plinth topboard
Sub-chassis
ring glued on supplied
Note - Small ring in thin
spring position
Spring
Rubber
Serrated washer
Nut to adjust
suspension height
Install the sub-chassis
Fit Bearing house
Fit the bearing house to the sub-chassis as shown below-only "nip" the nuts tight with a pair of pliers-more forcethan
this is detrimental to performance -the top of the bearing house should be between 3mm and 8mm from the top of the
bearing house nut –3mm is probably ideal. Please note that ALL the bolts on the Sub-chassis assembly are carefully
torqued to a correct tension at factory –DO NOT TIGHTEN ANY ALLEN BOLT SETTINGS OR IT WILL
DEGRADE THE PERFORMANCE. ”. The sub-chassis is attached to the “spring plate” by one “pivot bolt” -thetwo
plates should be free to swivel and are loosely restrained by an “anti-rotate bolt” -this locating bolt on the side of the
sub-chassis should not be tightened at all. The pivot bolt is tightened at factory and should not be tightened or the
performance will degrade significantly.

17
Diagram showing bearing house fastening arrangement
Bearing House
Allen bolt
Spacing washer
Bearing House
Sub-chassis plate
Bearing plate
Bearing house nuts
17 mm
Fit the motor
Fit the motor to the motor plate using the 3 small machine screws supplied. These screws should be “just” tight to keep
motor noise to a minimum. The motor fits on the underside of the motor plate –see “diagram of sub-chassisassembly”.
The motor plate is adjustable to enable optimum belt tension to be achieved–The belt tension is set by rotating the
whole motor assembly on it’s pivot point. The motor is held in position by the friction of the pivot assembly. If for any
reason this becomes slack you may need to tighten up the pivot bolt. Ideally the centre of the pulley should be
approximately 124mm from the centre of the bearing house. Generally the optimum position is such that markerbolt in
the “slot” is located at approx the mid point of the slot and this provides a useful reference point. Install Sub-chassis&
Fit springs
Fit the Sub-Chassis
Offer up the sub-chassis assembly into the plinth and fit the springs as shown in the “ diagram of support rods and
spring arrangement”. Each particular spring is of a different compliance and should be in the positions shown in the
“diagram showing spring positions
Diagram showing spring positions
MEDIUM
SPRING
POSITION
THICK
SPRING
POSITION
THIN
SPRING
POSITION
Dress the motor wires
Screw one of the cable clips onto the inner side wall of the left hand side of the plinth (see “top view of wiring layout and
connections”) such that it holds the input and motor wires (brown, blue, red & black) away from the sub-chassisandany
danger of restricting it’s movement. For full details on the motor and power supply set up read the relevant section
contained later in this manual.
Install the arm

18
It is necessary to fit the tonearm to the deck, before final “levelling” of the sub-chassis so that the weight distribution is
correct. At this stage the arm simply needs to be in position –it does not need to be adjusted for height or have the
cartridge fitted etc.
If you do not have a VTA adjuster
If you do not have a VTA adjuster then bolt thearm to the armboard now-you only need tighten the large bolt to
finger tightness or very slightly tighter ("nipped tight 1/16 turn or less"). You will need to fit the arm “packing washer”
underneath the large bolt or it will not “clamp” on the 4mm thick armboard.
It is NOT recommended to place the large serrated washer (supplied by Origin Live with OEM Rega arms or
modification kits) under the large base nut as this does not work well with metal armboards.
If you have the Origin live threaded VTA adjuster (which fits all decks)
Thread the adjuster onto the arm. Ensure that the threaded metal sleeve is the right way up with the recess on the top
side. This ensures that the arm goes all the way down into the sleeve. It is NOT recommended to place the large serrated
washer (supplied with Origin Live OL1 arms or modification kits) under the large base nut as this does not work well
with metal armboards.
Bolt the arm to the armboard-you only need tighten the large bolt to finger tightness or very slightly tighter ("nipped
tight 1/16 turn" or less). You will need to fit the arm “packing washer” underneath the large bolt or it will not “clamp”
on the 4mm thick armboard.
If you have the Origin Live VTA sliding adjuster
Ensure that the Aluminium sleeve is the right way up with the recess on the top side This ensures that the arm goes all
the way down into the sleeve. Place the arm in the aluminium sleeve and then clamp it in position via the set screw in the
side of the VTA housing (i.e the sleeve is forced in togrip the arm’s threaded base). You do not need the Rega nut on
the base of the arm. Only tighten the set screw sufficiently to clamp the arm in position–over-tighteningcan makethe
arm sound bright. Do not fit a threaded VTA adjuster if you have the sliding adjuster.
Fit the arm cable
Fasten the arm cable -this should be supported by a cable clip screwed into position underneath the plinth-leave a
slight droop on it so that it isn’t “tight” (See diagram “Top view of wiring layout & connections” for position).This is
helpful to minimise vibration of the cable. Avoid pulling the external wires at the base of toneamrs as they are not
indestructible and can become detached if excessive force is used to manipulate them.
You can use one hole or two in the rear of the plinth to lead out the external cable. For thicker leads you will need to use
both holes. See picture “View of assembled kit from underside” at front of manual.
Fit the cartridge
If you are new to fitting Hi-Fi cartridges please see the notesprovided under the heading “Hi-Fi Cartridges -setting up
procedures” but do not carry out any fine tuning at this stage as you only need the cartridge bolted to the headshell for
arm height adjustment purposes.
Install the Sub-platter & Platter
With the syringe supplied, run approx 5 drops of oil into the top of the bearing house. Wipe the sub-platter spindle
surface to ensure that it is absolutely clean and very gently insert the sub-platter into the bearing house (If the oil does not
overflow when the spindle touches the bottom then try 2 drops at a time till you just achieve overflow -wipe away
excess oil) and then place the platter on top. The bearing needs a few minutes to “run in” and should run silent when
truly vertical and full of oil -if it doesn’t do so, there has probably been contamination with dust and you will need to
clean it out with a lint free paper towel or similar wrapped around a thin rod. If you do this, be sure to also wipe the oil
off the spindle as this also may contain microscopic contamination that is not visible.
Level up the platter using the nuts under the spring assemblies but only approximately at this stage. Ignore the fact that
the spring support plate is not level -it hangs at a slightly different angle to the actual sub-chassis that supports the arm
and platter -this is by design.
The top of the platter should be approx 31mm above the top of the arm board ( or top of the VTA adjuster if present).
Fit the belt over the motor pulley and sub-platter after cleaning all the running surfaces with methylated or surgical spirit.
Place the platter again on the sub-platter and level the platter by adjusting the nuts underneath the spring seats. Ideally
you should use a small spirit level for this purpose. You should also aim to get the top of the arm-board (or VTA
adjuster) roughly level with the top of the plinth top-board. Note that the sub-chassis should bounce freely without
contacting anything. It need only bounce up and down 1mm or so. Unlike some decks such as the LP2 you donot need
to achieve an “even” bounce -the Sub-chassis takes most of the weight on one spring so it doesn’t bounce very evenly.
Troubleshooting

19
Please note that very occasionally the bearing house will not be truly vertical due to slight variations of thethread pickup
on the nuts. It is purely a matter of trial and error to get this right by rotating the nuts and bearing house slightly. Aim to
get the platter parrallel with the arm-board in at least the plane that affects cartridge “azimuth”. For definition of
“azimuth” see section on “hi-Fi Cartridges –setting up procedures”. You can always alter the height of the arm to get
the other plane true.
Be careful in moving or transporting the deck -it is possible to bend the spring supporting bolts if a severe side
movement occurs (bear in mind that the sub-chassis etc. is quite heavy). Ideally it is best to use the transit bolts to hold
the sub-chassis rigidly to the plinth topboard when transporting the deck. In the unlikely event of a sub-chassisfoulona
support rod, the answer is usually to bend the bolt to the correct position. Only resort to such measures after you have
checked all other possibilities such as springs not locating in their sub-chassis housings etc.
Set up of motor and power supply
In the first 4 hours of use from starting up the motor, the speed tends to drift but then settles down permanently. To
burn in the regulator board components we recommend at least 4 hours of running the motor before you accurately set
the speed.
If you look under the deck in the area of the switch you will see a PCB screwed in a position such that you can adjust the
motor speed using the two rectangular blue trimmers
Connect up the motor & transformer
VERY IMPORTANT –if the leads are not correctly connected you can burn out your motor –For this reason follow
the procedure outlined as follows–
The thin output wires from the power supply are only 12 volts maximum and therefore safe to handle. Voltagesinside
the transformer are dangerous so the transformer case should not be unscrewed or opened.
First connect the plug on the flying lead from the MOTOR to the CONNECTORS emerging from the regulator board
under the plinth (if not already done so) The connections push together –excess wire can be pushed, tapped or tie
wrapped out of the way so that they do not foul the sub-chassis assembly.
Now connect the lead from the in line TRANSFORMER (power supply) to the DC connector socket at the back of the
turntable. It is useful to screw lock this connector.
Plug in the power supply to the electrical mains supply –allow 10 minutes or so for circuits to warm up before carrying
out any speed checks.
When the rotary switch is turned fully anti-clockwise the motor is off. One click of the switch clockwise is 33.3 rpm and
the second click clockwise is 45rpm. Use the strobe card provided to set the speed of your deck. Speed should only be
checked with the cartridge dragging on a centre track of a record. It will take 4 hours for your dc regulator board to run
in before you can set the speed accurately without “drift”.
Setting the motor
The motor speed is set by 2 rectangular blue trimmer resistors. Access to these trimmers is possible from the underside
of the deck (this is most easily achieved by getting the front left hand corner of the deck to overhang an edge of furniture
or similar. You must let the board components “run in”-we recommend 4 hours for this. The reason is that the motor
speed changes significantly while components burn in but they “settle” after 1 to 4 hours. This is best carried out with
the motors running fast so turn the pre-sets clockwise as outlined below.
When the rotary switch is turned fully anti-clockwise the motor is off. One click of the switch clockwise is 33.3 rpm and
the second click clockwise is 45rpm.
Now adjust the motor speed as follows using the 25 turn resistors P1 and P2 on the regulator board (P1 is the blue
component nearest the centre of the printed circuit board and P2 is the other blue component situated nearer the end of
the board). Note:-to increase speed turn the presets clockwise using a small screwdriver in the top slot. The pre-set
screw will not fall out and may need a fair number of turns to set the correct speed so keep turning until the speed
changes. If the screw reaches the end of it’s travel you can usually hear a faint clicking sound for a complete turn.
With the switch set at the 1st click -set P1 so that the platter turns at 33.3rpm . Use the strobe disc provided to set the
speed (full instructions are on the card). However if you have problems using the strobe card, then count the rpm using
the following method. Counting the 33.3 revs per minute is best accomplished by placing a small piece of sticky tape on
the perimeter of the platter and then counting 100 revolutions. 33.3 rpm is exactly 100 revolutions completed in 3
minutes. To save time in the early stages it is easiest to count 50 revs in 1 minute 30 seconds (or 25 revs in 45 seconds)
and save the 100 count for the final check. When setting the speed, place the arm on the centre track of a record so that
the cartridge is tracking the grooves this ensures that the drag of the cartridge is taken into account (even though the
difference is only 0.8 % from setting the speed without the cartridge on the record). Speed variations of up to plus or

20
minus 2% are quite common on decks and the dc kit is capable of plus or minus 0.3%-the advanced dc kit measures
0.1% accuracy..
Please note the following points when setting the speed. Firstly all the figures beloware based onsetting the speedon the
deck using the centre track and letting the deck play for a good 5 minutes beforehand with the stylus on the record so
that the whole system has settled down. The regulators seem to take about 5 minutes to warm up, so speed is about
2mins 58 seconds for 100 revolutions when the system starts from cold. In other words it is 2/180 x 100 = 1 % fast
when started from cold. Speed variation with the dc kit varies minutely depending on the track played and cut of record.
Usually outer tracks play 0.26% slow and inner tracks play 0.26 % fast. When the speed at the centre track is set using
the strobe and then timed, the drift is usually 1 second in 100 turns from the rpms timed on the 1st track to the rpms
timed on thelast track. i.e outer track measures 2min 59.5 seconds for 100 turns and inner track is 3min 0.5 seconds for
100 turns. This means a plus or minus 0.26 % speed variation.
Click the rotary switch to the 2nd click clockwise and set P2 so that the platter rotates at 45rpm using the above method.
The dc motors may be slightly noisy to begin with and are never completely silent as a/c motors are -This is thought to
be because they rely on a different type of precious metal brush. Having said this they still sound a great deal better in
performance terms. To assist "running in" you can disconnect the brown wire from the rotary switch and remove the
belt. The motor then runs at full speed. Allow this for approx 5 hours. After the running in period, reconnect the
brown wire and the motor should be quieter than when it first ran
Like most turntable manufacturers we recommend that you leave the turntable running between changing records as this
reduces the belt wear that occurs with constant stopping and starting.
Notes
Do not use the power supply for anything other than the dc motor or the power supply will definitely be irreparably
damaged and so might the equipment it is connected to.
Always de-power the circuit when troubleshooting by removing the power supply plug from the wall socket. The
circuit will take around 8 hours to run in and sound it's best.
In the first 4 hours of use from starting up the motor, the speed tends to drift but then settles down permanently. To
burn in the regulator board components we recommend at least 4 hours of running the motor before you accurately set
the speed.
Set up & maintenance of turntable
Set up
Carry out a final check on the levelness of the platter with the turntable resting on the surface that is going to be it’s final
residence. It is best to use a spirit level for this purpose.
You can now move on to the section on “arm set up”.
Notes & Maintenance
Notes
The Platter works best without any type of mat (including the Ringmat) or record clamp.
Maintenance
The deck is not prone to going out of tune -we recommend that you check the level of the platter after the first few days
as the springs initially need to “bed in” and every year or so after this.
Depending on your use of the deck, the belt should ideally be replaced every 2 years or so.
If you withdraw the sub-platter spindle you should put in a drop of oil to compensate for any possible loss.
Wow on the speed –can be caused by 4 main factors as listed below. Most of these relate to the freedom of rotation of
the sub-platter. A useful check is to see how freely the sub-platter “glides” round at slow speed with only the gentlest of
nudges.
Insufficient belt tension
Sub-platter “bottoming” on the top of the bearing house –check that there is a space of over 1mm or overso between
the top of the bearing house and the underside of the sub-platter
The brass insert at the bottom of the bearing house has somehow got lost –this is very rare but it is just possible –the
bottom of the bearing house should be flat due to the presence of an insert sitting in the bottom–youcan feelthiswith
a long thin screwdriver or use a torch –if the surface is coned as you would expect in a drill hole then the insert is
missing and you should request a new one.
Table of contents
Other Origin live Turntable manuals

Origin live
Origin live Calypso MK3 User manual

Origin live
Origin live ENCOUNTER User manual

Origin live
Origin live AURORA GOLD User manual

Origin live
Origin live ALLIANCE User manual

Origin live
Origin live Aurora Mk2 User manual

Origin live
Origin live THE RESOLUTION CLASSIC User manual

Origin live
Origin live ALLIANCE User manual

Origin live
Origin live The Complete Ultra Turntable kit User manual

Origin live
Origin live Aurora Mk3 User manual

Origin live
Origin live Aurora MK4 User manual