3
Assembly
Initial assembly of the mount is extremely easy as the mount
is mostly pre-assembled at the factory. Unpack all of the parts
and lay them out in your workspace before beginning.
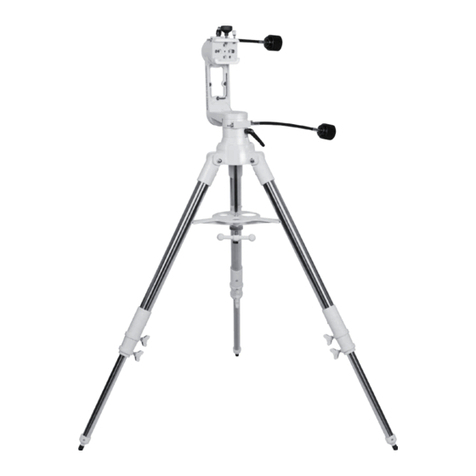
1. Spread the tripod legs apart as far as they will go.
2. Place the accessory tray onto the three-sided leg spread-
er and align the tabs so that the center of the accessory
tray registers with the leg spreader.
3. Rotate the accessory tray so that it firmly clicks into the
three tabs on the leg spreader (Figure 2).
Connecting a Telescope
The AZ-4 mount was designed to be used with spotting
scopes, binoculars and smaller telescopes. For best results,
the telescope optical tube assembly should not weigh more
than 4 lbs.
To connect a telescope, a dovetail mounting bar is required.
Some telescopes have this bar directly attached to the tube.
Telescopes or spotting scopes with a ¼"-20 mounting block
require a dovetail bar with a ¼"-20 stud built in. This acces-
sory is available from Orion (#7388).
Binoculars require an L-bracket (available from Orion), in
addition to the ¼"-20 dovetail mounting bar.
For telescopes that do not have a dovetail bar or ¼"-20
mounting block attached, you will need a set of tube rings to
attach a dovetail bar (Figure 3). These accessories are avail-
able through Orion. Additionally, if your telescope has a ¼"-20
threaded mounting hole, Orion offers a dovetail “L-bracket”
that will fit the dovetail receptacle of the AZ-4 and thread into
this hole.
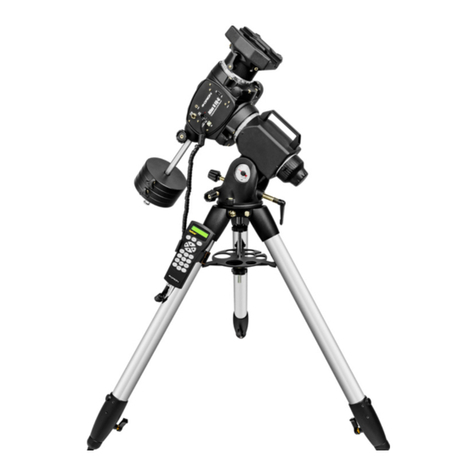
Once you have a dovetail mounting bar on your telescope
tube, connecting the telescope to the mount is easy. First,
unthread the knurled black plastic thumbscrew on the AZ-4’s
dovetail holder until the tip is flush with the interior wall of
the dovetail holder. Then, insert the telescope’s dovetail bar
into the mount’s dovetail holder, and tighten the thumbscrew
firmly. The telescope and dovetail bar will be installed on the
mount as shown in Figure 4.
Note: If you have a telescope with a dovetail mount-
ing bar attached directly to the tube, or you are using
the 1/4"-20 dovetail adapter), the finderscope may be
oriented in an awkward position when connected to the
AZ-4. In most cases, this should not cause any prob-
lems in actual usage but may be awkward or uncom-
fortable. Contact Orion Customer Service or visit our
website (OrionTelescopes.com) for additional product
information.
For best up-and-down motion, the telescope should be bal-
anced front-to-back when positioned horizontally. You can bal-
ance the telescope by loosening the thumbscrew slightly, and
moving the dovetail bar slightly forward or back in the dovetail
holder. If you are using tube rings, you can move the telescope
tube forward or back in the tube rings. When the telescope
doesn’t move up-and-down by itself when the arm’s tensioning
knob is not very tight, you have achieved good balance.
Using the AZ-4 Mount
The AZ-4 mounts allow motion of the telescope in two axes:
altitude (up-and-down) and azimuth (left-to-right). Hence, the
AZ-4 is an “altazimuth” mount. Loosen the altitude and azi-
muth lock knobs (see Figure 1 for location), then push the
telescope to the direction you want to look at. The mount will
have enough tension to hold the telescope in place if it is rea-
sonably balanced.
Slow Motion Control
After you have pointed the telescope at the direction or object
you want, you can use the slow motion cables to make more
precision movements. This is especially helpful when center-
ing an object, or tracking a celestial object if you are using the
mount for star gazing. Tighten the two lock knobs before using
the slow motion control cables. If you need to make larger
movements, loosen the lock knobs and reposition the tele-
scope before tightening the knobs again.
Tracking Celestial Objects
Celestial objects appear to move slowly across the sky
because of the rotation of the Earth on its polar axis. When
you observe an object through your telescope, you’ll see it
drift gradually across the field of view. To keep the object cen-
tered in the field, turn the slow motion cables for both alti-
tude and azimuth as needed to keep the object centered.
Make sure the lock knobs are tightened before using the slow
motion cables.
Figure 4.
