manuals.online logo
Brands
  1. Home
  2. •
  3. Brands
  4. •
  5. Osaki
  6. •
  7. Massager
  8. •
  9. Osaki TP-8500 User manual

Osaki TP-8500 User manual

OPERATION INSTRUCTIONS
SAVE THESE INSTRUCTIONS
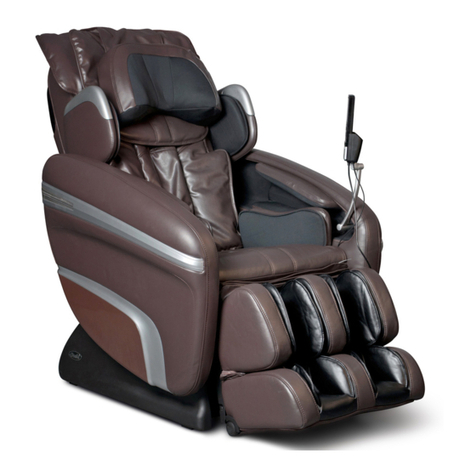
TP-8500 Massage Chair
01
Please read the instructions contained in the manual carefully before operating
the chair. Carefully read and practice all important safety warning.
Note: Our Company reserves the right to revise the design and description of this
product without any further notice.
CONTENTS
02
06
07
08
19
Important Safety Instruction
Name and function of components
Function
Installation Instructions
Product specification
0302
When using this product, basic precautions should
always be followed as listed below
Read all instructionsbefore using this product.
DANGER-To reduce the risk of electric shock:
1) Alwaysunplug the massage chair from the electricaloutlet immediately
after using massage chair and prior to cleaning. This will also protect the chair
for power surges and outages.
WARNING-To reduce the risk of burns, fire,
electric shock, or injury to Persons:
1) This chair should neverbe left unattendedwhen plugged in.Unplug from
outlet whennot in use or being serviced or cleaned.
2) Do not use this chair with a blanket, pillows or additional articles.
Excessive heating can occur and cause fire, electricshock, or injuryto the
user.
3) Persons with any medical conditions or injuries must not use this product
with out confirming with their physician's approval.
4) Use this massage chair only forits intended useas described inthis
manual. Do not modify or add other peripherals to this chair.
5) Never operatethe massage chair if it has the following issues; Ifit has a
damaged cord orplug, not operating properly, if ithas been dropped or has
made contact with any liquids. If the massage chair has been subject to any of
these conditions, please contact the manufacturer immediately and refrain
from any use.
6) Do notattempt to pull the power cordor any cableson the chair that may
lead to electric damage or injury.
7) Keep thecord away fromheated surfaces or high temperature emitting
sources.
8) Never operatethe massage chair if there are any air hoses that are
blocked and if there are any airbags not inflating.
9) This chair is for home and indoor use only and must be kept in dry room
temperature (55 to 90 degrees Fahrenheit.
10) Keep away from any arousal sprays.
11) The chair must be plugged into a properly grounded outlet.
Safety And Maintenance
instructions .
12) Children under the age of 18 are not permitted to use the chair
without the consent of their medical doctor.
13) Remove all jewelery when using the massage chair.
SAVE THESE INSTRUCTIONS
GROUNDING INSTRUCTIONS
This product must be grounded ,if it should malfunction or breakdown ,grounding
provides a path of least resistance for electric current to reduce the risk of electric
shock ,this product is equipped with a electrically certified cord with ground. The
power cord must be plugged into an appropriate outlet that is properly installed and
grounded in accordance with all local codes and ordinances
DANGER:Improper connection of the equipment can result in a risk of
electric shock. If uncertain please check with a qualified electrician to ensure the
outlet meets the standards.
This product uses a standard nominal 120-volt circuit,and has a grounding plug as
illustrated in sketch on the page 13. Do not attempt to use a power adapter to insert
a different voltage outlets. Be sure that the ground connector on the plug is intact
before plugging into the outlet.
IMPORTANT SAFETY INSTRUCTION
0504
06 07
Function
- The chair is equipped with a quiet 4 roller massage system that can deliver
a variety of massage styles, shiatsu, kneading, flapping,knocking, simultaneous
kneading and flapping.
- The Computer body scan will identify where the shoulders and neck are located
to use as a starting point for the massage and will also map the contour of the
back to apply an even pressure during the massage.
- The chair has multiple preset programs to select from as well as 2 memory
buttons that allow you to store into memory your favorite massage combinations.
- Int he manual massage mode you are able to select the region of the massage
on back, upper, lower and full back. You can also pin point the massage to stay
in one locations focusing specific spot.
- Airbag massager are located in the side shoulders (4 airbags), arm (8 airbags),
legs (6 airbags) with three intensity levels.
- Located on the bottom of foot, there are 2 set of massagers a side. One that
rotates and the one that glides forward and back (scraping massage).
- Back heating function: carbon fiber far infrared heat pad are located in the lumbar
area.
- When sitting down there is a USB charging stations so that you can use and
enjoy your device while getting a massage. There are also quick controls to
operate the chair on side panel.
- The leg-rest can extend out to accommodate a variety of heights. Simply apply
pressure to the footrest and extend. Backrest frame down slides used technology
to deviate from the wall by keeping zero space, reach the maximum space saving
- When the chair reclines the legs will raise simultaneously. The legs can be
adjusted independent of the backrest.
- L-Track massage contours to the curves of the body through the lower back past
the glutes and to the hamstrings.
Name and function of components Function
1.Pillow pad
2.Upper arm air bag components
3.Arm air bag components
4.Armrest hotkey
5.Seat cushion
6.Leg rest frame
7.Foot rest frame
8.Calf stop sealing plate
9.Back rest pad
10.Armrest decoration
11.Manual controller pocket
12.Armrest
13.Side cover
14.Back cover
15.Manual controller
16.Drive box cover
17.Safety switch
18.Base caster
19.Power line and power plug
20.Power socket
21.Fuse box
22.Power switch
23.Manual controller socket
1
2
3
5
6
9
11
7
15
14
18
20
12
21 22 23
13
8
16
17
19
4
10
0908
Menory
Menory
Method of usage Method of usage
1.Switch power supply on
Diagram of plug in Diagram of the switch position of power supply
2.Start to massage
1). Press power button and the massage chair will slightly recline. Select a preset
massage and it will start massage.
2). Prior to starting the massage it will do a body scan to map the user's body.
3). Right after the body scan you have the ability to readjust the starting point
higher or lower by pressing the up or down arrow on the remote labeled
"Adjust Shoulder". The adjustment must be completed within 10 sec. the chair
has finished it's body scan.
youcan adjust the up and down button to a suitable position. Shoulder position
has 10 grades adjustable.It will run automatic massage if there is noadjustment
on shoulder position within 10 seconds
Button Description Display
Movesthe massage head upward
Move the massage head downward
Shoulder
adjust
High shoulder position
suitable shoulder position
Low shoulder position
4) Choose massage function to massage
Function Button Display
Memory
massage
- Press one of the 5 preset massage programs on the upper half of the red circle
of the remote. TO store your favorite massage combination for next time press
down on the M1 or M2 for about 3 seconds until you hear a beep.
1110
Characterized auto massage
Air pressure functionmassage
Auto F1
Auto F2
Auto F3
Auto F0
Auto F4
Auto F5
Use these buttons to raise
and lower the massage heads
Other manual function
Method of usage Method of usage
Function Button Feature Display
Characterized
auto
massage
Deep massage that focuses on
accupressure points of the body.
focuses on loosening muscles
Overall massage covering a variety of massages
Geared to provide a quick deep massage
Massage concentrating on the upper body
Massage concentrating on the lower body
Upper body manual massage, lower body manual massage
1)Upper body manual massage
Function Button What is adjustable Display
Technique
Speed
Width
Shiatsu
Flap
Knead&flap
Knock
Knead
Speed And Width
Speed
Speed And Width
Speed
Speed And Width
Three Grades Speed Adjustable
Three Grades Widths Adjustable
Speed
Width
Function Button Massage Concentration Display
Back
Stretch
Back Stretch
Back Stretch
Back Stretch
Massage hand
move up
Massage hand
move down
Function Button Description Display
Air pressure
mode
Intensity
Three air massage modes(full body, arm and leg)
You can adjust the intensity of air pressure from
medium, strong to deep.
Function Button Description Display
Roller
Heating
Sole roller: sole roller switch, with 3 rotating
speed levels
Far infrared back heating is located in the back
which will activate after 3 min into the massage.
Back Stretch
Back Stretch
H0
H1
H2
H3
H4
Fixed position (fixed point)
Small area (partial area)wll cover about 1/2 region
Overall massage Top to bottom
Upper body massage
Lower body massage
Other manual function
Function Button Description
Calf rise
and drop
Backrest rise
and drop
Auto lay
down mode
This button will raise the legrest
This button will lower the legrest
This button will bring up the backrest
This button will recline the backrest
The "Zero" button will automatically recline you into the zero
gravity position.
13
12
The casing around the power supply
must not be damaged. Do not apply any
heavy weight or pressure on the casing
to prevent from damage and inury.
Method of usage Method of usage
4.Turn off power, stop massage
Diagram of the switch position of power supply Power switch method map
WARNING
1) Press power button during massage progress, all massage function will be stop
immediately, the backrest and footrest will return to original position automatically,
meanwhile you can set up memory function.
2) Memory function: At the end of the massage you can store your favorite massage
combination in memory by pressing the M1 or M2 button for 3 seconds until you
hear a beep.
3)After the you hear the beep turn the chair off.
Open the master carton, take down the calf rest. (figure 1)
Remove the back cushion (note: please ensure the heat wire in the cushion was
unplugged before remove). (figure 2)
Figure 1 Figure 2
Remove the back pad. Make sure that the power connection to the heating pads
are disconnected before removing the back pad ans shown in Figure 2. Then
proceed to unzip the backrest cover shown in Figure 3.
At the front of chair remove the leg-rest plastic plate as shown in Figure 4. Pull
on the plastic connector to disengage.
Figure 3 Figure 4
Pull
remove the 8 screws of front front plate as shown in Figure 5.
Open the front plate and unplug the air hose and power cables that feed to the
armrest. (figure 6)
Figure 5 Figure 6
5.Armrest disassembly instructions
Note: Use the correct tools to disassemble and carefully follow the instructions
below.
Disconnect the legrest from the chair. There are 2 air hose connections and 2
electrical wires. Be sure the connectors are NOT damaged. Have the chair in the
reclined position as shown in Figure 1.
Function Button Description
Calf rise
and drop
Backrest rise
and drop
Legrest lifting button. Ppress this button to raise the legrest.
Release the button and the legrest will stop.
Legrest lift button. Press this button to lower the legrest.
Press this button to raise the backrest.
Press this button to recline the backrest.
USB
3.USB recharging function and lie-down function.
ON/OFF
Switch Press to turn on and off the massage chair.
USB recharging port is located on the right hand side when
sitting in the chair.
. Unscrew the screw on the front-end of armrest (note: the screw is in the side of
steel frame). (figure 7)
. Unscrew the screw on the front-end of armrest (note: be careful not to
misplace the plastic black block). (figure 8)
Figure 7 Figure 8
. Unscrew the screw on the back-end of armrest (note: zip the backrest kneading
cloth open completely to access the screw). (figure 9)
. Gently lift up the front-end of armrest, pull out the buckle. (figure 10)
Figure 9 Figure 10
Lift up gently
. Gently pull forward the back-end of armrest to pull out the plastic part of the panel (Figure 11).
Before complete removing the side panel there is a hose connection that has to be unplugged
first (Figure 12).
Pull forward gently
Figure 11 Figure 12
Connect the air pipe on the back-end of armrest to the upper arms. (figure 1)
Put the air pipe
and power cord into the steel frame (avoid the air pipe blockage). (figure 2)
Figure 1 Figure 2
Hook the back-end of armrest on the steel frame as shown in the illustration
(figure 3).
Insert the back-end of armrest into the plastic cover of upper arm. (figure 4)
Figure 3 Figure 4
Hook the front-end of armrest on the steel frame and lock the buckle. (figure 5)
Gently push the armrest down, double check if the hook well locked. (figure 6)
Figure 5 Figure 6
Put the plastic block between the armrest and legrest, then tighten the up &
down screws. (figure 7)
Tighten the screws on the back-end of armrest. (figure 8)
Figure 7 Figure 8
PRESS IT
DOWNWARD GENTLY
6.Armrest installation method
Method of usage Method of usage
15
14
Connect the joint of air pipe and power cord (note: there's marks on the air pipe and
size of cable connectors is different, you won't miss it). (figure 9)
Pull the calf rest air pipe and power cord through the hole of front dam-board, then
tighten the screws of dam-board. (figure 10)
Figure 9 Figure 10
Zip the backrest kneading cloth up. figure 11
Plug the heat plug of the back cushion into the heat hole on the backrest, put the
back cushion tidily on the backrest. (figure 12)
Figure 11 Figure 12
The calf rest decoration cover is card slot design, make an effort to push it when
assembly (note: please keep the cover tight with the side), armrest installation is
completed. (figure 13)
Push
Figure 13
7.Calf installation
Install the rotating shaft incalf fixed axis first, noticed the hole should be aligned, so
that the R shape pin assembly (chart 1)
After calf is connected with the fixed axis aligned, then insert (chart 2)
chart 1 chart 2
Plug R pin, then moved to the other side of the calf, and the plug R pin (chart 3)
Finished (chart 4)
chart3 chart4
When the machine under the working state, with lying and calf rest lifting, you
could not apply gravity on the calf, to prevent the massage chair does harm to
peoplebefore dumping(chart1).
chart2).
Ensure the mechanism hands not in the seat part ,otherwise will cause
uncomfortable in the Buttock when you seating in the chair(
Note
chart1 chart2
Method of usage Method of usage
17
16
18 19
Note:During movementyou must turn off the power switch firstand then unplug the
power line and hand controller connecting line
Method of usage
Product specification
9.Floor Protection
Put the heavy massage chairs on the wood floor for a longtime may damage thefloor,
so please place a carpet or other object to avoid this damage.
10.Method of movement
Make sure that all wires are far above the ground, tilt the backrest backward to
acertain degree (with the gravity center resting on the wheels), push the chair
forwardor backward with your hands and finally resume the chair to the normal
position in aslow and gentle manner.
Model: TP-8500
Name: Massage Chair
Rated voltage: 110-120V~ 60Hz
220-240V~ 50Hz/60Hz
Rated power input:150W
Rated time: 20Min
Safety structure: Class
Material introduction: PVC, PA, steel parts and electric &ele
-ctron parts
MATERIAL PU LEATHER CLOTH WOOD
Caution: Do not move the chairs with its wheels on wood floor, rough ground or in
anarrow space. Two people are required to lift the chair.During the lifting period, the
windscreen and backrest cover grooves as the focal point(Please do not lift armrest
directly)
Method of usage
8.Pillow and backrest pad's dismounting and use manual
Using pillows can reduce the kneading massage intensity on shoulder
andneck,according to your needs to decide whether the pillow pad is
needed(recommend headcushions). Backrest cushion and backrest connected
byzipper (1), head cushion and backrest pad connected by thread gluing (2)
Zipper Thread gluing

Other manuals for TP-8500

1

Other Osaki Massager manuals

Osaki JP650 3D User manual

Osaki

Osaki JP650 3D User manual

Osaki NECK TENS User manual

Osaki

Osaki NECK TENS User manual

Osaki OS-7200H Pinnacle User manual

Osaki

Osaki OS-7200H Pinnacle User manual

Osaki 3D Pro Intelligent User manual

Osaki

Osaki 3D Pro Intelligent User manual

Osaki OS-PRO Maestro User manual

Osaki

Osaki OS-PRO Maestro User manual

Osaki OS-2000 User manual

Osaki

Osaki OS-2000 User manual

Osaki Os Pro-3D Sigma User manual

Osaki

Osaki Os Pro-3D Sigma User manual

Osaki PLATINUM OP-4D Ultima User manual

Osaki

Osaki PLATINUM OP-4D Ultima User manual

Osaki OS-Hiro LT User manual

Osaki

Osaki OS-Hiro LT User manual

Osaki Pro Admiral User manual

Osaki

Osaki Pro Admiral User manual

Osaki OS-4000XT User manual

Osaki

Osaki OS-4000XT User manual

Osaki OS-Ai Vivo 4D+2D User manual

Osaki

Osaki OS-Ai Vivo 4D+2D User manual

Osaki OS-Pro Maxim User manual

Osaki

Osaki OS-Pro Maxim User manual

Osaki OS4000 User manual

Osaki

Osaki OS4000 User manual

Osaki First Class LE User manual

Osaki

Osaki First Class LE User manual

Osaki OS-Pro Soho User manual

Osaki

Osaki OS-Pro Soho User manual

Osaki Otamic LE OS-3D User manual

Osaki

Osaki Otamic LE OS-3D User manual

Osaki Touch Heart OS-7075R User manual

Osaki

Osaki Touch Heart OS-7075R User manual

Osaki OS 3D PRO DREAMER User manual

Osaki

Osaki OS 3D PRO DREAMER User manual

Osaki OS 4000CS User manual

Osaki

Osaki OS 4000CS User manual

Osaki OS Pro Marquis User manual

Osaki

Osaki OS Pro Marquis User manual

Osaki Premier OS-3D User manual

Osaki

Osaki Premier OS-3D User manual

Osaki 3D Avalon User manual

Osaki

Osaki 3D Avalon User manual

Osaki OS6000 User manual

Osaki

Osaki OS6000 User manual

Popular Massager manuals by other brands

Lanaform Hot & Cold Mass instructions

Lanaform

Lanaform Hot & Cold Mass instructions

Doxy Die Cast instructions

Doxy

Doxy Die Cast instructions

Cozzia CZ-357 installation manual

Cozzia

Cozzia CZ-357 installation manual

Panasonic EV-326 operating instructions

Panasonic

Panasonic EV-326 operating instructions

Bodyfriend REX-L user manual

Bodyfriend

Bodyfriend REX-L user manual

Smart Comfort POLO QUICK START GUIDE & OPERATING INSTRUCTIONS

Smart Comfort

Smart Comfort POLO QUICK START GUIDE & OPERATING INSTRUCTIONS

Cozzia CZ-580 Use & care manual

Cozzia

Cozzia CZ-580 Use & care manual

HoMedics ODBR-100 Instruction manual and  warranty information

HoMedics

HoMedics ODBR-100 Instruction manual and warranty information

Therabody THERAGUN SENSE user manual

Therabody

Therabody THERAGUN SENSE user manual

Zaahn P33-C user guide

Zaahn

Zaahn P33-C user guide

irelax Smart Deluxe instruction manual

irelax

irelax Smart Deluxe instruction manual

ZION VIP Operation manual
ZION
ZION VIP Operation manual
DEDAKJ K-GE22e Manual instruction

DEDAKJ

DEDAKJ K-GE22e Manual instruction

HoMedics ELM-CELL100-EU instruction manual

HoMedics

HoMedics ELM-CELL100-EU instruction manual

Health Island InfraTapp 2 Maintenance instructions

Health Island

Health Island InfraTapp 2 Maintenance instructions

Beper Body Sense use instructions

Beper

Beper Body Sense use instructions

RestArt RK7101 user manual

RestArt

RestArt RK7101 user manual

Sableline Healthcare Flex Massage Cushion manual

Sableline Healthcare

Sableline Healthcare Flex Massage Cushion manual

manuals.online logo
manuals.online logoBrands
  • About & Mission
  • Contact us
  • Privacy Policy
  • Terms and Conditions

Copyright 2025 Manuals.Online. All Rights Reserved.