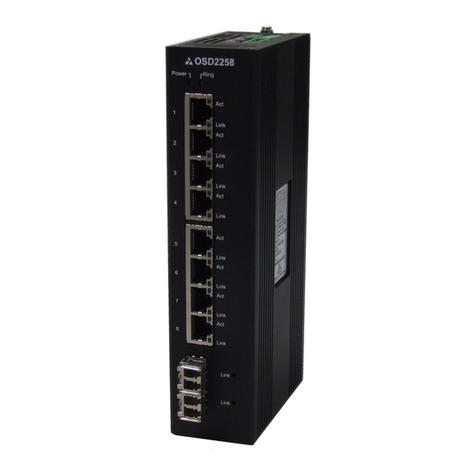
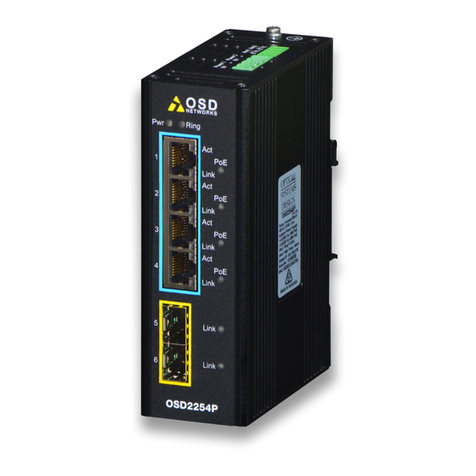
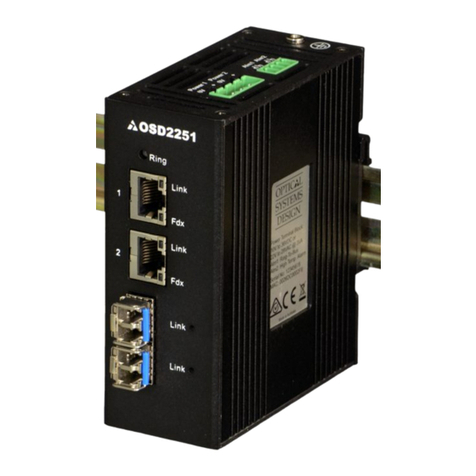
OSD NETWORKS OSD2254E User manual

OSD2254E
Lite Managed 6-port Ethernet Switch with
SNMP & VLAN
4 x 10/100/1000BASE-T & 2 x Gigabit SFP
Operator Manual


PAGE 3 10116302
OSD2254E Operator Manual
INDEX 1
1TECHNICAL SUMMARY ................................................................................................5
1.1 BRIEF DESCRIPTION.................................................................................................5
1.1.1 OVERVIEW ...........................................................................................................................5
1.1.2 FEATURES AND BENEFITS ................................................................................................5
1.2 TYPICAL SYSTEM DESIGN........................................................................................6
1.3 TECHNICAL SPECIFICATIONS..................................................................................7
1.4 PORT ALLOCATION....................................................................................................8
2INSTALLATION AND OPERATION...............................................................................9
2.1 INTRODUCTION..........................................................................................................9
2.2 INSTALLATION............................................................................................................9
2.2.1 WARNING AND PRECAUTIONS..........................................................................................9
2.2.2 DRAWINGS AND DIMENSIONS.........................................................................................10
2.2.3 LOCATION ..........................................................................................................................11
2.2.4 POWER SUPPLY CONNECTIONS.....................................................................................11
2.2.5 ALARM CONNECTION.......................................................................................................12
2.2.6 USB CONNECTOR.............................................................................................................13
2.2.7 MINI USB PORT..................................................................................................................14
2.2.8 LED INDICATORS...............................................................................................................15
2.2.9 CONTROLS.........................................................................................................................16
2.2.10 FITTING SFP CONNECTORS ............................................................................................17
2.3 OPERATION..............................................................................................................18
2.3.1 CONNECTIONS..................................................................................................................18
2.4 COMMAND LINE INTERFACE..................................................................................20
2.4.1 TERMINAL EMULATION SETUP........................................................................................20
2.4.2 COMMAND LINE FUNCTIONS...........................................................................................21
3WEB GUI.......................................................................................................................40
3.1.1 LOGGING ON TO THE SWITCH ........................................................................................41
3.1.2 GUI MENU...........................................................................................................................42
4MAINTENANCE ............................................................................................................65
4.1 INTRODUCTION........................................................................................................65
4.2 EXTERNAL INSPECTION .........................................................................................65
4.3 ROUTINE MAINTENANCE........................................................................................65
5WARRANTY..................................................................................................................66
5.1 WARRANTY PERIOD................................................................................................66
5.2 REPAIRS ...................................................................................................................66
5.2.1 WARRANTY REPAIRS .......................................................................................................66
5.2.2 OUT-OF-WARRANTY REPAIRS.........................................................................................66
5.2.3 SITE REPAIRS....................................................................................................................66
5.2.4 EXCLUSIONS .....................................................................................................................66
FIGURE 1: TYPICAL SYSTEM DESIGN...................................................................................6
FIGURE 2: PORT ALLOCATION...............................................................................................8
FIGURE 3: MOUNTING DIMENSIONS ...................................................................................10
FIGURE 4: POWER SUPPLY CONNECTIONS ......................................................................11
FIGURE 5: ALARM OUTPUTS ................................................................................................12
FIGURE 6: CONTACT CLOSURE OUTPUT ...........................................................................12
FIGURE 7: USB TYPE B CLI PORT........................................................................................13
FIGURE 8: CLI INSTALLATION...............................................................................................13
FIGURE 9: USB CONNECTOR ...............................................................................................14
FIGURE 10: PORT/LED...........................................................................................................15
FIGURE 11: CONTROLS.........................................................................................................16
FIGURE 12: 8-WAY DIP SWITCH ...........................................................................................16
FIGURE 13: FITTING/REMOVING SFP CONNECTORS .......................................................17
FIGURE 14: REDUNDANT RING CONFIGURATION.............................................................18
FIGURE 15: REDUNDANT RING CONNECTION...................................................................19

PAGE 4 10116302
OSD2254E Operator Manual
FIGURE 16: BUS CONNECTION ............................................................................................19
FIGURE 17: SERIAL PORT SETTINGS..................................................................................20
FIGURE 18: VERSION CHECK...............................................................................................22
FIGURE 19: FACTORY DEFAULT SETTING..........................................................................23
FIGURE 20: IP CONFIGURATION ..........................................................................................24
FIGURE 21: TOPOLOGY CHECK...........................................................................................25
FIGURE 22: TOPOLOGY CHECK...........................................................................................26
FIGURE 23: NODE CHECK.....................................................................................................27
FIGURE 24: LOCAL NODE CHECK........................................................................................28
FIGURE 25: FLOAT BACKUP ENABLED 1.............................................................................29
FIGURE 26: RING TOPOLOGY...............................................................................................29
FIGURE 27: FLOAT BACKUP ENABLED 2.............................................................................30
FIGURE 28: FLOAT BACKUP ENABLED 3.............................................................................30
FIGURE 29: FLOAT BACKUP DISABLED 1............................................................................31
FIGURE 30: FLOAT BACKUP DISABLED 2............................................................................31
FIGURE 31: FLOAT BACKUP DISABLED 3............................................................................32
FIGURE 32: NODE IP SET......................................................................................................33
FIGURE 33: NODE ALL CHECK .............................................................................................33
FIGURE 34: REBOOT..............................................................................................................34
FIGURE 35: SNMP...................................................................................................................35
FIGURE 36: SNMP MENU.......................................................................................................36
FIGURE 37: PORT CONTROL ................................................................................................37
FIGURE 38: PORT SECURITY................................................................................................38
TABLE 1: TECHNICAL SPECIFICATIONS................................................................................7
TABLE 2: POWER CONNECTIONS........................................................................................11
TABLE 3: ALARM CONNECTIONS.........................................................................................12
TABLE 4: LED FUNCTION.......................................................................................................15
TABLE 5: 8-WAY DIP SWITCH SETTINGS ............................................................................16
TABLE 6: TERMINAL COMMAND LINES ...............................................................................21

PAGE 5 10116302
OSD2254E Operator Manual
1 TECHNICAL SUMMARY
1.1 BRIEF DESCRIPTION
1.1.1 OVERVIEW
The OSD2254E is a 6-port lite managed industrial ethernet switch with four Gigabit RJ45 and two Gigabit
SFP uplink ports which can be used as standard ports or as a redundant fiber ring using OSD’s proprietary
ring protocol. Along with higher level features including SNMP, VLAN and IGMP snooping the OSD2254E
is suitable for use in critical networks. A rugged IP30 casing, fan-less design and wide operating
temperature range from -40 to +75ºC make it suitable for use in a wide range of harsh industrial
environments.
1.1.2 FEATURES AND BENEFITS
▲Complies with IEEE802.3i/802.3u/ 802.3ab
10/100/1000Base-T, IEEE802.3z
1000Base-Lx/Sx standards
▲Has a total of six ports: four fixed copper
ports for 10/100/1000Base-T and two SFP
ports for the fiber ring or non-ring
(100Base-Fx or 1000Base-X)
▲A network diameter of hundreds of
kilometers is practical
▲Ring reconfiguration in the case of cable or
switch failures takes less than two
milliseconds per hop
▲MDI/MDIX Crossover: no need for
crossover cables
▲Can be used with either 1 or 2 singlemode
or multimode fiber over a variety of link
budgets via plug in SFP module (sold
separately)
▲Auto-Negotiation for half or full duplex
operation
▲Supports 10KB jumbo frames
▲Powered by non-critical 10 to 36VDC or
24VAC supplies with dual power supply
inputs
▲Integrates with third party NMS system via
industry standard SNMP v1, v2c, v3
▲Supports VLAN and IGMP v1, v2, v3
snooping
▲Port security guaranteed with MAC binding
function
▲Operates over the temperature range of -
40°C to +75°C
▲Web browser GUI included
▲Compatible with the OSD22XX series of
redundant ring Gigabit Ethernet switches
▲Available for operation in ring, bus or point-
to-point configuration
▲DIN rail or wall mounting

PAGE 7 10116302
OSD2254E Operator Manual
1.3 TECHNICAL SPECIFICATIONS
TABLE 1: TECHNICAL SPECIFICATIONS
Hardware
Ethernet
4 x 10/100/1000Base-T RJ45, IEEE802.3i/802.3u/802.3ab
Data Rate
10, 100, 1000Mbps with energy detect, auto negotiate, auto
MDIX
Jumbo Frame Support
10KB
SFP
2 x Gigabit SFP ports (100Mbps or 1000Mbps user selectable)
Optical Data Interface
IEEE802.3z 1000Base-Lx/Sx, IEEE802.3u 100Base-Fx
Enclosure Protection Class
IP30
Installation
DIN rail, wall mount or desktop
Alarm (ring version only)
Ring to Bus, High Temperature
Alarm Interface
Opto isolated MOSFET rated at 100mA @ 46V maximum
Alarm Connector
4 way 3.5mm terminal block
DIP Switch
8 way DIP switch for configuration
Power Requirements
+10 to 36VDC or 22 to 28VAC
Power Connector
4 way 5.08mm terminal block
Indicators
4 x Copper Link on each RJ45
4 x Copper Activity on each RJ45
2 x SFP Speed/Activity/Link on each SFP
2 x Redundant Power Supply
1 x Initialise/Ring/Bus
1 x Power/Temperature Alarm
Environmental
-40 to +75ºC
Relative Humidity
0 to 95% non-condensing
Dimensions
43W x 91D x 130H mm
Weight
620g
Management
Interfaces
Command Line Interface (CLI USB Type B)
Web browser based Graphical User Interface (GUI) (Chrome or
Edge browser)
SNMP v1, v2c, v3
Port Configuration
Port enable/disable, Auto negotiation
Port Status
Speed, duplex mode, link status, auto negotiation status
Port Security
MAC address binding
VLAN
802.1Q VLAN
Multicast Protocol
RFC 2236 IGMP snooping v1, v2, v3
Ethernet Redundancy
OSD-Ring
SNMP MIBs
RFC 1213 MIB
Private MIB Framework
Warranty
Warranty Period
5 years
MTBF (Ground Benign Environment,
30ºC)
480,000 hours

PAGE 8 10116302
OSD2254E Operator Manual
1.4 PORT ALLOCATION
Front Panel: There are four fixed copper ports for 10/100/1000Base-T and two SFP ports.
Top Panel: The top panel consists of a 4-way 5.08mm terminal block power connector and a
4-way 3.5mm terminal block alarm connector.
Bottom Panel: 8-Way DIP switch, Mini USB connector and a Type-B USB connector.
Each section will be described further throughout this manual.
FIGURE 2: PORT ALLOCATION
Front Panel
Top Panel
Bottom Panel
Ring LED
Power LED
Activity LED x 4
RJ45 Port x 4
SFP Port x 2
Alarm Port
Dual Power
Port
Console Port
Programming
Port
Configuration
Switches
Earth Screw
Link LED x 4
Link LED x 2
Power Supply
LED x 2

PAGE 9 10116302
OSD2254E Operator Manual
2 INSTALLATION AND OPERATION
2.1 INTRODUCTION
This section outlines the methods required to install and operate the OSD2254E successfully.
It should be studied carefully if damage to the equipment or poor results are to be avoided.
This equipment has been fully tested prior to dispatch and is ready for immediate operation.
However, it is advisable to check for external transportation damage before operation. If
damage is evident, return the unit with the packaging to your supplier immediately.
2.2 INSTALLATION
2.2.1 WARNING AND PRECAUTIONS
▲ELECTROMAGNETIC COMPATIBILITY
WARNING: This is a Class A product. In a domestic environment this product may cause
radio interference in which case the user may be required to take adequate measures.
▲OPTICAL OUTPUT OPERATION
WARNING: Laser Safety: Class 1 Laser Product per IEC/EN 60825-1:2014 standard.
Class 1
The OSD2254E is a Class 1 laser product.
PRECAUTIONS
▲All service personnel should be provided training as to the hazards of direct viewing
of laser radiation and of the precautionary measures during servicing of equipment
▲Areas where laser products are installed should be restricted in access to trained
service personnel only and appropriate warning signs posted in the work area.
▲All laser apertures should be covered by protective covers when not connected to
optical fibers. Never leave outputs uncovered.
▲Laser equipment should be positioned above or below eye level where possible.
Apertures should be positioned away from personnel.
▲Protective eyewear should be worn in the vicinity of laser equipment.

PAGE 10 10116302
OSD2254E Operator Manual
2.2.2 DRAWINGS AND DIMENSIONS
The OSD2254E is designed to be wall mounted onto a DIN-Rail (35mm top hat) fixture or by
using 4 x M4 captivated screws (DIN Rail mount requires removal and flanges repositioned –
see below). The unit dimensions (excluding connectors, SFPs, etc) is shown in Figure 3
below.
DIN Mount Wall Mount
DIN to Wall Mount Conversion
FIGURE 3: MOUNTING DIMENSIONS
Unscrew x 4
Remove DIN
Unscrew x 2
(Top & Bottom)
Rotate
Screw x 2
(Top & Bottom)

PAGE 11 10116302
OSD2254E Operator Manual
2.2.3 LOCATION
As with any electrical device, the OSD2254E should be placed where the switch will not be
subjected to extreme temperatures, humidity, or electromagnetic interference. Specifically,
the site selected should meet the following requirements:
•The ambient temperature should be between -40°C to 75°C.
•The relative humidity should be less than 95 percent, non-condensing.
•Surrounding electrical devices should not exceed the electromagnetic field (RFC)
standards.
•Make sure that the switch receives adequate ventilation. Do not block the ventilation
holes on any side of the switch.
Note: Without proper cooling and control (lowering) of ambient temperature, the components
within the OSD2254E can be subject to increased heat shortening the longevity and reliability.
It is thus good engineering practice to ensure the unit is installed in a well ventilated area.
2.2.4 POWER SUPPLY CONNECTIONS
The OSD2254E requires external power to the Redundant DC Terminal Block Power
Connector located at the top of the unit. Always ensure that the power is off before any
installation.
Redundant DC Terminal Block Power Inputs
There are two pairs of power inputs for use with redundant power sources. Only one power
input is required to be connected to run the switch.
Step 1: Connect the DC power to the appropriate power source, connect the plug-able
terminal block on the OSD2254E switch and then turn power on.
Step 2: Disconnect the power if you want to shut down the switch.
TABLE 2: POWER CONNECTIONS
External Power Pin
Specification
Power 1 +
+10VDC to 36VDC or 22 to 28VAC
Power 1 0V
Ground –0V
Power 2 +
+10VDC to 36VDC or 22 to 28VAC
Power 2 0V
Ground –0V
Earth Ground Connection
FIGURE 4: POWER SUPPLY CONNECTIONS

PAGE 12 10116302
OSD2254E Operator Manual
2.2.5 ALARM CONNECTION
The OSD2254E has two monitoring alarm outputs: 1) Ring to Bus Alarm and 2) Temperature
Alarm. The alarm connections and conditions for alarm outputs are as set out in Table 3.
There are four pins on the 3.5mm terminal block used alarm output. Maximum ratings the
OSD2254E relay can drive is 100mA @ 46V(max). Note: Alarm output has no polarity.
TABLE 3: ALARM CONNECTIONS
Alarm
Output
Alarm 1
Ring /Bus Status
Alarm 2
Temperature
Open
Ring
Less than 80C
Closed
Bus*
Higher than 80C
*Note: Bus alarm is only triggered after a ring connection is established.
FIGURE 5: ALARM OUTPUTS
FIGURE 6: CONTACT CLOSURE OUTPUT
Alm1
Alm2
OSD2254E

PAGE 13 10116302
OSD2254E Operator Manual
2.2.6 USB CONNECTOR
The OSD2254E has a USB –Type B connector located on the bottom of the unit that is used
for Command Line Interface (CLI) from the PC to the OSD2254E via the PC’s USB connector.
See section 2.4 for further CLI information.
FIGURE 7: USB TYPE B CLI PORT
To operate and control the OSD2254E using the CLI, a proprietary driver will be required to
be installed onto the PC being used. The driver can be found and downloaded via the
following site: www.silabs.com and searching for the CP210x driver. Download the relevant
driver for your operating system, install and follow the installation instructions from your PC.
FIGURE 8: CLI INSTALLATION
USB Type B - CLI Port

PAGE 14 10116302
OSD2254E Operator Manual
2.2.7 MINI USB PORT
The Mini USB Port is used for uploading firmware updates. All OSD2254E units will be
shipped with the latest firmware already installed. This port has no function for end user.
FIGURE 9: USB CONNECTOR
Mini USB Port

PAGE 15 10116302
OSD2254E Operator Manual
2.2.8 LED INDICATORS
FIGURE 10: PORT/LED
TABLE 4: LED FUNCTION
No
Function
LED Colour Function
On
Blink
Off
Green
Gr/Am
Amber
Power
-
No Power
Power
-
-
Ring/Bus
Initial
Non-Ring
Ring
-
-
-
Activity
No Activity
1G/100M/10Mbps
-
-
Link
-
No Link
-
-
On
Fiber Link
Activity
No Link
1Gbps
-
100Mbps
Power
Supply 1
-
Not
Connected
Power On
-
-
Power
Supply 2
-
Not
Connected
Power On
-
-

PAGE 16 10116302
OSD2254E Operator Manual
2.2.9 CONTROLS
The OSD2254E has an 8-way DIP switch to control a number of functions. Table 5 outlines
the function of each switch.
FIGURE 11: CONTROLS
FIGURE 12: 8-WAY DIP SWITCH
TABLE 5: 8-WAY DIP SWITCH SETTINGS
SWITCH
NUMBER
DESCRIPTION
FUNCTION
SWITCH
POSITION
1
GUI Mode
GUI Enabled
ON*
GUI Disabled
OFF
2
Reserved
Normal Operation/User Mode
OFF*
3
Reserved
Normal Operation/User Mode
OFF*
4
Reserved
Normal Operation/User Mode
OFF*
5
Ring/Bus
Non-Ring
ON
Ring
OFF*
6
Port 5 Fiber Speed
100Mbps
ON
1000Mbps
OFF*
7
Port 6 Fiber Speed
100Mbps
ON
1000Mbps
OFF*
8
Reserved
Erase Mode
ON
Normal Operation/User Mode
OFF*
* Default settings.
ϮAt Off position and power-up, unit will switch to default settings.
Note: The unit requires a power cycle (Off/On) for any switch position change to take effect.
ON
OFF
1
2
3
4
5
6
7
8
8-Way DIP Switch

PAGE 17 10116302
OSD2254E Operator Manual
2.2.10 FITTING SFP CONNECTORS
Care should be taken when inserting/removing the SFP connectors from SFP port 5 and 6 as
SFP modules are Electrostatic (ES) sensitive and Electrostatic Discharge (ESD) precautions
should be taken when installing. Ensure that the SFP is fully engaged and latched into
position.
Inserting SFP –Ensure that the SFP lever is in the locked position and insert into appropriate
SFP port. Gently push the SFP until it locks into place. Remove plastic/rubber dust cap and fit
fiber cable or RJ45 plug.
Removing SFP –Remove fiber connector or RJ45 plug. Pull the SFP lever down to unlock
SFP from housing. Using the lever, gently pull the SFP out.
Fiber SFP
Copper SFP
FIGURE 13: FITTING/REMOVING SFP CONNECTORS
Inserting
SFP
Removing
SFP
1
2
Inserting
SFP
Removing
SFP
1
2

PAGE 18 10116302
OSD2254E Operator Manual
2.3 OPERATION
When using the OSD2254E for the first time, check that the unit is in good condition with no
visible damage.
Upon power up check that the indicators illuminate accordingly on power up (see Table 4).
2.3.1 CONNECTIONS
For RJ45 connection use Category 5 (CAT5) or higher. Length should be no more than 100
meters.
For singlemode fiber connections, fiber used must be 9/125μm singlemode fiber.
For multimode fiber connections, fiber used must be 50/125μm or 62/125μm multimode fiber.
Plug in the appropriate connectors for system configuration;
–RJ45 cable to fixed copper ports (port 1 and 2) and copper SFP modules
–LC or SC fiber cable to fiber SFP modules.
Redundant Ring Operation
The OSD2254E connected in a redundant ring topology providing maximum reliability on
critical networks (up to 64 nodes per ring). In the event of device or fiber failure the data path
will automatically switch to a secondary path in less than 2ms per node to maintain ring
network integrity.
FIGURE 14: REDUNDANT RING CONFIGURATION

PAGE 19 10116302
OSD2254E Operator Manual
To connect the OSD2254E in a redundant ring configuration ports 5 and 6 must be used
together with fiber SFPs. The non-ring ports (ports 1,2,3 & 4) should be used to connect to
your Ethernet devices (eg. Cameras, PLCs, computers, etc.)
Figure 15 shows the connection method. Typically, the SFP used would be a fiber SFP with
duplex LC connectors. The dashed line indicates the closed loop, but more OSD2254E units
can be connected to the ring as required using this topology. Ensure that the switch settings
for port 5 and 6 are set to 1000Mbps (1Gbps) –see Table 5. Note: connection diagram is for
illustrative purposes only. Port 5/6 can be connected in to either port to achieve redundant
ring configuration.
FIGURE 15: REDUNDANT RING CONNECTION
Bus Operation
To connect the OSD2254E in a bus configuration ports 5 and 6 must be used together with
fiber SFPs. The remaining ports (ports 1,2,3 & 4) should be used to connect to your Ethernet
devices (eg. Cameras, PLCs, computers, etc.)
FIGURE 16: BUS CONNECTION
Connect more OSD2254E units as required using this
topology
Connect more OSD2254E units as required using this
topology

PAGE 20 10116302
OSD2254E Operator Manual
2.4 COMMAND LINE INTERFACE
The Command Line Interface (CLI) is a useful tool for checking link status and debugging link
connections. To enable the use of CLI the OSD2254E must be connected to a PC with a
serial port and an appropriate cable as specified in section 2.2.6. Using a terminal emulation
program such as Hyperterminal, a number of command lines specific to the OSD2254E can
be implemented to check link/node status, ring/bus topology and enable/disable float backup.
2.4.1 TERMINAL EMULATION SETUP
Using a terminal emulation program such as hyperterminal the following parameters should
be set up for correct command line operation. Select the appropriate “COM port” set up for
the serial port.
FIGURE 17: SERIAL PORT SETTINGS
Table of contents
Other OSD NETWORKS Switch manuals
Popular Switch manuals by other brands
HP
HP 438031-B21 - 1:10Gb Ethernet BL-c Switch user guide
Festo
Festo PEV-1/4-B operating instructions
3Com
3Com Baseline Switch 2916-SFP Plus Specifications
Edimax
Edimax EK-UA2C user manual
ZyXEL Communications
ZyXEL Communications ES1100-8P user guide

Omega Engineering
Omega Engineering LVH-200 Series user guide

