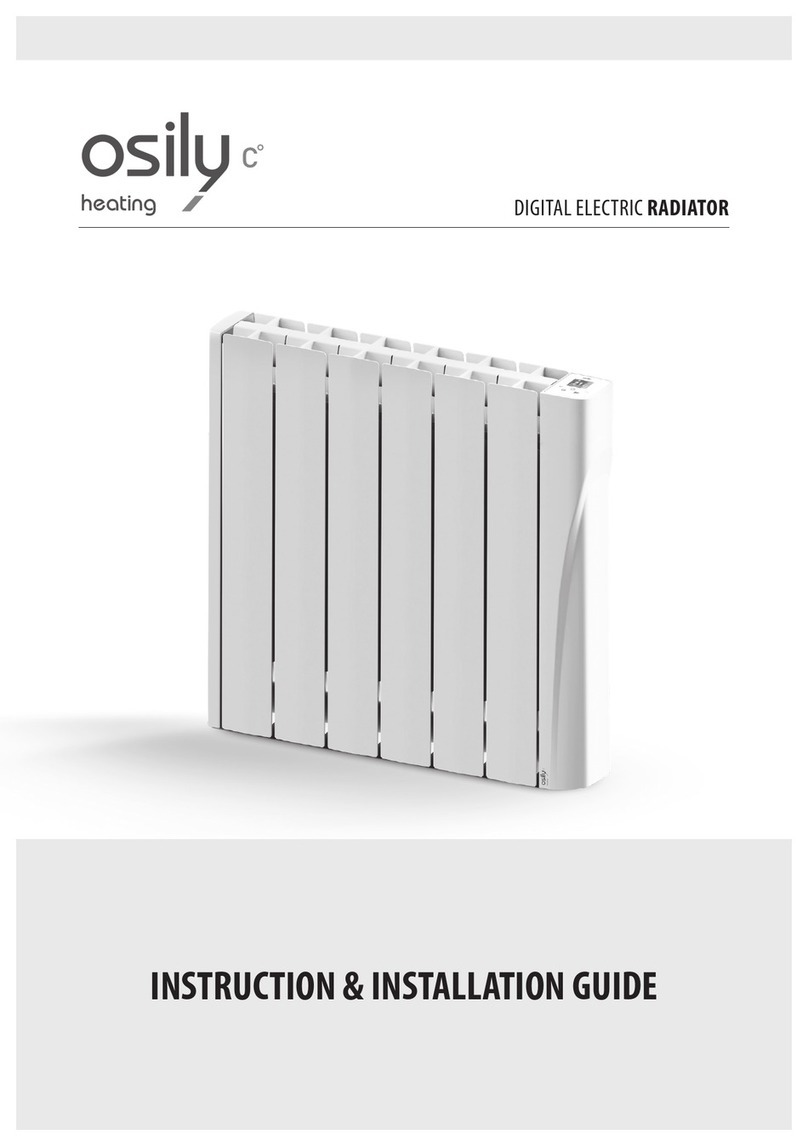
osily OSDR700P Owner's manual

DIGITAL OIL FILLED RADIATORS
Installation And Operation Instructions
www.osily.co.uk
Model Number
OSDR700P/1000P/1500P/2000P

www.osily.co.uk
OSDR700P/1000P/1500P/2000P Digital Oil Filled Radiator
Installation & Operating Instructions
IMPORTANT SAFETY INFORMATION
WARNING: In order to avoid overheating, do not cover the heater.
We recommend that this appliance is installed by a qualified electrician
in accordance to the current wiring and building regulations.
This appliance is intended for internal use only in domestic and small commercial
applications, the instructions and warnings must be adhered to at all times.
Do not cover the heater. Never cover or obstruct in any way the heat outlet slots at the top of
the heater or the air inlet slots in the base of the heater.
This appliance can be used by children aged from 8 years and above and persons with
reduced physical, sensory, or mental capabilities or lack of experience and knowledge if they
have been given supervision or instruction concerning use of the appliance in a safe way and
understand the hazards involved.
Children shall not play with the appliance. Cleaning and user maintenance shall not be made
by children without supervision.
Some parts of this appliance can become very hot and cause burns, please ensure that the
heater has been switched off and allowed to cool before cleaning etc.
If the supply cord is damaged, it must be replaced by the manufacturer, it’s service agent or
similarly qualified persons in order to avoid a hazard
Please do not use the product for any other purpose. Do not use this product
with an extension lead or multi plug adapter.
For your safety, this heater is fitted with a thermal cut-out. In the event that the product
overheats for some reason, the cut-out prevents excessive temperatures on the product
by cutting the power to the heater.
There are no user serviceable parts in this appliance.
Please unplug and ensure that the unit is disconnected from the mains supply before any
attempt to open the case or any part of this heater
Thank you for purchasing this Osily Panel Heater. Please read these instructions before
installation or operation and leave with the appropriate person for future retention.
16 mm
5 mm
57 mm

www.osily.co.uk
Wall Mounting your Radiator
To Install your Radiator
Make sure distances to walls and objects are observed at all times, this is very important to
prevent damage to walls, furniture and soft furnishings and to prevent the product overheating.
1. Use the screws, dowels and brackets supplied by the manufacturer
2. For drilling dimensions, see the drilling template
3. Steps on the installation process are show on the following pages.
CAUTION: Before switching on the appliance make sure that the radiator is correctly fixed
and is secure to the wall.
Wall Mounting Instructions
OSDR700P/1000P/1500P/2000P
1x Low Bracket 2x High Bracket 5x Wall Mounting
Screws
2x Locking Screws

www.osily.co.uk
Wall Mounting Instructions
MODEL OSDR700P OSDR1000P OSDR1500P OSDR2000P
L1 105mm 210mm 424mm 424mm
L2 423mm 423mm 423mm 423mm
L3 105mm 105mm 210mm 210mm
1
2
>20cm
>20cm
>10cm
>50cm
>60cm
2
1
φ8
model
700W
1000W 1500W
2000W
L1(mm)
105 210 422 422
L2(mm) 423
423 423 423
L3(mm)
105 105 210 210
>20cm
>20cm
>10cm
>50cm
>60cm
2
1
φ8
model
700W
1000W 1500W
2000W
L1(mm)
105 210 422 422
L2(mm) 423
423 423 423
L3(mm)
105 105 210 210
>20cm
>20cm
>10cm
>50cm
>60cm
2
1
φ8
model
700W
1000W 1500W
2000W
L1(mm)
105 210 422 422
L2(mm) 423
423 423 423
L3(mm)
105 105 210 210
>20cm
>20cm
>10cm
>50cm
>60cm
2
1
φ8
model
700W
1000W 1500W
2000W
L1(mm)
105 210 422 422
L2(mm) 423
423 423 423
L3(mm)
105 105 210 210
>20cm
>20cm
>10cm
>50cm
>60cm
2
1
φ8
model
700W
1000W 1500W
2000W
L1(mm)
105 210 422 422
L2(mm) 423
423 423 423
L3(mm)
105 105 210 210
>20cm
>20cm
>10cm
>50cm
>60cm
2
1
φ8
model
700W
1000W 1500W
2000W
L1(mm)
105 210 422 422
L2(mm) 423
423 423 423
L3(mm)
105 105 210 210
OSDR700P OSDR1000P
OSDR1500P OSDR2000P

www.osily.co.uk
Operating Instructions
Quick Start Guide
If you would like to use your radiator to heat up a room, please use these simple steps:
Please read the instruction manual before you plug in the radiator.
1. Check that there is no damage to the radiator before assembly.
2. Connect the radiator to the mains power supply that corresponds with the product rating plate.
3. Press the power button on the back of the radiator to switch the unit on.
4. On the touch screen LED panel on top of the radiator, press the on button
.
5. The display will then light up. Press the mode button
until the comfort symbol
is illuminated
.
6. From here you can press the
or
symbol on the screen to adjust the temperature.
7. Press the
mode button to confirm the required temperature.
8. The heating icon will then illuminate meaning the radiator is heating up.
The radiator will
not start to heat until the room temperature is lower than the temperature you have selected.
9. The radiator will stay on until the on/off button
on the LED panel is pressed or
by pressing the switch on the back of the radiator.
10. Remember to unplug the radiator when not in use.
OPERATING INSTRUCTIONS
QUICK START GUIDE
\I I
8
On / Off Switch

www.osily.co.uk
LED Display Key
LED Screen Description
ICON DESCRIPTION ICON DESCRIPTION
Multifunctional digital display Heating icon
Day of the week number (1 to 7) Temperature safety function
Comfort mode Wi-Fi icon - not used in this model
Economy mode Open window function
Frost prevention mode Child lock
Time mode Daily status (0 to 24h)
Sensor mode Scroll left (swipe)
Not used in this model Scroll right (swipe)
Power button Decrease button
Increase button Mode button
Note: On first use of this heater you may notice a slight odour. This is normal and will soon subside.

www.osily.co.uk
This Radiator has 5 Modes
Comfort Mode The radiator will stay at a set temperature as in the Quick Start Guide.
Economy Modes The radiator will stay at a set temperature.
Frost Prevention A set temperature that cannot be amended of 7°C to prevent Frost.
Timer Mode There are 7 modes within this function that can be set for economy
and comfort settings on a 24 hour clock. These modes can also be
changed or modified to suit you.
Sensor Mode The radiator can detect if there is any movement in the room and switch
to a more energy efficient mode until motion is detected.
(This mode is found after the timer mode and setting the clock instruction)
Comfort Mode
In COMFORT MODE the radiator runs until the room temperature reaches the set temperature.
The default setting temperature is 19°c. Comfort Mode is designed for use when the room is occupied.
To adjust the temperature whilst in COMFORT MODE press
or
to change the temperature,
the range is 7~30°c, in a 0.5°c increments.
Economy Mode
Press the
mode button until the ECONOMY MODE function is displayed. In ECONOMY MODE, the
temperature setting should not be higher than COMFORT MODE. The default temperature is 15.5°c.
ECONOMY MODE is designed to be used when the room is not occupied.
To adjust the temperature whilst in ECONOMY MODE press
or
to change the temperature,
the range is 7~30°c, in a.0.5°c increments.
Frost Prevention Mode
Press the mode
button until the frost prevention mode is displayed. This mode is designed
to ensure the lowest temperature is no less than 7°C, so that any frost risk can be avoided.
The temperature cannot be adjusted in this mode.
Timer Mode
Press the
mode button until the TIMER MODE symbol is displayed. During the initial set-up
of your Radiator and following long periods without use, the radiator will require the time
and day to be set. Setting the time and day allows you to pre-set your preferences within the
programs to allow the radiator to be at your preferred temperature.

www.osily.co.uk
Setting the clock and programming
While In Timer Mode And Programming
1. Press the
mode button for 5 seconds until the hour icon
(“00”) flashes. If there is no operation in 30 seconds, the screen
will automatically jump to the minute settings.
2. Press the
button and
button to set hour (“00”). If there
is no operation in 30 seconds, the screen will automatically
jump to the minute settings. Note- The radiator uses a 24hr
clock function.
3. Short press the
mode button, until the minute icon (“00”)
flashes, Press
key and
key to set minute (“00”) If there
is no operation in 30 seconds, the screen will automatically
jump to the week settings.
4. Short press the mode button, the day icon flashes (“1”)
Press
and
keys to select the day of the week where;
1=Monday, 2=Tuesday, 3=Wednesday, 4=Thursday, S=Friday,
6=Saturday, 7=Sunday
Press
mode button to move to the program settings.
If there is no operation in 30 seconds, the screen will
automatically jump to the program setting.
5. You can switch between programs by pressing
and
keys. Select program (P1-P7 where1=Monday), Set your desired
program and then press mode key to move to the next day and
repeat until all 7 days have been completed.
6. After selecting the program on the seventh day (Sunday),
press the
mode button to return to the timing
master interface.
If there is no operation in 30 seconds, the screen will
automatically jump to the home page.
y
Day
Preset program
AND PROGRAMMING
AND PROGRAMMING
Preset
Program
Day

www.osily.co.uk
You May Want to Modify the Program
There are 7 heating programmes that can be used with the timer.
They are indicated by the small squares at the bottom of the LED screen.
Each of these heating programmes can be amended to suit you, if not they can be left at the factory
setting as indicated in the “Pre-set Factory Settings” section of page 14.
The top line indicates the comfort mode
and the bottom line indicates economy mode
.
The example below shows that the radiator will heat to the comfort mode heat setting from 6am to
11pm then switch to economy heat setting mode from 11pm to 6am.
To modify programs (P1 to P7) see below illustrations.
Example: To modify the P1 program.
To get to the programming screen make sure the LED display
is shown as the below with the timer function
showing
underneath the time by pressing the mode key.
1. From here press the
mode button for 5 seconds
until the hour flickers. You can also set the time here
if you haven’t already done so.
2. Then press the
mode button, the minutes will flicker.
7
hour
in the “Preset Factory Settings” section
on page 14.
5
7
hour
in the “Preset Factory Settings” section
on page 14.
5
Heating
Program
7
hour
in the “Preset Factory Settings” section
on page 14.
5
7
hour
in the “Preset Factory Settings” section
on page 14.
5

www.osily.co.uk
3. Press
mode button - the smaller number on the right of the circle
which indicated the day will flicker then press
key until you reach
your desired day. The list of days and the equivalent numbers are
listed on the LED icon descriptions.
4. Then press the
mode button. This should bring you to the
programme screen.
5. Press and hold the
mode button for 5 seconds or until 1 becomes
“00”. Press
or
keys to modify the P1 program. (Press
to
operate COMFORT MODE, press
button to operate ECONOMY MODE)
The program squares will flash.
6. After you have modified the program, press mode button to exit.
7. If you wish to modify more pre-set programs, use the
or
keys to select the program to be modified (P1-P7), then repeat
steps 5 & 6 above for each program being modified.
8. When modifying of pre-sets is completed, wait for 30 seconds and the
screen will return to the timing master interface. The modified pre-sets
will automatically be saved.
9. The modified pre-sets can now be programmed into the required days by
following the steps in “Setting the Clock and Programming” on page 12.
NB: The factory set timing program pre-sets can be restored by resetting back to defaults
by doing the following:
1. Press the power button to put the radiator into standby mode.
2. Press and hold the power button for 15 seconds to restore the device to default settings.
7. If you wish to modify more preset programs, use the + and -
keys to select the program to be modified (P1 - P7), then repeat
steps 5 & 6 above for each program being modified.
When modifying of presets is completed, wait for 30 seconds and the
screen will
The modified presets will automatically be saved.
9. The modified presets can now be programmed into the required days
by following the steps in “Setting the Clock and Programming” on page 11.
NB: The factory set timing program presets can be restored by resetting back to defaults by doing the following:
Press the power button to put the radiator into standby mode.1.
Press and hold the power button for 15 seconds to restore the device to default settings.2.

www.osily.co.uk
Pre-set Factory Setting for the Timing Programs
P1
COMFORT MODE
6:00 to 22:00
(The remaining time
is ECONOMY MODE)
P2
COMFORT MODE
19:00 to 6:00
(The remaining time
is ECONOMY MODE)
P3
COMFORT MODE
6:00 to 9:00 and
16: to 22:00
(The remaining time
is ECONOMY MODE)
P4
COMFORT MODE
6:00 to 9:00, 12:00 to
14:00 and 16: to 22:00
(The remaining time is
ECONOMY MODE)
P5
ECONOMY MODE
0:00 to 24:00
P6
COMFORT MODE
0:00 to 24:00
P7
COMFORT MODE
16:00 to 22:00
(The remaining time
is ECONOMY MODE)

www.osily.co.uk
Sensor Mode
When the radiator is in Sensor Mode, the radiator will automatically shift to a more energy-efficient
mode if there is no movement within the room. If the radiator detects movement, it will automatically
switch back to the set temperature setting.
If you want to use Sensor Mode, you need to press the on/off key
to enter stand-by mode. Press
and hold the plus
key. Press the Mode button until Sensor Mode symbol appears.
NOTE - The function must be set for the sensor symbol to appear. If the function is set at ‘O’ the symbol
will not appear. You can choose for the sensor time setting to “O”, “15”, “30”, “45” and “60” minutes of
no movement being detected. To change this setting please go to ‘Other functions’ below.
How the SENSOR MODE works - example if the radiator is set to:
Detecting time is set to 15 minutes
• In the first 15 minutes if nobody is detected - the temperature will drop to 1°C
below the Comfort mode setting.
• In the second 15 minutes if nobody is detected - the temperature will drop to 2°C
below the Comfort mode setting.
• For the third 15 minutes if nobody is detected - the temperature will change to
Economy mode setting.
• After 24 hours if nobody is detected - the temperature will change to Frost
Prevention mode.
• Once somebody is detected - the temperature will change to economy mode.
• If in the next 15 minutes if somebody is detected - the temperature will change to
2°C below the Comfort mode setting.
• Then in the next 15 minutes if somebody is detected - the temperature will change
to 1°C below the Comfort mode setting.
• And the next 15 minutes after this if somebody is detected - the temperature will
change back to the Comfort mode setting.
Child Lock
The CHILD LOCK function can be used to avoid the settings being adjusted accidentally. To activate the
Child Lock, press the
or
buttons simultaneously for 5 seconds until you see
appears in the
screen. The screen is locked and buttons will no longer allow adjustments. (except when you are in
standby
). To release child lock function, press the
and
together, until
disappears.

www.osily.co.uk
Other Functions
To enter these functions make sure the Radiator is in Stand By Mode. Press and hold the
plus key
until F0 shows on the LED display. To move between function use the
mode function key.
FO Temperature compensation:
This function is to allow for the sensitivity of the temperature to be adjusted. Press
to increase
temperature, press
to decrease temperature, adjusting range is 5~5°C, stepping by 1°C. After set
up, press
to move to the next function.
F1 Motion Sensor:
Press the
plus key to add time and press the minus
key to reduce time. You can use “0”, “15”,
“30”, “45”, “60”min. Select the chosen time and press the function key to confirm
.
F2 Window open function:
During heating, if the temperature suddenly drops by 2°C or more in five minutes, the radiator
switches to Frost Prevention Mode, for the set amount of minutes, if after this time the temperature
keeps dropping, the radiator will continue to stop heating, and will continue to repeat this cycle.
To set the amount of minutes the temperature will drop you can use the plus
or
keys to
select ‘0’ minutes, “60” or “90” minutes, press
to confirm.
F3 Temperature safety function:
If the radiator is set to 25°C on the LED display the inner radiator will continue to heat up until the
room temperature reaches this temperature.
This function allows you to reduce or increase the inner radiator temperature cut off point.
This function is good if you have small children in touching distance of the Radiator and want to
reduce the outer temperature. Or if you would like a room to heat up quicker you can increase the
inner radiator temperature as below.
Press the plus key
to add temperature and press the
minus key to reduce the temperature.
There are 6 temperature options “0”’ “40”’ “45”’ “50”’ “55”’ “60” °C
After set up, press
to confirm.
F4 WiFi Function:
This feature is not available on this model.

www.osily.co.uk
Reset to Default Settings
When in STAND BY Mode, press and hold the On/Off button
to reset your radiator and reinstall
the original factory configuration.
The full screen will display for 3 seconds and then go to stand by press
to turn on the radiator.
High and Low Temperature Alarm
PROBLEM CODE
The room temperature sensor is disconnected or
the room temperature is too low Err 1
The room temperature sensor is short-circuited or
the room temperature is too high Err 2
IV / MAINTENANCE
TURN OFF THE UNIT BEFORE ANY MAINTENANCE.
Clean with a soft damp cloth.
Always disconnect the appliance and let it completely cool before any maintenance.
Clean your appliance at least once a year with a vacuum cleaner to remove any dust deposits
when switched off and unplugged.
Never immerse the device in water or any other liquid.
The coating of your radiator ensures perfect and unalterable protection. To clean it, use only a
neutral detergent (cleaner or non-abrasive solvent). The thermostat housing is made of plastic,
do not use solvents for maintenance.
Any repair must be carried out by the manufacturer, its representatives or by the after-sales service.

www.osily.co.uk
Disposal
For end of life disposal of this product please do not dispose of with household waste.
Please recycle where facilities exist. Check with your Local Authority or supplier for recycling information.
Distributed by YESSS Electrical UK, YESSS House, Foxbridge Way, Normanton, West Yorkshire, WF6 1TN Telephone: 01924 227940
WARNING
Never cut the power cable supplied with your radiator, if it is cut, the electrical part of the radiator
cannot be guaranteed. Never try to open the radiator even when it is not electrically powered.
IMPORTANT
Temperature changes are normal when using an electric thermostat in case of electrical changes,
or changes in ambient conditions outside the room. The set value is correct for radiators installed
in standard environments. It is normal for the regulation to be different for the same temperature
in two different atmospheres (environmental influence).
This manual suits for next models
3
Table of contents
Other osily Heater manuals
Popular Heater manuals by other brands

Roda
Roda RSP-500 operating instructions
Sovelor
Sovelor MT30 Use and maintenance book
Rinnai
Rinnai Graduate MkII Operating information and installation instructions

Cordivari
Cordivari CLAUDIA BLOWER MISTO 500X763 User instructions
Bimar
Bimar HF206 Instruction booklet
Sencor
Sencor SCF 4200WH Translation of the original manual
