manuals.online logo
Brands
  1. Home
  2. •
  3. Brands
  4. •
  5. OSP Designs
  6. •
  7. Indoor Furnishing
  8. •
  9. OSP Designs MET8724 User manual

OSP Designs MET8724 User manual

MET8724 / MET8730
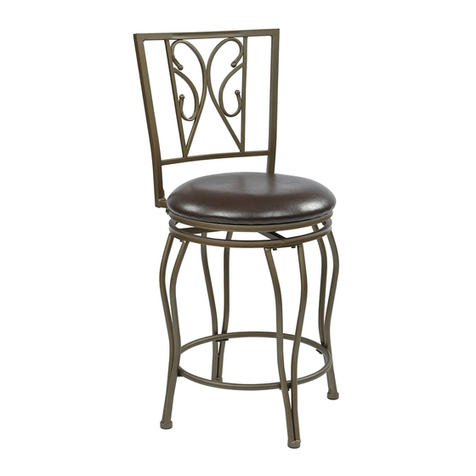
24”& 30”PARSONS STOOL w/ NAIL HEAD ACCENTS
OPERATING INSTRUCTIONS
Enlever toutes les pièces du carton, les organiser selon les numéros de pièce indiqués sur la liste et vérifier les quantités des pièces.
ÉTAPE 1 Poser le dossier (1) sur une surface lisse. Aligner les trous du dossier (1) avec les trous du cadre de l’assise (2). Fixer le trou
central du cadre de l’assise (2) contre le dossier (1) avec une rondelle plate (8), une rondelle de blocage (9) et une vis longue (11),
TEL QUE MONTRÉ DANS LE DESSIN DE DÉTAIL A. Fixer les côtés droit et g auche du cadre de l’assise (2) contre le dossier (1)
avec quatre rondelles plates (8), quatre rondelles de blocage (9) et quatre vis longues (11), TEL QUE MONTRÉ DANS LE DESSIN DE
DÉTAIL B. SERRER TOUTES LES VIS AU MOYEN DE LA CLÉ ALLEN (13).
ÉTAPE 2 Attacher la jambe avant gauche (3) et la jambe avant droite (4) au cadre de l’assise (2) avec deux rondelles plates (8), deux
rondelles de blocage (9) et deux vis longues (11) pour chaque jambe, TEL QUE MONTRÉ DANS LE DESSIN DE DÉTAIL C. NE PAS
SERRER ENTIÈREMENT LES VIS. Insérer barre d’accouplement gauche (6) et droite (7) entre dossier et jambes avant (3 et 4). Insérer
barre d’accouplement avant (5) entre jambes avant (3 et 4). Attacher barres (5, 6, et 7) avec deux vis à bois (10) pour chaque barre, TEL
QUE MONTRÉ DANS LE DESSIN DE DÉTAIL D. NE PAS SERRER ENTIÈREMENT LES VIS. Retourner le siège en position verticale,
appliquer une forte pression pour aligner les pièces et SERRER ENTIÈREMENT TOUTES LES VIS. Fixer l’écran anti-poussièr (12) en
bas de cadre de l’assise (2) à l’aide du matériau à crochets et boucles pré-installé.
ATTENTION : AVANT D’UTILISER LE CHAISE, VOUS ASSURER D’AVOIR RESSERRÉ COMPLÈTEMENT TOUTES LES VIS.
© Office Star Products mars 2015
ÉTAPE 1 2
10
10
10
1
PIÈCE QTÉ
1. Dossier .....................1
2. Cadre de l’assise ..............1
3. Jambe avant gauche ...........1
4. Jambe avant droite ............1
5. Barre d’accouplement avant .....1
6. Barre d’accouplement gauche ....1
7. Barre d’accouplement droite .....1
8. Rondelle plate ................9
9. Rondelle de blocage ...........9
10. Vis à bois ...................6
11. Vis longue ..................9
12. Écran anti-poussièr ...........1
13. Clé allen (non montré) .........1
MET8724 / MET8730
24 PO et 30 PO CHAISE PARSONS AVEC ACCENTSTÊTE DE CLOU
INSTRUCTIONS DE MONTAGE
ÉTAPE 2
3
5
4
13
1
6
7
NOTES IMPORTANTES :
1. Utilisez les outils à mains seulement pour l’assemblage comme les outils lourds
peuvent provoquer des dommages.
2. Enlevez soigneusement n’importe quelles agrafes utilisées pour l’emballage.
3. Le Tourne-a-vis de Phillips est aussi besoin pour l’assemblage (non fourni).
WARNING
1. Do not use this product unless all screws and bolts are securely
tightened.
2. Check that all screws and bolts are tight every three months or as
needed.
3. Dispose of packing material properly. Do not use plastic cover as
head covering. It may cause suffocation.
4. Do not use this product as a stepladder.
5. Use this product for its intended purpose only.
8. Intended for residential use only.
OSP DESIGNS LIMITED WARRANTY
OSP Designs Warrants, to the original purchaser its products to be free from defects in material and workmanship for a period of 90 days. Defects and damage
from misuse, abuse, negligence, alteration, accident, vandalism, rusting, acts of nature or any other event beyond the control of OSP Designs is not covered.
The warranty does not cover cosmetic damage that may result from normal use. Liability for incidental or consequential damages is excluded. The user
assumes all risk of injury resulting from use of this product. This warranty gives you specific legal rights, and you may also have other rights which vary from
state to state.
To make a warranty claim, contact Parts Department. Provide model number, proof of purchase, description of the problem and obtain return authorization.
At it’s option Office Star Products will:
(a) Supply compatible components of current manufacture.
(b) Repair the customer’s component. The customer must prepay freight on any components returned to the factory. Return freight on components
still in warranty will be paid by Office Star Products.
It is the customer’s responsibility to prepay freight on any components returned to the factory. Return freight on components covered by warranty
will be paid by Office Star Products.
Our quality standards are among the highest in the industry. Sometimes, no matter how hard we try, there are times when parts are damaged or missing. Our
Parts Department will do everything possible to promptly remedy the problem. Contact us via e-mail parts@officestar.net, by Fax 1-909-930-5629, or toll free
parts number 1-800-950-7262, Monday through Friday 8:00 a.m. - 5:00 p.m. Pacific Time.
DÉTAIL C
8911 13
DÉTAIL D
10
DÉTAIL B
8
9
11
13
DÉTAIL A
8
9
11
13
© Office Star Products March 2015
IMPORTANT NOTE:
1. Use hand tools only for assembly as power tools may cause damage.
2. Carefully remove any staples used for packaging.
3. Phillips Screwdriver also needed for assembly (not provided).
STEP 1 2
10
10
10
DETAIL C
8911 13
DETAIL D
10
DETAIL B
8
9
11
13
DETAIL A
8
9
11
13
1
PART QTY
1. Chair Back ...................1
2. Seat Frame ..................1
3. Left Front Leg ................1
4. Right Front Leg ...............1
5. Front Stretcher ................1
6. Left Stretcher .................1
7. Right Stretcher ................1
8. Flat Washer ..................9
9. Lock Washer .................9
10. Wood Screw ................6
11. Long Screw .................9
12. Dust Barrier .................1
13. Allen Wrench ................1
MET8724 / MET8730
24”& 30”PARSONS STOOL w/ NAIL HEAD ACCENTS
ASSEMBLY INSTRUCTIONS
STEP 2
3
5
4
12
1
6
7
Remove all parts from carton, separate by part numbers indicated on parts list, and verify part quantities.
STEP 1 Place Chair Back (1) on a soft surface. Align the holes on the Chair Back (1) with the holes on the Seat Frame (2). Secure the
center hole of the Seat Frame (2) to the Chair Back (1) using one Flat Washer (8), one Lock Washer (9) and one Long Screw (11),
AS SHOWN IN DETAIL A. Secure the right and left side of the Seat Frame (2) to the Chair Back (1) using four Flat Washers (8), four
Lock Washers (9) and four Long Screws (11), AS SHOWN IN DETAIL B. TIGHTEN ALL SCREWS USING ALLEN WRENCH (13).
STEP 2 Attach Left Front Leg (3) and Right Front Leg (4) to Seat Frame (2) using two Flat Washers (8), two Lock Washers (9) and two
Long Screws (11) for each leg, AS SHOWN IN DETAIL C. DO NOT FULLYTIGHTEN SCREWS. Insert Left Stretcher (6) and Right Stretcher (7)
between Chair Back (1) and Front Legs (3 & 4). Insert Front Stretcher (5) between Front Legs (3 & 4). Secure Stretchers (5, 6, & 7) using
two Wood Screws (10) for each Stretcher, AS SHOWN IN DETAIL D. DO NOT FULLY TIGHTEN WOOD SCREWS. Turn chair to the
upright position, apply firm pressure to align and FULLY TIGHTEN ALL SCREWS. Secure Dust Barrier (12) to bottom of Seat Frame (2)
using pre-installed hook and loop material.
ATTENTION: MAKE SURE ALL SCREWS ARE FULLY TIGHTENED BEFORE USING CHAIR.
MET8724 / MET8730
24 PO et 30 PO CHAISE PARSONS AVEC ACCENTSTÊTE DE CLOU
MODE D’EMPLOI
GARANTIE LIMITÉE OSP DESIGNS
OSP Designs garantit à l’acheteur original que ses produits sont exempts de vices de matériaux et de fabrication pendant une période de 90 jours. Cette
garantie ne couvre pas la main d’œuvre, le transport ou les dégâts entraînés par la mauvaise utilisation, la négligence, la modification, les accidents, le
vandalisme, la rouille, les catastrophes naturelles ou tout autre événement indépendant de la volonté OSP Designs. La garantie ne couvre pas des dégâts
superficiels qui pourraient se produire au cours de l’utilisation normale. La responsabilité de dommages indirects ou accessoires est exclue. L’utilisateur
accepte tout risque de blessure résultant de l’utilisation de ce produit. Cette garantie vous accorde des droits spécifiques reconnus par la loi, et vous pouvez
avoir d’autres droits qui varient d’un état et d’une province à l’autre.
Pour faire une réclamation de garantie, contacter le service des pièces. Fournir le numéro de modèle, preuve de paiement, et une description du problème.
À sa discrétion, Office Star Products:
(a) fournira des pièces compatibles de produits courants
(b) réparera la pièce du client. Le client doit payer d’avance les frais de transport de toute pièce retournée à l’usine. Les frais de transport de retour
pour des pièces encore sous garantie seront payés par Office Star Products.
C’est la responsabilité du client de payer d’avance les frais de transport de toute pièce retournée à l’usine. Les frais de transport de retour pour des
pièces encore sous garantie seront payés par Produits Office Star.
Nos normes de qualité sont parmi les plus élevées de l’industrie. De temps en temps, malgré nos efforts, il arrive que des pièces soient endommagées
ou manquantes. Notre département de pièces fera tout son possible pour régler le problème promptement. Contactez-nous par courriel à
parts@officestar.net, par télécopie à 1-909-930-5629 ou à notre numéro sans frais pour le service des pièces à 1-800-950-7262, du lundi au vendredi de 8 h
à 17 h, heure du Pacifique.
AVERTISSEMENT
1. Ne pas utiliser ce produit à moins que toutes les vis et tous les bou-
lons soient resserrés.
2. Vérifier à tous les trois mois ou au besoin que toutes les vis et tous
les boulons sont resserrés.
3. Éliminer les matériaux de conditionnement d’une manière conven-
able. Ne pas utiliser la couverture en plastique pour couvrir la tête à
cause du risque d’étouffement.
4. Ne pas utiliser ce produit comme un escabeau.
5. Ce produit ne doit servir qu’à l’usage pour lequel il a été conçu.
6. Prévu pour utilisation résidentielle uniquement.
This manual suits for next models

1

Other OSP Designs Indoor Furnishing manuals

OSP Designs CUP082 User manual

OSP Designs

OSP Designs CUP082 User manual

OSP Designs QUINTON QTN296 User manual

OSP Designs

OSP Designs QUINTON QTN296 User manual

OSP Designs KENSINGTON KNS54 User manual

OSP Designs

OSP Designs KENSINGTON KNS54 User manual

OSP Designs ALEXANDRIA ALX12 User manual

OSP Designs

OSP Designs ALEXANDRIA ALX12 User manual

OSP Designs Tacoma TAC12 User manual

OSP Designs

OSP Designs Tacoma TAC12 User manual

OSP Designs CC25 User manual

OSP Designs

OSP Designs CC25 User manual

OSP Designs WESTBROOK WB424 User manual

OSP Designs

OSP Designs WESTBROOK WB424 User manual

OSP Designs SANTA CRUZ STCZ08 User manual

OSP Designs

OSP Designs SANTA CRUZ STCZ08 User manual

OSP Designs NWP25-BK User manual

OSP Designs

OSP Designs NWP25-BK User manual

OSP Designs AURORA AR2544R User manual

OSP Designs

OSP Designs AURORA AR2544R User manual

OSP Designs BRT432-CHY User manual

OSP Designs

OSP Designs BRT432-CHY User manual

OSP Designs PARSONS MET88ES User manual

OSP Designs

OSP Designs PARSONS MET88ES User manual

OSP Designs IND4730-C209-1 User manual

OSP Designs

OSP Designs IND4730-C209-1 User manual

OSP Designs SB283F-G14 User manual

OSP Designs

OSP Designs SB283F-G14 User manual

OSP Designs BRAYDON BRY581 User manual

OSP Designs

OSP Designs BRAYDON BRY581 User manual

OSP Designs HELENA HLN19 User manual

OSP Designs

OSP Designs HELENA HLN19 User manual

OSP Designs MESD MESSINA DESK User manual

OSP Designs

OSP Designs MESD MESSINA DESK User manual

OSP Designs MCKAYLA MK6578 User manual

OSP Designs

OSP Designs MCKAYLA MK6578 User manual

OSP Designs MD2542 User manual

OSP Designs

OSP Designs MD2542 User manual

OSP Designs MIDDLETON MDT13 User manual

OSP Designs

OSP Designs MIDDLETON MDT13 User manual

OSP Designs SANTA CRUZ STCZ27 User manual

OSP Designs

OSP Designs SANTA CRUZ STCZ27 User manual

OSP Designs PASADENA NESTING PASA7920 User manual

OSP Designs

OSP Designs PASADENA NESTING PASA7920 User manual

OSP Designs NWP27-BK User manual

OSP Designs

OSP Designs NWP27-BK User manual

OSP Designs WELLINGTON WEL4630 User manual

OSP Designs

OSP Designs WELLINGTON WEL4630 User manual

Popular Indoor Furnishing manuals by other brands

comfortel 8030 owner's manual

comfortel

comfortel 8030 owner's manual

Mayer 3020 quick start guide

Mayer

Mayer 3020 quick start guide

Teknik Craft 5427456 quick start guide

Teknik

Teknik Craft 5427456 quick start guide

Poliman Moveis 0656.10 Assembling instructions

Poliman Moveis

Poliman Moveis 0656.10 Assembling instructions

New Classic Furniture ELK RIVER EK Assembly instructions

New Classic Furniture

New Classic Furniture ELK RIVER EK Assembly instructions

OVE DYLAN IV 42 installation manual

OVE

OVE DYLAN IV 42 installation manual

Next 665152 Assembly instructions

Next

Next 665152 Assembly instructions

Habitat Kuda 968419 Assembly instructions

Habitat

Habitat Kuda 968419 Assembly instructions

Zenna Home 9114W Assembly instructions

Zenna Home

Zenna Home 9114W Assembly instructions

Dorel Living DL8559-R manual

Dorel Living

Dorel Living DL8559-R manual

Canvas WHISTLER CONVERSATION 088-2298-2 Assembly instructions

Canvas

Canvas WHISTLER CONVERSATION 088-2298-2 Assembly instructions

Next BRONX & MARBLE M50775 Assembly instructions

Next

Next BRONX & MARBLE M50775 Assembly instructions

Summit Sensit operating instructions

Summit

Summit Sensit operating instructions

Flexa Classic 1709111 Assembly instructions

Flexa

Flexa Classic 1709111 Assembly instructions

rst brands Venetia OP-ALSTR2424-VEN Assembly instructions

rst brands

rst brands Venetia OP-ALSTR2424-VEN Assembly instructions

PrimeCables CAB-ET101 installation guide

PrimeCables

PrimeCables CAB-ET101 installation guide

Leander 950 Series: Operator's manual

Leander

Leander 950 Series: Operator's manual

Med-Aire 14027 Operator's manual

Med-Aire

Med-Aire 14027 Operator's manual

manuals.online logo
manuals.online logoBrands
  • About & Mission
  • Contact us
  • Privacy Policy
  • Terms and Conditions

Copyright 2025 Manuals.Online. All Rights Reserved.