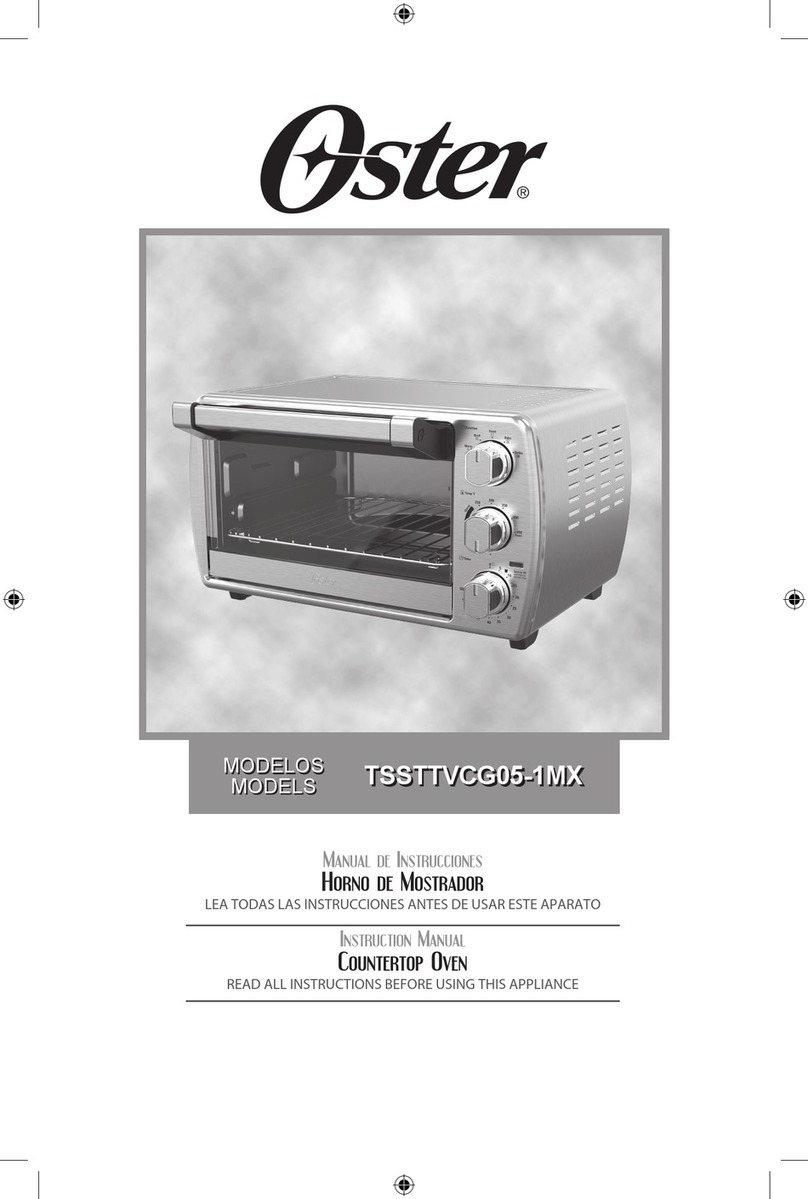
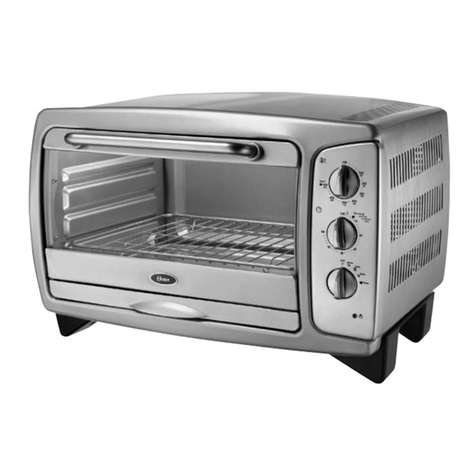
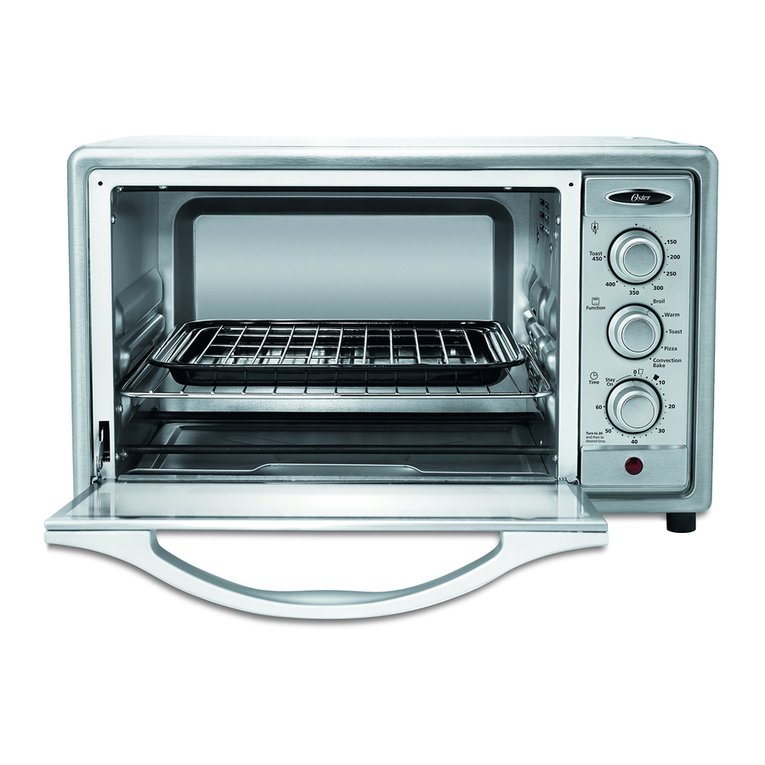
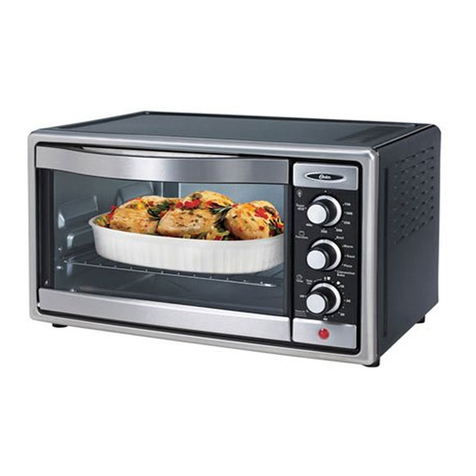
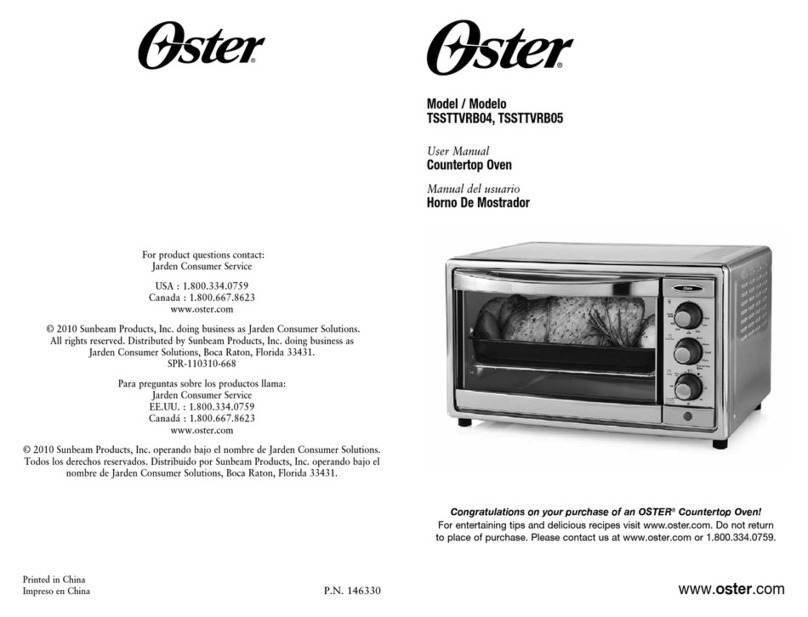
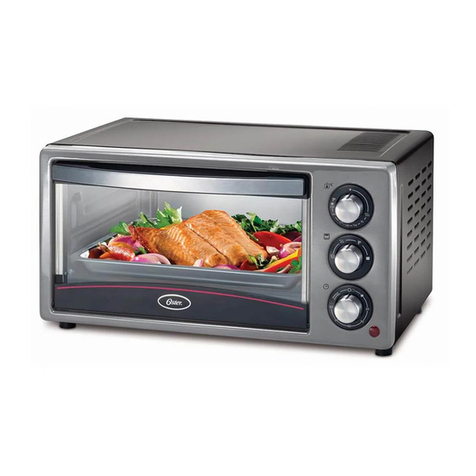
Oster 6058 User manual

MODEL/MODÈLE
MODELO
MODEL/MODÈLE
MODELO 6058
Instruction Manual
DIGITAL MULTI-FUNCTION OVEN
READ ALL INSTRUCTIONS BEFORE USING THIS APPLIANCE
Manuel d’Instructions
FOUR NUMERIQUE A MULTI-FONCTIONS
LIRE TOUTES LES INSTRUCTIONS AVANT D ’ UTILISER CET APPAREIL
Manual de Instrucciones
HORNO DIGITAL MULTI-FUNCION
LEA TODAS LAS INSTRUCCIONES ANTES DE USAR ESTE APARATO
Manual de Instruções
FORNO DIGITAL MULTI-FUNÇÃO
LEIA TODAS AS INSTRUÇÕES ANTES DE USAR ESTE APARELHO
6058

1
IMPORTANT SAFEGUARDS
When using electrical appliances, basic safety precautions should always be followed
including the following:
READ ALL INSTRUCTIONS, PRODUCT LABELS AND WARNINGS BEFORE USING
THE OVEN.
• DO NOT touch hot surfaces. Always use oven mitts when handling hot materials and
allow metal parts to cool before cleaning. Allow the unit to cool thoroughly before
putting in or taking off parts. Always use the oven handles when moving the unit.
• Whentheunitisnotinuseandbeforecleaning,unplugtheovenfromthewalloutlet.
Note: Make sure the oven is turned off before unplugging.
• Toprotectagainstriskofelectricalshock,DO NOT immerse the appliance in water or
any other liquids.
• Closesupervisionisalwaysnecessarywhenthisoranyapplianceisusednear
children.Thisapplianceisnotforusebychildren.
• DO NOT operate this or any appliance with a frayed or damaged cord or plug or after
the appliance malfunctions or is dropped or has been damaged in any manner. Return
appliance to the nearest authorized service facility for examination, repair or
adjustment.
• DO NOT use attachments not recommended by the manufacturer; they may cause
fire, electric shock or personal injury.
• DO NOT use outdoors or for commercial purposes.
• DO NOT use this appliance for other than its intended use.
• DO NOT let the cord dangle over the edge of a tabletop or countertop or touch hot
surfaces.
• DO NOT place the appliance near a hot gas or electric burner or in a heated oven.
• Extremecautionshouldbeusedwhenusingcontainersconstructedofmaterialother
than metal or glass.
• Afiremayoccuriftheoveniscoveredortouchingflammablematerials,including
curtains, draperies, walls, etc., when in operation. DO NOT store any items on top of
the appliance when in operation.
• Whenusingoven,pulltheunitoutaminimumof15cm(6inches)awayfromwallson
all sides. Remove cords from other products from behind the oven.
• DO NOT store any materials, other than manufacturer’s recommended accessories, in
this unit when not in use.
• DO NOT place any flammable materials in oven, such as paper, cardboard, plastic or
any materials that may catch fire or melt.
• DO NOTcovertheovenwithmetalfoil.Thiswillcauseoverheatingoftheappliance.

2
• Oversizedfoodsormetalutensilsmustnotbeinsertedintheapplianceastheymay
create a fire or risk of electrical shock.
• DO NOT clean with metal scouring pads. Pieces can break off the pad and touch
electrical parts involving a risk of electrical shock.
• Whenbroiling,useextremecautionwhenremovingtrayordisposingofhotgrease.
•Thedoorandtheoutersurfacemaygethotwhenapplianceisbeingused.
• Todisconnect,pressStop/Cancelbuttontwicetoturnunitoff,thenremoveplugfrom
wall outlet.
THIS UNIT IS FOR HOUSEHOLD USE ONLY.
SAVE THESE INSTRUCTIONS
(For 120 & 127 Volts Only)
Toreducetheriskofelectricalshock,thisappliancehasapolarizedplug(oneblade
iswiderthantheother).Thisplugfitsapolarizedoutletonlyoneway.Thisisasafety
feature intended to help reduce the risk of electrical shock. If the plug does not fit fully
into the outlet, reverse the plug. If it still does not fit, contact a qualified electrician. Do not
attempt to defeat this safety feature.
SHORT POWER SUPPLY CORD INSTRUCTIONS
A short power-supply cord is provided to reduce the risk resulting from becoming entan-
gled in or tripping over a longer cord. An extension cord may be used if care is exercised
in its use. If an extension cord is used, the electrical rating of the cord must be at least as
greatastheelectricalratingoftheappliance.Theextensioncordshouldbearrangedso
that it will not drape over the countertop or tabletop where it can be pulled on by children
or tripped over unintentionally.

3
7
DESCRIPTION OF THE APPLIANCE
123
8
6
54
1.RemovableWireRack
2.TimeDisplay
3.ControlButtons
4.ExternalRemovableCrumbTray
5.GlassDoor
6.EasyCleanInteriorWalls
7.BakingPanandBroilingRack
8.ThreeRackPositions
Control Buttons
Function Buttons –
Oven –SelecttoBake,Convection(FanBake),
Broil.
Toast –Selecttotoastbread,bagels,etc.
Pizza –Selecttobake23cm–30cm(9”–12”)
pizza.
Dehydrate –Selecttodehydratefoods.
Defrost –Selecttodefrostfoods.
–Adjuststime,temperatureortoastshade.
Timer/Temp – Use this button to change between
timeandtemperaturewhenBake,
ConvectionBakeorBroilhasbeen
selected.
Clock –SetstheOvenClock.
Lamp –TurnsonInteriorLamp.
Stop/Cancel – Stopsheatingorcancelsfunction.
Start –Startsbaking/cookingprocess.

4
PREPARING TO USE YOUR OVEN
FOR THE FIRST TIME
If you are using your oven for the first time, please be sure to:
Remove any stickers from the surface of the oven.
Openovendoorandremoveallprinteddocumentsandpaperfrominsidetheoven.
Cleantherack,tray,andpanwithhotwater,asmallamountofdishwashingliquidanda
non-abrasive sponge or cleaning pad.
DO NOT IMMERSE THE BODY OF THE UNIT IN WATER.
Dry the unit thoroughly before using.
Selectalocationfortheoven.Thelocationshouldbeinanopenareaonaflatcounter
where the plug will reach an outlet. Plug the oven into the appropriate electrical outlet.
USING YOUR TOASTER OVEN
Setting the Clock
PushtheClockbuttonandholdforthreeseconds.Theclockwillflash.
Usethearrowkeystosetthehour.PushtheClockbuttonagain.
Use the arrow keys to set the minutes.
PushtheClockbuttononcemoreandthetimewillbeset.
Preheating the Oven
Placeovenrackintothedesiredpositionbeforeheatingtheoven.(See“Positioning
Rack”Section)
Push oven button once.
Use arrows to set desired temperature.
PushTimer/Tempbutton,thenthedownarrowuntilsevenminutesisdisplayed.
PushtheStartbutton.
To Use the Bake Function
Placeovenrackintothedesiredpositionbeforeheatingtheoven.(See“Positioning
Rack”Section)
Arrange food on the wire rack or in the baking pan.
PushtheOvenbuttononce.Usethearrowkeystoselectdesiredtemperature.
PushTimer/Tempbutton.Usethearrowkeystoselectdesiredtime.
PushtheStartbutton.
NOTE –BothheatingelementswillcycleONandOFFtomaintainthedesiredtempera-
ture. When baking is completed, open door fully and remove food carefully.

5
To Use the Convection Fan Bake Function
WhenyouselecttheFanBaketheconvectionfanwillturnonandcirculateairallowing
the food to cook evenly and faster.
Placeovenrackintothedesiredpositionbeforeheatingtheoven.(See“Positioning
Rack”Section)
Arrange food on the wire rack or in the baking pan.
PushtheOvenbuttontwotimesuntil“FanBake”lightsupondisplay.Usethearrowkeys
to select desired temperature.
PushTimer/Tempbutton.Usethearrowkeystoselectdesiredtime.
PushtheStartbutton.
NOTE –BothheatingelementswillcycleONandOFFtomaintainthedesiredtempera-
ture. When baking is completed, open door fully and remove food carefully.
To Use the Broil Function
Place ovenrackintothedesiredpositionbeforeheatingtheoven.(See“Positioning
Rack”Section)
Place broil rack in oven pan to make broiler rack.
Arrange food on broiler rack.
Place broiler pan on oven rack.
PushOvenbuttonthreetimesuntiltheword“Broil”lightsupondisplay.
PushTimer/Tempbutton.Usearrowstoselectthedesiredtime.
PushtheStartbutton.
NOTE – Thetop-heatingelementwillcycleONandOFFtomaintaindesiredtemperature.
When broiling is completed, open door fully and remove food carefully.
WARNING: DO NOT LEAVE OVEN UNATTENDED.
To Use the Toast Function
Placeovenrackintothedesiredpositionbeforeheatingtheoven.(See“Positioning
Rack”Section)
NOTE –Differenttypesofbreadrequiredifferentsettings.Lighterbreadsandwaffles
requirealightersetting.Darkerbreads,muffins,andEnglishmuffinsrequireadarker
setting.
Arrange food on the wire rack.
PushtheToastbutton.UsearrowstoselectToastShade.
1isthelightestsettingand6isthedarkestsetting.
PresstheStartbutton.
When toasting is completed, open door fully and remove food carefully.
To Use the Pizza Function
Placeovenrackintothedesiredpositionbeforeheatingtheoven.(See“Positioning
Rack”Section)
Arrange pizza on the wire rack.
PushthePizzabuttonand20:00defaulttimewillappear.Usearrowkeystoadjustthe
timeasdesired.PushtheStartbutton.
NOTE – ThePizzafunctiontemperatureissetat205°C(400°F)andcannotbeadjusted.
Ifdifferenttemperatureisdesired,cancelPizzafunctionanduseBakefunction.

6
Dehydrating Function
Push Dehydratebutton.TemperatureControlisalreadysetto85°C(185°F).
Use arrow keys to set desired time.
PushtheStartbutton.
Defrosting Function
Whendefrostingdonotpreheatoven.TemperatureControlisalreadysetto65°C
(150°F).
Pushthedefrostbutton.Usearrowkeystoadjusttime.Allow15to20minutesperside
for meats or fish to defrost. Always cook food promptly after thawing.
PushtheStartbutton.
Positioning Rack
To accommodate a wide variety of foods the oven has three rack positions.
(SeeFigure1)
Positioning of the rack will depend on the size of the food and desired browning.
Beforeremovingtherackallowtheunittocool.
PLEASE NOTE –Forbesttoastandpizzaresults,positiontherackintheuppositionon
the middle rack guide.
CLEANING YOUR DIGITAL MULTI-FUNCTION OVEN
BeforecleaningyourOster®Multi-FunctionOven,unplugitandallowittocool.Toclean,
wipewithdampcloth.DONOTIMMERSEINWATER!Makesuretouseonlymild,soapy
water. Abrasive cleaners, scrubbing brushes and chemical cleaners will damage the coat-
ingonthisunit.Emptycrumbtrayfrequentlytoavoidaccumulationofcrumbs.
Toasterovenracksaredishwashersafe(topofdishwasheronly).Otherthanthe
recommended cleaning, no further user maintenance should be necessary.
STORING YOUR DIGITAL MULTI-FUNCTION OVEN
Allow the appliance to cool completely before storing. If storing the oven for long periods
oftimemakecertainthattheoveniscleanandfreeoffoodparticles.Storetheovenina
dry location such as on a table or countertop or cupboard shelf.
Figure1

7
PROBLEM
• Overcooked/undercookedfoods.
• Burntsmell.
• OvendoesnotturnON.
• Onlyoneheatingelementisheating
up.
• HeatingelementsdonotstayON.
• Cannotchangefunctionbutton.
HELPFUL TIPS/ TROUBLESHOOTING
POTENTIAL CAUSE
• Incorrecttemperatureortime
setting.
• Rackplacement.
• Foodbuild-upinsideoven,on
heating elements or in crumb tray.
• Unitisunplugged.
• DidnotpressStart.
• Functionsettingselection
determines which heating element
will operate.
• HeatingelementswillcycleONand
OFFtomaintainproperheat.
• Needtocancelfunction.
SOLUTION
• Youmayhavetoadjustthetimeand
temperature to the desired taste.
• Becauseyourovenissmallerthan
your regular oven, it will heat up
faster and generally cook in shorter
periods of time.
• Referto“PositioningRack”Section.
Rack may need to be adjusted to
accommodate food type.
• Referto“CleaningYour
Multi-FunctionOven”Section.
• Plugthetoasteroveninto
appropriate electrical outlet.
• Settimerknobandtemperature
knobtothedesiredsetting.Both
must be turned on to operate the
oven.
• PressStart.
• Whentoasting,makesuretheoven
is not set to broil setting.
• Becertainthatfunctionisas
desired.
• Presscancel.

8
PRÉCAUTIONS IMPORTANTES
Lorsqu’onutiliseunappareilélectroménager,certainesconsignesdesécurité
élémentairesdoiventêtreobservéesdont:
LISEZ TOUTES LES CONSIGNES, AVERTISSEMENTS ET ÉTIQUETTES RELATIFS À
CE FOUR NUMERIQUE A MULTI-FONCTIONS AVANT DE L’UTILISER.
• Netouchezpaslessurfaceschaudes.Porteztoujoursdesgantsdecuisinierpour
manipulerlessubstancesetlesmatériauxchaudsetlaissezlespiècesmétalliques
refroidiravantdelesnettoyer.Laissezcomplètementrefroidirlefouravantd’yplacer
oud’enretirerdespièces.Pourdéplacerlefour,utiliseztoujourssespoignées.
• Silefourn’estpasutilisé,etavantdelenettoyer,débranchez-ledelaprisedecourant.
Remarque:Assurez-vousquelefournefonctionnepasavantdeledébrancher.
• Pourvousprotégercontrelesrisquesdesecoussesélectriques,n’immergezpasce
four dans l’eau ou dans tout autre liquide.
• Surveilleztoujoursattentivementlesenfantssivousutilisezvotrefouroutoutautre
appareilàproximitéd’enfants.Nelaissezpaslesenfantsutilisercefour.
• N’utilisezpasvotrefouroutoutautreappareilsisoncordonélectriqueesteffilochéou
soncordonetsafichesontendommagésousil’appareilfonctionnemal,s’ilesttombé
ouendommagé.Retournezl’appareilàl’installationdeserviceautoriséelaplusproche
pourvérification,réparationouajustement.
• N’utilisezpasd’accessoiresautresqueceuxrecommandésparlefabricant,cette
pratiquerisqueraitdecauserunincendie,vouspourriezvousfaireélectrocuterouêtre
gravementblessé.
• N’utilisezpascefouràl’extérieurniàdesfinscommerciales.
• N’utilisezpascefouràd’autresfinsquecellespourlesquellesilaétéconçu.
• Nelaissezpaslecordonélectriquependredubordd’unetableoud’uncomptoir,ni
toucher des surfaces chaudes.
• Nelaissezpascefoursurniàproximitéd’unbrûleurélectriqueouàgazchaudnidans
unFourchauffé.
• Soyezextrêmementprudentsivousutilisezdescontenantsautresqueceuxenmétal
ou en verre.
• VousrisquezdeprovoquerunincendiesivousrecouvrezvotreFourNumeriquea
Multi-Fonctionsous’ilvientencontactaveclesmatériauxinflammables,ycompris
les rideaux, les tentures, les murs, etc. pendant qu’il fonctionne. Pendant que le four
fonctionne, ne posez rien dessus.
• PendantquevousutilisezvotreFourNumeriqueaMulti-Fonctions,nel’approchez
pasàplusde15centimètres(6pouces)dessurfacesavoisinantes.Enlevezlecordon
électriquedesautresappareilspouvantsetrouverderrièrevotreFourNumeriquea
Multi-Fonctions.
• Pendantquevousn’utilisezpasvotrefour,n’yrangerpasd’autres
accessoiresqueceuxrecommandésparlefabricant.

9
• Nemettezpasdematériauxinflammablesdansvotrefour,commedupapier,du
carton,duplastiqueouautresmatériauxsemblablesquipourraientprendrefeuou
fondre.
• Nerecouvrezpasvotrefourd’unefeuilled’aluminium,sinonilsurchauffera.
• Nemettezpasd’alimentsnid’ustensilesenmétalsurdimensionnésdansvotrefour,car
ilsrisquentdeprésenterunrisqued’incendieoudesecoussesélectriques.
• Nenettoyezpasvotrefouravecdestamponsàrécurermétalliques.Desmorceaux
peuvents’endétacheretvenirencontactaveclespiècesélectriques,créantainsiun
risquedesecoussesélectriques.
• Sivousutilisezvotrefourpourlacuissonaugrill,soyezextrêmementprudentlorsque
vous sortirez le plat de cuisson contenant de la graisse chaude.
•Ilestpossiblequeporteetsurfaceextérieuredeviennentbrûlanteslorsquel’appareil
est en service.
• Pourdébrancher,appuyezàdeuxreprisessurlatouche«Stop/Cancel»,puisretirez
la fiche de la prise de courant murale.
CET APPAREIL NE DOIT ÊTRE UTILISÉ QU’À DES FINS DOMESTIQUES.
CONSERVEZ CES INSTRUCTIONS
(Uniquement pour 120 & 127 volts)
Pourdiminuerlerisqued’électrocution,cetappareilestmunid’unefichepolarisée(une
deslamesestpluslargequel’autre).Cetteficheneconvientqu’auxprisespolarisées.Si
leslamesnerentrentpasdanslaprisedansunsens,inversezleslames.Silafichen’y
rentretoujourspas,prenezcontactavecunélectricienqualifié.Nepastenterdemodifié
laprised’aucunefaçon.
INSTRUCTIONS CONCERNANT LES CORDONS ÉLECTRIQUES COURTS
Uncourtcordonélectriqueestfourniavecvotrefourafinderéduirelesrisquesde
blessuresquipourraientsurveniraucasoùonviendraitàs’emmêleroutrébucherdans
uncordontroplong.Enétantextrêmementprudent,vouspouvezutiliseruncordon
prolongateur.Toutefois,cecordonprolongateurdevraporterlamêmeclassificationque
celleducordonélectriquedevotrefour.Utilisezuncordonprolongateurdefaçonqu’il
nependepasducomptoiroudelatableafind’éviterquelesenfantstirentdessusou
trébuchentintentionnellementdedans.

10
DESCRIPTION DE L’APPAREIL
7
123
8
6
54
1. Grilleamovible
2. Affichage de l’heure
3. Touchesdecommande
4. Tiroiràmiettesexterneamovible
5. Portevitrée
6. Paroiintérieurefacileànettoyer
7. Plat de cuisson et grille pour la cuisson au gril
8. Troispositionspourlagrille
Touches de commande
Touches des fonctions –
Oven – Pour cuire au four par convection, faire griller.
Toast – Pour griller du pain, des baguels, etc.
Pizza –Pourcuiredespizzasde23à30cm(9à12
pouces).
Dehydrate –Pourdéshydraterlesaliments.
Defrost –Pourdécongelerlesaliments.
–Pourréglerl’heure,letemps,latempératureetla
couleur des rôties.
Timer/Temp –Pourmodifierletempsetlatempératurede
cuisson au four normal, par convection ou pour
griller.
Clock –Pourréglerl’heure.
Lamp –Pourallumerlalampeintérieure.
Stop/Cancel – Pourarrêterlechauffageouannulerles
fonctions.
Start – Pour commencer la cuisson.

11
AVANT D’UTILISER VOTRE FOUR
GRILLE-PAIN POUR LA PREMIÈRE FOIS
SivousutilisezvotreFourNumeriqueaMulti-Fonctionspourlapremièrefois,n’oubliez
pas:
D’enlever tous les autocollants de sa surface.
D’ouvrirsaporteetd’enlevertouteladocumentationimpriméequisetrouveàl’intérieur.
De nettoyer les grilles et le plat de cuisson à l’eau chaude dans laquelle vous aurez
ajoutéunpeudedétergentàvaisselle.Utilisezuneépongeouuntamponàrécurernon
abrasif.
N’IMMERGEZ PAS VOTRE FOUR DANS L’EAU.
Avantd’utiliservotrefour,essuyez-lecomplètement.
Disposez-lesuruncomptoirplat,dansunendroitdégagé,prèsd’uneprisedecourant.
Branchez-ledansuneprise.
UTILISATION DE VOTRE FOUR NUMERIQUE
A MULTI-FONCTIONS
Pour Régler L’heure
Appuyezsurlatouchedel’horlogeetmaintenez-laappuyéependant3secondes.
L’horlogeclignotera.
Utilisezlesflèchespourréglerl’heure.Appuyezdenouveausurlatouchehorloge.
Utilisezlesflèchespourréglerlesminutes.
Appuyezunefoisdeplussurlatouchedel’horloge.L’heureestréglée.
Préchauffage du Four
Avantdefairechauffervotrefour,réglezlagrilledanslapositiondésirée.(Reportez-vous
àlarubrique«Positionnementdelagrille»)
Appuyezunefoissurlatouche«Oven».
Utilisezlesflèchespourréglerlatempératuredésirée.
Appuyezsurlatouche«Timer/Temp»,puissurlatoucheverslebasjusqu’àcequesept
minutessoientaffichées.
Appuyezsurlatouche«Start».
Pour Utiliser la Fonction Cuisson au Four Ordinaire
Avantdefairechauffervotrefour,réglezlagrilledanslapositiondésirée.
(Reportez-vousàlarubrique«Positionnementdelagrille»)
Disposez les aliments sur la grille ou le plat de cuisson.
Appuyezunefoissurlatouche«Oven».Utilisezlesflèchespourchoisirla
températuredésirée.
Appuyezsurlatouche«Timer/Temp».Utilisezlesflèchespourchoisirletempsdésiré.
Appuyezsurlatouche«Start».
REMARQUE –Lesdeuxélémentss’ALLUMERONTets’ÉTEINDRONTalternativement
pourgarderlatempératuredésirée.Lacuissonterminée,ouvrezlaporteetsortez
prudemment les aliments.

12
Pour Utiliser la Fonction Cuisson par Convection
Sivousutilisezlafonctioncuissonparconvection,leventilateurfonctionnera,l’air
circuleraetlesalimentsserontcuitsplusuniformémentetplusrapidement.
Avantdefairechauffervotrefour,réglezlagrilledanslapositiondésirée.
(Reportez-vousàlarubrique«Positionnementdelagrille»)
Disposez les aliments sur la grille ou le plat de cuisson.
Appuyezdeuxfoissurlatouche«Oven»jusqu’àcequelamention«FanBake»soit
affichée.Utilisezlesflèchespourchoisirlatempératuredésirée.
Appuyezsurlatouche«Timer/Temp».Utilisezlesflèchespourchoisirletempsdésiré.
Appuyezsurlatouche«Start».
REMARQUE –Lesdeuxélémentss’ALLUMERONTets’ÉTEINDRONT
alternativementpourgarderlatempératuredésirée.Lacuissonterminée,ouvrezlaporte
et sortez prudemment les aliments.
Pour Utiliser la Fonction Cuisson au Gril
Avantdefairechauffervotrefour,réglezlagrilledanslapositiondésirée.
(Voirlarubrique«Positionnementdelagrille»)
Mettezlagrilledansleplatpourcuissonaugrilpourenfaireungril-lèchefrite.
Disposezlesalimentssurlegril-lèchefrite.
Disposezlegril-lèchefritesurlagrilledufour.
Appuyeztroisfoissurlatouche«Oven»jusqu’àcequelamention«Broil»soit
affichée.Utilisezlesflèchespourchoisirlatempératuredésirée.
Appuyezsurlatouche«Timer/Temp».Utilisezlesflèchespourchoisirletempsdésiré.
Appuyezsurlatouche«Start».
REMARQUE –L’élémentdevoûtes’ALLUMERAets’ÉTEINDRAalternativementpour
garderlatempératuredésirée.Lacuissonaugrilterminée,ouvrezlaporteetsortez
prudemment les aliments.
AVERTISSEMENT : NE LAISSEZ PAS VOTRE FOUR NUMERIQUE A MULTI-FONC-
TIONS SANS SURVEILLANCE.
Pour Utiliser la Fonction Rôties
Avantdefairechauffervotrefour,réglezlagrilledanslapositiondésirée.
(Voirlarubrique«Positionnementdelagrille»)
REMARQUE – Enfonctiondupain,lesréglagesvarieront.Pourdesrôtiesetdes
gaufresdecouleurclaire,utilisezunréglageplusbas.Pourlespainsfoncés,les
muffinsetlesmuffinsanglais,utilisezunréglageplusfoncé.
Disposez les aliments sur la grille.
Appuyezsurlatouche«Toast».Utilisezlesflèchespourchoisirlacuissondésirée
(claire/foncée).Choisissezle1pourunbrunissagelégeretle6pourunbrunissageplusfort.
Appuyezsurlatouche«Start».Lorsquelesrôtiesserontgrillées,ouvrezlaportedufour
et sortez-les prudemment.
Pour Utiliser la Fonction Pizza
Avantdefairechaufferlefour,réglezlagrilledufourdanslapositiondésirée.
(Voirlarubrique«Positionnementdelagrille»)
Disposez la pizza sur la grille.
Appuyezsurlatouche«Pizza».Letempspardéfaut«20:00»seraaffiché.Utilisezles
flèchespourréglerletempsdésiré.Appuyezsurlatouche«Start».
REMARQUE –Latempératuredelafonction«Pizza»estrégléeà205°C(400°F)et
nepeutpasêtremodifiée.Sivousdésirezuneautretempérature,annulezlafonction«
Pizza»etutilisezlafonction«Bake».

13
Fonction Déshydratation
Appuyezsurlatouche«Dehydrate».Latempératureestdéjàrégléeà85°C(185°F).
Utilisezlesflèchespourréglerletempsdésiré.
Appuyezsurlatouche«Start».
Fonction Décongélation
Pourdécongelerdesaliments,nefaitespaschaufferlefouraupréalable.La
températureestdéjàrégléeà65°(150°F).Appuyezsurlatouche«Defrost».Utilisezles
flèchespourréglerletemps.Pourdécongelerlaviandeetlepoisson,prévoyezentre15
et20minutesparcôté.Unefoislesalimentsdécongelés,cuisez-lesimmédiatement.
Appuyezsurlatouche«Start».
Positionnement de la Grille
Vouspouvezréglerlagrilledufourdanstroispositions.(VoirlaFigure1).
Sapositiondépendraduvolumedesalimentsetdubrunissagequevousdésirezobtenir.
Avant d’enlever la grille, laissez le four refroidir.
REMARQUE – Pour les rôties et les pizzas, nous vous recommandons de positionner la
grille au centre.
POUR NETTOYER VOTRE FOUR A MULTI-FONCTIONS
AvantdenettoyervotreFouraMulti-FonctionsOster®,débranchez-leetlaissez-le
refroidir,puisessuyez-leavecunchiffonhumide.NEL’IMMERGEZPASDANSL’EAU!
Utilisezuniquementdel’eausavonneusedouce.Lesnettoyantsabrasifs,lesbrossesà
poilsdursetlesnettoyantschimiquesendommagerontsonrevêtement.Videzfréquem-
mentletiroiràmiettespourempêcherl’accumulationexcessivedemiettes.Vouspouvez
laverlesgrillesdevotrefourentoutesécuritédansunlave-vaisselle(enhautdu
lave-vaisselleseulement).Àpartcesimplenettoyage,votrefournenécessiteaucun
autre entretien.
POUR RANGER VOTRE FOUR A MULTI-FONCTIONS
Avantdeleranger,laissez-lecomplètementrefroidir.Sivousdevezlerangerpour
longtemps, assurez-vous qu’il est propre et qu’il ne contient aucune particule d’aliments.
Entreposez-ledansunendroitsec,surunetable,uncomptoiroul’étagèred’unearmoire,
par exemple.
Figure1

14
INCIDENTS
• Lesalimentssontcuitsoupasas
sez cuits.
• Odeurdebrûlé.
• Lefournes’ALLUMEpas.
• Unseulelementchauffe.
• Lesélémentsnerestentpas
ALLUMÉS.
• Impossibledemodifierlestouches
de fonction.
CONSEILS UTILES/DÉPANNAGE
CAUSES PROBABLES
• Latempératureouletempsnesont
pasbienréglés.
• Lagrillen’estpasplacéedansla
bonne position.
• Accumulationd’alimentsàl’intérieur
dufour,surlesélémentschauffants
ou dans le tiroir à miettes.
• Lefourn’estpasbranché.
• Leboutondeminuterien’avaitpas
ététournéjusqu’àdépasserla
marquede20minutes.
• Lechoixdesfunctionsdétermine
quel element chauffant fonctionnera.
• Lesélémentschauffants
s’ALLUMERONTets’ÉTEINDRONT
alternativement pour garder la
bonnetempérature.
• Lafonctiondoitêtreannulée.
SOLUTIONS
• Vousdevrezpeut-êtreréglerle
tempsetlatempératureselonvos
désirs.
• ÉtantdonnéquevotreFoura
Multi-Fonctionsestpluspetitqu’un
four ordinaire, il chauffera plus vite
etlesalimentscuirontgénéralement
plus rapidement.
• Reportez-vousàlarubrique«
Positionnementdelagrille».En
fonction des aliments à cuire, vous
devrezpeut-êtremodifierlaposition
de la grille.
• Reportez-vousàlarubrique«Pour
nettoyervotreFoura
Multi-Fonctions».
• BranchezvotreFoura
Multi-Fonctionsdansuneprise.
• Réglezlatouchedutempsetcelle
delatempératureauréglagedésiré.
Vousdevezappuyezsurcesdeux
touchespourquevotreFouraMulti-
Fonctionsfonctionne.
• Pourlesrôties,assurez-vousque
votrefourn’estpasréglésur«Cuis
sonaugril».
• Assurez-vousquelafonctionchoisie
estcelledésirée.
• Appuyezsurlatouche«Cancel».

15
PRECAUCIONES IMPORTANTES
Cuandoutilicesuhorno,siempredebeseguirprecaucionesbásicasdeseguridad,
incluyendo las siguientes:
LEA TODAS LAS INSTRUCCIONES, LAS ETIQUETAS DEL PRODUCTO Y LAS
ADVERTENCIAS, ANTES DE UTILIZAR SU HORNO.
• NOtoquelassuperficiescalientes.Siempreuseguantescuandomanejemateriales
calientesypermitaquelaspartesmetálicasseenfríenantesdelimpiar.Permitaque
launidadseenfríecompletamenteantesdeponeroquitarpartes.Siempreuselas
asas del horno cuando mueva la unidad.
• Desconecteelhornodeltomacorrientecuandolaunidadnoestéenusoyantesde
limpiarla.NOTA:Verifiquequeelhornoestéapagadoantesdedesenchufarlo.
• Paraprotegersecontraunadescargaeléctrica,nosumerjaelartefactoenaguaoen
otroslíquidos.
• Esnecesariaunasupervisióncontinuacuandoésteocualquierotroartefactoesté
siendoutilizadocercadelosniños.Esteartefactonodebeserusadoporlosniños.
• NOopereningúnartefactoconuncableoenchufedañado,despuésdequeel
artefacto haya fallado o si se cae al suelo o se daña de cualquier otra manera.
RegreseelartefactoalCentrodeServicioOster®Autorizadomáscercanopara
examinarlo,repararlooparaajustarlomecánicaoeléctricamente.
• NO utilice accesorios no recomendados por el fabricante, ya que pueden causar
incendios,descargaseléctricasolesionespersonales.
• NOutiliceesteartefactoalairelibreoparapropósitoscomerciales.
• NOutiliceesteartefactomásqueparaloquehasidodiseñado.
• NO permita que el cable cuelgue sobre el borde de la mesa o mostrador o toque
superficies calientes.
• NOlocoloquesobreocercadequemadoresdeestufasdegasoeléctricas,tampoco
dentro de un horno caliente.
• Tengaextremocuidadocuandousecontenedoresquenoesténfabricadosdevidrioo
de metal.
• Puedeocurrirunincendiosielhornoestáfuncionandoyentraencontactoose
encuentracubiertoconmaterialesinflamables,incluyendocortinas,tapicería,paredes,
etc. NOcoloqueningúnobjetosobreelartefactocuandoestéfuncionando.
• Cuandouseelhorno,colóqueloaunmínimode15cm(6pulgadas)alejadodela
paredportodossuslados.Quiteloscordonesdeotrosartículosquepuedanestar
detrásdelhorno.
• Cuandoestaunidadnoseestéutilizando,noalmaceneensuparteinteriorningún
material que no sea un accesorio recomendado por el fabricante.
• NOcoloquedentrodelhornoningúnmaterialinflamablecomopapel,cartón,plásticoo
cualquier material que se pueda incendiar o derretir.

16
• NO cubra la bandeja para migas o ninguna parte del horno con papel aluminio o
• metálico.Estopuedecausarelsobrecalentamientodelartefacto.
• Losalimentosgrandesoutensiliosmetálicosnodebenserintroducidosenelhornoya
quepuedencausarincendiosodescargaseléctricas.
• NOlimpieconesponjasofibrasmetálicas.Sepuedendesprendertrozosdelaes
ponjaofibraytocarparteseléctricascreandoelriesgodedescargaseléctricas.
• Cuandoasealimentos,tengaextremocuidadoalremoverlacharolaodesecharla
grasa caliente.
• Lapuertaylasuperficieexteriorpuedencalentarsecuandoelartefactoestáen
funcionamiento.
• Paradesconectar,presioneelbotón“Stop/Cancel”yluegoretireelenchufedel
tomacorriente.
ESTA UNIDAD ESTA DISEÑADA SOLO PARA USO DOMESTICO.
CONSERVE ESTAS INSTRUCCIONES
(Para 120 y 127 Voltios Solamente)
Parareducirelriesgodeunadescargaeléctrica,esteartefactocuentaconunenchufe
polarizado(unaclavijaesmásanchaquelaotra).Esteenchufeentrasólodeuna
maneraenuntomacorrientepolarizado.Sielenchufenoentracorrectamenteenel
tomacorriente,simplementecolóqueloalrevés.Sitodavíanoentra,comuníquesecon
unelectricistacompetente.Deningunamaneraintentemodificaroforzarlaconexión
diseñada como medida de seguridad.
USO DE UN CABLE ELECTRICO CORTO
Seincluyeuncableeléctricocortoparaevitarqueseenredeoquecausetropiezos.Un
cabledeextensiónpuedeutilizarseconcuidado.Siseusauncabledeextensión,laca-
pacidadnominalmarcadaenelcabledeextensióndebeserporlomenosigualomayor
aladelartefacto.Elcabledeextensióndebecolocarsedemaneraquenocuelguedel
mostrador o de la mesa, donde pueda causar tropiezos accidentalmente.

17
DESCRIPCION DEL ARTEFACTO
7
123
8
6
54
1.RejilladeAlambreRemovible
2.VisualizadordeTiempo
3.BotonesdeControl
4.BandejaExternaRemovibleparaMigas
5.PuertadeVidrio
6.ParedesInterioresFácilesdeLimpiar
7.BandejaparaHornearyRejillaParaAsar
8.TresPosicionesparalaRejilla
Botones de control
Botones de las Funciones -
Oven (Horno) –Seleccionelafuncióndeseada:Hornear,
HornearConvección(conVentilador),
Asar a la parrilla.
Toast (Tostar) –
Seleccioneparatostarpan,bagels,etc
.
Pizza –Seleccioneparahornearunapizzade23a30cm
(9a12pulgadas).
Dehydrate (Deshidratar) – Seleccioneparadeshidratar
alimentos.
Defrost (Descongelar) –Seleccioneparadescongelar
alimentos.
–Lepermiteajustareltiempo,latemperaturaola
intensidad de tostado.
Timer/Temp (Contador de Tiempo/Temperatura) – Utilice
estebotónparacambiarentretiempo
y temperatura una vez que haya
seleccionado alguna de las funciones
deHornear,Hornearporconveccióno
Asar a la parrilla.
Clock (Reloj) –Seutilizaparagraduarelrelojdelhorno.
Lamp (Luz) –Enciendelaluzinterior.
Stop/Cancel (Detener/Cancelar) – Interrumpe el calor o
anulalafunción.
Start (Iniciar) –Iniciaelprocesodehornear/cocinar.

18
PREPARANDOSE PARA UTILIZAR SU HORNO
POR PRIMERA VEZ
Sivaautilizarsuhornoporprimeravez,asegúresedelosiguiente:
Retirecualquiercalcomaníadelasuperficiedesuhornoylímpielaconunpañohúmedo.
Abra la puerta del horno y saque los documentos impresos y papeles del interior del
horno.Limpielarejilla,labandejaparahornearylabandejademigasconaguacaliente
yunapequeñacantidaddedetergentelíquidoparalavarplatos,utiliceunaesponja
suave y no abrasiva.
NO SUMERJA EL HORNO EN AGUA.
Sequecompletamentelaunidadantesdeutilizarla.
Seleccioneunlugarparacolocarelhorno.Ellugardebeserunáreaabiertasobreun
mostrador con superficie plana donde el enchufe tenga alcance a un tomacorriente.
Enchufeelhornoenuntomacorrienteeléctricodelvoltajecorrespondientealdesu
artefacto.
UTILIZANDO SU HORNO MULTI-FUNCION
Ajustando el Reloj
Oprimaelbotóndelreloj“Clock”ymanténgaloapretadotressegundos.Elrelojse
pondráintermitente.
Uselosbotonesdelasflechasparaseleccionarlahora.Oprimadenuevoelbotón
delreloj“Clock”.
Use los botones de las flechas para seleccionar los minutos.
Oprimaunavezmáselbotóndelrelojylahoraquedaráfijada.
Precalentando el Horno
Coloquelarejillaenlaposicióndeseadaantesdecalentarelhorno.(Consultela
sección“Colocandolarejilla”)
Oprimaelbotóndelhorno“Oven”unavez.
Utilice las flechas para fijar la temperatura deseada.
Oprimaelbotóncontadordetiempo/temperatura“Timer/Temp”,luegolaflechahacia
abajo hasta que aparezca en la pantalla siete minutos.
Oprimaelbotóndeiniciar“Start”.
Utilizando la función de Hornear
Coloquelarejillaenlaposicióndeseadaantesdecalentarelhorno.(Consultela
sección“Colocandolarejilla”)
Coloquelosalimentosenlarejillaoenlabandejaparahornear.
Oprimaelbotóndelhorno“Oven”unavez.Uselosbotonesdelasflechaspara
seleccionar la temperatura deseada.
Oprimaelbotóncontadordetiempo/temperatura“Timer/Temp”.Uselosbotonesde
las flechas para seleccionar el tiempo deseado.
Oprimaelbotóndeiniciar“Start”.
NOTA –Amboselementoscalefactoresseencenderányseapagaránparamantenerla
temperaturadeseada.Cuandohayaterminadodehornear,abralapuertatotalmentey
saque los alimentos con cuidado.

19
Utilizando la Función de Hornear por Convección (Calor Envolvente)
Cuandoseleccionelafuncióndehornearporconvección(conventilador)seencenderáel
ventiladordeconvecciónyharácircularelairepermitiendoquelosalimentossecocinen
uniformementeymásrápido.
Coloquelarejillaenlaposicióndeseadaantesdecalentarelhorno.(Consultela
sección“Colocandolarejilla”)
Coloquelosalimentosenlarejillaoenlabandejaparahornear.
Oprimaelbotóndelhorno“Oven”dosveceshastaquelafuncióndehornearconventilador
“FanBake”seilumineenlapantalla.Uselosbotonesdelasflechasparaseleccionarla
temperatura deseada.
Oprimaelbotóncontadordetiempo/temperatura“Timer/Temp”.Utilicelosbotonesdelas
flechas para seleccionar el tiempo deseado.
Aprieteelbotóndeiniciar“Start”.
NOTA –Amboselementoscalefactoresseencenderányseapagaránparamantener
latemperaturadeseada.Cuandohayaterminadodehornear,abralapuertatotalmentey
saque los alimentos con cuidado.
Utilizando la Función de Asar a la Parrilla
Coloquelarejillaenlaposicióndeseadaantesdecalentarelhorno.(Consultela
sección“Colocandolarejilla”)
Coloquelarejillaparaasarenlabandejaparahornearparaconvertirlaenunrecipiente
para asar a la parrilla.
Coloquelosalimentosenelrejillaparaasaralaparrilla.
Coloqueelrecipienteparaasaralaparrillaenlarejilladelhorno.
Presioneelbotóndelhorno“Oven”tresveceshastaquelapalabra“Broil”seilumineen
la pantalla.
Presioneelbotóncontadordetiempo/temperatura“Timer/Temp”.Utilicelasflechaspara
seleccionar el tiempo deseado.
Presioneelbotóndeiniciar“Start”.
NOTA – Elelementocalefactorsuperiorseencenderáyseapagaráparamantenerla
temperaturadeseada.Cuandohayaterminadodeasar,abralapuertatotalmentey
saque los alimentos con cuidado.
ADVERTENCIA: NO DEJE SU HORNO DESATENDIDO.
Utilizando la Función de Tostar
Coloquelarejillaenlaposicióndeseadaantesdecalentarelhorno.(Consultela
sección“Colocandolarejilla”)
NOTA –Senecesitandistintasgraduacionesparadiferentestiposdepan.Lospanes
másblancosyloswaflesrequierenunagraduaciónmásbaja.Lospanesmásoscuros,
losmuffinsylospanecillos,requierenunagraduaciónmásalta.
Coloquelosalimentosenlarejilla.
Presioneelbotóndetostar“Toast”.Uselasflechasparaseleccionarelgradodetostado
deseado.
1eslagraduaciónparamásclaroy6paramásoscuro.
Presioneelbotóndeiniciar“Start”.
Una vez que haya terminado de tostar, abra la puerta totalmente y retire los alimentos
con cuidado.
Utilizando la Función Pizza
Coloquelarejillaenlaposicióndeseadaantesdecalentarelhorno.(Consultela
sección“Colocandolarejilla”)
Coloquelapizzaenlarejilla.
PresioneelbotóndePizzayesperequeaparezcaeltiempopredeterminadode20:00.Utilice
lasflechasparaajustareltiempodeseado.Presioneelbotóndeiniciar“Start”.
Other manuals for 6058
2
Table of contents
Languages:
Other Oster Oven manuals

Oster
Oster TSSTTV0000 User manual

Oster
Oster TSSTTVRB04 User manual

Oster
Oster TSSTTVSK01 User manual

Oster
Oster TSSTTVRB04 User manual

Oster
Oster 6056 User manual

Oster
Oster TSSTTV15LTR User manual

Oster
Oster TSSTTVFDDG User manual

Oster
Oster TSSTTVXLDG-003 User manual

Oster
Oster TSSTTVCG01 User manual

Oster
Oster TSSTTVFDXL User manual

Oster
Oster TSSTTVFDDG User manual

Oster
Oster TSSTTVDG01 Assembly instructions

Oster
Oster TSSTTVDFL1 User manual

Oster
Oster OS-BOV701LK User manual

Oster
Oster 6209 User manual

Oster
Oster 6081 User manual

Oster
Oster TSSTTVFDXL2 User manual

Oster
Oster TSSTTVLS25NS User manual

Oster
Oster 6293 User manual

Oster
Oster TSSTTV7118 User manual