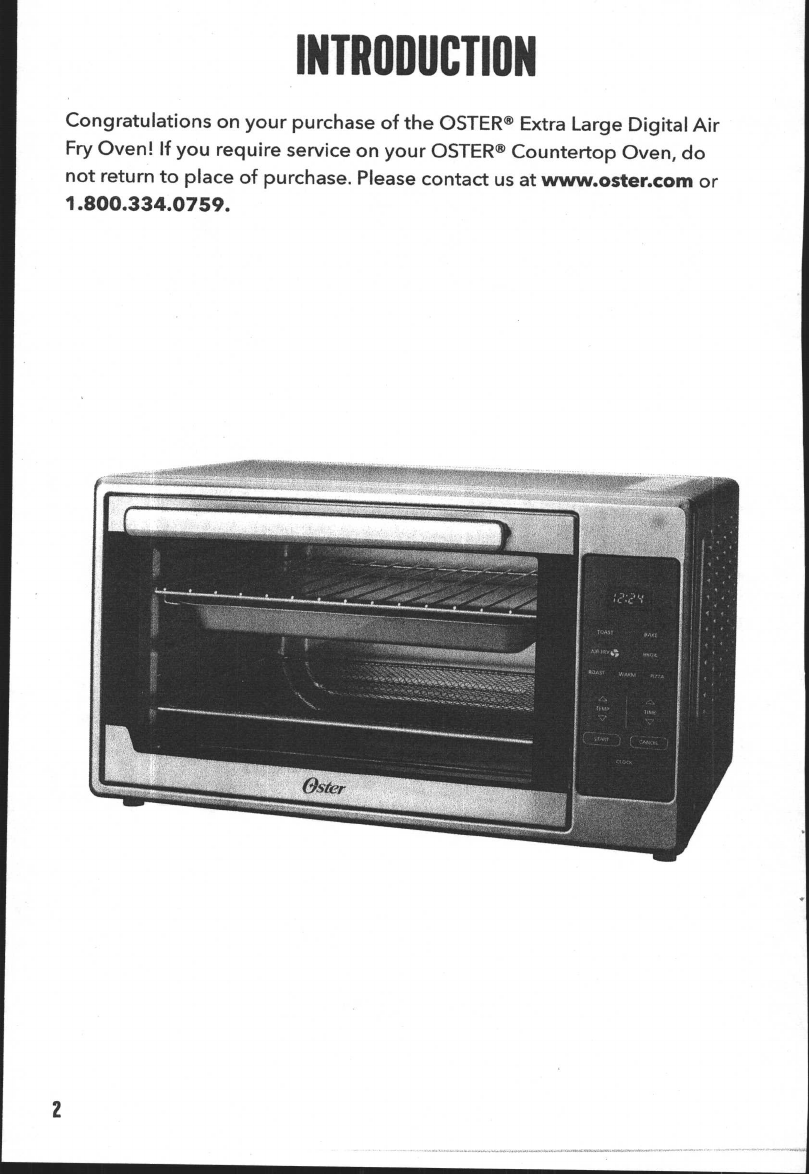
Oster TSSTTV-ELXLDAF3 User manual

TSSTTY-
ELXLDAF3
NODEL
EXTRA
LARGE
DIGITAL
AIR
FRY
OVEN
INSTRUCTION
MANUAL
P.
N.
ART0000918481
f
p
@
0
www.
oster.
com
SAP
Number:
2153271

INTRODUCTION
Congratulations
on
your
purchase
of
the
OSTER®
Extra
Large
Digital
Air
Fry
Oven!
If
you
require
service
on
your
OSTER°
Countertop
Oven,
do
not
return
to
place
of
purchase.
Please
contact
us
at
www.
oster.
com
or
1.
800.
334.
0759.

IMPORTANT
SAFEWARDS
When
using
electrical
appliances,
basic
safety
precautions
should
always
be
followed
to
reduce
the
risk
of
fire,
electric
shock,
and/
or
injury
to
persons
including
the
following:
1.
Read
all
instructions
before
using
this
product.
2,
is
This
appliance
generates
heat
during
use.
Do
not
touch
hot
surfaces.
Use
handles
or
knobs.
Always
protect
your
hands
with
non -
slip
oven
mitts
or
similar.
3.
To
protect
against
electric
shock,
do
not
place
or
immerse
cord,
plugs,
or
appliance
in
water
or
other
liquid.
4.
This
appliance
is
not
intended
for
use
by
children
or
by
persons
with
reduced
physical,
sensory,
or
mental
capabilities,
or
lack
of
experience
and
knowledge.
Close
supervision
is
necessary
when
any
appliance
is
used
near
children.
Children
should
be
supervised
to
ensure
that
they
do
not
play
with
the
appliance.
Keep
the
appliance
and
its
cord
out
of
reach
of
children.
5.
Unplug
from
outlet
when
not
in
use,
before
putting
on
or
taking
off
parts
and
before
cleaning.
Allow
to
cool
before
putting
on
or
taking
off
parts,
and
before
cleaning.
To
disconnect,
turn
any
control
to
OFF,
then
unplug
power
cord
from
outlet.
Do
not
disconnect
by
pulling
on
cord.
Always
grasp
the
plug
and
pull
to
disconnect.
6.
Do
not
operate
any
appliance
with
a
damaged
cord
or
plug
or
after
the
appliance
malfunctions,
or
has
been
damaged
in
any
manner.
Do
not
attempt
to
replace
or
splice
a
damaged
cord.
Return
appliance
to
the
manufacturer (
see
warranty)
for
examination,
repair
or
adjustment.
7.
The
use
of
accessory
attachments
not
recommended
by
the
appliance
manufacturer
may
cause
injuries.
8.
Do
not
use
outdoors
or
for
commercial
purposes.
9.
Do
not
let
cord
hang
over
edge
of
table
or
counter,
or
touch
hot
surfaces.
10.
Do
not
place
on
or
near
wet
surfaces,
or
heat
sources
such
as
a
hot
gas
or
electric
burner,
or
in
a
heated
oven.
11.
Extreme
caution
must
be
used
when
moving
an
appliance
or
removing
a
pan,
containing
hot
oil
or
other
hot
liquids.
Always
protect
your
hands
with
non -
slip
oven
mitts
or
similar.
12.
Do
not
use
appliance
for
other
than
intended
use.
Misuse
can
cause
injuries.
Intended
for
household
countertop
use
only.
Keep
6
inches (
152
mm)
clear
from
the
wall
and
on
all
sides.
Always
use
appliance
on
a
dry,
stable,
level
surface.
13.
Oversize
foods
or
metal
utensils
must
not
be
inserted
in
a
toaster -
oven
as
they
may
create
a
fire
or
risk
of
electric
shock.
14.
A
fire
may
occur
if
the
toaster -
oven
is
covered,
touching
or
near
flammable
materials,
including
curtains,
draperies,
towels,
walls,
and
the
like,
when
in
operation.
Do
not
store
any
item
on
top
of
the
appliance
when
in
operation.
15.
Do
not
clean
with
metal
scouring
pads.
Pieces
can
break
off
the
pad
and
touch
electrical
parts,
creating
a
risk
of
electric
shock.
3

IMPORTANT
SAFEGUARDS (
CONY.)
16.
Extreme
caution
should
be
exercised
when
using
containers
constructed
of
materials
other
than
metal
or
glass.
17.
Do
not
store
any
materials,
other
than
manufacturers
recommended
accessories,
in
this
oven
when
not
in
use.
18.
Do
not
place
any
of
the
following
materials
in
the
oven:
paper,
cardboard,
plastic,
or
any
materials
that
may
catch
fire
or
melt.
19.
Do
not
cover
crumb
tray
or
any
part
of
the
oven
with
metal
foil.
This
will
cause
overheating
of
the
oven.
20.
Empty
the
crumb
tray
after
each
use.
21.
The
glass
door
is
made
of
tempered
glass.
Always
inspect
the
glass
door
for
chips,
cracks
or
any
other
damage.
Do
not
use
the
toaster
oven
if
the
glass
door
is
damaged,
as
the
glass
may
shatter
during
use.
22.
If
your
toaster
oven
is
equipped
with
a
STAY -
ON
feature,
toaster
oven
will
stay
ON
if
knob
is
turned
counter -
clockwise
past
zero.
Exercise
caution
when
using
this
feature
and
do
not
operate
unattended
for
long
periods.
23.
Do
not
use
with
a
programmer,
timer,
wireless
plug
adapter
or
outlet
that
allows
control
remotely,
or
connect
to
a
circuit
that
is
regularly
switched
on
and
off
by
the
utility.
SAYE
THESE
INSTRUCTIONS
HOUSEHOLD
USE
ONLY
North
American
models
with
polarized
plugs:
Polarized
plug
This
appliance
has
a
polarized
plug, (
one
blade
e
is
wider
than
the
other).
As
a
safety
feature
to
e
reduce
the
risk
of
electrical
shock,
this
plug
is
intended
to
fit
in
a
polarized
outlet
only
one
way.
If
the
plug
does
not
fit
fully
in
the
outlet,
reverse
the
plug.
If
it
still
does
not
fit,
contact
a
qualified
electrician.
Do
not
attempt
to
defeat
this
safety
feature
or
modify
the
plug
in
any
way.
If
the
plug
fits
loosely
into
the
AC
outlet
or
if
the
AC
outlet
feels
warm
do
not
use
that
outlet.

POWER
CORD
INSTRUCTIONS
A
short
power -
supply
cord
or
detachable
power -
supply
cord
is
provided
to
reduce
risks
resulting
from
becoming
entangled
in
or
tripping
over
a
longer
cord.
Longer
detachable
power -
supply
cords
or
extension
cords
are
available
and
may
be
used
if
care
is
exercised
in
their
use.
If
a
long
detachable
power -
supply
cord
or
extension
cord
is
used:
a.
The
marked
electrical
rating
of
the
cord
set
or
extension
cord
should
be
at
least
as
great
as
the
electrical
rating
of
the
appliance;
b.
The
cord
should
be
arranged
so
that
it
will
not
drape
over
the
countertop
or
tabletop
where
it
can
be
pulled
on
by
children
or
tripped
over
unintentionally;
and
c.
If
the
appliance
is
of
the
grounded
type,
the
cord
set
or
extension
cord
should
be
a
grounding -
type
3-
wire
cord.
Do
not
pull,
twist
or
otherwise
abuse
the
power
cord.
PRODUCT
NOTICES
Some
countertop
and
table
surfaces
are
not
designed
to
withstand
the
prolonged
heat
generated
by
certain
appliances.
Do
not
set
the
heated
unit
on
a
finished
wood
table.
We
recommend
placing
a
hot
pad
or
trivet
under
your
countertop
oven
to
prevent
possible
damage
to
the
surface.
During
initial
use
of
this
appliance,
some
slight
smoke
and/
or
odor
may
be
detected.
This
is
normal
with
many
heating
appliances
and
will
not
recur
after
a
few
uses.

GET
TO
KNOW
YOUR
OVEN
3
4
1.
Air
Fry
Rack
2.
Baking
Pan
3.
Wire
Rack /
Broil
Rack
4.
Crumb
Tray /
Cookie
Sheet
5.
Three
Rack
Positions
6
5
6
6.
Glass
Door
7.
Control
Buttons
8.
Time
Display
9.
Handle
NOTE:
Accessories
included
are
dependent
of
model
purchased.
8
7

GETTING
STARTED
Preparing
To
Use
Your
Countertop
Oven
for
the
First
Time
If
you
are
using
your
countertop
oven
for
the
first
time,
please
be
sure
to:
1.
Remove
any
stickers
from
the
surface
of
the
oven.
2.
Open
oven
door
and
remove
all
printed
documents
and
paper
from
inside
the
countertop
oven.
3.
Clean
the
air fry
rack,
wire
rack,
baking
pan,
and
removable
crumb
tray
with
hot
water,
a
small
amount
of
dishwashing
liquid
and
a
non-
abrasive
sponge
or
cleaning
pad.
CAUTION:
DO
NOT
IMMERSE
THE
BODY
OF
THE
UNIT
IN
WATER.
4.
Dry
the
unit
thoroughly
before
using.
5.
Select
a
location
for
the
countertop
oven.
The
location
should
be
in
an
open
area
on
a
flat counter
where
the
plug
will
reach
an
outlet.
6.
Plug
the
countertop
oven
into
a
120
Volt
AC
electrical
outlet.
NOTE:
It
is
recommended
that
the
countertop
oven
heat
at
450'
for
approximately
15
minutes
to
eliminate
any
manufacturing
residue
that
may
remain
after
shipping.
SETTING
THE
CLOCK
1.
Push
the
Clock
button.
The
clock
will
flash.
2.
Use
the
arrow
keys
to
set
the
hour.
Push
the
Clock
button
again.
3.
Use
the
arrow
keys
to
set
the
minutes.
4.
Push
the
Clock
button
once
more
and
the
time
will
be
set.
7

OVEN
FUNCTIONS
OVERVIEW
Preset
Best
For:
Preheat
Bake
Yes
Toast
No
z2m%
rw?,
f' ;
Yes
499mw-
Middle
8

USING
YOUR
OVEN
To
Open
the
Oven
Door:
Step
1:
Grab
the
center
of
the
handle
underhanded
with
fingertips (
See
Figure
1).
Figure
1
Step
2:
Pull
down
the
oven
door
carefully (
See
Figure
2).
Figure
2
CAUTION:
This
appliance
generates
heat
during
use.
Do
not
touch
hot
surfaces.
Always
use
handles
or
knobs
per
above
instructions.
To
Preheat
the
Oven
1.
Place
oven
rack
into
the
desired
position
before
heating
the
oven.
2.
Select
desired
cooking
function.
3.
Use
the
temp
arrow
keys
to
select
the
desired
temperature.
4.
Use
the
timer
arrow
keys
to
select
the
desired
time.
5.
Select
the
start
button.
NOTE:
While
preheating,
the
display
will
show
PrE.
When
the
oven
reaches
the
desired
temperature,
it
will
beep.
Press
the
start
button
to
begin
the
cooking
process.
This
oven
has
a
preheat
feature
in
Bake,
Air
Fry,
Pizza,
and
Roast.
To
bypass
the
preheat
function
press
the
start
button
a
second
time.
9

To
Use
the
Bake,
Air
Fry,
Broil,
Roast,
Pizza,
or
Warm
Functions
1.
Select
desired
oven
rack
position. (
See "
Oven
Functions
Overview"
Section).
2.
Arrange
food
on
the
Wire
Rack,
Air
Fry
Rack,
Baking
Pan,
or
in
the
Cookie
Sheet.
NOTE:
When
air
frying
foods
with
high
amounts
of
fat
or
grease,
it
is
recommended
to
place
the
Wire
Rack,
with
Baking
Pan
on
top,
in
the
bottom
rack
position
to
catch
drippings
during
the
cooking
cycle.
3.
Select
the
desired
cooking
function.
4.
Use
the
temperature
arrow
keys
to
select
desired
temperature
and
the
time
arrow
keys
to
select
desired
time.
5.
Select
the
Start
button.
When
cooking
is
completed,
open
door
fully
and
remove
food
carefully.
WARNING:
Cooked
food
can
be
very
hot.
Handle
with
care.
Do
not
leave
countertop
oven
unattended.
To
Use
the
Toast
Function
1.
Place
Wire
Rack
into
the
middle
rack
position
before
heating
the
oven.
NOTE:
Different
types
of
bread
require
different
settings.
Lighter
breads
and
waffles
require
a
lighter
setting.
Darker
breads,
muffins,
and
English
muffins
require
a
darker
setting.
2.
Select
the
Toast
button.
3.
Use
the
time
arrows
to
select
the
Toast
Shade.
4.
Press
the
Start
button.
When
toasting
is
completed,
open
door
fully
and
remove
food
carefully.
WARNING:
Cooked
food
can
be
very
hot.
Handle
with
care.
Do
not
leave
countertop
oven
unattended.
10

AIR
FRY
CHART
Food
FWeight
Function
Temperature
F)
Time
Oil?
Potatoes
Hand -
Cut
Fries
2
Ibs
AIR
FRY
425
degrees
20-22
min
Yes
Hand -
Cut
Sweet
Potato
Fries
2
Ibs
AIR
FRY
425
degrees
19-
21
min
Yes
Frozen
Fries (
Thick
Cut)
1.
5
Ibs
AIR
FRY
450
degrees
10-
13
min
No
Frozen
Fries (
Thin
Cut)
1.
5
Ibs
AIR
FRY
450
degrees
10-
12
min
No
Meat/
Poultry/
Seafood
Chicken
Wings
2
Ibs
AIR
FRY
400
degrees
35
min
No
Chicken
Breast
Cutlet
2.5
Ibs
AIR
FRY
4.50
degrees
27-
30
min
Yes
Chicken
Tenderloin
1.
5
lbs
AIR
FRY
400
degrees
25-
30
min
Yes
Hamburger
1.
5
Ibs
AIR
FRY
450
degrees
18-
22
min
No
Pork
Chops
4
Ibs
AIR
FRY
450
degrees
20-
25
min
Yes
Breaded
Fish
1
lb
AIR
FRY
425
degrees
18-
22
min
Yes
Frozen
Snacks
Frozen
Chicken
Nuggets
1.
5
Ibs
AIR
FRY
450
degrees
15-
18
min
No
Frozen
Chicken
Fingers
1.
5
Ibs
AIR
FRY
425
degrees
18-
20
min
No
Frozen
Mozzarella
Sticks
1.
5
Ibs
AIR
FRY
425
degrees
8-
10
min
No
Frozen
Onion
Rings
1
lb
AIR
FRY
425
degrees
7-
8
min
No
Frozen
Mixed
Vegetables
1.
5
Ibs
AIR
FRY
450
degrees
35-
40
min
Yes
Fresh
Vegetables
Broccoli
2
Ibs
AIR
FRY
425
degrees
18-
24
min
Yes
Asparagus
2
Ibs
AIR
FRY
425
degrees
18-
24
min
Yes
Brussels
Sprouts
2
Ibs
AIR
FRY
425
degrees
20-
25
min
Yes
Carrots
1
lb
AIR
FRY
400
degrees
20-
25
min
Yes
Cook
times
are
estimates
and
may vary
based
on
food
type
and
preparation.
Note:
Not
all
foods
will
benefit
from
being
tossed
in
oil
prior
to
being
air
fried.
Frozen
foods
and
foods
with
a
high
fat
content
such
as
chicken
wings
or
bacon
do
not
require
oil.
To
achieve
crispy
and
browned
results
on
foods
such
as
hand -
cut
fries
or
vegetables,
evenly
coat
food
with
about
one
tablespoon
of
oil.
11

MM
Pan
Position
POSITIONING
Baking
pan
on
top
of
the
wire
rack
Baking
pan
in
guide
rails
below
wire
rack
The
baking
pan
can
be
placed
on
top
of
the
rack
or
inserted
into
the
guide
rails
below
the
rack.
Before
removing
the
baking
pan
allow
the
unit
to
cool.
Positioning
of
the
baking
pan
will
depend
on
the
desired
cooking
method.
For
baking,
place
the
baking
pan
on
top
of
one
of
the
racks.
For
broiling,
insert
the
baking
pan
into
the
guide
rails
below
the
rack
and
place
the
food
on
top
of
the
rack.
PLEASE
NOTE:
Do
not
use
the
baking
pan
under
the
wire
rack
in
the
lower
position.
12

CARE
AND
CLEANIN6
Cleaning
Your
Countertop
Oven
Before
cleaning
your
OSTER°
Countertop
Oven,
unplug
it
and
allow
it
to
cool.
To
clean,
wipe
with
damp
cloth.
CAUTION:
DO
NOT
IMMERSE
IN
WATER!
Make
sure
to
use
only
mild,
soapy
water.
Clean
the
air
fry
rack,
baking
pan,
wire
rack,
and
removable
crumb
tray
with
hot
water,
a
small
amount
of
dishwashing
liquid
and
a
non-
abrasive
sponge
or
cleaning
pad.
Abrasive
cleaners,
scrubbing
brushes
and
chemical
cleaners
will
damage
the
coating
on
this
unit.
Empty
crumb
tray
frequently
to
avoid
accumulation
of
crumbs.
This
appliance
has
no
user
serviceable
parts.
Any
servicing
beyond
that
described
in
the
Cleaning
Section
should
be
performed
by
an
Authorized
Service
Representative
only.
See
Warranty
Section.
Storing
Your
Countertop
Oven
Allow
the
appliance
to
cool
completely
before
storing.
If
storing
the
countertop
oven
for
long
periods
of
time
make
certain
that
the
countertop
oven
is
clean
and
free
of
food
particles.
Store
the
countertop
oven
in
a
dry
location
such
as
on
a
table
or
countertop
or
cupboard
shelf.
Other
than
the
recommended
cleaning,
no
further
user
maintenance
should
be
necessary.
13

HELPFUL
TIPS
1
TROUBLESHOOTING
Problem
Potential
Cause
Solution
Overcooked /
Incorrect
You
may
have
to
adjust
the
Undercooked
Foods
temperature
or
time
time
and
temperature
to
setting
desired
taste.
Because
your
countertop
oven
is
smaller
than
your
regular
oven,
it
will
heat
up
faster
and
generally
cook
in
shorter
periods
of
time.
Rack
placement
Refer
to "
Oven
Functions
Overview"
section,
page
8.
Rack
may
need
to
be
adjusted
to
accommodate
food
type.
Burnt
Smell
Food
build-
up
Refer
to "
Cleaning
you
inside
oven,
on
Countertop
Oven"
Section,
heating
elements
or
page
13.
in
crumb
tray.
Oven
does
not
turn
Unit
is
unplugged
Plug
the
countertop
oven
into
ON
a
120-
volt
AC
electrical
outlet.
Set
timer
and
temperature
to
desired
setting.
Both
must
be
turned
on
to
operate
the
countertop
oven.
Did
not
press
start.
Press
Start.
Only
one
heating
Function
setting
When
toasting,
make
sure
the
element
is
heating
selection
oven
is
not
set
to
broil
setting.
up
determines
which
heating
element
will
operate.
Heating
elements
do
Heating
elements
Be
certain
that
function
is
as
not
stay
ON
will
cycle
ON
and
desired.
OFF
to
maintain
Heating
elements
may
not
proper
heat.
glow.
Cannot
change
Need
to
cancel
Press
cancel.
function
button
function.
14

1
YEAR
SATISFACTION
6UARANTEED
Sunbeam
Products,
Inc., (
collectively "
Sunbeam")
warrants
that
for
a
period
of
one
year
from
the
date
of
purchase,
this
product
will
be
free
from
defects
in
material
and
workmanship.
Sunbeam,
at
its
option,
will
repair
or
replace
this
product
or
any
component
of
the
product
found
to
be
defective
during
the
guarantee
period.
Replacement
will
be
made
with
a
new
or
remanufactured
product
or
component.
If
the
product
is
no
longer
available,
replacement
may
be
made
with
a
similar
product
of
equal
or
greater
value.
This
is
your
exclusive
guarantee.
Do
NOT
attempt
to
repair
or
adjust
any
electrical
or
mechanical
functions
on
this
product.
Doing
so
will
void
this
guarantee.
This
guarantee
is
valid
for
the
original
retail
purchaser
from
the
date
of
initial
retail
purchase
and
is
not
transferable.
Keep
the
original
sales
receipt.
Proof
of
purchase
is
required
to
obtain
satisfaction
guarantee
performance.
Sunbeam
dealers,
service
centers,
or
retail
stores
selling
Sunbeam
products
do
not
have
the
right
to
alter,
modify
or
any
way
change
the
terms
and
conditions
of
this
guarantee.
This
guarantee
does
not
cover
damage
resulting
from
any
of
the
following:
negligent
use
or
misuse
of
the
product,
use
on
improper
voltage
or
current,
use
contrary
to
the
operating
instructions,
disassembly,
repair
or
alteration
by
anyone
other
than
Sunbeam
or
an
authorized
Sunbeam
service
center.
Further,
the
guarantee
does
not
cover:
Acts
of
God,
such
as
fire,
flood,
hurricanes
and
tornadoes.
What
are
the
limits
on
Sunbeam'
s
Liability?
Sunbeam
shall
not
be
liable
for
any
incidental
or
consequential
damages
caused
by
the
breach
of
any
express,
implied
or
statutory
guarantee
or
condition.
Except
to
the
extent
prohibited
by
applicable
law,
any
implied
guarantee
or
condition
of
merchantability
or
fitness
for
a
particular
purpose
is
limited
in
duration
to
the
duration
of
the
above
guarantee.
Sunbeam
disclaims
all
other
guarantees,
conditions
or
representations,
express,
implied,
statutory
or
otherwise.
Sunbeam
shall
not
be
liable
for
any
damages
of
any
kind
resulting
from
the
purchase,
use
or
misuse
of,
or
inability
to
use
the
product
including
incidental,
special,
consequential
or
similar
damages
or
loss
of
profits,
or
for
any
breach
of
contract,
fundamental
or
otherwise,
or
for
any
claim
brought
against
purchaser
by
any
other
party.
15

Some
provinces,
states
or
jurisdictions
do
not
allow
the
exclusion
or
limitation
of
incidental
or
consequential
damages
or
limitations
on
how
long
an
implied
guarantee
lasts,
so
the
above
limitations
or
exclusion
may
not
apply
to
you.
This
guarantee
gives
you
specific
legal
rights,
and
you
may
also
have
other
rights
that
vary
from
province
to
province,
state
to
state
or
jurisdiction
to
jurisdiction.
How
to
Obtain
Satisfaction
Guarantee
Service
In
the
U.
S.
A.
If
you
have
any
question
regarding
this
guarantee
or
would
like
to
obtain
guarantee
service,
please
call
1-
800-
334-
0759
and
a
convenient
service
center
address
will
be
provided
to
you.
In
the
U.
S.
A.,
this
guarantee
is
offered
by
Sunbeam
Products,
Inc.,
located
in
Boca
Raton,
Florida
33431.
If
you
have
any
other
problem
or
claim
in
connection
with
this
product,
please
write
to
the
Consumer
Service
Department.
PLEASE
DO
NOT
RETURN
THIS
PRODUCT
TO
ANY
OF
THESE
ADDRESSES
OR
TO
THE
PLACE
OF
PURCHASE.
16

For
product
questions
contact:
Sunbeam
Consumer
Service
USA:
1.
800.
334.
0759 -
www.
oster.
com
2021
Sunbeam
Products,
Inc.
All
rights
reserved.
Distributed
by
Sunbeam
Products,
Inc.,
Boca
Raton,
Florida
33431.
Printed
in
China.
TSS7TV-
ELXLDAF3_
21
EM1 (
US)
GCDS-
OST-
JC
Table of contents
Other Oster Oven manuals

Oster
Oster TSSTTV7032R User manual

Oster
Oster OS-BOV701LK User manual

Oster
Oster TSSTTVF8GA User manual

Oster
Oster TSSTTVDFL1 User manual

Oster
Oster TSSTTVSKBT User manual

Oster
Oster 6235 User manual

Oster
Oster TSSTTVRB04 User manual

Oster
Oster TSSTTVRB04 User manual

Oster
Oster TSSTTVMATT User manual

Oster
Oster 4-Slice Toaster Oven User manual

Oster
Oster TSSTTVMAF1 User manual

Oster
Oster 4831 User manual

Oster
Oster TSSTTVFDXLPP-033 User manual

Oster
Oster 6239 User manual

Oster
Oster TSSTTVXLDG-001 User manual

Oster
Oster TSSTTVRB05 User manual

Oster
Oster TSSTTVXXLL User manual

Oster
Oster TSSTTVFDDAFNS User manual

Oster
Oster CKSTRS20-SBC User manual

Oster
Oster 6056 User manual