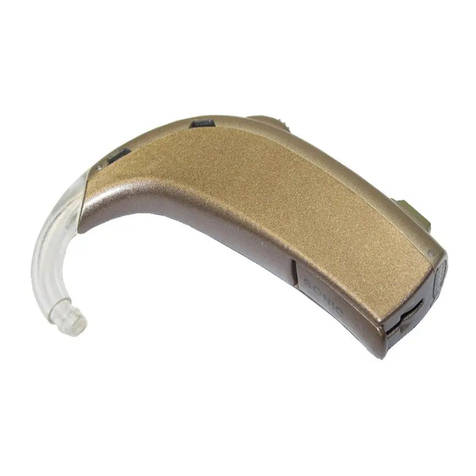
oticon Sumo XP Assembly instructions

Fitting Guide Sumo XP


3
Introduction
Advanced technology and fitting strategies provide vastly improved hearing instrument solutions for
people with severe to profound hearing loss. However, this distinctive group of clients continues to
present challenges that require careful and intelligent fitting.
Studies have shown that this population may have reduced dynamic range, "dead zones" within
the cochlea, large variability in speech perception scores, increased distortion, lower audibility
of signal, and often quite poor speech perception. Fortunately, SUMO assists you through advanced
super power technology and Genie enables the implementation of tools to achieve the best fitting
possible. This guide will suggest a number of answers and provide additional explanation to enable
you to provide the best possible fitting.

4
Step 1: Select Instrument and Rationale
Select Hearing Instrument
Manually selecting the hearing instru-
ment is also an option. The intuitive
software makes it easy to select the
correct hearing aid for the client. Click
on the Select button and then choose
SUMO.
Choose Rationale, venting, damping, etc.
The fitting software offers five different linear
rationales, including three of the most popular
for power fittings: POGO II + BC, NAL-RP, and
DSL i/o, as well as Correll-2 and SSM+. Click
on the Change button to access the rationales.
Detect Instruments
For a fast and easy fitting; connect the
instruments to the HI-PRO and click
on the Detect Instruments button. The
instruments will then automatically be
detected showing the model, type and
rationale.
Or
SUMO is fitted using Genie 2.1 (or higher). SUMO
incorporates linear gain amplification, which is
applied as specified by standard gain rationales.

There are 3 main issues to deal with when fitting severe or profound hearing losses: MPO, Feedback and
Frequency Response.
The structure of this guide follows the recommended fitting flow as shown in the following 5 steps:
In addition to these steps, important information is provided in this guide about Fitting SUMO to children,
Earmould Considerations and Troubleshooting.
5
Step 2: Fitting SUMO
Step 2b
Check for
Feedback
Step 2a
Check the
MPO level
Step 2c
Check the
Frequency Response
Step 2d
Check Programmable
Volume Control
Step 2e
Check the T-coil
and FM settings

6
Step 2a: Check the MPO Level
The fitting software will always prescribe an MPO based upon the hearing threshold and the age of the
wearer. Despite this, due to the restricted dynamic range associated with severe to profound hearing losses,
it is very important to begin the fitting session by checking that the MPO is set correctly.
A too high level of the UCL (MPO) control may cause the client to decrease the VC, and thereby reduce the
audibility of speech. Alternatively, setting the UCL control too low may produce complaints of poor sound
quality of own voice and reduced speech intelligibility.
To test the UCL control setting the following procedure can be followed:
• Start talking loudly in front of the client.
• Then talk closer and closer to the ear.
You should always start carefully so you do not cause unnecessary discomfort.
Try to distinguish between a loud sound as being indeed too loud or being uncomfortably loud.
• If the sound is not uncomfortably loud, increase the UCL control and test again.
• If the sound is found to be uncomfortably loud, decrease the UCL control and test again.
The client should also talk and listen to their own voice to evaluate their own voice quality.
Fitting tip:
If the preferred MPO setting is not
at the maximum setting, a 5dB
damped hook should be considered.
This will enable the level of low-
frequency output to be increased,
which may be preferred by users who
need increased low-frequency amplifi-
cation (e.g. left-corner audiogram).
MPO Level
UCL (dB HL)
Adjusts the maximum power
output (MPO) according to the
user's uncomfortable level (UCL).

7
Fitting tips:
1) If clients complain that the sound
is harsh or distorted with PC, then try
one of the AGC options.
2) Changing from PC to either AGC
method will cause the MPO level to
decrease 3dB. Test if the new MPO
level is correct. You may need to
increase the level to maintain the
same loudness.
3) The release time for both AGCs is
fast so that the gain for subsequent
speech sounds is not unnecessarily
decreased.
Then Select Limiting Options
MPO Level
AGC fast + PC:
AGC fast + PC has a fast attack time
(5 ms.) which results in rapid gain
reduction, preventing distortion even
for quickly changing sounds.
PC
Peak clipping is the default MPO
limiting method for SUMO. This will
provide the client with the highest
possible output at every moment,
which many clients with profound
hearing losses prefer.
AGC slow + PC:
AGC slow + PC has a slow attack time
(90 ms.) which prevents brief sounds from
activating the output AGC circuit and
hence the sound reproduction is only
slightly modulated by the AGC. A more
natural sound reproduction may be
obtained.

8
Although the prescribing algorithm takes the risk of feedback occurring into account when calculating
the prescribed setting, there is still some risk of feedback occuring when the fitting session begins or at
higher volume control levels. This is because these settings are not based on the actual earmould being
used.
The following steps give you suggestions on how to manage feedback:
1. Check for feedback in the prescribed setting.
Ask the client to smile and move their jaw.
• If feedback occurs, run the FBM tool. (For more information see next page)
• If no feedback occurs continue to the next step.
2. Check for feedback at higher volume control settings by increasing the feedback trimmer in Genie.
Ask the client to smile and move their jaw.
• If feedback occurs, run the FBM tool.
• If no feedback occurs, you still may wish to run the FBM tool to provide more high
frequency gain at higher volume control levels.
When adjusting for feedback, it is very important that the client is active during the test. The client
should move their jaw and head and smile to maximize the risk of feedback in any situation.
When the FBM tool has been activated, a Measured Feedback Area is set. If you wish to return
to Default Feedback Area, press “Reset to Default Feedback Area” in the FBM dialogue box.
If a new earmould has been fitted you might wish to run the FBM tool again to define the Feedback
Area for the new earmould.
If you manually eliminate feedback using the Feedback Manager trimmer, never set the trimmer to
below 3.0. If this is necessary in order to eliminate feedback, use the FBM tool instead as this will
provide a more optimal setting.
Step 2b: Check For Feedback
Feedback Mgr.
FBM tool
Feedback Manager
This tool eliminates
feedback during the
fitting session.
(See next page)

9
Feedback Management Tool
The Feedback Management tool (FBM) tool shows a graph with a marked Feedback Area. There is a high
likelihood of feedback occuring if the prescribed Insertion Gain falls within this area. This area is used in
the initial prescribing algorithm to prescribe a setting without feedback when the fitting session opens.
The Test curve (Simulated Insertion Gain) will follow the Target P1 curve (Target Insertion Gain) in the
Low Frequencies to fulfil the requirement of the selected rationale. However, in the High Frequencies the
Test curve will avoid entering the Feedback Area to prevent unrealistically high gain causing feedback. If
the Test (actual) curve is prescribed within this area then it is likely that there will be feedback unless the
earmould is very tight.
When running the FBM tool a Measured Feedback Area will be reset to match the client's own earmould.
The Feedback Area will either be enlarged or reduced depending on the tightness of the earmould.
Fitting tips:
The FBM tool is a routine to optimize
the settings of the instrument in
relation to feedback. This routine
preserves the frequency response
as far as possible, but if feedback is
encountered and is adjusted for, then
the FBM routine may change the
settings for the A-Gram, Crossover
Frequency, Gain and Volume Control.
In the fitting screen the trimmer,
unlike the FBM tool, only makes
adjustments to the VC level beyond
which the high frequency gain
will no longer be increased (it does
not change the setting or the other
trimmers to provide a better
response).

Gain
Adjusts the preset overall gain of the instrument.
Ideally this should be set to a comfortable level when
the volume control is around 3. This will leave the
user with approximately 10 dB reserve gain. But
for many profound hearing losses, the prescribed
VC setting might be set higher than 3 to provide
sufficient gain.
10
Step 2c: Check the Frequency Response
Crossover Frequency
Adjusts the frequency at which point
the A-Gram slope circuit cuts the
low and high frequencies. The
trimmer may be used to fine-tune
the frequency response to provide
a better setting if feedback is a
problem. Alternatively it may be
adjusted automatically as part of
the Feedback Management routine
to provide an optimal setting if
feedback is a problem.
A-Gram Slope
Adjusts the low frequency sounds
(LC) or high frequency sounds
(HC) according to the slope of the
audiogram.
Frequency Response

Volume Control allows on-screen adjustment of the instrument's VC during the fitting. Manual
operation overrides the on-screen setting of the VC and vice versa.
VC range sets the available range between position 1 and 4 of the volume control. Choices are
Full (30 dB), Half (15 dB) and Disabled (no range). The Full range is the default setting.
Fitting tips:
1) Before reducing the range, make
sure that appropriate gain is fitted in
the Full range, and that the VC is set
to preferred level.
2) When changing VC Range, consider
the listening environments the client
is exposed to during the day. If the
loudness of the sound level changes
often and varies widely, then “Half”
range might not be a good solution,
because the client might not be able
to sufficiently decrease the volume
if the enviroment becomes uncomfort-
ably loud.
3) Clients who have difficulty with
adjusting inside the “Full” range,
and who are not exposed to varied
listening situations, might benefit
from “Half” range or “Disabled”
setting.
11
Step 2d: Check Programmable
Volume Control
Volume Control

12
Step 2e: Program the function
switch for T-coil and FM/DAI
SUMO's programmable function switch, marked M-1-2, allows for a variety of user configurations.
After the appropriate switch function has been selected for the user, consider activating the Telecoil
Boost, which adds 6dB to the response. The Telecoil in SUMO closely matches the microphone
response. In most cases, the client can also use the VC to further improve the telecoil strength.
FM/DAI fitting tips:
1) When using the SUMO FM
adapter shoe (part# 399-50-920)
and a plug-in FM receiver, SUMO's
default switch setting becomes:
M = Microphone
1 = Microphone + FM
2 = FM only
The switch on the FM receiver
should be set at FM + M. SUMO's
function switch should be used to
choose between FM + M (position 1)
or FM only (position 2).
2) With a DAI shoe attached,
SUMO's default switch setting
becomes:
M = Microphone
1 = Microphone + DAI
2 = DAI only
3) The T-coil in SUMO can only be
used when the FM receiver or DAI
shoe is removed.
T-coil switch options Default setting
6 dB telecoil boost

13
Earmold Advice and Information
The high Gain and MPO of a super power hearing aid like SUMO XP makes the physical
fit of the earmould very important in providing the client with a good setting without
the risk of feedback. Even though the Feedback Management System in SUMO can provide
a feedback free setting, it is still important to take great care when taking an impression
and making the earmould.
Earmould fitting tips:
1) To make a good tight earmould,
the impression is very important.
A good impression is characterized
by a relatively long tip and that all
parts of the concha are filled out.
2) Soft earmoulds of high fitting
quality prevent feedback and are
highly recommended for severe/
profound hearing loss.
3) Soften the concha of the ear with
mild body-lotion (not vaseline), so
that insertion of the earmould is
made easier without stressing the ear.
4) With a tight fitting earmould the
ear is almost air-tight, therefore
daily cleaning of earmoulds is
recommended.

14
Fitting SUMO to Children
For the small ear canals of infants and children, the acoustics of standard
measurements (2cc and IEC 711) are not representative, as the Open Ear Response of
infants and children differs from that of adults. Because hearing aid and audiometer
calibrations are performed according to adult standards, corrections are needed for the
ears of an infant or a child.
The fitting rationales in SUMO take into consideration the acoustics of an infant/child
ear. Therefore, the gain (as well as MPO) prescription depends upon measured or
predicted RECD and REUR values. Predicted values are based upon the child's age.
Great care should be taken when fitting SUMO to a child because of the
high MPO and Gain. Therefore the following steps should be taken:
• Select the child's age in the Personal Profile step.
• Enter the RECD dialogue box.
• Set the Audiometry method.
• If measured RECD values are available those can be entered,
otherwise predicted values will be used.
• Observe the child's reaction when you check the MPO level.
• Check for feedback, even for extreme situations, with your palm
very close to the hearing instrument.
• Observe the child's reaction when you check if soft sounds are audible.
The sound level for soft sounds should be around 55-60 dB.

15
Troubleshooting
Problem Solution Increase = Decrease = Move Left = Move Right =
UCL !2 dB.
A-Gram "1 step, UCL !2 dB. If A-Gram is in LC, Gain !2 dB.
A-Gram "1 step. If A-Gram is in LC, Gain !2 dB.
A-Gram "1step, UCL !2 dB. If A-Gram is in LC, Gain !2 dB.
In noise
In quiet
Gain !2 dB.
If A-Gram is in LC move A-Gram #1 step.
A-Gram "1step, !UCL 2 dB. If A-Gram is in LC, Gain !2 dB.
A-Gram #1 step. If A-Gram is in HC, Gain !2 dB.
In noise
In quiet
Gain !1 dB.
A-Gram #1step. If A-Gram is in HC, Gain !1 dB.
Low Frequencies
A-Gram "1step. If A-Gram is in LC, Gain !1 dB.
High Frequencies
All
Increase UCL !2 dB.
A-Gram #1 step, UCL !2 dB. If A-Gram is in HC, Gain !2 dB.
Low Frequencies
A-Gram "1 step, UCL!2 dB. If A-Gram is in LC, Gain !2 dB.
High Frequencies
All
➔
➔
➔
➔
Loud sounds
Soft sounds
Loudness - too soft
Speech is too soft
Speech is unclear
Speech Intelligibility

16
Problem Solution Increase = Decrease = Move Left = Move Right =
Gain $1 dB.
A-Gram "1 step. If A-Gram is in HC, Gain $2 dB.
A-Gram #1 step. If A-Gram is in LC, Gain $2 dB.
Decrease UCL $2 dB.
A-Gram "1 step, UCL $2 dB. If A-Gram is in HC, Gain $2 dB.
A-Gram #1 step, UCL $2 dB. If A-Gram is in LC, Gain $2 dB.
Low Frequencies
All
High Frequencies
All
Low Frequencies
High Frequencies
UCL $2 dB. If PC, change to AGC fast
All
➔
➔
➔
➔
Soft sounds
Loud sounds
Very Loud sounds
Too Loud

17
Problem Solution Increase = Decrease = Move Left = Move Right =
A-Gram #1 step.
A-Gram #1 step. If A-Gram is in LC, Gain $2 dB.
UCL !2 dB.
A-Gram "1 step.
A-Gram "1 step. If A-Gram is in HC, Gain $2 dB.
A-Gram #1 step.
A-Gram "1 step.
UCL !2 dB.
Change MPO limiting method to PC or AGC slow.
Change MPO method to AGC fast.
A-Gram #1 step.
A-Gram #1 step. If A-Gram is in HC, Gain !2 dB.
A-Gram "1 step.
A-Gram "1 step. If A-Gram is in HC, Gain $2 dB.
A-Gram "1 step.
A-Gram "1 step. If A-Gram is in HC, Gain $2 dB.
Gain$2 dB.
A-Gram #1 step. If A-Gram is in HC, Gain !2 dB.
Gain !2 dB.
Run the Feedback Manager.
Run the Feedback Manager.
If the telephone has a magnetic coil and is hearing aid compatible, advise the client to use the T position.
For more information, see “Instructions for use”.
Echo
Sharp
Hollow, muffled
Boomy
Too loud
Too soft
Constant
When chewing, smiling
or using the telephone
Sounds are muffled
Sounds are too sharp
Pumping
Distorted
➔
➔
➔
➔
Sound Quality
Own voice
Feedback

www.oticon.com
We believe that it takes more than
technology and audiology to create
the best hearing instruments. That’s
why we put the individual needs
and wishes of hearing impaired
people first in our development of
new hearing care solutions.
904 52 610 07/02.03 Printed in Denmark
Table of contents
Other oticon Hearing Aid manuals
oticon
oticon Oticon Xceed Series User manual
oticon
oticon Delta 4000 User manual
oticon
oticon HIT PRO User manual
oticon
oticon Chili BTE 13 SP User manual
oticon
oticon Phone 2.0 User manual
oticon
oticon Agil User manual
oticon
oticon miniRITE Alta2 User manual
oticon
oticon BTE Alta2 Pro User manual
oticon
oticon miniRITE R User manual
oticon
oticon BTE SP User manual
oticon
oticon Sumo DM User manual
oticon
oticon Intiga i User manual
oticon
oticon miniBTE User manual
oticon
oticon ponto streamer User manual
oticon
oticon minirite Speaker 60 User manual
oticon
oticon Opn Series User manual
oticon
oticon OPN User manual
oticon
oticon miniRITE-T User manual
oticon
oticon Go User manual
oticon
oticon STREAMER PRO User manual
