Guarantee
Your Otter Legend is guaranteed against failure due to defective workmanship or
material for a period of 3 years from the date of purchase. Failure caused by
accidental damage, misuse, neglect or used in liquids other than cold water are
excluded from this guarantee. If a failure occurs during this period, a purchase
receipt must be returned with the unit which will be repaired or replaced. The
company can not accept any additional claims or consequential losses.
THIS GUARANTEE DOES NOT AFFECT YOUR STATUTORY RIGHTS.
THIS UNIT IS MADE IN THE E.C AND CONFORMS TO CE REGULATIONS
LOTUS WATER GARDEN PRODUCTS LTD. LOTUS HOUSE, DEER PARK IND EST. EASTLEIGH, HANTS
Dealers Stamp:
At regular intervals dependant on individual water conditions it will be necessary to carry out the
following maintenance program.
Maintenance
We highly recommend that you clean the pump periodically. It is of the utmost importance to clean
the pump when there is a decrease in the pumping capacity.
To clean, Proceed as follows:
1. Unscrew and remove the fountain/flow adjustment assembly and clean each of the components.
2. Remove the filter housing (2) and clean with pond water. Do not use any type of cleaning solvent
or detergent.
3. Carefully twist the rotor cover (3) anticlockwise to access the rotor (5) taking care of the rubber O
ring (4) Clean and insect the O ring for signs of damage and replace if necessary.
4. Remove the rotor (5) and again, clean and inspect for signs of damage.
6. Check the pump and cable for damage. If there are signs of damage, please replace pump.
7. Reassemble by reversing the above procedure and make sure the O ring (4) is seated correctly.
To protect the pump from icing during winter, at the end of the summer season remove the pump
from the pond, clean and store it in a dry place.
Important:- Disconnect the mains electricity supply before attempting any maintenance
work.
ŸAlways disconnect the mains electricity supply before attempting any installation or handling of
any kind.
ŸNever run the pump out of water or without the outer casing attached, as this will damage the
pump.
ŸDo not attempt to pull the pump out of the water by it’s electrical supply cable.
ŸRegularly inspect the pump and cable for any signs of damage. Replacement parts are available
from your local stockist.
REGULAR MAINTENANCE
REGULAR MAINTENANCE
1.
2.
3. 4.
5.
6.
7.
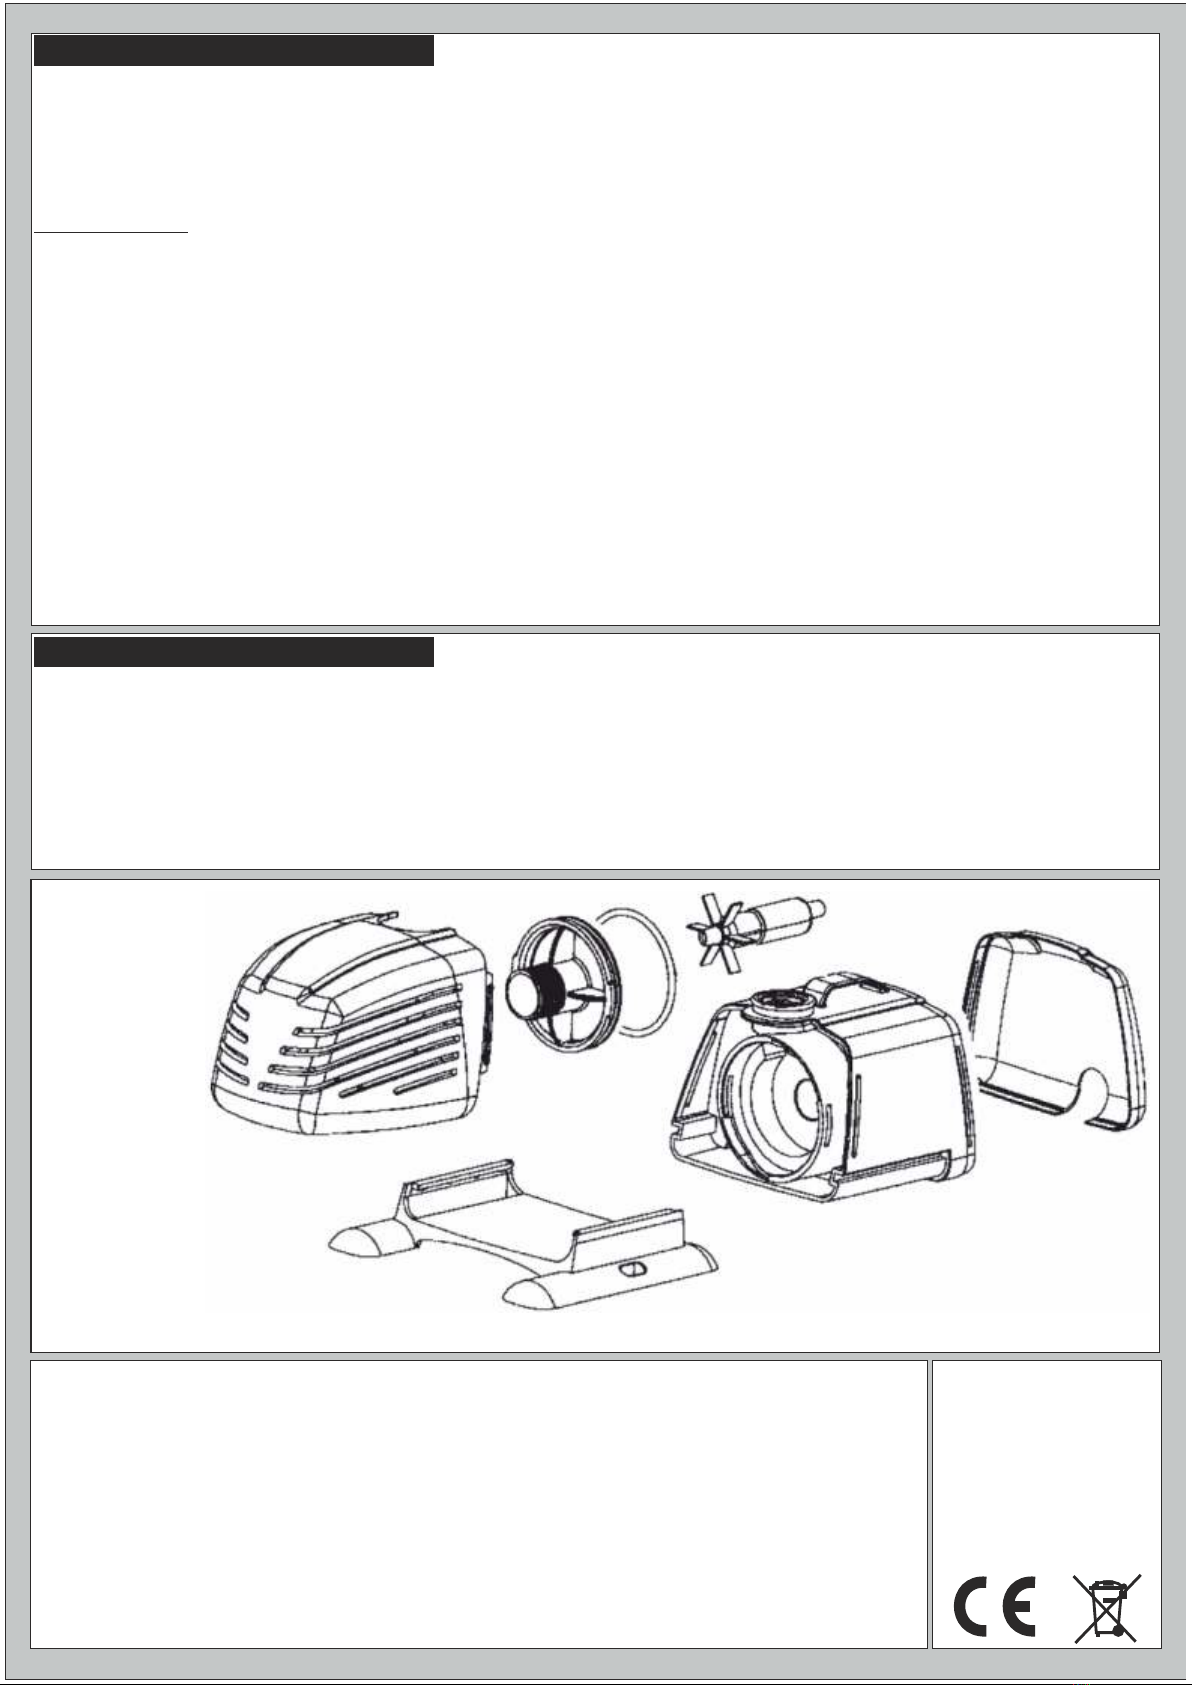
1. Pump Body.
2. Filter Cage.
3. Rotor Cover.
4. Rubber O Ring.
5. Rotor.
6. Base/Foot.
7. Rear Cover.


