!
Be sure to clean the entire system before installing a new filtration cartridge.
Changing Cartridges
When should I replace the Filter Net?
When should I replace the Filter
Sleeve?
When should I replace the
Pleated Fibrous Purification
Filter?
When should I replace the Multi-
Media Filter Cartridge?
After approximately 6,500 liters (1,800
gallons)* or 12 months of use, you will need
to replace the Multi-Media Filtration
Cartridge. If you notice any changes in taste
and/or odor, this is also a good indication
that the Multi-Media Cartridge is in need of
replacement. To replace the cartridge
please follow the detailed steps found
below:
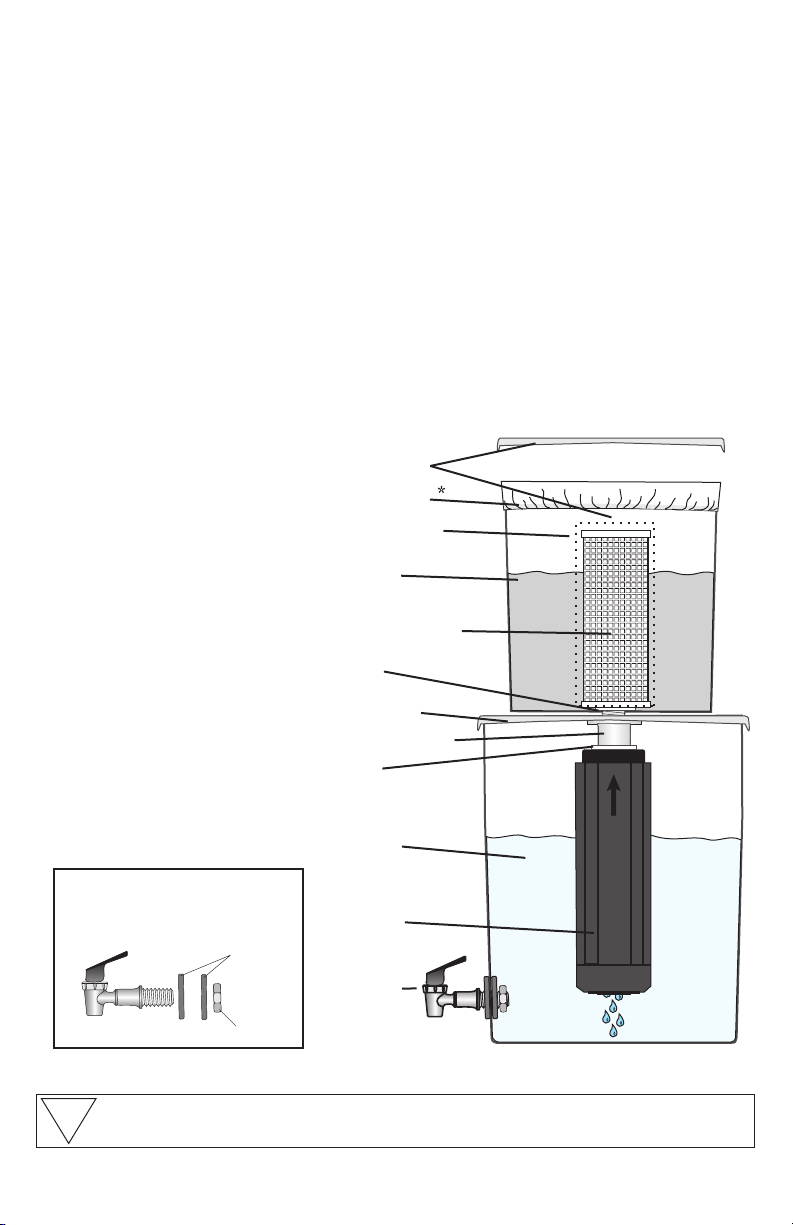
1. Lift the lid assembly
off of the purified water
container. The source
water container and
cartridge assembly are
attached to this lid.
2. Un-screw the Multi-Media
Cartridge from the Filter Connecter
on the bottom side of the lid. Discard
the used cartridge as you would your
normal trash. (Be careful to remove
the gasket from the threaded end of
the cartridge and save it for use with
the new cartridge.)
Thoroughly wash the system with
filtered water.
3. Place the gasket (reserved in step 2) over
the threaded end of a new Multi-Media
Filtration Cartridge. Screw the cartridge
onto the Filter Connecter by turning it
clockwise (by hand only).
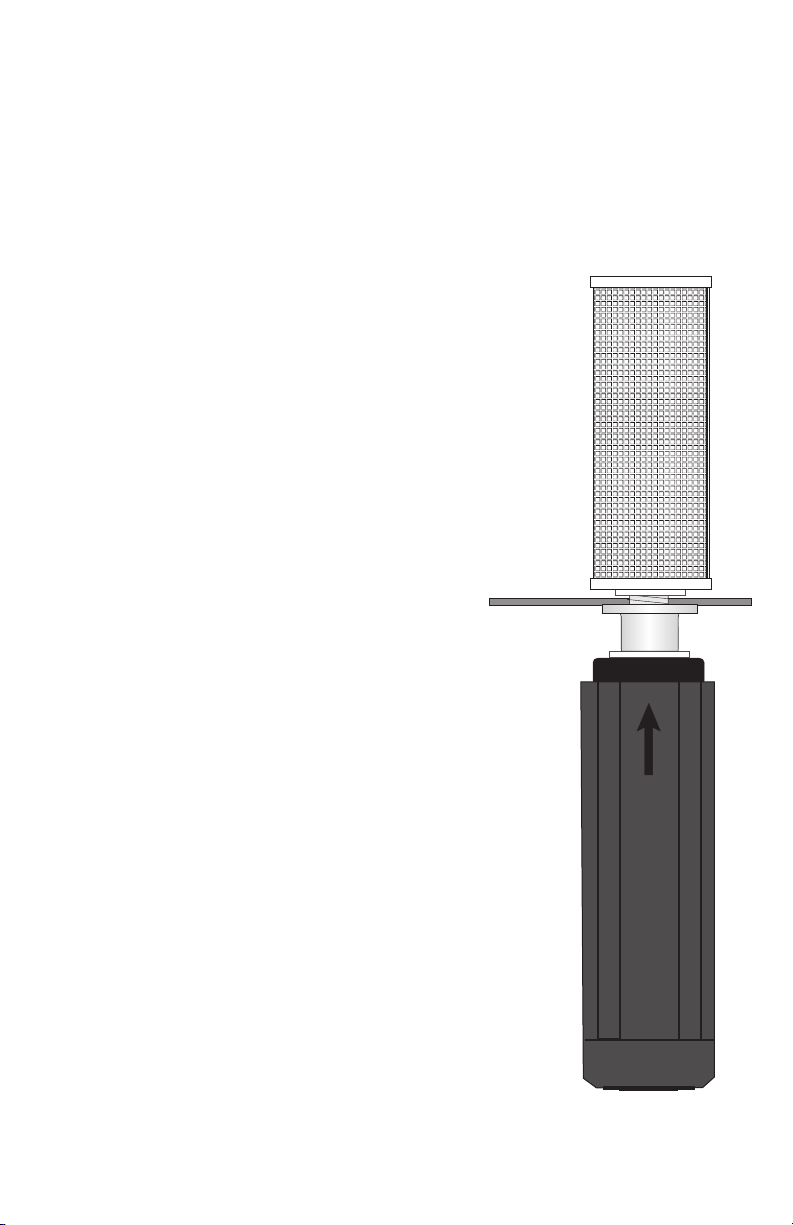
4. Flush the new cartridge by allowing water
to flow through the system until it runs clear.
This will remove any loose carbon fines from
the carbon stage of the Multi-Media
Cartridge. Although carbon fines are
completely harmless new cartridges should
be flushed thoroughly before use.
The Pre-Filter Net is very durable and
can be cleaned and re-used repeatedly.
It should be replaced when there is
indication of wear that would reduce its
effectiveness in screening unwanted
debris from the source water. This
would include fraying, noticeable change
in weave or exhaustion of the elastic
used to hold it on the source water pail.
Replace after 6 months or if there
is a noticeable reduction in flow
rate that cannot be resolved by
taking the following steps:
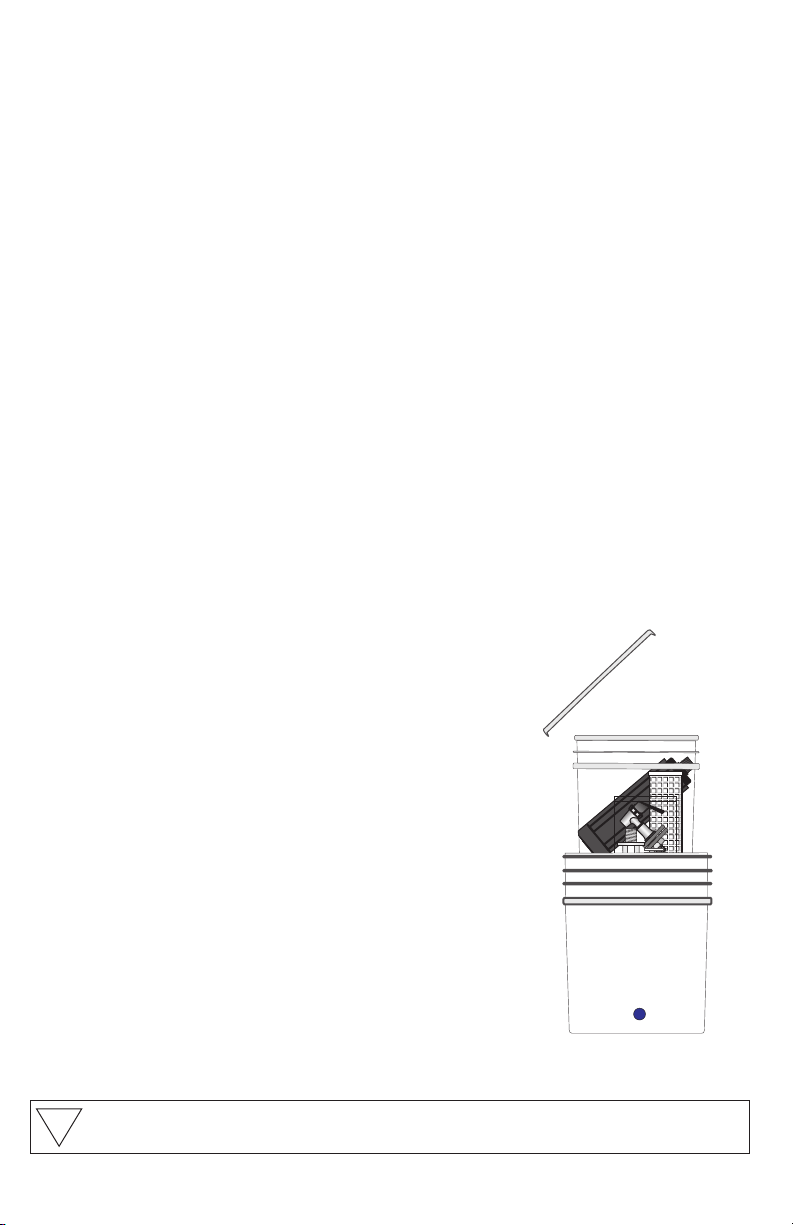
1. Remove the Pleated Fibrous
Filter from the Filter Connector.
2. Hold the filter horizontally by it's end-
caps, and GENTLY tap it on a hard
surface. Rotate and repeat several times.
This may loosen any larger particles
trapped in the filter's surface.
3. Rinse the filter with clear water to
remove any debris it may have
accumulated.
4. Re-connect the filter to the Filter
Connecter inside Source Water Container.
5. If water flow is still slow, replace the
used Pleated Fibrous Filter with a new
one - attaching it as pictured.
8
Item: NF7
Item: PFnet
Item: RM300
Item: Sleeve 5m
The Filter Sleeve can be rinsed to remove
debris and improve flow rate however if
rinsing does not improve flow rate it should
be replaced.
MADE IN USA
MADE IN USA
!
Wash and sanitize Purified Water Container before installing new cartridges and
after handling it's interior for any purpose.
Specifications and Replacement Parts
9
Replacement Parts
Outback Specifications***
* Highest flow rate can be achieved by keeping upper bucket full to maintain maximum gravity pressure on filters
** Capacity or life expectancy of the filter cartridges may vary depending on the quality of the source water
*** Specifications and capacities are subject to change without notice.
Questions about your installation? Please contact your local dealer for assistance.
DIMENSIONS Assembled: 24" x 11.75"
Boxed: 18” x 12” x 12”
Boxed: 8.00 lbs.
WEIGHT Empty: 6.75 lbs.
When filled with water: 45.50 lbs.
3
CUBE 1.5 ft
FLOW RATE* 6-12 Gallons/Day (depending on water conditions)
CAPACITY** 1,800 Gallons** or diminished flow
o o
OPERATING TEMPERATURE 42 F to 125 F
CARTRIDGES 7 “ Pleated Fibrous Purification Filter
10" Multi-Media Filtration Cartridge
APPLICATIONS Fresh or Moving Water Only
American Standard
Item # Parts Description Placement
Pfnet (optional) Pre-Filter Net Over Source Water Container
NF7 Pleated Fibrous Purification Filter Source Water Container
RM300 Multi-Media Filtration Cartridge Purified Water Container
FC-Gasket12 1/2" Filter Connecter Gasket Nipple end of Filter Connector
FC-Gasket34 3/4" Filter Connecter Gasket Nipple end of Multi-Media Cartridge
Sleeve 5m (optional) 5 micron Pre-Filtration Sleeve Over 2003 Purification Filter