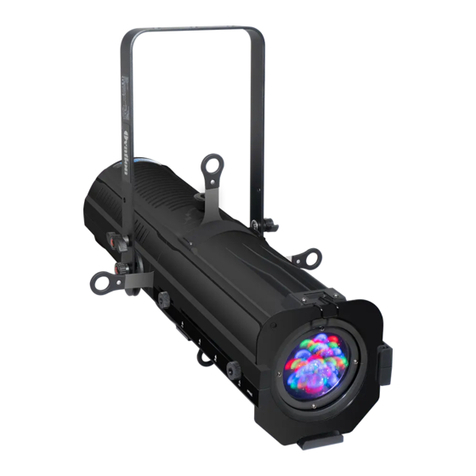
Ovation Honor 250T Zoom User manual

USER MANUAL
HONOR 250T ZOOM
Profile Spot Zoom 250W tunable

Caution!.................................................................................................................. 3
Introduction ........................................................................................................... 3
Safety instructions................................................................................................. 3
Overview ................................................................................................................ 3
Installation ............................................................................................................. 5
Read ‘Safety information’ before installing the fixture....................................................................... 5
Fastening the fixture to a flat surface ................................................................................................. 5
Mounting the fixture on a truss ........................................................................................................... 5
Securing with a safety cable ............................................................................................................... 6
DMX-512 connection/connection between fixtures .......................................................................... 6
Power connection................................................................................................................................ 7
Operation ............................................................................................................... 7
Control Menu Map............................................................................................................................... 7
Control menu ....................................................................................................................................... 8
Main Menu ........................................................................................................................................... 9
Addressing ........................................................................................................................................... 9
Universal DMX Control ......................................................................................................................10
RDM control.......................................................................................................................................10
Rotary Knob function.........................................................................................................................10
Set dimmer curves.............................................................................................................................11
Zoom ..................................................................................................................................................12
DMX Protocol ...................................................................................................... 12
Fixture Cleaning .................................................................................................. 12
Fuse Replacement .............................................................................................. 13
Troubleshooting .................................................................................................. 13
The fixture does not work, no light ................................................................................................... 13
Technical specifications ..................................................................................... 13
Table of contents

3V1.47
Caution!
Be careful with your operations. With a dangerous voltage you can suffer a dangerous electric
shock when touching the wires!
Avoid looking directly into the light source!
Wear protective glasses and other PPE (personal protective equipment) when working on or near
the xture.
For your own safety, please read this user manual carefully before you initial start-up.
Follow operating safety precautions and pay attention to warning signs methods and equipment
on the user manual.
Indoor use only! To prevent risk of re or shock, do not expose this product to rain or moisture. IP
20 rating.
The ambient temperature must always be between -5° C and +45° C.
Always make sure you are connecting this product to the proper voltage in accordance with the
specications in this manual or on the product’s specication label.Make sure it is grounded when
using it!
Unplug mains lead before opening the housing!
Make sure that the power cord is never crimped or damaged by sharp edges. Check the xture
and the powercord from time to time.
Make sure to replace the fuse with another of the same type and rating.
Warning! This symbol indicates a hot surface. Certain parts of the housing can become hot
during operation. After use, wait for a cool-down period of at least 10 minutes before handling or
transporting the device.
Every person involved with the installation, operation and maintenance of this device has to
- be qualied
- follow the instructions of this manual
- consider this manual to be part of the total product
- keep this manual for the entire service life of the product
- pass this manual on to every further owner or user of the product
- download the latest version of the user manual from the Internet
Introduction
Thank you for having chosen Honor 250T Zoom. You will see you acquired a powerful and versatile de-
vice.
Unpack your item. Before you initial start-up, please make sure that there is no damage caused by trans-
portation. Should there be any, consult your dealer and do not use the device.
Safety instructions
This device has left our premises in absolutely perfect condition. In order to maintain this condition and to
ensure a safe operation, it is absolutely necessary for the user to follow the safety instructions and warn-
ing notes written in this user manual. Always disconnect from the mains, when the device is not in use
or before cleaning it. Keep away children and amateurs from the device! There are no serviceable parts
inside the device. Maintenance and service operations are only to be carried out by authorized dealers.
Overview

4V1.47
LCD display
Menu
button
Up
button
Down
button
Enter
button
Dmx signal indicator
Power indicator
Handle
Rotary
button
Dmx outDmx inFusePower
out
Power
in
On/off
switch
LCD display
Yoke
Shutters
Gobo holder slot
Iris slot
Focus knob
Yoke locking knob
Zoom knob Color frame clip
Color frame

5V1.47
Installation
Read ‘Safety information’ before installing the xture.
The xture is designed for indoor use only and must be used in a dry location with adequate ventilation.
Ensure that none of the xture’s ventilation slots are blocked.
Fasten the xture to a secure structure or surface. Do not stand it on a surface or leave it where it can
be moved or fall over. If you install the xture in a location where it may cause injury or damage if it falls,
secure it as directed in this user manual using a securely anchored safety cable that will hold the xture if
the primary fastening method fails.
Fastening the xture to a flat surface
The xture can be fastened to a hard, xed, flat surface that is oriented at any angle. Ensure that the sur-
face and all fasteners used can support at least 10 times the weight of all xtures and equipment to be
installed on it.
Fasten the xture securely. Do not stand it on a surface or leave it where it can be moved or fall over. If
you install the xture in a location where it may cause injury or damage if it falls, secure it as directed be-
low with a securely anchored safety cable that will hold the xture if the primary fastening method fails.
Mounting the xture on a truss
The xture can be clamped to a truss or similar rigging structure in any orientation. When installing the
xture hanging vertically down, you can use an open-type clamp such as a G-clamp. When installing in
any other orientation, you must use a half-coupler clamp that completely encircles the truss chord.
To clamp the xture to a truss:
1. Check that the rigging structure can support at least 10 times the weight of all xtures and equipment
to be installed on it.
2. Block access under the work area.
3. Fold the legs of the mounting bracket together and bolt a rigging clamp securely to the mounting
bracket. The bolt used must be M10, grade 8.8 steel minimum. It must pass through both mounting
bracket legs and be fastened with a self-locking nut.
4. Working from a stable platform, hang the xture with its clamp on the truss and fasten the clamp se-
curely.
5. Secure the xture with a safety cable as directed below.
Table of contents
Other Ovation Spotlight manuals
Popular Spotlight manuals by other brands

Foscam
Foscam S41/SPC user manual

EuroLite
EuroLite LED SLS-144 UV Floor Spot user manual

Guangzhou Yinhe Lighting&Sound Equipment Factory
Guangzhou Yinhe Lighting&Sound Equipment Factory NE-204 user manual

LIVARNO home
LIVARNO home 375304 2101 Installation, operating and safety information

Leviton
Leviton Ellipsoid 5/50 user guide

Vector
Vector SL3AKV instruction manual

Quantum
Quantum Q262 Product data sheet

EUROSPOT
EUROSPOT C51 instruction manual

DTS
DTS MINI BRICK ARC user manual

Federal Signal Corporation
Federal Signal Corporation VISIBEAM II Installation, operation and maintenance instructions

ACME
ACME LED-MS350B user manual

EuroLite
EuroLite Akku flat light 1 user manual