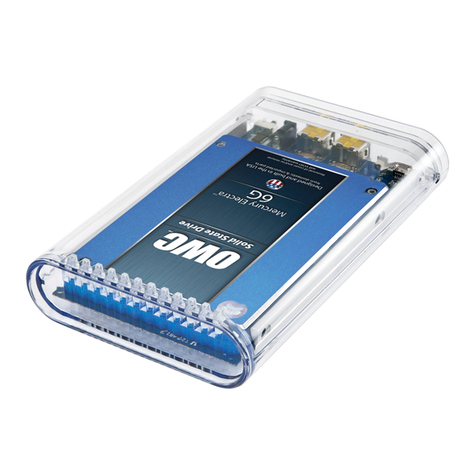
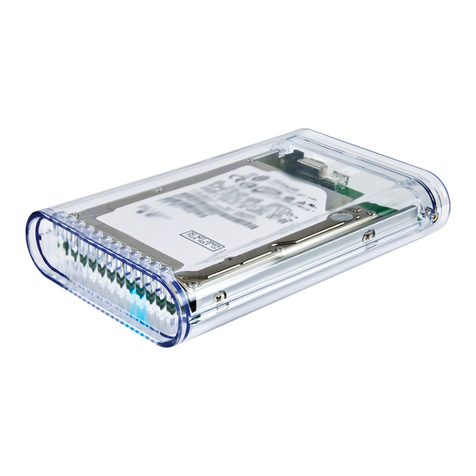
OWC Mercury On-The-Go Pro Series User manual

Assembly Manual
OWC Mercury On-The-Go Pro Series

OWC Mercury On-The-Go Pro Table of Contents
1.1 SYSTEM REQUIREMENTS
1.1.1 Mac Requirements
1.1.2 PC Requirements
1.2 PACKAGE CONTENTS
1.3 ABOUT THIS MANUAL
1.4 PORT VIEW & CABLE CONNECTIONS
1.5 DETAILED VIEW
1.5.1 LED Indicator
2 SYSTEM SETUP
5 APPENDIX
6 TECHNICAL SUPPORT
6.1 BEFORE CONTACTING TECHNICAL SUPPORT
6.2 CONTACT INFORMATION
2.1 SOFTWARE INSTALLATION
2.2 CONNECTIONS TO COMPUTER
3.1 MACINTOSH FORMATTING
3.2 REMOVING AN EXISTING GUID PARTITION
3.3 WINDOWS FORMATTING
4 TROUBLESHOOTING & TIPS
4.1 TROUBLESHOOTING
4.2 USAGE TIPS
5.1 FAQ
5.2 ABOUT DATA PROTECTION
1 INTRODUCTION
3 FORMATTING

1 INTRODUCTION
1.1 System Requirements
1.1.1 Mac Requirements
•Minimum PowerPC G4 CPU, 128MB RAM
•FireWire interface, Mac OS X 10.2 or later
•USB 2.0 interface, Mac OS X 10.2 or later
•USB 3.0 interface - see your interface card manufacturer for specications
1.1.2 PC Requirements
•Minimum 500MHz Intel Pentium III CPU, 128MB RAM
•FireWire interface, Windows 2000 / XP / Vista / Windows 7
•USB 2.0 or 3.0 interface, Windows 2000 / XP / Vista / Windows 7
1.2 Package Contents
➀➁➂
➄
➃
➅
➀ OWC Mercury On-The-Go Pro
➁ Carrying Case
➂ Software CD Bundle
➃ User Guide & Owner’s Manual
➄ FireWire 800 (1394B) cable*
➅ USB 2.0 (A-B) cable*
➆ USB 3.0 (A-B) cable*
Owner’s Manual
All Models of the
OWC Mercury On-The-Go Pro Series
1.3 About This Manual
Firmware, images, and descriptions may vary slightly between this manual and the unit
shipped. Functions and features may change depending on the rmware version. Please
visit the product webpage for the most recent specications.
OWC Mercury On-The-Go Chapter 1 - Introduction
*USB cable included with all solutions. FireWire 800 cable only included with FireWire 800
solutions. Refer to website for list of exact cables included.
➆

Cable Connections: (from the right)
➀ DC IN port - Use an auxiliary power source (not included, and not normally needed)
with your OWC Mercury On-The-Go Pro with this port. If you need a power adapter, they
are available via separate purchase at:
http://eshop.macsales.com/otgpower
➁ On/O Switch - Turn the OWC Mercury On-The-Go Pro on and o here.
➂USB 2.0 mini Port - Connect one of your computer’s USB ports to the OWC Mercury
On-The-Go Pro here using the included cable. If your computer’s USB port does not
provide enough power to use the OWC Mercury On-The-Go Pro, OWC oers a custom “Y”
cable that will draw power from 2 separate USB 2.0 ports - it’s available for purchase at:
http://eshop.macsales.com/search/auxiliary
➃ USB 3.0 micro Port - Connect to a computer or interface card that has a USB 3.0 port
using this connection. It is also backwards compatible with USB 2.0 for use with older
systems.
➄ FireWire 800 (1394B) Ports - Connect one FireWire 800 port to your computer using
the included cable and have an extra FireWire 800 port to add peripherals with!
NOTE: OWC does not recommend bus powering more than one external storage device.
1.4 Port View & Cable Connections
1.5 Detailed View
The OWC Mercury On-The-Go Pro has a blue LED at the front of the hard drive enclosure.
It will illuminate blue when powered on, and ash on drive activity (both reading and
writing).
OWC Mercury On-The-Go Pro Chapter 1 - Introduction
➊
➊
➋
➋
➌
➍
➎
➎

OWC Mercury On-The-Go Pro Chapter 2 - System Setup
ATTENTION: The OWC Mercury On-The-Go Pro utilizes an integrated aluminum heatsink
that is exposed on the bottom of the enclosure. This heatsink will become warm to the touch
during heavy usage. Use caution when picking the enclosure up.
This guide will get you up and running quickly, demonstrating how to install your own
2.5” hard drive into the OWC Mercury On-The-Go Pro enclosure.
Your computer is a static-sensitive device. It is susceptible to
invisible damage if not protected during installation.
We recommend proper grounding by using a grounding
strap. Make sure to work in a clean and static-free area, and
avoid wearing clothing that retains static charges.
For more information, please visit
http://www.macsales.com/static
Got tools? If you don’t have the tools necessary to complete this installation, Newer
Technology oers a fantastic toolkit with everything you need included to perform this
installation, and most common computer hardware installations.
It’s available at:
http://www.macsales.com/tools
2 SYSTEM SETUP

OWC Mercury On-The-Go Pro Chapter 2 - System Setup
2.1 Hard Drive Assembly & Installation
Remove the bridge card from the aluminum heatsink. It just slides in, no screws are
holding it in place.
①
②
Remove the bridge card and aluminum heatsink from the packaging.

Turn the bridge over and look through the screw holes. Make sure they are fully lined up
and insert 4 screws into the hard drive.
OWC Mercury On-The-Go Pro Chapter 2 - System Setup
Set the aluminum heatsink aside for now.
③
Place your hard drive mechanism onto the bridge card and fully seat the drive onto the
connector.
④
⑤

OWC Mercury On-The-Go Pro Chapter 2 - System Setup
Slide the bridge card with the hard drive into the aluminum heatsink - there is a notch
that the bridge card will slide into.
Do NOT insert screws into the side of the drive through the heatsink.
Gently slide the completed heatsink, drive, and bridge assembly into the acrylic enclo-
sure.
Take 4 Phillips screws from the included plastic bag and once again, don’t fully tighten
the screws, just start them, as you will need to rock the assembly back and forth a bit to
get all 4 screws started, then you can tighten them. Note that there is a rubber mounting
strip on the bottom of the heatsink, that makes it a bit dicult to get the screws all the
way in. You may nd holding the enclosure in your hand, screws down, works best.
➅
➆

Here you see the OWC Mercury On-The-Go Pro drive inserted into the acrylic enclosure,
ready to have it’s end cap attached.
Insert the acrylic endcap, fully sliding it over the bridge card ports.
Once you have the endcap on, attach it to the enclosure using the 2 included small
Phillips screws. The location is circled above. You will have 4 larger screws remaining, they
are extra.
Do not exert too much force while screwing these in, you can accidentally strip the screw
head easily.
OWC Mercury On-The-Go Pro Chapter 2 - System Setup
➇
➈

3.1 Formatting your OWC Mercury On-The-Go Pro on a Macintosh with
Mac OS X
Open the Disk Utility application, which is located in /Applications/Utilities
Select the device with no volumes attached to it; in this picture, that would be the 320.07
GB OWC device. Click on the picture of the drive icon next to the text.
①
OWC Mercury On-The-Go Pro Chapter 3 - Formatting
3 FORMATTING
WARNING: This procedure will destroy ALL data on the disk you run it on!!! Be sure there
is nothing you need to keep on your drive before running any of these commands.

Once you’ve selected the OWC device, you will notice the above change in the Disk
Utility application. Click on the “Erase” tab in this picture.
You then need to name the volume that you want to format, and erase it. Name
the volume as you want, choose the Volume Format pulldown (Mac OS Extended
(Journaled) is default), and click the Erase button.
OWC Mercury On-The-Go Pro Chapter 3 - Formatting
②
③
➊
➋

Click the erase button to conrm you wish to erase the disk.
After a few moments, the erase command will complete and the OWC Mercury
On-The-Go Pro volume will mount on your desktop. You can quit Disk Utility, you’re all
set!
⑤
④
OWC Mercury On-The-Go Pro Chapter 3 - Formatting

3.2 Removing the GUID Partition Scheme
Only for XP, 2000, ME and earlier. (XP 64-BIT, Vista & Windows 7 can continue to the next section)
➆ Type exit and hit enter.
➇ Close the command prompt window.
You may now proceed with formatting the drive.
Your new OWC Mercury On-The-Go Pro is preformatted for use with a Macintosh.
Unfortunately, this is not readable by Windows without special software. If you
wish to use your storage solution on a computer running Windows, you will need to
repartition and reformat using the following instructions.
➀ Go to the DOS command prompt by selecting “Run”
from the Start Menu.
➁ Type in cmd in text box, and hit the“OK” button.
➂ Type diskpart and hit enter.
➃ Type list disk and hit enter.
➄ Type select disk x replacing x with the number of the disk you want to reformat.
(Typically, you will see an asterisk (*) under “GPT” for the disk requiring formatting.)
➅ Type clean and hit enter.
OWC Mercury On-The-Go Pro Chapter 3 - Formatting
WARNING: The clean command will destroy ALL data on the disk you run it on!!! Be sure
there is nothing you need to keep on your drive before running any of these commands.
WARNING: The clean command will destroy ALL data on the disk you run it on!!! Be sure
there is nothing you need to keep on your drive before running any of these commands.

3.3 Formatting your OWC Mercury On-The-Go Pro on Windows 2000
and later
Instructions for other operating systems can be found at
http://www.macsales.com/format.
① With the drive connected to the computer and powered
on, right click on the “My Computer” icon and select “Man-
age” from the menu. The “Initialize and Convert Disk Wizard”
window should appear.
If the Wizard does not appear, expand the Storage menu by
clicking on the plus (+) sign. Then, right click next to the disk
number of the drive that you have just connected and click
Initialize to bring up the Wizard.
② In the next window, there should be
only one drive listed. That will be the drive
that you connected via eSATA, FireWire or
USB. Make sure the box next to the drive
name is checked and click “Next.”
③ The Wizard will perform its tasks, and
you will get the following screen. You may
click “Finish.”
OWC Mercury On-The-Go Pro Chapter 3 - Formatting
WARNING: This procedure will destroy ALL data on the disk you run it on!!! Be sure there is
nothing you need to keep on your drive before running any of these commands.

④ Your drive will appear similar to how
Disk 1 does below. Notice that the space
on the lower right reads as “Unallocated.”
Right click in this space and choose “New
Partition.”
⑤ The “New Partition Wizard” will
launch. Click “Next” to continue.
⑥ Specify your partition type as “Prima-
ry,” and click “Next.”
⑦ The wizard will display the
maximum partition size for your drive.
It is strongly recommended that you
do not change the default value. Click
“Next”
OWC Mercury On-The-Go Pro Chapter 3 - Formatting

⑧ If you like, you can specify the
drive letter designation for your new
drive. Otherwise, one will automatically
be assigned. Click “Next.”
⑨ Before you can use the drive, it
must be formatted. On most systems
running Windows 2000 or later, it is
advisable to specify the le system as
NTFS. Leave the Allocation unit size as
“Default,” and feel free to give the drive
whatever name you prefer. Be sure to
check the box “Perform a quick format”.
If you do not, it will likely take several
hours for your drive to format. Click
“Next.”
⑩ At the end of the Wizard, you will
see a summary of the information that
you specied during the previous steps.
Click “Finish.”
OWC Mercury On-The-Go Pro Chapter 3 - Formatting

⑪ Once you have nished with the
formatting wizard, you will see that
your new drive (represented as “Disk
E” in this case) will display a message
of “Formatting.” This should only take
a couple of minutes if you chose the
quick format option.
⑫ After a moment or two, the drive’s
status will change from “Formatting” to
“Healthy.”
OWC Mercury On-The-Go Pro Chapter 3 - Formatting

Using your new Storage Solution on both Macs and PCs?
MacDrive 9
For over 15 years, MacDrive has been the industry-leading solution for
Windows users who need to access, format and manage Mac disks.
MacDrive gives you hassle-free, seamless access to Mac les on Mac
disks directly from Windows. You can open, edit and save les on Mac
disks, as well as create new disks and repair damaged ones. MacDrive is
like having a Mac interpreter in your PC.
Maximum Compatibility
MacDrive has always given you access to the
most Mac disks. With MacDrive you can access
virtually any Mac-formatted disk, including
internal and external hard drives, CDs, DVDs,
ash drives and more. MacDrive works with
all Mac formats, including HFS+ and HFS,
GPT, APM and MBR. No matter how they are
formatted, MacDrive can handle it.
You can nd MacDrive at:
http://eshop.macsales.com/search/macdrive
⑬ At this point, you may close the Computer Management window. Your drive is ready
to use and can be found in “My Computer.”
OWC Mercury On-The-Go Pro Chapter 3 - Formatting

4.1 Troubleshooting
• Many problems can be traced to power or connectivity issues.
Verify that your cables (both ends!) are properly plugged into the computer and storage
solution. If they are, and the storage solution is still not working properly, try connecting
to another interface such as the USB connection and see if the device works properly.
If these suggestions do not work, try the OWC Mercury On-The-Go Pro on a dierent
computer, if available to you.
• Disk is recognized, but unable to be accessed.
If the disk is recognized by the System, but you’re having trouble accessing it, try using
the Repair Disk and Repair Permissions options in the Disk First Aid pane of OS X’s Disk
Utility or using a commercial piece of software such as Alsoft’s Disk Warrior for Mac or
Prosoft Engineering’s Data Rescue, which is available for both Mac & PC.
• Drive does not show up at all
If your OWC Mercury On-The-Go Pro drive is not being recognized at all, begin by
checking some basic possibilities, such as:
• Are all cables tightly attached to the computer and drive?
• Have you tried a dierent cable and/or port?
• Is the power switch in the ON position?
• Further Troubleshooting
For further troubleshooting tips, visit our FAQ section online at:
http://eshop.macsales.com/tech_center/FAQ/index.cfm
If you are still experiencing problems, please contact OWC Technical Support. Contact
information is available in chapter 6.
OWC Mercury On-The-Go Pro Chapter 4 -Troubleshooting & Tips
4 TROUBLESHOOTING & TIPS

4.2 Tips
Identifying the LED indicators on your drive
The OWC Mercury On-The-Go Pro has a blue LED at the front of the hard drive enclosure.
They will illuminate blue when powered on, and ash on drive activity (both reading and
writing).
To properly unmount any connected hard drives from your computer,
you need to follow a few simple steps:
• For Macintosh systems:
There are multiple methods to umount disks with Macintosh systems. Either drag the
icon for the hard disk you wish to dismount to the trash can, or you can click the eject
icon next to the hard disk name in under the “DEVICES” tab in the sidebar in any nder
window, and nally another method is to right click on the hard drive icon on your
desktop and select “Eject”.
• For Windows systems:
1. Go to the System Tray (located in the lower right corner of your screen). Click on the
Eject icon (a small green arrow over a hardware image).
2. A message will appear, detailing the devices that the Eject icon controls. i.e. “Safely
remove...” Click on this prompt.
3. You will then be given the following message. “Safe to Remove Hardware”. It is now safe
to unhook the OWC Mercury On-The-Go Pro.
Optional AC Adapter
While the OWC Mercury On-The-Go series is designed to be bus powered, there are some
special situations where customers require a power adapter.
If you want to purchase an AC adapter , they are available from our Web site:
http://eshop.macsales.com/otgpower
NOTE: OWC does not recommend bus powering more than one external storage device.
OWC Mercury On-The-Go Pro Chapter 4 -Troubleshooting & Tips
Table of contents
Other OWC Enclosure manuals

OWC
OWC Superslim Guide

OWC
OWC Mercury Elite RAID User manual

OWC
OWC NASPerform User manual

OWC
OWC Express User manual

OWC
OWC Mercury Elite Pro Dual User manual

OWC
OWC ENVOY EXPRESS User manual

OWC
OWC Envoy Pro User manual

OWC
OWC OWCMANVLS2ASY User manual

OWC
OWC TB2U3DKR2 User manual

OWC
OWC Mercury Elite Pro Dual Guide

OWC
OWC Mercury Elite-AL Pro User manual
OWC
OWC Mercury Elite-AL 800 Pro User manual

OWC
OWC Mercury Elite Pro Dual Guide
OWC
OWC Mercury Elite-AL Pro User manual
OWC
OWC data doubler User manual

OWC
OWC Value Line User manual

OWC
OWC Mercury Elite-AL Pro User manual

OWC
OWC Mercury Elite Pro Dual Guide

OWC
OWC ThunderBay 4 mini Guide

OWC
OWC Envoy Pro User manual