Owens Corning VentSure Solar Attic Exhaust Fan Additional Solar Panel... User manual

VentSure™Solar Attic Exhaust Fan
Additional Solar Panel Kit
Installation Instructions
Installation and Mounting
Guide
Kit Includes:
• Panel with 30
feet of wire and
Y-adapter
• One (1) set of wall
brackets
Thank you for purchasing the VentSure™
Solar Attic Exhaust Fan Additional Solar
Panel Kit from Owens Corning™ Roong
& Asphalt LLC.
If there is a problem with your product
call us at 1-800-GET-PINK®.
Before beginning the installation of
the VentSure Solar Attic Exhaust Fan
Additional Solar Panel Kit, please read
through the entire installation instructions
and call us if you have any questions.
Connecting the motor
and two panels with the
Y-Adapter
The Y-adapter allows
2 solar panels to be
connected in parallel
to the motor. This
does not double
the voltage to the
motor—it simply
provides another
power source to
allow the unit to
operate for a longer period of time during
the day.
A. For the Gable Mount Unit:
Step A1.
Connect the lead of the rst solar panel to
the Y-Adapter. If using the wire extension,
attach directly to the solar panel (as in
remote mounting instructions) and the
other end to the Y-adapter.
Step A2.
Connect the leads from the second panel
to the Y-adapter in the same fashion.
Step A3.
Connect the other end of the Y-adapter
to the quick connector leading from the
motor.
B. For the Roof
Mount Unit
Step B1.
An access point is
located under the
shroud to allow for
connecting an extra
panel. (Figure 2) Cut
the zip ties that hold
the wires to the
frame. (Figure 3)
Step B2.
Separate the
quick-connector
under the shroud,
separating the panel
and the motor
connection.
Step B3.
Now connect the Y-adapter as described in
steps A1–A3 to the motor and panel leads.
Step B4.
Bundle and re-attach the wires to the
rodent screen with zip ties.
Figure 2
Figure 3
Figure 4—gable or
roof mounted attic fan
max 60 feet
Add-a-Panel
Option
Add-a-Panel
Option
a.
a.
b.
Optional Hardware (not included)
For roof mounting:
• 3" galvanized deck screws (for mounting
to asphalt-shingle roof)
• Caulk gun with roof tile adhesive (for
mounting solar panel directly to Spanish
tile, at tile or metal roofs)
For wall mounting
• 1.5–3" anchor screws (depending on your
specic type of stucco, cement or brick
wall. Must support up to 20 pounds)
• 1.5–3" galvanized screws (depending on
your specic type of wood or vinyl siding.
Must support up to 20 pounds)
• Caulk gun with roof tile adhesive (for
sealing screw heads when mounting to
wood or vinyl siding). We recommend
ASTM D 4586 Type 1 Asphalt Roong
Cement.
Figure 1

Mounting the additional
solar panel
If you are adding
a panel be sure to
measure the distance
before installing.
Selecting the best
location for the
additional panel
We’ve designed the VentSure Solar Attic
Exhaust Fan Additional Solar Panel Kit
to allow you the exibility to place it
where you can get the best exposure
to the sun during the course of the
day. You can place it on the opposite
side of the roof or an exterior wall
that gets the sun exposure in the
morning or afternoon. Survey your
home to determine the best location
for the extra panel. If the rst panel
gets morning sun but no afternoon
sun, consider installing a second panel
where it will get exposed more to the
afternoon sun and vice-versa. This will
keep the fan running for much longer
periods during the day.
Determine the
desired location
for mounting the
solar panel. It is
recommended
the panel be
placed within 30
feet from where
the fan will be
installed. Identify
a location that will
maximize exposure
to the sun’s path
throughout the
day. South or
Southwest facing
roof slopes are
ideal. (Figure 4)
Note: This product
comes with 30 feet
of extension wire,
as this is suitable
for the vast majority
of installations.
However, the panel
can be placed up to
60 feet away from
the fan’s location
without having a
meaningful drop
in performance.
If the distance
exceeds 30 feet,
a Wire Extension
Kit specic to
this product will need to be purchased
separately from your building materials
supplier. Surface Mounting
on Asphalt Roofs
Step 1
After determining
a location for
mounting the solar
panel, go into the
attic and make sure
the location will
allow a 3⁄8” diameter
hole without hitting
a rafter. Once the
location has been
conrmed drive
a nail through the
roof deck from the
attic side. (Figure 5)
Step 2
Locate the nail shank
on the roof. This will
be the center of the
solar mount location.
Step 3
Mark the location
and remove the nail.
Drill a 3⁄8” diameter
hole where the nail
was removed.
Step 4
Locate the solar
panel mounting
base over the 3⁄8”
diameter hole lining
up the center hole
in the mounting
base with the 3⁄8” diameter hole in the
roof deck.
Step 5
Loosen and remove
screw A (both
sides) to allow the
panel to swing away
from the base. Set
the screws aside.
(Figure 6)
Step 6
Pull the wire back through the hole in the
center of the base to allow the base to
lay at on the roof deck.
(Figure 7)
Step 7
Fasten the mounting base to the roof
deck using the four (4) 3” galvanized
screws. Seal the tops of the mounting
screws with an
exterior grade
silicone sealant.
Tilt the panel away
from the base
when installing the
screws. If the panel
Figure 7
Figure 8
Figure 9
F i g u r e 11
Figure 12
Figure 13
reinstall
screw A
Fig ure 17
See Optional
Hardware
Figure 16
Bolt F
Figure 10
mount on at
least 2 tiles
Figure 5
Figure 14
Figure 15
Figure 6
screw A
Optional Fascia
Mounting Kit and
Brackets
Figure 18

is to remain at
against the base, it
is recommended
to allow the sealant
to completely dry
before it comes in
contact with the
panel. (Figures 8
and 9)
Step 8
After attaching the
mounting base to
the roof deck, feed
the connecting cable
through the hole in
the roof deck. Leave
enough slack under
the solar panel to
allow the panel
full travel to avoid
pinching the cable
or pulling on the
cable connection
during adjustment.
Step 9
Adjust the tilt of the
panel to maximize
exposure to the
sun throughout the
day. The optimal
adjustment is to
have the panel 90
degrees to mid-day
path of the sun. If
desired, the angle
of the panel can
be adjusted as the
seasons change to maximize sunlight
captured.
Step 10
After the panel is adjusted to the desired
position, secure the cable to one of the
support arms using a tie wrap.
S t e p 11
After the cable is secured, seal the area
around the cable where it enters the roof
deck with exterior grade silicone sealant
to keep water from entering the attic
around the cable.
Step 12
Locate the cable in the attic and drape
the cable from rafter to rafter and
connect to the cable from the fan. Secure
any excess cable to the rafters with tie
wires or coaxial staples.
Surface Mounting for Tile or
Metal Roofs
Step 1
Determine the location of the contact
points by positioning the panel in the
desired area. For Spanish tile roofs, nd
a position with as much surface area
coming in contact with the bottom of
the panel as possible. The panel must
be mounted on at least 2 rows of tile as
shown. (Figures 10 and 11)
Step 2
Apply enough roof tile adhesive to the
underside of the base to rmly secure the
panel to the surface. Both surfaces should
be dry and free of any dirt or solvents.
(Figur e 12)
Step 3
The panel can be tilted into 2 positions
with the adjustment arm, choose the best
angle and reinstall the adjusting screws
(screw A). (Figure 13)
Wall Mounting (Optional)
Brackets are included to mount the
panel to a wall if preferred. (Figures 14
and 15)
Step 1
Attach the brackets to the panel using
the 4 bolts (F). (Figure 16)
Step 2
Depending on the material your wall
is made of, mount the assembly to the
wall using appropriate fasteners (see
“Optional Hardware” for details). (Figure
17)
Fascia Mounting (Optional)
The Fascia Mounting Kit allows you to
install the solar panel of the VentSure™
Solar Attic Exhaust Fan—Gable Mount
and Additional Solar Panel Kit directly
to a fascia board. This gives you another
option for mounting the panel instead of
on the roof tiles or an exterior wall.
Attach the fascia brackets to the
fully assembled wall brackets
included with your VentSure™Solar
Attic Exhaust Fan—Gable Mount
Unit
Step 1
On a at surface, orient the fascia and
wall brackets as shown. (Figure 18) You
can also install on wall brackets that are
already attached to the panel—just make
sure they are facing the same direction.
Step 2
Locate the lower hole on the wall bracket
(Figure 19) and t the bolt through the 2
brackets and attach the nut. (Figure 20)
Step 3
Repeat Step 2 for the upper hole with
another bolt and nut. (Figure 21 and
22) Once both nuts are secure, tighten
completely with an adjustable wrench.
Step 4
Repeat all the steps again for the second
bracket. Then attach to the solar panel as
described in the installation instructions
that came with your VentSure™Solar
Attic Exhaust Fan (Gable or Roof Mount)
or Additional Solar Panel Kit.
Attach the complete assembly to
your fascia board
Step 5
Find a desired location for the completed
assembly and attach with (4) 1.5”
galvanized screws (not included) or
fasteners appropriate for your fascia
material. (Figure 23 and 24). Once secure,
adjust the panel as desired.
Figure 19
Figure 20
Figur e 21
Figure 22
Figure 24
Figure 25
Figure 23

OWENS CORNING ROOFING AND ASPHALT, LLC
ONE OWENS CORNING PARKWAY
TOLEDO, OHIO, USA 43659
1-800-GET-PINK®
www.roofing.owenscorning.com
Pub. No. 10017985. Printed in U.S.A. October 2012. THE PINK PANTHER™&
©1964–2012 Metro-Goldwyn-Mayer Studios Inc. All Rights Reserved. The
colorPINK is a registeredtrademark ofOwensCorning. © 2012OwensCorning.
All Rights Reserved.

Panel solar adicional para ventilador
extractor solar para ático VentSure™—
Instrucciones de instalación
Guía de instalación y montaje
El paquete incluye:
• Panel con
30 pies de cable
y adaptador Y
• Un (1) juego de
soportes para
pared
Gracias por comprar el juego de panel
solar adicional para ventilador extractor
solar para ático VentSure™ de Owens
Corning™ Roong & Asphalt LLC.
Si hay algún problema con el producto,
llámenos al 1-800-GET-PINK®.
Antes de comenzar con la instalación del
juego de panel solar adicional para ventilador
extractor solar para ático VentSure, lea
totalmente las instrucciones de instalación
y llámenos si tiene alguna pregunta.
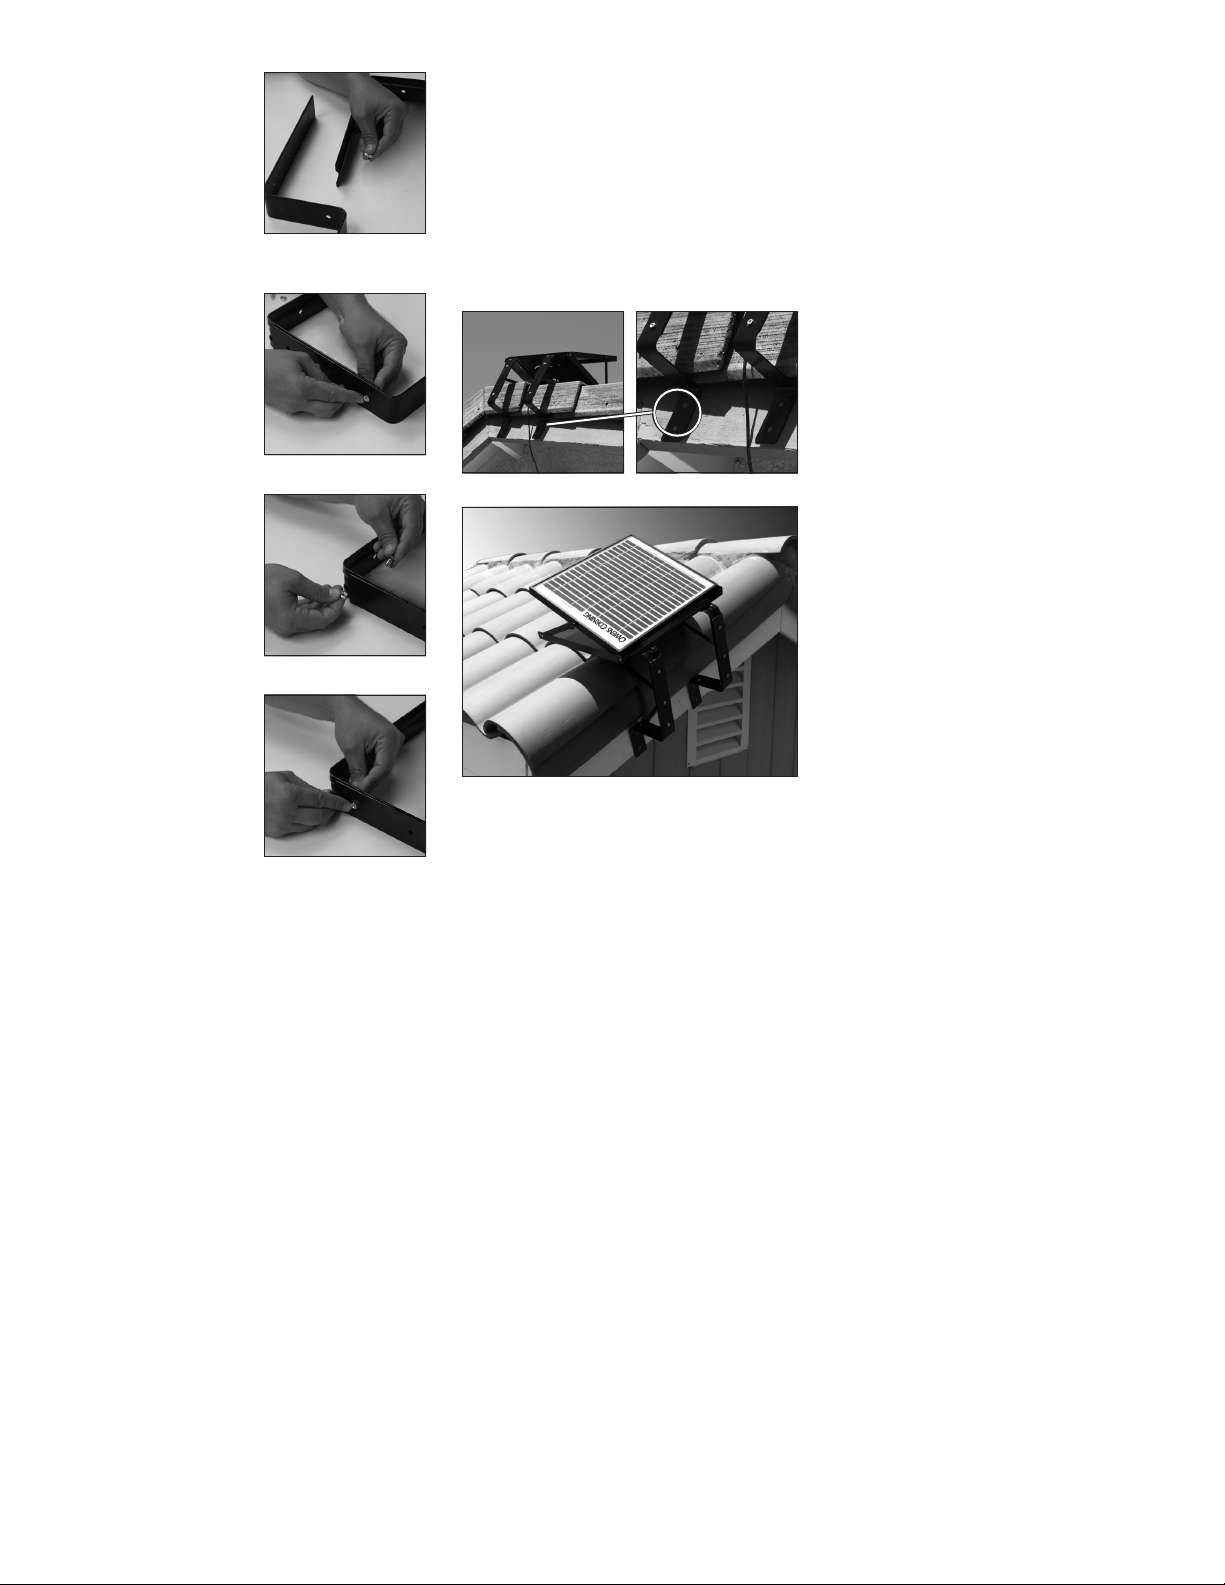
Conexión del motor y de
los dos paneles con el
adaptador Y.
El adaptador Y
permite que se
conecten dos paneles
solares en paralelo
con el motor. Esto no
duplica la tensión del
motor, simplemente
suministra otra
fuente de alimentación para permitir que
la unidad funcione durante un período más
largo durante el día.
A. Para la unidad de montaje
en hastial:
Paso A1.
Conecte el borne del primer panel solar al
adaptador Y. Si utiliza la extensión del cable,
sujétela directamente al panel solar (como
en las instrucciones de montaje remoto) y
al otro extremo del adaptador Y.
Paso A2.
Conecte los cables del segundo panel al
adaptador Y de la misma manera.
Paso A3.
Conecte el otro extremo del adaptador
Y al conector rápido que viene del motor.
A. Para la unidad de montaje en techo:
Paso B1.
Hay un punto de
acceso debajo de
la cubierta para
permitir la conexión
de un panel extra.
(Figura 2) Corte
los precintos que
mantienen el cable
en el bastidor.
(Figura 3)
Paso B2.
Separe el conector
rápido ubicado
debajo de la cubierta,
separando el panel
y la conexión del
motor.
Paso B3.
Ahora, conecte el adaptador Y como se
describe en los pasos A1 a A3 con el motor
y los bornes del panel.
Paso B4.
Agrupe y vuelva a colocar los cables en la
pantalla contra roedores con precintos.
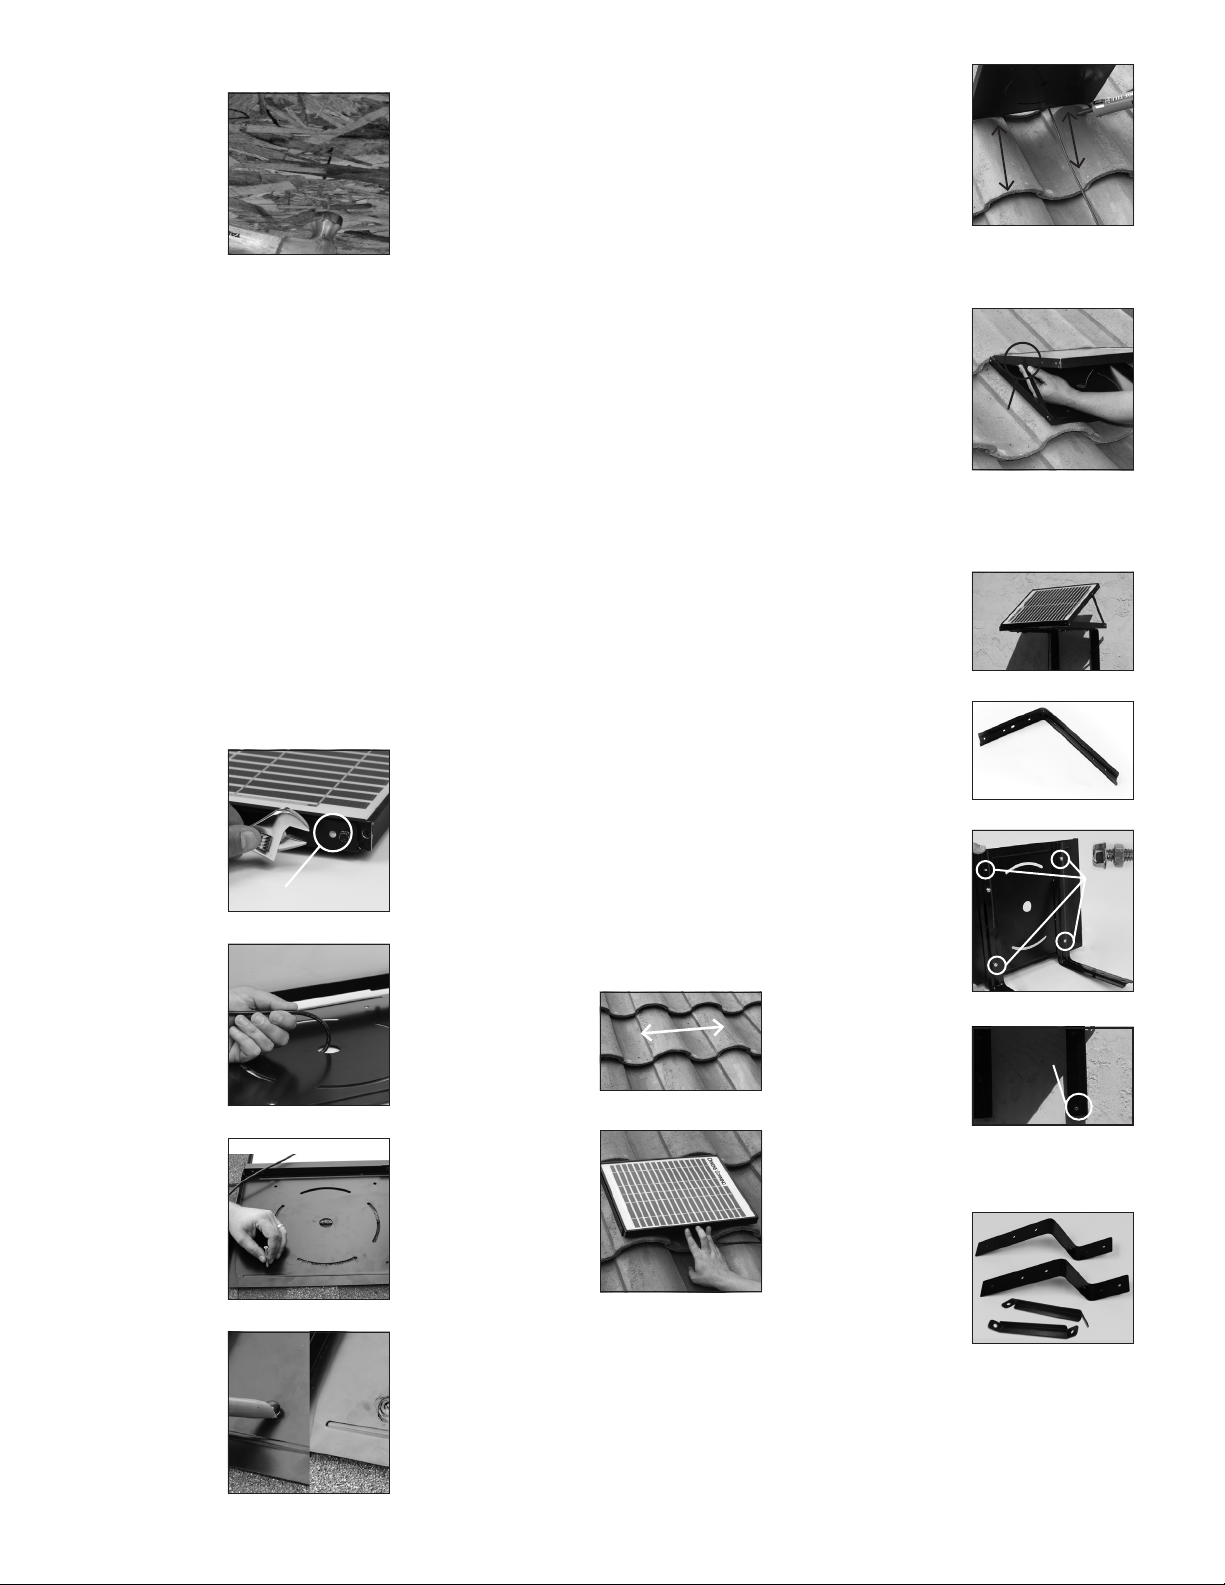
Montaje del panel solar
adicional
Si está agregando un panel, asegúrese de
medir la distancia antes de instalarlo.
Selección de la mejor ubicación para el
panel adicional
Hemos diseñado el juego de panel solar
adicional para ventilador extractor solar
para ático VentSure para permitir que
usted tenga la exibilidad necesaria para
ubicarlo donde pueda obtener la mejor
exposición al sol durante el transcurso del
día. Puede ubicarlo en el lado opuesto
del techo o en una pared exterior que
obtenga la exposición del sol a la mañana
o a la tarde. Realice una evaluación de
su hogar y determine cuál es la mejor
ubicación para el panel extra. Si el primer
panel obtiene luz solar a la mañana pero
no obtiene luz solar a la tarde, considere
instalar un segundo
panel donde
quede expuesto
a la luz solar de la
tarde, y viceversa.
Esto mantendrá
el ventilador en
funcionamiento
durante períodos
mucho más largos a
lo largo del día.
Determine la ubicación deseada para
montar el panel solar. Se recomienda
que el panel se coloque a una distancia
que no supere los 30 pies del lugar de
instalación del ventilador. Identique
una ubicación que mejore la exposición
al recorrido del sol durante el día. Las
pendientes de los techos con orientación
sur o sureste son ideales. (Figura 4)
Nota: Este producto incluye un cable de
extensión de 30 pies de largo, y es adecuado
para la mayoría de las instalaciones. Sin
embargo, el panel se puede ubicar a una
distancia de hasta 60 pies de la ubicación
del ventilador sin que se produzca una
caída importante en el rendimiento. Si la
distancia excede los 30 pies, será necesario
adquirir por separado un conjunto de cable
de extensión especíco para este producto
en la tienda proveedora de materiales de
construcción de su localidad.
Figura 2
Figura 3
Figura 4: ventilador de
ático de montaje en
hastial o techo
max 60 feet
Add-a-Panel
Option
Add-a-Panel
Option
a.
a.
b.
Accesorios opcionales (no incluidos)
Para montaje en techo:
• Tornillos galvanizados de 3 pulg. (para
montaje en techos con tejas asfálticas)
• Pistola de calafatear con adhesivo para
techos con tejas (para montar el panel
solar directamente en tejas españolas,
tejas planas o techos metálicos)
Para montaje en pared
• Tornillos para anclaje de 1,5 a 3 pulg.
(según el tipo especíco de estuco,
cemento o pared de ladrillos. Debe
soportar hasta 20 lb.)
• Tornillos galvanizados de 1,5 a 3 pulg.
(según el tipo especíco de madera o
revestimiento de vinilo). Debe soportar
hasta 20 lb.)
• Pistola de calafatear con adhesivo
para techos con tejas (para sellar las
cabezas de los tornillos cuando realice el
montaje en madera o en revestimientos
de vinilo). Recomendamos el uso de
adhesivo para tejas de asfalto ASTM D
4586 Tipo 1.
Figura 1
Table of contents
Languages:
Popular Solar Panel manuals by other brands

REC
REC TwinPeak 2S Mono 72 Series installation instructions

Flexsolar
Flexsolar C100 Instruction manual & warranty

Energizer
Energizer HardCase Sunpack 120W user guide

solarwatt
solarwatt EasyIn 60M Series installation instructions

Mission Solar Energy
Mission Solar Energy MONO Series Installation and user manual

Wiedenmann
Wiedenmann Favorit XP Translation of original operating instructions