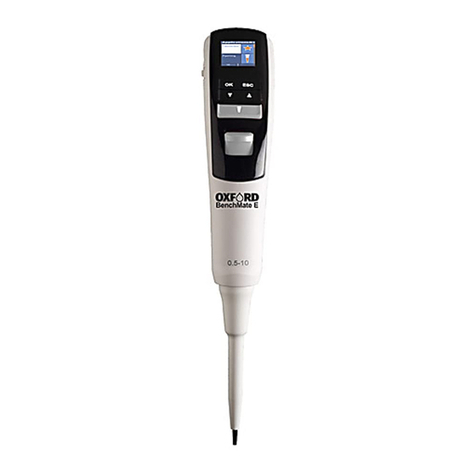
Oxford BenchMate E User manual


Table of Contents :
-2-
1. Introduction 3
2. Volume Range 3
3. Before you start 3
4. Getting Started 3
5. Overview 4
6. Modes 4
6.1 Favourites 4
6.1.1 Edit 5
6.2 Pipetting 5
6.3 Reverse Pipetting 6
6.4 Multi Dispensing 6
6.4.1 Repeat Dispense 6
6.4.2 Auto Dispense 6
6.4.3 Sequence Dispense 7
6.5 Diluting 7
6.5.1 Diluting 7
6.5.2 Diluting + Mixing 8
6.6 Mixing 8
6.6.1 Mixing 8
6.6.2 Pipette + Mixing 9
6.6.3 Diluting + Mixing 9
6.7 Settings 9
6.7.1 Speed 9
6.7.2 Sound 10
6.7.3 User ID 10
6.7.4 Product ID 10
6.8 Calibration 10
6.8.1 3 Point Calibration 11
6.8.2 2 Point Calibration 11
6.8.3 1 Point Calibration 12
6.8.4 Restore Factory Calibration 12
6.8.5 Last Calibration Date 12
6.8.6 Due Calibration Date 13
6.8.7 Edit Password 13
6.8.8 Forgot Password 13
7. Warning / Safety Precautions 13
8. Battery and Charging 14
8.1 Inserting a battery 14
8.2 Charging through power adopter 14
8.3 Charging through charging pod 14
9. Technical Specification 15
9.1 Single channel pipette specification 15
9.2 Multi-channel pipette specification 15
10. Maintenance 16
10.1 Single channel pipette maintenance 16
10.1.1 Volume wise dis-assembly procedure 16-18
10.1.2 List of spares 19-21
10.2 Multichannel pipette maintenance 22
10.2.1 List of spares 23
10.2.2 List of spares 24
11. Autoclavability 25
12. Troubleshooting 25
Oxford Benchmate E
Electronic Pipette
User Guide

-3-
1. Introduction
The Oxford BenchMate E electronic pipette offers you the best
ergonomic design in the field of liquid handling devices. The ergonomic
design of the electronic pipettes reduces the risk of repetitive strain
injuries (RSI). The self explanatory functions of the pipette allow for
easy access of each operation. The electronically operated piston
movement reduces the manual error and provides high accuracy.
2. Volume Range
Please verify your box includes the following
Ÿ Electronic Pipette
Ÿ Li-ion Battery
Ÿ Charger
Ÿ User Guide
Ÿ Calibration Report
Ÿ Toolkit
- Grease Container
- Tips
Please insert the Li-ion battery as shown in 8.1.Please charge the
battery for 3 hours or unless the bar stops moving in the pipette display.
Please follow charging instruction as shown in 8.2.
Please switch on the instrument by pressing the ON / OFF switch. Here
you can start working in any modes of the pipette.
8 Channel
3. Before You Start
4. Getting Started
Number of
Channel
1 Channel
1 Channel
1 Channel
1 Channel
1 Channel
8 Channel
8 Channel
8 Channel
8 Channel
12 Channel
12 Channel
12 Channel
12 Channel
12 Channel 15-300
15-300
10-200
10-200

8
7
5
6
9
10
1
3
4
Favourites
11
12
13
2
-4-
5. Overview
There are various modes available on the application menu. You can
use them according to requirement.
Special Note :
Press “OK” button for selection.
Press “ESC” button to come out from the mode any time.
1. Select Favorites from applications.
2. Select Prog1 / Prog2 / Prog3.
3. Select the mode.
4. Select volume by using up / down arrow key.
5. Select Aspiration Speed by using up / down arrow key.
6. Select Dispensing Speed by using up / down arrow key.
7. Select one of the 3 options.
(a. Save & Run. b. Save & Exit. c. Do Not Save).
a) Save & Run
This will save the program and it will be ready for
pipetting.
b) Save & Exit
This will save the program and will exit from menu.
c) Do Not Save
No program will be saved. You can use ESC key as
well if you do not want to save this program.
6. Modes
6.1 Favorites
Steps :
1. Micro USB Charging Port
2. ON/OFF Switch
3. Battery Cover
4. Display
5. OK Key
6. ESC Key
7. Down Arrow Key
8. UP Arrow Key
9. Trigger Key
10. Tip Ejector Pusher
11. Tip Ejector
12. Tip Cone
13. Charging Point for
Auto Charging Stand

-5-
This will allow the user to edit the sequence of the saved program. You
can change the position of your program from 1st to 2nd or 3rd or vise
versa.
This program allows you to edit your saved favorite program. Also you
can change the sequence of saved programs.
Edit Program
This program allows you to edit the mode, aspiration speed, dispensing
speed and volume. Also you can delete the program from this function.
Steps :
1. Select Favorites.
2. Select Edit.
3. Select Edit Prog.
4. Select any of the following options
a) Mode : This will allow you to change the mode.
b) Volume : This will allow you the change the volume.
c) Speed : This will allow you to change the aspiration
and dispensing speed.
d) Save & Exit : Come out of the mode after saving the
program.
e) Do not save : It will not change anything.
f) Delete Prog : This will delete the existing program.
1. Select Favorites.
2. Select Edit.
3. Select Edit Seq.
4. Select program position which you want to swap.
5. Press OK button.
6. Select the position with which you want to swap your
program by using up / down arrow key.
7. Press OK button.
You will be directed to the favorite mode where you can see the
changes.
This will allow you to aspirate and dispense the selected volume.
1. Select Pipetting from the applications.
2. Select volume by pressing up / down arrow key.
3. Press OK to finalize the volume.
4. Press trigger key to aspirate the volume.
5. Press trigger key to dispense the volume.
6. Press trigger key to repeat the process or Press ESC key to
come out from the mode.
6.1.1 Edit
Edit Sequence
Steps :
6.2 Pipetting
Steps :

-6-
6.3 Reverse Pipetting
This mode is generally used for pipetting high viscous liquids
accurately. It aspirates little excess liquid than the selected volume and
it dispense the exact liquid of the selected volume. The rest of the liquid
in the tip will need to be discarded.
Steps :
1. Select Reverse Pipetting from the applications.
2. Select volume by pressing up / down arrow key.
3. Press OK to finalize the volume.
4. Press trigger key to aspirate the volume.
5. Press trigger key to dispense the volume.
The excess liquid will remain in the tip.
6. Press trigger key to discard the excess liquid.
7. Press trigger key to repeat the process or press ESC key to
come out from the mode.
1. Select Multi Dispense from the applications.
2. Select Repeat Dispense from the Multi Dispense menu.
3. Select volume.
4. Select Dispensing Steps, the pipette will calculate the
maximum number of steps once you select the volume.
5. Use up/down arrow key to modify the dispensing steps and
press OK button.
6. Press trigger key to aspirate the liquid.
7. Press trigger key to dispense the liquid.
The excess liquid will remain in the tip.
8. Press trigger key to discard the excess liquid.
9. Press trigger key to repeat the process or press ESC key to
come out from the mode.
6.4 Multi Dispense
6.4.1 Repeat Dispense
The repeat dispense mode repeatedly dispenses the volume in
selected increments. For better accuracy, it will aspirate the excess
volume which will need to be discarded at the end.
6.4.2 Auto Dispense
Auto Dispense has a same function of Repeat Dispense but with an
automatic timer setting.
Steps :

-7-
Steps :
1. Select Multi Dispense from the applications.
2. Select Auto Dispense from the Multi Dispense menu.
3. Select volume.
4. Select Dispensing Steps. The pipette will calculate the maximum
number of steps automatically once you select the volume.
5. Use up/down arrow key to modify the Dispensing Steps and
press OK button.
6. Select Time Gap between 1 to 3 sec. and press OK button.
7. Press trigger key to aspirate the liquid.
8. Press trigger key to dispense the liquid.
The excess liquid will remain in the tip.
9. Press trigger key to discard the excess liquid.
10. Press trigger key to repeat the process or press ESC key to
come out of the mode.
1. Select Multi Dispense from applications.
2. Select Sequence Dispense from Multi Dispense.
3. Select No. of Sequences by pressing up / down arrow key
(max. 4 sequences can be selected).
4. Select 1st volume by using up / down arrow key.
5. Repeat this process for 2nd, 3rd and 4th sequence selected.
6. Aspirate the volume by using trigger key.
7. Dispense the 1st sequence of volume.
8. Repeat the process till all the volume.
9. Discard the excess liquid by using trigger key.
This mode is used to dispense the liquid in different sequences.
Note : (If you choose nominal volume in the 1st selection then you
won’t be allowed to select other sequences)
6.4.3 Sequence Dispense
Steps :
6.5 Diluting
This technique is used to mix two different liquids in one vessel.
Steps :
1. Select Diluting from applications.
2. Select Diluting.
3. Select No. of Dilutants (Max. 2 dilutants can be selected).
4. Select 1st volume by using up / down arrow key.
5. Select 2nd volume by using up / down arrow key.
6. Aspirate 1st volume by pressing trigger key.
7. Aspirate Air by pressing trigger key.
8. Aspirate 2nd volume by pressing trigger key.
9. Dispense total volume in vessel by using trigger key.
6.5.1 Diluting

-8-
Steps :
1. Select Diluting from applications.
2. Select Diluting + Mixing.
3. Select No. of Dilutants (Max. 2 dilutants can be selected).
4. Select 1st volume by using up / down arrow key.
5. Select 2nd volume by using up / down arrow key.
6. Select Mixing Cycle by using up / down arrow key. Max. 10
cycles can be selected.
7. Aspirate 1st volume by pressing trigger key.
8. Aspirate Air by pressing trigger key.
9. Aspirate 2nd volume by pressing trigger key.
10. Dispense total volume in vessel by using trigger key.
11. Mixing will automatically start once you dispense the liquid
into the vessel.
12. You can stop mixing if require by using the ESC key.
13. Press trigger to start the mixing again / Press the ESC key to
completely stop the mixing in between the process. It will discard
the excess liquid remaining in the tip.
6.5.2 Diluting + Mixing
6.6 Mixing
You can mix the liquids using this mode. There are three modes under
mixing.
a) Mixing . b) Pipetting + Mixing. c) Diluting + Mixing.
6.6.1 Mixing
Steps :
1. Select Mixing from the applications.
2. Select volume by using the up/down arrow key.
3. Select Mixing Cycles by using up/down arrow key. Max. 10
cycles can be selected.
4. Aspirate the volume.
5. Mixing will automatically start .
6. You can stop mixing by using the ESC key.
7. Press trigger to start the mixing again / Press the ESC key to
completely stop the mixing in between the process. It will discard
the excess liquid remaining in the tip.

-9-
Steps :
1. Select Pipetting + Mixing from the applications.
2. Select volume by using up/down arrow key.
3. Select Mixing Cycles by using up/down arrow key Max. 10
cycles can be selected.
4. Aspirate the selected volume by using trigger key.
5. Dispense the selected volume by using trigger key.
6. Mixing will automatically start .
7. You can stop mixing by using ESC key.
8. Press trigger key to start the mixing again / Press the
ESC key to completely stop mixing in between the
process. It will discard the excess liquid remaining in the tip.
6.6.3 Diluting + Mixing
Steps :
1. Select Diluting from applications.
3. Select Diluting + Mixing.
4. Select No. of Dilutants. Max. 2 dilutants can be selected.
5. Select 1st volume by using up / down arrow key.
6. Select 2nd volume by using up / down arrow key.
7. Select Mixing Cycle by using up / down arrow key. Max. 10
cycles can be selected.
8. Aspirate 1st volume by pressing trigger key.
9. Aspirate Air by pressing trigger key.
10. Aspirate 2nd volume by pressing trigger key.
11. Dispense total volume in vessel by using trigger key.
12. Mixing will automatically start once you dispense the liquid
into the vessel.
13. You can stop mixing by using the ESC key.
14. Press trigger to start the mixing again / Press the
ESC key to completely stop mixing in between the
process. It will discard the excess liquid remaining in the tip.
6.7 Settings
6.7.1 : Speed
Steps :
1. Select Settings from the applications.
2. Select Speed.
3. Change the Aspiration Speed by using up/down arrow key and
press OK.
4. Change the Dispense Speed by using up/down arrow key and
press OK.
5. You will find new aspiration and dispense speed on the
display.
6. If you do not want to change any speed, press ESC key.
This is a control menu where you can define Speed, Sound, User ID and
Product ID of the pipette.
6.6.2 Pipetting + Mixing

6.7.3 User ID
Steps :
1. Select Settings from applications.
2. Select User ID.
3. Select 1st character by using up / down arrow key and press OK.
You can select letters from alphabets, 1-9 number and few
symbols.
4. After pressing OK button, 2nd character will be highlighted.
Follow the same process till maximum character.
5. Once you will select the last character, display will show the setting
menu with all changes.
6.7.2 Sound
Steps :
1. Select Settings from the applications.
2. Select Sound.
3. Change the sound level by using the up/down arrow key and
press OK.
4. You will find the new selected sound on the display.
5. If you do not want to change sound, press the ESC key.
6.7.4 Product ID
Steps :
1. Select settings from applications.
2. Select Product ID.
3. Select 1st character by using up / down arrow key and press OK
button once you select 1st character. You can select letters from
the alphabet numbers 1-9 and few symbols.
4. After pressing the OK button, the 2nd character will be highlighted.
Follow the same process until maximum character limit is reached.
5. Once you will select the last character, the display will show the
setting menu with all changes.
-10-
6.8 Calibration
The Oxford Benchmate E pipette offers you 3 types of calibration
settings depending on the user’s requirement.
a.) 3 Point Calibration b.) 2 Point Calibration c.) 1 Point Calibration
By default 3 Point Calibration has been adjusted on the pipette for
supreme accuracy at each volume.

-11-
6.8.1 3 Point Calibration
Steps :
1. Select Calibration from the applications.
2. Select Enter Password from the sub menu by default, press
“0000” if you have not set your own password.
3. Select 3 Point Cal. from the sub menu.
4. Select Expected Volume 1. By default, 10% of the nominal
volume will be on the display, you can change this volume
according to your requirement by using up / down arrow key.
5. Enter Delivered Volume 1.
6. Select Expected Volume 2. By default middle volume will be
on the display, you can change this volume according to
your requirement by using up / down arrow key.
7. Enter Delivered Volume 2.
8. Select Expected Volume 3. By default nominal volume will be on
the display, you can change this volume according to
your requirement by using up / down arrow key.
9. Enter Delivered Volume 3.
10. Select “Yes” to save the changes. It will show Calibration
done on the display.
Select “No” to exit.
6.8.2 2 Point Calibration
Steps :
1. Select Calibration from the applications.
2. Select Enter Password from the sub menu by default, press
“0000” if you have not set your own password.
3. Select 2 Point Cal. from the sub menu.
4. Select Expected Volume1. By default, 10% of the nominal
volume will be on the display, you can change this volume
according to your requirement by using up / down arrow key.
5. Enter Delivered Volume 1.
6. Select Expected Volume 2. By default nominal volume will
be on the display, you can change this volume according to
your requirement by using up / down arrow key.
7. Enter Delivered Volume 2.
8. Select “Yes” to save the changes. It will show Calibration
done on the display.
9. Select “No” to exit.

-12-
6.8.3 1 Point Calibration
Steps :
1. Select Calibration from the applications.
2. Select Enter Password from the sub menu by default, press
“0000” if you have not set your own password.
3. Select 1 Point Cal. from the sub menu.
4. Select Expected Volume1. By default, 10% of the nominal
volume will be on the display, you can change this volume
according to your requirement by using up / down arrow key.
5. Enter Delivered Volume1.
6. Select “Yes” to save the changes. It will show Calibration
done on the display.
7. Select “No” to exit.
Steps :
1. Select Calibration from the applications.
2. Select Enter Password from the sub menu. By default, press
“0000” if you have not set your own password.
3. Select Restore Fact. Cal.
4. Select Yes by pressing up / down arrow key to restore the
factory calibration. “Factory Calibration Restored” screen will
appear for few seconds and you will directed to the
calibration menu.
5. Select No by pressing up / down key to keep the user
settings.
Special Note : Whenever the user makes any changes in the calibration,
the Applications will show “Calibration User”. Once you restore the
factory calibration, Applications will show “Calibration Fact.”.
6.8.4 Restore Factory Calibration
This feature will allow you to restore all the factory generated data of
the product. So, all the user changes will be nullified and factory
calibration will be restored.
Steps :
6.8.5 Last Calibration Date
Here you can keep a track of your last calibration date. Whenever you
calibrate your pipette, you can enter the date of the calibration.
1. Select Calibration from the applications.
2. Select Enter Password from the sub menu. By default, press
“0000” if you have not set your own password.
3. Select Last Cal. Date by using up / down arrow key.
4. Enter the date in DD/MM/YY format and you will be
directed to the calibration menu.

-13-
6.8.6 Due Calibration Date
Here you can save your due date for re-calibration of the product.
Steps :
1. Select Calibration Fact. From the applications.
2. Select Enter Password from the sub menu by default, press
“0000” if you have not set your own password.
3. Select Due Cal. Date by using up / down arrow key.
4. Enter the date in DD/MM/YY format and you will be
directed to the calibration menu.
Steps :
6.8.7 Edit Password
This feature will help user to edit the password. So only authorized
persons can modify the calibration.
1. Select Calibration from the applications.
2. Select Edit Password.
3. “Enter Existing Password” by using up / down arrow key. The
default password is “0000”.
4. Enter New Password by using up / down arrow key.
5. Repeat the New Password.
6. If everything is ok then “Password Change Successful”
window will appear.
6.8.8 Forgot password
In case you forget the password, please contact your supplier. They
will be able to reset your password.
7. Warning / Safety Precautions
To prevent fire, electronic shock or any serious injury to persons, follow
below safety instruction.
Ÿ Do not submerge the unit and its charger in any liquid.
Ÿ Do not operate the charger that has a damaged cord.
Ÿ Please use chargers that are compatible with the pipette.
Ÿ Do not handle the charger plug with moist hands.
Ÿ Do not burn, crush, damage the Lithium battery or expose it
to excessive heat.
Ÿ Always use recommended battery.

-14-
8.2 Charging - Power Adaptor
1. Insert the power cable in the pipette as shown in the image (A).
2. Connect the power plug of the power adaptor with the
external power source.
8.3 Charging - Charging Pod
1. Insert the power cable in the auto charging pod as shown in the
image (B).
2. Connect the power plug of the power adaptor with the
external power source.
3. Place the pipette on the auto charging pod.
8.1 Inserting a Battery
1. Please follow the image to open the battery cover.
2. Insert battery supplied along with the instrument in a way that
the metal pins inside the pipette establish proper contact with
the metal points on the battery.
3. Slide the battery cover down.
8. Battery and Charging
Favourites
1 2
(A)
(B)

9.1 Single Channel Pipette Technical Specification
-15-
Cat. No.
OBE-10
Test Volume
(µl)
Inaccuracy
(±) %
Imprecision
(±) %
0.5-10 µl
Volume
Range (µl)
1
5
10
2.5
2
1
1.8
1
0.6
OBE-100 5-100 µl
10
50
100
3
1
0.8
1
0.5
0.2
OBE-200 10-200 µl
20
100
200
2.5
0.7
0.6
0.7
0.3
0.2
OBE-1000 50-1000 µl
100
500
1000
3
1
0.6
0.6
0.4
0.2
OBE-5000 250-5000 µl
500
2500
5000
2.4
1.2
0.6
0.6
0.25
0.15
Color
Cat. No.
Test Volume
(µl)
Inaccuracy
(±) %
Imprecision
(±) %
0.5-10 µl
Volume
Range (µl)
1
5
10
8
4
2
5
2
1
OBE-8-20
OBE-12-20 2-20 µl
2
10
20
7
3
2
3
2
1.6
OBE-8-100
OBE-12-100 5-100 µl
10
50
100
3
1
0.8
2
0.8
0.3
OBE-8-200
OBE-12-200 10-200 µl
20
100
200
5
1
0.7
1.4
0.4
0.25
Color
9.2 Multi Channel (8-12) Pipette Technical Specification
OBE-8-10
OBE-12-10
OBE-8-300
OBE-12-300 15-300 µl
30
150
300
3
1
0.6
1
0.5
0.3
9. Technical Specification

10. Maintenance
-16-
You should check the pipette at the beginning of each day for
accumulation of dust and dirt on the outside surfaces. Attention should
be paid to the tip cone. No other solvent except Iso-propanol should
be used to clean the pipette. If the pipette is used daily, it should be
inspected every three months.
The servicing procedure starts with the disassembly of the pipette. Please
refer to the spare parts lists for better understanding of the components.
After disassembling pipette as per mentioned procedure follow below
routine maintenance steps :
Pull out the piston and other parts and follow general maintenance.
Remember to keep all parts in order for reassembly.
Clean piston, piston spring, Seal and O-ring with a isopropanol and line
free tissue. Allow them to dry.
Check the tip cone for foreign particles and remove, if any. Grease the
cleaned parts with the approved lubricant provided with each pipette.
Volume 0.5-10µl
Step 1 Step 2
Unscrew the Tip Ejector
as per shown direction
Unscrew the Tip Cone
Cap as per shown direction
Step 3
Pull out the Piston as
per shown direction
10.1.1 Volume-wise Dis-assembly Procedure
Shown here are dis-assembly procedure for different volumes pipettes.
10.1 Single channel pipette maintenance

-17-
Step 1 Step 2 Step 3
Unscrew the Tip Ejector
as per shown direction
Unscrew the Tip Cone
as per shown direction
Pull out the Piston as
per shown direction
Volume 50-1000µl
Step 1 Step 2 Step 3
Unscrew the Tip Ejector
as per shown direction
Unscrew the Tip Cone
Cap as per shown direction
Pull out the Piston as
per shown direction
Volume 5-100µl & Volume 10-200µl

-18-
Unscrew the Tip Ejector
Cap as per shown direction
then pull out piston
as per shown direction
Volume 250-5000µl
Step 1 Step 2 Step 3
Unscrew the Tip Ejector
as per shown direction
Unscrew the Tip Cone
as per shown direction

10.1.2 List of Spares:
Volume 5-100µl
OX AE 50033-3
OX CEP 40111-1
OX SP 00029-3
OX SP 00301-1
OX SP 00161-1
OX SP 00045-3
OX SP 00038-3
OX AE 50017C-1.1
-19-
OX CEP_SP 00041-3
OX AE 50102-1
OX SP 00028-3
OX SP 00158-1
OX SP 00038-3
OX AE 50017B-1.1
OX SP 00048-3
Volume 0.5-10µl
Other manuals for BenchMate E
1
Table of contents
Other Oxford Laboratory Equipment manuals