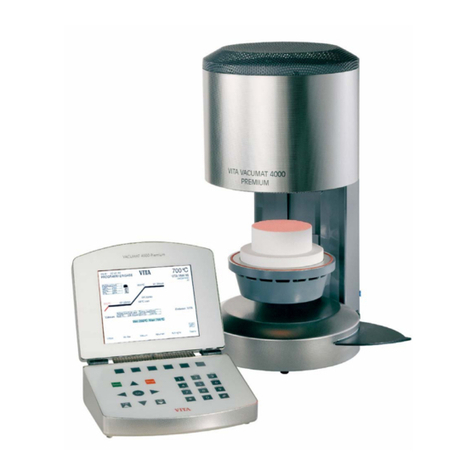
vita vPad comfort User manual

VITA vPad comfort / VITA vPad excellence
VITA shade, VITA made.
Operating manual
VITA shade control
VITA shade reproduction
VITA shade communicationVITA shade determination
Date of issue: 07.15


3
VITA vPad comfort · VITA vPad excellence
Table of contents
1 Welcome 5
1.1 General notes 5
1.2 Copyright 5
2 Scope of delivery 6
3 Technical information 6
4 Technical Data 6
4.1 Dimensions / weights 6
4.2 Electrical data 6
4.3 Ambient conditions 6
5 Intended use 7
6 Operation and cleaning of the control unit 8
6.1 Warranty and liability 8
6.2 Spare parts 8
6.3 Safety information 8
7 Safety functions 9
7.1 Mains power supply failure 9
8 Automatic temperature calibration 10
8.1 Service 10
9 Commissioning 11
9.1 VITA VACUMAT®6000 M connections
ceramics furnace 12
9.2 VITA VACUMAT®6000 MP connections
combination pressing furnace 12
9.3 Pressurized air connection 13
9.4 VITA ZYRCOMAT®6000 MS connections
sintering furnace 13
10 Switching on the device 14
10.1 Standby 14
10.1.1 Activate Standby 14
10.1.2 Deactivate Standby 15
10.2 VITA Energy Efficiency Standby 15
10.3 Status display 15
10.4 Preventing condensation (VITA AntiCon) 15
11 Operations and functions for
VITA vPad comfort / excellence 16
11.1 Lift buttons 16
11.2 Program start with too high a temperature 17
11.3 Rapid cooling on standby 17
11.4 Switching off 17
12 Select firing program 18
12.1 Process data 19
12.2 Night program 20
12.3 Back button 20
12.4 Saving 20
12.5 Program buttons 20
13 Enter / change / save program values 21
13.1 Description of function buttons 21
13.2 Predrying temperature / predrying time 21
13.3 Lift positions for predrying 22
13.4 Prevacuum 23
13.5 Rise time / rise temperature 23
13.6 Firing temperature and holding time 24
13.7 Main vacuum 24
13.8 Cooling temperature and holding time 25
13.9 Lift position for cooling 25
13.10 Changes after starting
a firing program 26
14 Managing material, programs 27
14.1 Creating new material 29
14.2 Changing material 30
14.3 Duplicating (copying) material 30
14.4 Deleting material 31
14.5 Positioning material 31
14.6 Importing material 31
14.7 Exporting material 31
14.8 Creating new programs 32
14.9 Changing programs 33
14.10 Duplicating programs 33
14.11 Deleting programs 33
14.12 Positioning programs 33
14.13 Importing programs 34
14.14 Exporting programs 34

4
VITA vPad comfort · VITA vPad excellence
15 Managing a user profile 35
15.1 Activating/entering a password 36
15.2 Deleting a password 36
15.3 Changing a user profile 36
15.4 Duplicating a user profile 37
15.5 Deleting a user profile 37
15.6 Positioning a user profile 37
15.7 Importing a user profile 37
15.8 Exporting a user profile 37
16 Pressing programs 38
16.1 Starting temperature for pressing program 38
16.2 Rise time / rise temperature 38
16.3 Vacuum time 39
16.4 Pressing temperature/ p ressing time 39
16.5 Pressing time 1 and pressing pressure 39
16.6 Pressing time 2 and pressing pressure 39
16.7 Starting the pressing program 40
17 Sintering programs 41
17.1 Selecting a sintering program 42
17.2 Sintering program description 43
17.3 HighSpeed Mode 43
18 Predrying (VITA PreDry) 44
18.1 Rise 1/ VITA PreDry 44
18.2 Holding time 1/ VITA PreDry 44
18.3 Activating / deactivating predrying
in the sintering process 45
18.4 Individually create a predrying program
(VITA PreDry) 45
19 Changing a sintering program 46
19.1 Rise time 2 – Holding time 2 46
19.2 Rise time 3 and 4 – Holding time 3 and 4 47
19.3 Cooling program 47
19.4 Mode 1 user defined 47
19.5 Mode 2 VITA HighSpeed 48
19.6 Mode 3 Conventional 48
20 Photoviewer 49
20.1 Image settings 49
21 Settings 50
21.1 Multifurnace 51
21.2 Furnace settings 52
21.3 Setting pressing pressure 54
21.4 Device data 55
21.5 Date 56
21.6 vPad 56
21.7 Start profile 56
21.8 Languages 57
21.9 Basic settings – factory settings 57
21.10 Passwords 57
21.11 Update 58
21.12 Cancelling a firing program 58
22 VITA Help 59
23 Error messages 60
24 Alphabetic table of contents 62

5
VITA vPad comfort · VITA vPad excellence
1 Welcome
1.1 General notes
Dear Customer,
Congratulations and thank you for your decision to purchase a VITA vPad comfort / VITA vPad excellence control pad for the operation
and control of the VITA VACUMAT 6000 M ceramic firing furnace, VITA VACUMAT 6000 MP combination pressing furnace or the
VITA ZYRCOMAT 6000 MS high-speed sintering furnace.
With the VITA vPad comfort, you can immediately operate up to two VITA VACUMAT 6000 M / VITA VACUMAT 6000 MP and
VITA ZYRCOMAT 6000 MS, with the VITA vPad excellence up to four VITA VACUMAT 6000 M / VITA VACUMAT 6000 MP and
VITA ZYRCOMAT 6000 MS.
The VITA vPad uses the latest state of the art technologies and meets all international safety standards. However, improper handling
may cause problems. Please read this operating manual carefully and observe the following instructions.
This operating manual will help you to use your VITA instrument properly and avoid possible problems, reduce repair costs and down
times and increase the reliability and service life of the instrument. All of the illustrations and drawings in this operating manual are
intended for general explanatory purposes and are not authoritative for the detailed construction of the device.
The operating manual should always be kept close to the instrument. It should be read and followed by all persons responsible for
performing tasks such as operation, troubleshooting during operation, cleaning and servicing (maintenance, inspection, repairs), either
with or on the instrument.
We wish you much success working with this VITA instrument.
VITA Zahnfabrik, Bad Säckingen, Germany
1.2 Copyright
Important notes concerning copyrights:
© Copyright 2015, VITA Zahnfabrik. All rights reserved.
This document and/or the software, data and information referenced or contained herein contain confidential and proprietary
information of VITA Zahnfabrik.
This document does not convey or represent any right or license to use any software, data or information, any right or license to use
any intellectual property rights, or any rights or obligations on the part of VITA Zahnfabrik to provide support or other services in
connection therewith. Any right or license to use any software data, information or other intellectual property rights of
VITA Zahnfabrik, or any obligation to provide support, must be conveyed by separate written agreement with VITA Zahnfabrik.

6
VITA vPad comfort · VITA vPad excellence
2 Scope of delivery
Device supplied in a special box with:
• 1 VITA vPad comfort 7“ LED Color Touch Display or
• 1 VITA vPad excellence 8.5“ LED Color Touch Display
• 1 Operating Manual
To operate two to four VITA VACUMAT 6000 M / VITA VACUMAT
6000 MP or VITA ZYRCOMAT 6000 MS units with the VITA vPad comfort /
VITA vPad excellence control unit, you also need a VITA Switchbox with
connection cable (VITA Art. No. D47009).
3 Technical Information
VITA vPad comfort control unit with 7“ LED Color Touch Display, memory
capacity of 500 programs with 1 GB photoviewer and control of up to two
sintering, firing or combination pressing units.
VITA vPad excellence control unit with 8.5“ LED Color Touch Display,
memory capacity of 1000 programs, 2 GB photoviewer and control of up to
four sintering, firing or combination pressing units.
4 Technical Data
4.1 Dimensions / weights
VITA vPad comfort / VITA vPad excellence
• Width: 235 mm
• Depth: 156 mm
• Height: 150 mm
• Weight: 0.7 kg
• Housing: resin
4.2 Electrical data
The 48 volt DC power supply comes through the VITA VACUMAT
6000 M / VITA VACUMAT 6000 MP or VITA ZYRCOMAT 6000 MS
connection cable
4.3 Ambient conditions
• Use indoors
• Ambient temperature 2 °C to 40 °C
• Relative humidity: max. 80% at 31 °C

7
VITA vPad comfort · VITA vPad excellence
5 Intended use
Basic information on the instrument design
The instrument is designed according to state of the art technology and
recognized safety standards.
However, if it is used inappropriately, hazards for the health and safety of the
user or third parties, as well as the risk of damaging the instrument and other
material property, may arise.
Unauthorized modes of operation
The operation of the instrument with power sources, products, etc., which
are subject to hazardous materials regulations or could have any negative
impact on the health of the operating personnel when using equipment
modified by the user are not permitted.
Authorized modes of operation
The operation of the device is only permitted if this operating manual has
been completely read and understood and the procedures described in it have
been observed.
Any other or additional use, e.g., processing of products other than those
intended as well as handling of hazardous materials or substances injurious
to health, is considered to be contrary to the recommended use.
The manufacturer/supplier will not be liable for any damage resulting from
such unauthorized use.
The risk of such use is borne exclusively by the user.

8
VITA vPad comfort · VITA vPad excellence
6 Operation and cleaning of the control unit
Do not operate the control unit with sharp-edged or hot objects. This
causes damage to the touch screen.
Clean the display at regular intervals with a screen cleaner. This cleaner does
not cause any scratches, has an antistatic effect and prevents re-soiling.
Damage to the display resulting from improper use during operation
or cleaning is excluded from the warranty.
6.1 Warranty and liability
The warranty and liability are based on the terms and conditions stipulated in
the contract.
In the event of software modifications without the knowledge and
approval of VITA Zahnfabrik H. Rauter GmbH & Co. KG, all liability and
warranty claims are invalidated.
6.2 Spare parts
Spare parts must comply with the technical requirements specified by the
manufacturer. This is only ensured when using original VITA spare parts.
6.3 Safety information
Please observe the safety instructions for the VITA VACUMAT 6000 M /
VITA VACUMAT 6000 MP (see Operating Manual for the VITA VACUMAT
6000 M / VITA VACUMAT 6000 MP Safety Instructions) or VITA ZYRCOMAT
6000 MS (see Operating Manual for the VITA ZYRCOMAT 6000 MS Safety
Instructions) before starting the instrument up.

9
VITA vPad comfort · VITA vPad excellence
7 Safety functions
If the furnace is operated with a VITA vPad comfort / VITA vPad excellence
control unit, it is equipped with the following safety and monitoring
functions:
• Temperature sensor monitoring
• Temperature monitoring
• Vacuum monitoring
• Power failure protection
• Lift monitoring
Additional functions while operating the VITA VACUMAT 6000 MP:
• Pellet detection for VITA press pellets
• Press path detection
7.1 Mains power supply failure
The instrument is equipped with power supply failure protection.
This component prevents a program cancellation and hence any incorrect
firing in the event of a brief failure of the mains power supply. The power
failure protection is activated as soon as the mains power supply fails when
a firing program is running.
Failure of the mains power supply for a period shorter than
approximately 15 sec.
The firing program is not cancelled; the display does not work for this period.
Once mains power is supplied again, the starting image is displayed; after
activating the Material button, the running program reappears in the display.
Failure of the mains power supply for a period greater than
approximately 15 sec.
The program is cancelled and the display is out of order.
Once mains power is supplied again, the starting image is displayed again.
Once mains power is supplied again, the time required for the
control unit to switch back on again is approximately 20 seconds.

10
VITA vPad comfort · VITA vPad excellence
8 Automatic temperature calibration
The temperature is automatically calibrated each time the furnace is
switched on.
This temperature calibration takes into consideration and corrects all
deviations occurring in the electronic components for temperature
measurement and temperature regulation.
Therefore, a constant temperature control of +/- 1 °C is achieved even with a
long operating time of the instrument.
8.1 Service
Further information on this device is available on our homepage:
http://www.vita-zahnfabrik.com
Software updates are available as a download on the website of the supplier,
VITA Zahnfabrik.
An option to register so that the latest information on the device is
automatically emailed to you is also provided at http://www.vita-
zahnfabrik.com/update-messenger.
In case of technical queries regarding the instrument or regarding repair
services and warranty provisions, contact us at:
Email: instruments-service@vita-zahnfabrik.com
Tel. +49 (0) 7761 / 562-105, -106, -101

11
VITA vPad comfort · VITA vPad excellence
9 First commissioning
Please also refer to the installation and commissioning instructions in the VITA
VACUMAT 6000 M / VITA VACUMAT 6000 MP or VITA ZYRCOMAT 6000 MS
Operating Manual.
• Plug the control unit with accompanying connection cable into the VITA
VACUMAT 6000 M / VITA VACUMAT 6000 MP or VITA ZYRCOMAT 6000 MS
and into the VITA vPad comfort / VITA vPad excellence
• Plug in the VITA vacuum pump (VITA VACUMAT 6000 M / VITA VACUMAT
6000 MP only)
• Insert the vacuum hose for the VITA vacuum pump (VITA VACUMAT 6000 M/
VITA VACUMAT 6000 MP only)
• Plug in the power cable
• Switch on the instrument using the main switch
• The lift goes down to the low position, up to the high position and down
again to the low position (lift path measurement)
In addition, for the VITA VACUMAT 6000 MP:
• Insert the pressurized air connection (max. 5 bar) into the pressure regulator
of the VITA vacuum pump. Attach the enclosed hose clamps to the
compressed air hose: 1x at the exit from the laboratory compressed air line
and 1x at the pump access.
For information about the connections, see Sections 9.1, 9.2 and 9.4
Attach the VITA firing socket to the lift plate.
Operation without the firing socket causes damage to the instrument
from high heat exposure.
When operating two or more firing devices with one VITA vPad comfort /
VITA vPad excellence control unit and the VITA Switchbox, pay attention to the
numerically identified connections of the VITA Switchbox.
One firing device must always be connected to connection no. 1.
To supply up to four firing devices (VITA VACUMAT®6000 M or
VITA VACUMAT®6000 MP) simultaneously with a vacuum with only
one VITA vacuum pump, use the VITA MultiPump (VITA Art. No. D61000).
VITA Switchbox
VITA MultiPump

12
VITA vPad comfort · VITA vPad excellence
9.1 Connections of the VITA VACUMAT®6000 M ceramic furnace
(see also the VITA VACUMAT 6000 M Operating Manual)
Main switch
Vacuum hose connection
Connection for
VITA vPad comfort / VITA vPad excellence
control unit or VITA Switchbox
Status display
(see Section 10.3)
Mains power supply connection
Connection for VITA vacuum pump
Instrument fuses (see VITA
VACUMAT 6000 M / VITA VACUMAT
6000 MP Operating Manual)
9.2 Connections of the VITA VACUMAT®6000 MP combination pressing
furnace (see also the VITA VACUMAT 6000 MP Operating Manual)
Status display
(see Section 10.3)
Connection for
VITA vPad comfort / VITA vPad excellence
control unit or VITA Switchbox
Vacuum hose connection
Pressurized air connection
max. 5 bar
Main switch
Mains power supply connection
Device fuses
Connection for VITA vacuum pump
Pressure regulator 3 bar

13
VITA vPad comfort · VITA vPad excellence
9.3 Pressurized air connection
The input pressure on the VITA VACUMAT 6000 MP is controlled by a
pressure regulator (supplied with the VITA VACUMAT 6000 MP only). This
can be attached to the VITA vacuum pump.
The input pressure from the laboratory pressurized air network should be a
maximum of 6 bar.
Set the pressure output of the device to a maximum of 5 bar on the pressure
regulator.
See Section 21.3 regarding the settings for the pressing pressure.
9.4 Connections of the VITA ZYRCOMAT®6000 MS sintering furnace
(see also the VITA ZYRCOMAT 6000 MS Operating Manual)
Status display
(see Section 10.3)
Connection for
VITA vPad comfort / VITA vPad excellence
control unit or VITA Switchbox
Device fuses
Main switch
Mains power supply connection
VITA vacuum pump for VITA VACUMAT 6000 M and
VITA VACUMAT 6000 MP

14
VITA vPad comfort · VITA vPad excellence
Switch off Standby on Standby off Lift up Lift down Switch off
Furnace 1 Furnace 2
1:Ready
Image 2 Display with two connected devices
Image 1 Display with one connected device
10 Switching the device on
Switch the device on at the main switch (see Sections 9.1, Pkt. 9.2, Pkt. 9.4),
The life goes down to the lower position, software is loaded, devices are
displayed.
Once the VITA VACUMAT 6000 M / VITA VACUMAT 6000 MP,
VITA ZYRCOMAT 6000 MS is connected, the display shows:
VITA vPad comfort / VITA vPad excellence with 1 device.
Doc
1:Ready Doc
Standby on Standby off Lift up Lift down
Switch off
VITA vPad comfort / VITA vPad excellence with 2 devices.
10.1 Standby
10.1.1 Activate standby
1 Device:
Press the Standby button.
2 device:
Select the device you want using the Furnace 1 or Furnace 2 button by touch.
Press the Standby button.
The lift moves into the firing chamber, the combustion chamber temperature
climbs to the set standby temperature (pre-set to 500 °C). After reaching the
standby temperature and holding it for 10 minutes, the device is ready for
firing processes.
The Rapid Cooling button is only visible then if the combustion chamber
temperature of 50°C is higher than the Standby temperature.
If Standby Mode is active when the furnace is turned off, Auto Standby is
activated after turning the equipment back on so that the unit automatically
goes into the last activated standby.

15
VITA vPad comfort · VITA vPad excellence
10.1.2 Deactivating Standby
Standby Mode is deactivated by pressing the Standby button again.
If Standby Mode is deactivated when the furnace is turned off, Auto Standby
also remains deactivated. Standby must be manually switched on after
turning the unit on again.
10.2 VITA Energy Efficiency Standby
To activate the special energy-saving mode (200°C), the VITA Energy Efficiency
button is selected.
By pressing the button again, the energy-saving mode is deactivated.
By pressing the Standby button the unit is switched over to normal
Standby Mode.
10.3 Status display
The status display shows the following operating modes:
• Green – device in standby operation
• Blue – program active
• Red – error
10.4 Prevention of condensation (VITA AntiCon)
If the device is switched on with the main switch and Standby is started,
the life moves into the upper position, but the firing chamber does not close
completely so that condensation can evaporate from the insulation.
After reaching the Standby temperature and holding for about 5 minutes, the
firing chamber is closed completely and the device is ready for operation.
With the Standby button the life moves out and the heat is switched
off.
The function is also available in the VITA Energy Efficiency Standby. This
function is only activated if the device has been switched off for at least 5
minutes using the main switch.

16
VITA vPad comfort · VITA vPad excellence
5 6 7 8 9 10
11 12 13 14
4
3
2
1
16
15
5 6 7 8 9 10
11 12 13 14 18
4
3
2
1
16
15
17
11 Operations and functions for
VITA vPad comfort / excellence
1. VITA Energy Efficiency Standby
2. Standby
3. Combustion chamber temperature
4. Time / Date
5. Device control
6. Materials / programs
7. Settings
8. User – individual material and program settings
9. Photoviewer
10. Help
11. automatic lift up
12. automatic lift down
13. manual lift up
14. manual lift down
15. Number of selected devices / user name / password protection status:
Password is activated – lock symbol is closed,
Password protection is not activated – lock symbol is open
16. Switch display off
17. Information field with remaining run time / user / temperature
18. Single device switched off in multiple furnace operation
Image 1 VITA vPad comfort /vPad excellence with 1 firing unit
Image 2 VITA vPad comfort /vPad excellence with 2 firing units
11.1 Lift buttons
Lift moves automatically down / up.
Lift moves down / up as long as the button is pressed.
1:Ready Doc
1:Ready Doc
Furnace 1 Furnace 2

17
VITA vPad comfort · VITA vPad excellence
11.3 Rapid cooling on standby
The Cooldown button is then only visible / active if the combustion chamber
temperature is 50°C higher than the Standby-temperature.
The lift remains in the lower position, the VITA vacuum pump is connected
after reaching the Standby temperature minus 50 °C, and the lift moves in and
the firing chamber is heated to the Standby temperature.
11.2 Program start with too high a temperature
If the combustion chamber temperature at the start of a firing program is
higher than the predrying temperature or the starting temperature of the
program, the program start options at too high a temperature are shown.
With a program start at too high a temperature, the following options can
be selected:
• Slow cooling off to starting temperature without connection to the
VITA vacuum pump
• Rapid cooling off to the starting temperature by connecting to the
VITA vacuum pump
• Quick Start program start at current combustion chamber temperature
When Quick Start is selected, the rise temperature (°C/min) is maintained
and the rise time adjusted. Likewise, the vacuum time is adjusted to the
temperature rise time in a program with vacuum. The adjusted values are
shown and must be confirmed with the OK button.
When operating several furnaces, each device can be switched off individually
in the unit control tab.
After pressing the Switch Off button, the lift moves in and the heating is
switched off.
The display can, after all furnaces are switched off on the display and
subsequently no longer displayed are switched off with the Display Off button.
The display is black.
11.4 Switching off
Cooling
Switch off

18
VITA vPad comfort · VITA vPad excellence
12 Select firing program
Programs can be selected with the Material tab or the User tab.
1:Ready
Switch off
Labor
Edit
Switch off
Oxidation firing
Opaque firing
EFFECT LINER firing
Glaze AP GLAZE
WASH OPAQ. Firing
OPAQUE Paste
First dentine firing
Glaze AP GLAZE LT
WASH OPAQ. Paste
MARGIN firing
Second dentine firing
Correction with COR
Edit Back
Switch off
VM 15
1st dentine firing
Back Save Stop Start
Night program
Process data
Image 1 Selecting the material
Image 2 Selecting the program
Image 3 Program status and course of the firing curve
1:Run Labor
1:Ready Labor
3. Start program with the Start button
The firing curve is colored red according to the program sequence.
The time elapsed is displayed in the individual buttons of the program phases.
The total program time is displayed in red (see clock symbol upper right).
When operating a furnace, the firing program is displayed during the entire
program sequence.
After the program sequence, it continues to be displayed until the program
sequence is manually quit.
2. Select program
Material
By pressing the Material tab, the saved materials are displayed. The programs
of the last selected profile are shown by default in the Material tab.
When activating the User tab, the stored user profiles are displayed, and after
selection of a user profile, the saved materials are displayed.
All firing programs can be opened with the VITA VACUMAT 6000 M /
VITA VACUMAT 6000 MP. The pressing programs can only be opened with the
VITA VACUMAT 6000 MP and the sintering programs only with the
VITA ZYRCOMAT 6000 MS.
Perform the following steps to select and start a firing program:
1. Select material
User

19
VITA vPad comfort · VITA vPad excellence
VM 15
1. Dentin
Press the Process data button, display shows:
Entry field for process data for quality assurance and traceability
The following data can be entered in the dialog field:
Activate entry field:
• Order number:
• Name of the respective client (dentist, patient) or operator
• Notes / comments on the firing object
Accept the input with OK button or keep the last entry with the Cancel button
and return to the firing program.
The following data is automatically saved:
• User profile
• Material name
• Firing program name
• Firing program data target and actual values
• Device type
• Device serial number
• Date and time of the firing process
This information is stored in the memory of the control unit.
The dates can be exported at a later time to a USB stick and then transferred
to the firing data administration program FDS (Firing Data System) on the PC
(see Section 21.4).
Image 4 Description of the process data
Switch off Back Save Stop Start
Night program
Process data
Labor
Cancel Ok
Job data
Job number
Name
Memo / N ote:
When operating several furnaces, the Device Control tab is displayed
again approximately 20 seconds after program start (see Section 10 Image 2).
Then the next free device can be selected and used for firing. The firing
program of a device that is currently running can be called up again at any time
using the Material tab.
At the end of the program, a signal tone sounds. See Section 21.2 for the
settings for these.
The running program can be cancelled at any time with the Stop button.
1:Ready
Information on additional function buttons
12.1 Process data
Process data

20
VITA vPad comfort · VITA vPad excellence
12.2 Night program
Night program
Back
Save
Pressing the button activates the night program, i.e., after a firing program
runs, the lift moves back in after the combustion chamber temperatures sinks
to 200 °C, and the display and heating are switched off.
To switch the device back on, the main switch must be switched off and then
on again.
The night program must be activated before starting a firing program.
12.4 Saving
12.3 Back button
The Back button is used to display the previously selected screen.
12.5 Program buttons
Saving program values – see Section 13.
Functions of the program buttons – see Section 13.1, section on
entering / changing program values.
The firing data administration program enables a display of the firing curve,
the archiving of all firing data and a later locating and printing out of individual
orders.
Note: Enter process data prior to the program start since,
otherwise, it is not saved.
Other manuals for vPad comfort
3
This manual suits for next models
1
Table of contents
Other vita Laboratory Equipment manuals