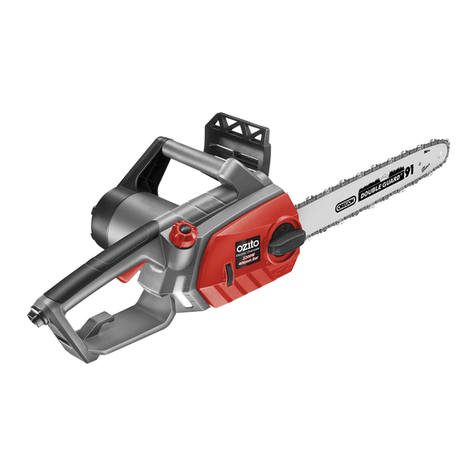
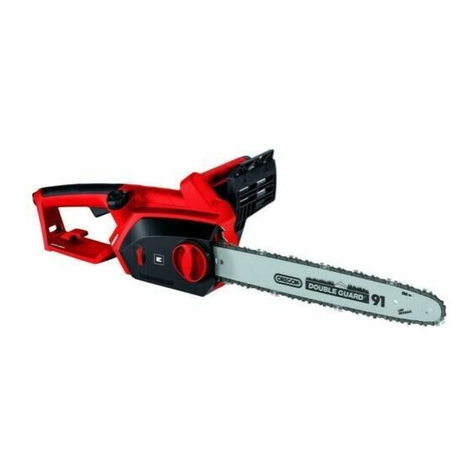
Ozito ECS-355 User manual

ELECTRIC
CHAINSAW
1800W
INSTRUCTION MANUAL
SPECIFICATIONS
Power: 1800W
Bar Length: 355mm (14”)
Chain Speed: 13.5m/s
Bar Type: Oregon
Chain Pitch: 9.53mm (3/8”)
Sharpening File: 5/32”
Oil Feed: Automatic
Oil Tank Capacity: 125ml
Chain Oil: Standard Chain Bar Oil
Weight: 4.5kg
ECS-355
WHAT’S IN THE BOX
Electric Chainsaw
Spanner/Chain
Tension Adjuster
Guide Bar Cover
ozito.com.au

1
ONLINE MANUAL
Scan this QR Code with your
mobile device to take you to
the online manual.
KNOW YOUR PRODUCT SETUP & PREPARATION
1 Rear handle
2 Cord retainer
3 On/off switch
4 Chainoilllercap
5 Front handle
6 Hand guard/chain brake
7 Chain
8 Guide bar
9 Oil level window
10Sidepanel
11 Bar securing nut
12Buckingspikes
13Barsecuringnutcover(tted)
14Spanner/chaintension
adjustor
1. CHAIN & BAR
ELECTRIC CHAINSAW
ACCESSORIES
1
910 11 12
13
2 3 4 6 7 8
14
5
IMPORTANT: IT IS VITAL FOR THE PROPER AND SAFE
OPERATION OF THE CHAINSAW THAT THE CHAIN IS
TENSIONED CORRECTLY.
Fitting a chain and bar
1. Remove the bar securing
nutcoverusingtheatend
of the tool.
2. Remove the bar securing nut
thenthesidepanel.
3. Fit the chain over the
guide bar making sure
that the cutters are facing
in the direction of rotation.
4. Place the guide bar and
chaininpositionensuring
the chain is around
sprocketwheel(B).
Note: If required adjust chain
tension screw to move the
tension lug back to allow the
bartot
B
Before assembling or disassembling a chain be sure to
disconnect the chainsaw from the power supply.
Always wear gloves when handling the chain as it is very sharp
and can cut you when it is not moving.

1
NOTE: ONLY USE OIL THAT IS EXPRESSLY LABELLED
“CHAIN BAR OIL”.
2. CHAIN BAR OIL
1.Removethechainbaroilcapandllthetank.ChainBarOilTank
Capacity:125ml
2.Retcapandclean
anyoilspillage.
3.Alwayslltheoiltankwhenthe
oil level is below the minimum
mark on the oil level window.
4.Tocheckthelubricatingsystem,switchonthechainsawandhold
itwiththeguidebarandchainabovesomelightcolouredpaper
suchasnewspaper.Asteadilyincreasingstaincausedbyoilspray
shows the lubricating system is working.
WARNING!: NEVER START WORK UNLESS THE
CHAIN AND BAR ARE LUBRICATED.
NOTE: THE CHAIN SHOULD BE ADJUSTED BEFORE
FIRST USE, AGAIN AFTER 2-3 MINUTES OPERATION
AND RECHECKED AND ADJUSTED IF NECESSARY
AFTER EACH FURTHER 30 MINUTES OF USE. TAKE
CARE NOT TO OVER TENSION THE CHAIN.
5. Adjust the chain
tensioningscrew(C)
untilthebolt(A)tsinto
the hole in the guide bar.
6.Fitthesidepanelbackontothe
chainsawandreplacethebar
securingnutngertightonly.
7.Adjustthetensiononthechainusingthechaintensionscrew(C).
The tension is correct when the
chain can be pulled 3mm away
from the guide bar when using
your nger and thumb.
Do not over-tighten as this will
reduce the life of the chain and
guide bar.
8.Tightenthebarsecuringnut. 9.Replacethebarsecuringnut
cover.
A
C
3mm gap is
the ideal tension
NOTE: CHAIN BAR OIL MAY LEAK IF THE TOOL IS
LEFT FOR LONG PERIODS. THIS IS NORMAL. IF THE
TOOL IS TO BE LEFT UNUSED FOR AN EXTENDED
TIME, DRAIN THE OIL FROM THE TOOL. REFILL
BEFORE USE.

1
3. CORD RETAINER 4. CHAIN BRAKE
OPERATION
1.Makealoopintheend
of the extension lead and
passtheloopthoughthe
hole in the handle and
hooktheloopoverthe
cord retainer.
3. Connect the extension
leadtothepowercord.
2. Pull the extension cord to
secureitinpositionover
the cord retainer.
Routethepowerandextensioncordawayfromtheworkareatoprevent
contact with the chainsaw.
Chain brake
Thechainbrakeoperatesautomaticallyintheeventofkickback.
Thechainsawisttedwithahandguard/chainbrakewhichwhen
operatedbringsthechaintoastopwithinatenthofasecond.
Thecordretainerisusedto“anchor”anextensioncordwhenitis
connectedtothepowerleadofthetool.Itpreventstheextension
cordfrombeingaccidentallydisconnectedfromthetoolpowercable
or shaken loose during use.
Thechainbrakecanbeoperatedmanuallybypushingitforwardor
automatically as a result of kickback.
Kick back occurs if the chain catches on the wood being cut and the
chainsawpushesbacksuddenly.
Intheeventofkickback,yourhand(whichisonthefronthandle
duringoperation)jerksforwardcausingthebackonyourhandtopush
theguardforward,engagingthechainbrakeandquicklystoppingthe
chain.
STOP RUN
BRAKE ON BRAKE OFF
Note:Alwaysuseanapprovedextensionleadsuitableforpowerinputof
this tool.

1
ECS-355
5. SWITCHING ON/OFF
6. CUTTING
1.Pressthebuckingspikes
against the timber ensuring
the chain is not making
contact with the material
being cut.
2. Start cutting by holding the
chainsaw by the front handle
and raising the rear handle.
3.Ifyoucannotcutthetimberinasinglestroke,applylightpressure
tothefronthandleandcontinuesawing,drawthechainsawback
alittlethenapplythebuckingspikesalittlelowerandnishthecut
by raising the rear handle.
4. Withdraw the chainsaw from the cut while the chain is still running.
Switching on
Switching off
1. Pull the hand guard/chain
braketowardsyou.The
brake may be stiff and
may require to be moved
with some force. If the
brake is engaged the
chainwillnotoperate.
1. Release the on/off switch.
Thechainquicklystopsbut
the motor will take a short
time to continue to run down.
2. Hold the front handle with your left hand and the rear handle
with your right hand.
3. Use the thumb of your right
handtopushthelock-offswitch
in and squeeze the on/off switch
to start the motor.
4.Thechainwillnowbe
running,readytomakea
cut.Releasethelock-off
switch.
Running in the chain
Priortooperation,anewchainshouldberuninfor2–3minutes
and then its tension should be checked and adjusted as
detailedin“MAINTENANCE”.
CAUTION: FIRST TIME USERS SHOULD, AS A
MINIMUM PRACTISE, CUT LOGS ON A SAW-HORSE
OR CRADLE
CAUTION: POSITION THE CORD SO THAT IT WILL
NOT BE CAUGHT IN BRANCHES DURING CUTTING
CAUTION!: AVOID CUTTING INTO THE GROUND AS
THIS WILL VERY QUICKLY DULL THE SAW CHAIN.

Bucking is cutting a log into lengths for easier handling.
Tosawaloglyingontheground,rstsawhalfway,then
rollthelogoverandcutfromtheoppositeside.
Tosawtheendofalogsupportedofftheground,rst
sawupfromthebottomone-thirdthroughthelogthen
nishbysawingdownfromthetop.Tosawaloginthe
middleoftwosupportsholdingitofftheground,rst
sawdownfromthetopone-thirdthroughthelogthen
nishbysawingupfromthebottom.
Limbingistheprocessofremovingthebranches
from a fallen tree. Check the direction in which a
branch will bend before cutting it. Always cut on the
oppositesidetothebendingdirectionsothatthe
guidebarisnotpinchedinthecut.Forlargelimbs
thatcannotberemovedinonecut,makeaninitial
cutfromthebentsideandnishbysawingfromtheoppositedirection.Donot
removelimbsthataresupportingthefallentreeonthegrounduntilthetreehas
been cut into lengths.
Adjusting the chain tension
Maintaining the guide bar
Pruning is the removal of a limb or branch from a
standing tree.
Felling a tree
Decidethedirectioninwhichyouwishthe
tree to fall taking into account the direction
ofthewind,thepositionofbranches,lean
ofthetree,easeofsubsequentlimbingand
buckingandotherfactorsprevalentatthe
time.
1. Remove the bar securing nut cover
usingtheatendofthespanner/
chain tension adjustor.
1. Remove any sawdust from the groove in the
guidebar,includingthegroove.
Oil and sawdust combine and emit a burning
smellduringoperationifthebladeisnot
regularly cleaned.
2.Makesurethattheoilportisnotclogged.
Greasethenosesprocketatthetipoftheguide
bar.
3.Checkforoilleakageandloosefastenings,
especiallythosesecuringthehandlesandthe
guide bar.
4.Cleaningaroundsprocketandchain,oilfeed
holes.
5. Clean any dust away from the cooling vents
as clogged vents can cause overheating. By
maintaining a clean unit you will extend the
useful life of the chain and the tool in general.
2.Usingthespanner,loosenthebar
securingnutsothatitisngertight
only.
3.Adjustthetensiononthechainusingthechaintensionscrew(C).
Thetensioniscorrectwhenthechaincanbepulled3mmawayfromtheguide
barwhenusingyourngerandthumb.Donotover-tightenasthiswillreduce
the life of the chain and guide bar.
4.Tightenthebarsecuringnut. 5.Replacethebarsecuringnut
cover.
WARNING!: FELLING A TREE SHOULD ONLY BE
DONE BY TRAINED OPERATORS.
1
2
Limbing
WARNING!: ALWAYS KEEP A BALANCED
STANCE. DO NOT STAND ON THE LOG. BE
ALERT TO THE FACT THAT THE LOG MAY ROLL OVER.
WHEN WORKING ON A SLOPE, ALWAYS STAND ON
THE UP HILL SIDE OF THE LOG.
1
21
2
Bucking
CAUTION!: AVOID CUTTING INTO THE GROUND AS
THIS WILL VERY QUICKLY DULL THE SAW CHAIN.
Pruning
WARNING!: DO NOT USE AN UNSTABLE
FOOTHOLD OR LADDER. DO NOT OVERREACH.
DO NOT SAW ABOVE SHOULDER HEIGHT. ALWAYS
USE BOTH HANDS TO HOLD THE SAW. FIRST CUT UP
FROM THE BOTTOM AND FINISH DOWN FROM THE
T O P.
1
2
APPLICATIONS MAINTENANCE
NOTE: BEFORE CLEANING YOUR CHAINSAW OR
CARRYING OUT ANY MAINTENANCE PROCEDURE,
MAKE SURE THAT THE MOTOR IS OFF AND THE
TOOL DISCONNECTED FROM THE POWER SUPPLY TO
PREVENT ACCIDENTAL STARTING.
NOTE: THE CHAIN HAS SHARP EDGES. FOR YOUR
SAFETY PLEASE USE WORK GLOVES.
3mm gap is
the ideal tension
C

HINTS & TIPS
• Donotforcethesawintothecut.Applyonlylightpressurewhilstrunningthe
motoratfullspeed.
• Ifthesawchaingetscaughtinthecut,donottrytoremoveitbytwistingthe
guideorpullingforcibly.Usealeverorwedgetoopenupthecutsothatthe
saw chain is freed.
• Whilecutting,always:
– Runthechainsawmotoratfullspeed.Thismakesthejobsafer,asthere
islesschanceofpull-inorkick-back.
– Positionyourbodytotheleftofthechainsawsoifitkicksback
uncontrollably,itgoesoveryourrightshoulder,neverstandinthecutting
line of the saw.
– Keeparmgripwithyourlefthandonthefronthandle,withyourthumb
securely below the handle.
• Theswivelofyourwristinakick-backsituationwillactivatethechainbrake.
• Makesurethechainistensionedcorrectly.
Chain Sharpening
Chain File:3.96mm(5/32”)
Chain Pitch:9.53mm(3/8”)
Chain Gauge:1.3mm(0.050”)
Sharpenthechainregularlytomaintainoptimum
performanceofthesaw.Signsofadullchainare:
• Thesawdustbecomespowder-like
• Extra force is required to execute a cut
• Thecutdoesnottrackinastraightline
• Increased vibration
Sharpeneachcutterusingachainle.Alwaysuseoutwardstrokesand
maintaina30°anglebetweenthechainandle.Aftersharpening,thecutters
must all have the same width and length.
Afterevery3–4usesgetanauthorisedrepaircentretoprofessionallysharpen
yourchain.Theyhavethespecialtoolsnecessarytoensurethecorrectcutting
anglesanddepths.
Guide bar wear
Reverse the guide bar every 8 working hours to ensure uniform wear. Check
theguiderailsfrequentlyandifnecessaryremoveburrsandsquareuptherails
usingaatle.
Note: Thechainsawwarrantydoesnotcovercomponentsthathavebeen
subjectedtooperatorabuseornegligence.Toreceivefullvaluefromthe
warranty,theoperatormustmaintainthechainsawasinstructedinthismanual.
Ozito Industries will not be responsible for any damage or injuries
caused by repair of the tool by an unauthorised person or mishandling
or mistreatment of the tool. This tool is designed for Domestic Home Use
only. Use in commercial or industrial environments will void the warranty.
CARING FOR THE ENVIRONMENT
Toolsthatarenolongerusableshouldnotbedisposedofwith
household waste but in an environmentally friendly way. Please
recycle where facilities exist. Check with your local council
authority for recycling advice.
Recyclingpackagingreducestheneedforlandllandraw
materials.Reuseofrecycledmaterialdecreasespollutioninthe
environment.Pleaserecyclepackagingwherefacilitiesexist.
Check with your local council authority for recycling advice.
Chain SPECS355-62
GuideBar SPECS355-61
BarSecuringNut SPECS355-64
BarSecuringNutCover SPECS355-65
CarbonBrush(Pair) SPECS355-14
Spare parts can be ordered from the Special Orders Desk
at your local Bunnings Warehouse.
For further information, or any parts not listed here, visit
www.ozito.com.au or contact Ozito customer service
Australia 1800 069 486
New Zealand 0508 069 486
E-mail: [email protected]
SPARE PARTS
DESCRIPTION OF SYMBOLS
Read instructions
Wear safety glasses
Beware of kickback
Regulator compliance mark
VVolts Hz Hertz
~Alternating current WWatts
/min Revolutions or
reciprocation per minute
Double insulated
no No load speed
Warning
øDiameter
Do not expose to rain
Wear muffs
Always hold the saw with
both hands
Disconnect and discontinue use should the power cord be damaged
outward
stroke
30°
WARNING!: WEAR HEAVY GLOVES WHEN
HANDLING THE CHAIN. HOLD THE GUIDE BAR
SECURELY IN A VICE.

SPARE PARTS Tool: 1800W Electric Chainsaw
Model No. ECS-355
Item
No. Description Part No.
How To Order
14
14
53-3
58
61
62
64
67
CarbonBrush(Pair)
OilCapAssembly
TensionScreww/Nut#53-3,53-4
SprocketKit#57-60
GuideBar355mm14”Oregon
Chain9.53mm3/8”
HexNutw/Cover#64-65
Guide Bar Cover
SPECS355-14
SPECS355-44
SPECS355-5303K
SPECS355-58K
SPECS355-61
SPECS355-62
SPECS355-64A
SPECS355-67
AvailablesparepartscanbeorderedthroughtheSpecialOrdersDeskatanyBunningsWarehouse.Ifyouhaveany
furtherquestions,pleasecontactOzitoCustomerServiceon:
Australia: 1800 069 486
New Zealand: 0508 069 486
ThefollowingisalistofsparepartscarriedbyOzito.
PleasecontactCustomerServiceforanypartsnot
listed.
1
2
3
4
10-1
10
9
19
52
51
50
49
48
47
45-1
45-2
45-3
45-4
45
45-5
45-6
45-7
46
20
21
22
23
24
25
53-1
53-2
53-3
53
54
55
56
61
62
63-1
63
63-3
63-2
64
65
66
67
53-4
53-5
53-6
53-7
53-8
8
7
6
5
26
41
57
58
59
60
42-1
42-2
42-3
42
42-4
42-5
42-6
43
44
44-1
44-2
44-3
27
28
29
30
31
32
33
34
35
36
37
38
39
40
10-2
10-3
11
12
13-1
13-2
13-3
13-4
13-5
13-7
13-8
13-9
17
14
15
16
13
18
1-4
1-3
1-2
1-1
13-6
Item
No. Description Part No.

ADDITIONAL SAFETY INSTRUCTIONS FOR CHAINSAWS
• Keep all parts of the body away from the saw chain when the chain saw is
operating. Before you start the chain saw, make sure the saw chain is not
contacting anything.Amomentofinattentionwhileoperatingchainsawsmay
cause entanglement of your clothing or body with the saw chain.
• Always hold the chain saw with your right hand on the rear handle and
you left hand on the front handle. Hold the chain saw with a reversed hand
congurationincreasestheriskofpersonalinjuryandshouldneverbedone.
• Hold the power tool by insulated gripping surfaces only, because the chain
may contact hidden wiring or its own cord.Sawchainscontactinga“live”wire
maymakeexposedmetalpartsofthepowertool“live”andcouldgivetheoperator
an electric shock.
• Wear safety glasses and hearing protection. Further protective equipment for
head, hands, legs and feet is recommended.Adequateprotectiveclothingwill
reducepersonalinjurybyyingdebrisoraccidentalcontactwiththesawchain.
• Do not operate a chain saw in a tree.Operationofachainsawwhileupinatree
mayresultinpersonalinjury
• Always keep proper footing and operate the chain saw only when standing
on xed, secure and level surface.Slipperyorunstablesurfacessuchasladders
may cause a loss of balance or control of the chain saw.
• When cutting a limb that is under tension be alert for spring back. When
thetensioninthewoodbresisreleasedthespringloadedlimbmaystrikethe
operatorand/orthrowthechainsawoutofcontrol.
• Use extreme caution when cutting brush and saplings.Theslendermaterial
maycatchthesawchainandbewhippedtowardsyouorpillyouoffbalance.
• Carry the chain saw by the front handle with the chain saw switched off and
away from your body. When transporting or storing the chain saw always t
the guide bar cover.Properhandlingofthechainsawwillreducethelikelihoodof
accidental contact with the moving saw chain.
• Follow instructions for lubricating, chain tensioning and changing
accessories. Improperlytensionedorlubricatedchainmayeitherbreakor
increase the chance for kickback
• Keep handles dry, clean, and free from oil and grease.Greasy,oilyhandlesare
slipperycausinglossofcontrol.
• Cut wood only. Do not use chain saw for purposes not intended. For
example: do not use chain saw for cutting plastic, masonry or non-wood
building materials.Useofthechainsawforoperationsdifferentthanintended
could result in a hazardous situation.
Causes and operator prevention of kickback
Kickbackmayoccurwhenthenoseortipoftheguidebartouchesanobject,orwhen
thewoodclosesinandpinchesthesawchaininthecut.
Tipcontactinsomecasesmaycauseasuddenreversereaction,kickingtheguidebar
upandbacktowardstheoperator.
Pinchingthesawchainalongthetopoftheguidebarmaypushtheguidebarrapidly
backtowardstheoperator.
Either of these reactions may cause you to lose control of the saw which could result in
seriouspersonalinjury.Donotrelyexclusivelyuponthesafetydevicesbuiltintoyour
saw.Asachainsawuser,youshouldtakeseveralstepstokeepyourcuttingjobsfree
from accident or injury.
Kickbackistheresultoftoolmisuseand/orincorrectoperatingproceduresor
conditionsandcanbeavoidedbytakingproperprecautionsasgivenbelow:
• Maintain a rm grip, with thumbs and ngers encircling the chain saw
handles, with both hands on the saw and position your body and arm to
allow you to resist kickback forces. Kickback forces can be controlled by the
operator,ifproperprecautionsaretaken.Donotletgoofthechainsaw.
• Do not overreach and do not cut above shoulder height.Thishelpsprevent
unintendedtipcontactandenablesbettercontrolofthechainsawinunexpected
situations.
• Only use replacement bars and chains specied by the manufacturer.
Incorrectreplacementbarsandchainsmaycausechainbreakageand/orkickback.
• Follow the manufacturer’s sharpening and maintenance instructions for the
saw chain.Decreasingthedepthgaugeheightcanleadtoincreasedkickback.
Thisapplianceisnotintendedforusebypersons(includingchildren)withreduced
physical,sensoryormentalcapabilities,orlackofexperienceandknowledge,unless
theyhavebeengivensupervisionorinstructionconcerninguseoftheappliancebya
personresponsiblefortheirsafety.
Recommendations for the use of a residual current device with a rated
residual current of 30mA or less.
WARNING! When using mains-powered tools, basic safety precautions, including
the following, should always be followed to reduce risk of re, electric shock,
personal injury and material damage.
Read the whole manual carefully and make sure you know how to switch the tool off in an
emergency,beforeoperatingthetool.
Savetheseinstructionsandotherdocumentssuppliedwiththistoolforfuturereference.
Theelectricmotorhasbeendesignedfor230Vand240Vonly.Alwayscheckthatthepowersupply
correspondstothevoltageontheratingplate.
Note:Thesupplyof230Vand240VonOzitotoolsareinterchangeableforAustraliaandNew
Zealand.
ThistoolisdoubleinsulatedinaccordancewithAS/NZS60745-1;
therefore no earth wire is required.
Ifthesupplycordisdamaged,itmustbereplacedbyanelectricianorapowertoolrepairerinorder
to avoid a hazard.
Note:Doubleinsulationdoesnottaketheplaceofnormalsafetyprecautionswhenoperatingthis
tool.Theinsulationsystemisforaddedprotectionagainstinjuryresultingfromapossibleelectrical
insulation failure within the tool.
Using an Extension Lead
Alwaysuseanapprovedextensionleadsuitableforthepowerinputofthistool.Beforeuse,inspect
theextensionleadforsignsofdamage,wearandageing.Replacetheextensionleadifdamaged
or defective.
Whenusinganextensionleadonareel,alwaysunwindtheleadcompletely.Useofanextension
leadnotsuitableforthepowerinputofthetoolorwhichisdamagedordefectivemayresultinarisk
ofreandelectricshock.
WARNING! Read all safety warnings and all instructions. Failure to follow the
warningsandinstructionsmayresultinelectricshock,reand/orseriousinjury.
Save all warnings and instructions for future reference.
Theterm“powertool”inthewarningsreferstoyourmains-operated(corded)powertoolorbattery-
operated(cordless)powertool.
1. Work area safety
a. Keep work area clean and well lit. Cluttered or dark areas invite accidents.
b. Do not operate power tools in explosive atmospheres, such as in the presence of
ammable liquids, gases or dust.Powertoolscreatesparks
which may ignite the dust or fumes.
c. Keep children and bystanders away while operating a power tool.Distractionscancause
you to lose control.
2. Electrical safety
a. Power tool plugs must match the outlet. Never modify the plug in any way.
Do not use any adapter plugs with earthed (grounded) power tools.Unmodiedplugsand
matching outlets will reduce risk of electric shock.
b. Avoid body contact with earthed or grounded surfaces, such as pipes, radiators, ranges
and refrigerators. Thereisanincreasedriskofelectricshock
if your body is earthed or grounded.
c. Do not expose power tools to rain or wet conditions.Waterenteringapowertoolwill
increase the risk of electric shock.
d. Do not abuse the cord. Never use the cord for carrying, pulling or unplugging the power
tool. Keep cord away from heat, oil, sharp edges or moving parts.Damagedorentangled
cords increase the risk of electric shock.
e. When operating a power tool outdoors, use an extension cord suitable
for outdoor use. Use of a cord suitable for outdoor use reduces the risk of electric shock.
f. If operating a power tool in a damp location is unavoidable, use a residual current device
(RCD) protected supply.UseofanRCDreducestheriskofelectricshock.
3. Personal safety
a. Stay alert, watch what you are doing and use common sense when operating a power
tool. Do not use a power tool while you are tired or under the inuence of drugs, alcohol
or medication.Amomentofinattentionwhileoperatingpowertoolsmayresultinserious
personalinjury.
b. Use personal protective equipment. Always wear eye protection.Protectiveequipment
suchasdustmask,non-skidsafetyshoes,hardhat,orhearingprotectionusedforappropriate
conditionswillreducepersonalinjuries.
c. Prevent unintentional starting. Ensure the switch is in the off-position before connecting
to power source and/or battery pack, picking up or carrying the tool. Carryingpowertools
withyourngerontheswitchorenergisingpowertoolsthathavetheswitchoninvitesaccidents.
d. Remove any adjusting key or wrench before turning the power tool on.
Awrenchorakeyleftattachedtoarotatingpartofthepowertoolmayresult
inpersonalinjury.
e. Do not overreach. Keep proper footing and balance at all times.Thisenablesbettercontrol
ofthepowertoolinunexpectedsituations.
f. Dress properly. Do not wear loose clothing or jewellery. Keep your hair, clothing and
gloves away from moving parts.Looseclothes,jewelleryorlonghaircanbecaughtinmoving
parts.
g. If devices are provided for the connection of dust extraction and collection facilities,
ensure these are connected and properly used.Useofdustcollectioncanreducedust-
related hazards.
4. Power tool use and care
a. Do not force the power tool. Use the correct power tool for your application. Thecorrect
powertoolwilldothejobbetterandsaferattherateforwhichitwasdesigned.
b. Do not use the power tool if the switch does not turn it on and off.Anypowertoolthat
cannotbecontrolledwiththeswitchisdangerousandmustberepaired.
c. Disconnect the plug from the power source and/or the battery pack from the power tool
before making any adjustments, changing accessories, or storing power tools. Such
preventivesafetymeasuresreducetheriskofstartingthepowertoolaccidentally.
d. Store idle power tools out of the reach of children and do not allow persons unfamiliar
with the power tool or these instructions to operate the power tool. Power tools are
dangerous in the hands of untrained users.
e. Maintain power tools. Check for misalignment or binding of moving parts, breakage of
parts and any other condition that may affect the power tool’s operation. If damaged, have
the power tool repaired before use.Manyaccidentsarecausedbypoorlymaintainedpower
tools.
f. Keep cutting tools sharp and clean.Properlymaintainedcuttingtoolswithsharpcuttingedges
are less likely to bind and are easier to control.
g. Use the power tool, accessories and tool bits etc. in accordance with these instructions,
taking into account the working conditions and the work to be performed. Useofthepower
toolforoperationsdifferentfromthoseintendedcouldresultinahazardoussituation.
5. Service
a. Have your power tool serviced by a qualied repair person using only identical
replacement parts. Thiswillensurethatthesafetyofthepowertool
is maintained.
b. If the supply cord is damaged, it must be replaced by the manufacturer,
itsserviceagentorsimilarlyqualiedpersonsinordertoavoidahazard.
GENERAL POWER TOOL SAFETY WARNINGS
ELECTRICAL SAFETY

INORDERTOMAKEACLAIMUNDERTHIS
WARRANTYYOUMUSTRETURNTHEPRODUCT
TOYOURNEARESTBUNNINGSWAREHOUSEWITH
YOURBUNNINGSREGISTERRECEIPT.PRIORTO
RETURNINGYOURPRODUCTFORWARRANTY

PLEASETELEPHONEOURCUSTOMERSERVICE
HELPLINE:
Australia 1800 069 486
New Zealand 0508 069 486
2 YEAR REPLACEMENT WARRANTY
Your product is guaranteed for a period of 24 months from
the original date of purchase. If a product is defective it will
be replaced in accordance with the terms of this warranty.
Warranty excludes consumable parts, for example:
guide bar, chain and included accessories.
WARNING
The following actions will result in the warranty being void.
• Professional, Industrial or high frequency use.
• If the tool shows signs of damage or defects caused
by or resulting from abuse, accidents or alterations.
• Failure to perform maintenance as set out within the
instruction manual.
• If the tool is disassembled or tampered with in any way.
WARRANTY
TOENSUREASPEEDYRESPONSEPLEASE
HAVETHEMODELNUMBERANDDATEOF
PURCHASEAVAILABLE.ACUSTOMERSERVICE
REPRESENTATIVEWILLTAKEYOURCALL
ANDANSWERANYQUESTIONSYOUMAY
HAVERELATINGTOTHEWARRANTYPOLICY
ORPROCEDURE.
OZITO Australia/NewZealand(HeadOfce) 1-23 Letcon Drive, Bangholme, Victoria, Australia 3175.
Thebenetsprovidedunderthiswarrantyareinaddition
to other rights and remedies which are available to you at law.
Our goods come with guarantees that cannot be excluded
at law. You are entitled to a replacement or refund for a major
failure and for compensation for any other reasonably foreseeable
loss or damage. You are also entitled to have the goods repaired
or replaced if the goods fail to be of acceptable quality and the
failure does not amount to a major failure.
Generally you will be responsible for all costs associated with
a claim under this warranty, however, where you have suffered
any additional direct loss as a result of a defective product you
may be able to claim such expenses by contacting our customer
service helpline above.
0713
Table of contents
Other Ozito Chainsaw manuals

Ozito
Ozito OCS-018 User manual

Ozito
Ozito CSE-355 User manual

Ozito
Ozito ECS-2040U Operation instructions

Ozito
Ozito ECS-406A User manual

Ozito
Ozito PCS-254 User manual

Ozito
Ozito PXCCSK-418 User manual

Ozito
Ozito PXCCSS-018U User manual

Ozito
Ozito ECS-1835 User manual

Ozito
Ozito Power X Change PXCCSS-0182 User manual

Ozito
Ozito ECS-1935 User manual

Ozito
Ozito OZPCS305A User manual

Ozito
Ozito 25.4cc-305mm Bar User manual

Ozito
Ozito CSL-036 User manual

Ozito
Ozito PXCCSS-018 User manual

Ozito
Ozito PXCCSS-0182U User manual

Ozito
Ozito PCS-406A User manual

Ozito
Ozito PCS-305A User manual

Ozito
Ozito PXCCSS-018 User manual

Ozito
Ozito PCS-406 User manual

Ozito
Ozito OZPCS305A User manual