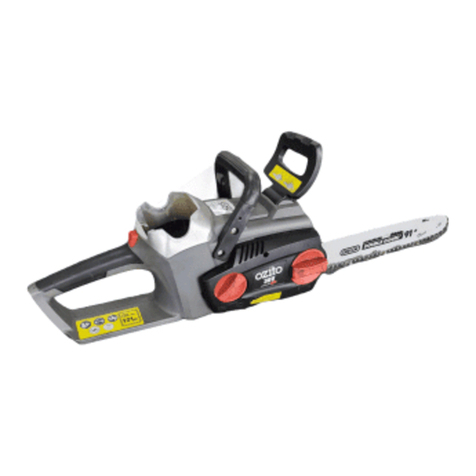
Ozito PXCCSS-0182U User manual

PXCCSS-0182U
Art.-Nr.: 45.017.82 I.-Nr.: 11019
7
GB Original operating instructions
Cordless Chainsaw
Anl_PXCCSS_0182U_SPK7.indb 1Anl_PXCCSS_0182U_SPK7.indb 1 27.11.2019 14:48:0227.11.2019 14:48:02

- 2 -
1
2
4
3
3
14 10
2
98
11
5
7
1
15
17
16
19
16 15
6
Anl_PXCCSS_0182U_SPK7.indb 2Anl_PXCCSS_0182U_SPK7.indb 2 27.11.2019 14:48:0327.11.2019 14:48:03

- 3 -
4 5
6b
6c
6a A
7
8
B
15B 16
9
16
15
9
Anl_PXCCSS_0182U_SPK7.indb 3Anl_PXCCSS_0182U_SPK7.indb 3 27.11.2019 14:48:0427.11.2019 14:48:04

- 4 -
9
10 11
12 13
8
13
A
12
18
12
10
B
min.
Anl_PXCCSS_0182U_SPK7.indb 4Anl_PXCCSS_0182U_SPK7.indb 4 27.11.2019 14:48:0727.11.2019 14:48:07

- 5 -
14 15
B
A
16 17
18 19
AA
C
C
B
D
A
C
1
23
B
B
A
A
Anl_PXCCSS_0182U_SPK7.indb 5Anl_PXCCSS_0182U_SPK7.indb 5 27.11.2019 14:48:1027.11.2019 14:48:10

- 6 -
20 21
22 23
24 25
B
A
B
A
Anl_PXCCSS_0182U_SPK7.indb 6Anl_PXCCSS_0182U_SPK7.indb 6 27.11.2019 14:48:1127.11.2019 14:48:11

- 7 -
123
56
4
26 27
28
A
15 19
7
Anl_PXCCSS_0182U_SPK7.indb 7Anl_PXCCSS_0182U_SPK7.indb 7 27.11.2019 14:48:1227.11.2019 14:48:12

GB
- 8 -
Table of contents
1. Safety regulations
2. Layout and items supplied
3. Proper use
4. Technical data
5. Before starting the equipment
6. Operation
7. Working with the chainsaw
8. Cleaning, maintenance and ordering of spare parts
9. Notes on environmental protection / disposal
10. Storage
11. Troubleshooting
12. Charger indicator
13. Permissible cutter sets
Anl_PXCCSS_0182U_SPK7.indb 8Anl_PXCCSS_0182U_SPK7.indb 8 27.11.2019 14:48:1327.11.2019 14:48:13

GB
- 9 -
Danger!
When using the equipment, a few safety pre-
cautions must be observed to avoid injuries and
damage. Please read the complete operating
instructions and safety regulations with due care.
Keep this manual in a safe place, so that the in-
formation is available at all times. If you give the
equipment to any other person, hand over these
operating instructions and safety regulations as
well.We cannot accept any liability for damage
or accidents which arise due to a failure to follow
these instructions and the safety instructions.
1. Safety regulations
Warning!
Read all safety warnings and all instructions.
Failure to follow the warnings and instructions
may result in electric shock, fire and/or serious
injury.
Save all warnings and instructions for future
reference.
The term “power tool” in the warnings refers to
your mains-operated (corded) power tool or
battery-operated (cordless) power tool.
1) Work area safety
a) Keep work area clean and well lit. Clutte-
red or dark areas invite accidents.
b) Do not operate power tools in explosive
atmospheres, such as in the presence
of flammable liquids, gases or dust. Po-
wer tools create sparks which may ignite the
dust or fumes.
c) Keep children and bystanders away while
operating a power tool. Distractions can
cause you to lose control.
2) Electrical safety
a) Power tool plugs must match the outlet.
Never modify the plug in any way. Do
not use any adapter plugs with earthed
(grounded) power tools. Unmodified plugs
and matching outlets will reduce risk of elec-
tric shock.
b) Avoid body contact with earthed or
grounded surfaces, such as pipes, radia-
tors, ranges and refrigerators. There is an
increased risk of electric shock if your body is
earthed or grounded.
c) Do not expose power tools to rain or wet
conditions. Water entering a power tool will
increase the risk of electric shock.
d) Do not abuse the cord. Never use the
cord for carrying, pulling or unplugging
the power tool. Keep cord away from
heat, oil, sharp edges or moving parts.
Damaged or entangled cord increase the risk
of electric shock.
e) When operating a power tool outdoors,
use an extension cord suitable for out-
door use. Use of a cord suitable for outdoor
use reduce the risk of electric shock.
f) If operating a power tool in a damp loca-
tion is unavoidable, use a residual cur-
rent device (RCD) protected supply. Use
of an RCD reduces the risk of electric shock.
3) Personal safety
a) Stay alert, watch what you are doing and
use common sense when operating a
power tool. Do not use a power tool while
you are tired or under the influence of
drugs, alcohol or medication. A moment of
inattention while operating power tools may
result in serious personal injury.
b) Use personal protective equipment.
Always wear eye protection. Protective
equipment such as dust mask, non-skid safe-
ty shoes, hard hat, or hearing protection used
for appropriate conditions will reduce perso-
nal injuries.
c) Prevent unintentional starting. Ensure
the switch is in the off-position before
connecting to power source and/or bat-
tery pack, picking up or carrying the tool.
Carrying power tools with your finger on the
switch or energising power tools that have the
switch on invites accidents.
d) Remove any adjusting key or wrench be-
fore turning the power tool on. A wrench
or a key left attached to a rotating part of the
power tool may result in personal injury.
e) Do not overreach. Keep proper footing
and balance at all times. This enables
better control of the power tool in unexpected
situations.
f) Dress properly. Do not war loose clothing
or jewellery. Keep your hair, clothing and
gloves away from moving parts. Loose
clothes, jewellery or long hair can be caught
in moving parts.
g) If devices are provided for the connection
of dust extraction and collection facilities,
ensure these are connected and properly
used. Use of dust collection can reduce dust-
related hazards.
Anl_PXCCSS_0182U_SPK7.indb 9Anl_PXCCSS_0182U_SPK7.indb 9 27.11.2019 14:48:1327.11.2019 14:48:13

GB
- 10 -
4) Power tool use and care
a) Do not force the power tool. Use the cor-
rect power tool for your application. The
correct power tool will do the job better and
safer at the rate for which it was designed.
b) Do not use the power tool it the switch
does not turn it on and off. Any power tool
that cannot be controlled with the switch is
dangerous and must be repaired.
c) Disconnect the plug from the power sour-
ce and/or the battery pack from the pow-
er tool before making any adjustments,
changing accessories, or storing power
tools. Such preventive safety measures redu-
ce the risk of starting the power tool acciden-
tally.
d) Store idle power tools out of the reach of
children and do not allow persons unfa-
miliar with the power tool or these inst-
ructions to operate the power tool. Power
tools are dangerous in the hands of untrained
users.
e) Maintain power tools. Check for misalign-
ment or binding of moving parts, breaka-
ge of parts and any other conditions that
may affect the power tool’s operation. If
damaged, have the power tool repaired
before use. Many accidents are caused by
poorly maintained power tools.
f) Keep cutting tools sharp and clean.
Properly maintained cutting tools with sharp
cutting edges are less likely to bind and are
easier to control.
g) Use the power tool, accessories and tool
bits etc. in accordance with these inst-
ructions, taking into account the working
conditions and the work to be performed.
Use of the power tool for operations different
from those intended could result in a hazar-
dous situation.
5) Battery tool use and care
a) Recharge only with the charger specified
by the manufacturer. A charger that is sui-
table for one type of battery pack may create
a risk of fire when used with another battery
pack.
b) Use power tools only with specifically
designated battery packs. Use of any other
battery packs may create a risk of injury and
fire.
c) When battery pack is not in use, keep it
away from other metal objects, like paper
clips, coins, keys, nails, screws or other
small metal objects, that can make a
connection from one terminal to another.
Shorting the battery terminals together may
cause burns of a fire.
d) Under abusive conditions, liquid may be
ejected from the battery; avoid contact.
If contact accidentally occurs, flush with
water. If liquid contacts eyes, additionally
seek medical help. Liquid ejected from the
battery may cause irritation or burns.
6) Service
a) Have your power tool serviced by a qua-
lified repair person using only identical
replacement parts. This will ensure that the
safety of the power tool is maintained.
Additional safety instructions
We pay a great deal of attention to the design of
every battery pack to ensure that we supply you
with batteries which feature maximum power den-
sity, durability and safety. The battery cells have
a wide range of safety devices. Each individual
cell is initially formatted and its electrical charac-
teristic curves are recorded.These data are then
used exclusively to be able to assemble the best
possible battery packs. Despite all the safety
precautions, caution must always be exer-
cised when handling batteries. The following
points must be obeyed at all times to ensure
safe use.
Safe use can only be guaranteed if undama-
ged cells are used. Incorrect handling can
cause cell damage.
Important: Analyses confirm that incorrect use
and poor care are the main causes of the damage
caused by high performance batteries.
Information about the battery
1. The battery pack supplied with your cordless
tool is not charged.The battery pack has to
be charged before you use the tool for the first
time.
2. For optimum battery performance avoid low
discharge cycles. Charge the battery pack
frequently.
3. Store the battery pack in a cool place, ideally
at 15°C and charged to at least 40%.
4. Lithium-ion batteries are subject to a natural
ageing process.The battery pack must be
replaced at the latest when its capacity falls to
just 80% of its capacity when new.Weakened
cells in an aged battery pack are no longer
capable of meeting the high power require-
ments and therefore pose a safety risk.
Anl_PXCCSS_0182U_SPK7.indb 10Anl_PXCCSS_0182U_SPK7.indb 10 27.11.2019 14:48:1327.11.2019 14:48:13


GB
- 11 -
5. Do not throw battery packs into an open fire.
There is a risk of explosion!
6. Do not ignite the battery pack or expose it to
fire.
7. Do not exhaustively discharge batteries.
Exhaustive discharge will damage the battery
cells.The most common cause of exhaustive
discharge is lengthy storage or non-use of
partly discharged batteries. Stop working as
soon as the performance of the battery falls
noticeably or the electronic protection system
triggers. Place the battery pack in storage
only after it has been fully charged.
8. Protect batteries and the tool from over-
loads. Overloads will quickly result in over-
heating and cell damage inside the battery
housing without this overheating actually
being apparent externally.
9. Avoid damage and shocks. Replace batte-
ries which have been dropped from a height
of more than one meter or which have been
exposed to violent shocks without delay, even
if the housing of the battery pack appears to
be undamaged.The battery cells inside the
battery may have suffered serious damage.
In this respect, please also read the waste
disposal information.
10. If the battery pack suffers overloading and
overheating, the integrated protective cut-off
will switch offthe equipment for safety rea-
sons. Important. Do not press the ON/OFF
switch any more if the protective cut-offhas
actuated.This may damage the battery pack.
11. Use only original battery packs.The use of
other batteries may result in injuries, explosi-
on and a fire risk.
Information on chargers and the charging
process
1. Please check the data marked on the rating
plate of the battery charger. Be sure to con-
nect the battery charger to a power supply
with the voltage marked on the rating plate.
Never connect it to a different mains voltage.
2. Protect the battery charger and its cable from
damage and sharp edges. Have damaged
cables repaired without delay by a qualified
electrician.
3. Keep the battery charger, batteries and the
cordless tool out of children’s reach.
4. Do not use damaged battery chargers.
5. Do not use the supplied battery charger to
charge other cordless tools.
6. In heavy use the battery pack will become
warm. Allow the battery pack to cool to room
temperature before commencing with the
charging.
7. Do not over-charge batteries. Do not ex-
ceed the maximum charging times.These
charging times only apply to discharged
batteries. Frequent insertion of a charged
or partly charged battery pack will result in
over-charging and cell damage. Do not leave
batteries in the charger for days on end.
8. Never use or charge batteries if you sus-
pect that the last time they were charged
was more than 12 months previously. The-
re is a high probability that the battery pack
has already suffered dangerous damage
(exhaustive discharge).
9. Charging batteries at a temperature below
10°C will cause chemical damage to the cell
and may cause a fire.
10. Do not use batteries which have heated du-
ring the charging process, as the battery cells
may have suffered dangerous damage.
11. Do not use batteries which have suffered
curvature or deformation during the charging
process or which show other non-typical sym-
ptoms (gassing, hissing, cracking,…)
12. Never fully discharge the battery pack (re-
commended depth of discharge max. 80%)
A complete discharge of the battery pack will
lead to premature ageing of the battery cells.
13. Never charge the batteries unsupervised.
Protection from environmental influences
1. Wear suitable work clothes.Wear safety gog-
gles.
2. Protect your cordless tool and the battery
charger from moisture and rain. Moisture
and rain can cause dangerous cell damage.
3. Do not use the cordless tool or the battery
charger near vapors and inflammable liquids.
4. Use the battery charger and cordless tools
only in dry conditions and an ambient tempe-
rature of 10-40°C.
5. Do not keep the battery charger in places
where the temperature is liable to reach over
40°C. In particular, do not leave the battery
charger in a car that is parked in the sunshine.
6. Protect batteries from overheating. Over-
loads, over-charging and exposure to direct
sunlight will result in overheating and cell
damage. Never charge or work with batteries
which have been overheated – replace them
immediately if possible.
7. Storage of batteries, battery chargers
and cordless tools. Store the charger and
your cordless tool only in dry places with an
Anl_PXCCSS_0182U_SPK7.indb 11Anl_PXCCSS_0182U_SPK7.indb 11 27.11.2019 14:48:1327.11.2019 14:48:13

GB
- 12 -
ambient temperature of 10-40°C. Store your
lithium-ion battery pack in a cool, dry place at
a temperature of 10-20°C. Protect them from
humidity and direct sunlight. Only place fully
charged batteries in storage (charged at least
40%).
8. Prevent the lithium-ion battery pack from free-
zing. Battery packs which were stored below
0°C for more than 60 minutes must be dispo-
sed of.
9. When handling batteries beware of electro-
static charge: Electrostatic discharges cause
damage of the electronic protection system
and the battery cells. Avoid electrostatic char-
ging and never touch the battery poles.
Rechargeable batteries and cordless electric
machines and tools contain materials that are po-
tentially harmful to the environment. Never place
any cordless electric machines or tools in your
household refuse. When cordless electric machi-
nes or tools become defective or worn, remove
the rechargeable batteries and return them to
iSC GmbH (address: Eschenstrasse 6, D-94405,
Germany). If the rechargeable batteries cannot be
removed, return the complete cordless machine
or tool.
You can then be sure that the equipment will be
correctly disposed of by the manufacturer.
When shipping or disposing of batteries and
cordless tools, always ensure that they are
packed individually in plastic bags to prevent
short circuits and fires.
Chain saw safety warnings:
• Keep all parts of the body away from the
saw chain when the chain saw is opera-
ting. Before you start the chain saw, make
sure the saw chain is not contacting
anything. A moment of inattention while ope-
rating chain saws may cause entanglement of
your clothing or body with the saw chain.
• Always hold the chain saw with your right
hand on the rear handle and your left
hand on the front handle. Holding the chain
saw with a reversed hand configuration incre-
ases the risk of personal injury and should
never be done.
NOTE: For chain saws designed with the gui-
de bar on the left side, the reference to “right
hand” and “left hand” positioning is reversed.
• Wear safety glasses and hearing protec-
tion. Further protective equipment for
head, hands, legs and feet is recommen-
ded. Adequate protective clothing will reduce
personal injury by flying debris or accidental
contact with the saw chain.
• Do not operate a chain saw in a tree. Ope-
ration of a chain saw while up in a tree may
result in personal injury.
• Always keep proper footing and operate
the chain saw only when standing on
fixed, secure and level surface. Slippery or
unstable surfaces such as ladders may cause
a loss of balance or control of the chain saw.
• When cutting a limb that is under tension
be alert for spring back. When the tension
in the wood fibres is released the spring loa-
ded limb may strike the operator and/or throw
the chain saw out of control.
• Use extreme caution when cutting brush
and saplings. The slender material may
catch the saw chain and be whipped toward
you or pull you off balance.
• Carry the chain saw by the front handle
with the chain saw switched off and away
from your body. When transporting or
storing the chain saw always fit the guide
bar cover.Proper handling of the chain saw
will reduce the likelihood of accidental contact
with the moving saw chain.
• Follow instructions for lubricating, chain
tensioning and changing accessories.
Improperly tensioned or lubricated chain
may either break or increase the chance for
kickback.
• Keep handles dry, clean, and free from oil
and grease. Greasy, oily handles are slippery
causing loss of control.
• Cut wood only. Do not use chain saw for
purposes not intended. For example: do
not use chain saw for cutting plastic,
masonry or non-wood building materials.
Use of the chain saw for operations different
than intended could result in a hazardous
situation.
Anl_PXCCSS_0182U_SPK7.indb 12Anl_PXCCSS_0182U_SPK7.indb 12 27.11.2019 14:48:1327.11.2019 14:48:13

GB
- 13 -

Causes and operator prevention of kickback:
Kickback may occur when the nose or tip of the
guide bar touches an object, or when the wood
closes in and pinches the saw chain in the cut.
Tip contact in some cases may cause a sudden
reverse reaction, kicking the guide bar up and
back towards the operator.
Pinching the saw chain along the top of the guide
bar may push the guide bar rapidly back towards
the operator.
Either of these reactions may cause you to lose
control of the saw which could result in serious
personal injury. Do not rely exclusively upon the
safety devices built into your saw. As a chain saw
user, you should take several steps to keep your
cutting jobs free from accident or injury.
Kickback is the result of tool misuse and/or incor-
rect operating procedures or conditions and can
be avoided by taking proper precautions as given
below:
• Maintain a firm grip, with thumbs and
fingers encircling the chain saw handles,
with both hands on the saw and position
your body and arm to allow you to resist
kickback forces. Kickback forces can be
controlled by the operator, if proper precau-
tions are taken. Do not let go of the chain saw.
• Do not overreach and do not cut above
shoulder height. This helps prevent uninten-
ded tip contact and enables better control of
the chain saw in unexpected situations.
• Only use replacement bars and chains
specified by the manufacturer. Incorrect
replacement bars and chains may cause
chain breakage and/or kickback.
• Follow the manufacturer’s sharpening
and maintenance instructions for the saw
chain.Decreasing the depth gauge height
can lead to increased kickback.
• Hold the power tool by insulated gripping
surfaces only, because the saw chain
may contact hidden wiring. Saw chains
contacting a “live” wire may make exposed
metal parts of the power tool “live” and could
give the operator an electric shock.
Residual risks
Even if you use this electric power tool in ac-
cordance to instructions, certain residual risks
cannot be eliminated.The following hazards may
arise in connection with the equipment’s const-
ruction and layout:
• Cut injuries if no safety clothing is used.
• Lung damage if no suitable protective dust
mask is applied.
• Damage to hearing if no suitable ear protec-
tion is applied.
• Health damage caused by hand-arm vibra-
tions if the equipment is used over a longer
period or is not properly guided and maintai-
ned.
Warning! The electric power tool generates an
electromagnetic field during operation. Under cer-
tain circumstances this field may actively or passi-
vely impede medical implants. To reduce the risk
of serious or fatal injuries, we recommend per-
sons with medical implants to consult their doctor
and the manufacturer of the medical implant prior
to using the equipment.
Do not lose this safety information.
Explanation of the symbols on the machine
(Fig. 28):
1. Read the operating instructions.
2. Wear safety goggles.
3. Wear ear protectors.
4. Never expose the device to rain.
5. Maximum cutting length / chain speed vu:
15 m/s
6. Unlock chain brake before putting into opera-
tion!
7. Store the battery only in dry rooms with an
ambient temperature of +10°C to +40°C.
Place only charged batteries in storage (char-
ged at least 40%).
2. Layout and items supplied
2.1 Layout (Fig. 1-3, 11, 12)
1. Claw stop
2. Front hand guard (chain brake)
3. Front handle
4. Rear handle
5. Safety lock-off
6. ON/OFF switch
7. Oil tank cover
8. Chain wheel cover
9. Fixing screw for the chain wheel cover
10. Chain tensioning screw
11. Chain oil fill level indicator
12. Battery pack (not included in delivery)
13. Pushlock button
14. Rear hand guard
15. Cutter bar
16. Saw chain
17. Cutter guard
Anl_PXCCSS_0182U_SPK7.indb 13Anl_PXCCSS_0182U_SPK7.indb 13 27.11.2019 14:48:1427.11.2019 14:48:14

GB
- 14 -
18. Charger (not included in delivery)
19. Adapter plate
2.2 Items supplied
Please check that the article is complete as
specified in the scope of delivery. If parts are
missing, please contact our service center or the
sales outlet where you made your purchase at
the latest within 5 working days after purchasing
the product and upon presentation of a valid bill
of purchase. Also, refer to the warranty table in
the service information at the end of the operating
instructions.
•Open the packaging and take out the equip-
ment with care.
•Remove the packaging material and any
packaging and/or transportation braces (if
available).
•Check to see if all items are supplied.
•Inspect the equipment and accessories for
transport damage.
•If possible, please keep the packaging until
the end of the guarantee period.
Danger!
The equipment and packaging material are
not toys. Do not let children play with plastic
bags, foils or small parts. There is a danger of
swallowing or suffocating!
•Original operating instructions
•Safety instructions
3. Proper use
The chainsaw is intended for felling trees and for
cutting trunks, branches, wooden beams, boards
etc. and can be used for cross cuts and longitudi-
nal cuts. It is not suitable for cutting any materials
other than wood.
The equipment is to be used only for its prescri-
bed purpose. Any other use is deemed to be a
case of misuse.The user / operator and not the
manufacturer will be liable for any damage or inju-
ries of any kind caused as a result of this.
Please note that our equipment has not been de-
signed for use in commercial, trade or industrial
applications. Our warranty will be voided if the
machine is used in commercial, trade or industrial
businesses or for equivalent purposes.
4. Technical data
Motor power supply: ............................... 36 V DC
Idle speed n0: ............................. max. 8200 min-1
Cutting speed at rated rpm: .............. max. 15 m/s
Oil tank capacity: .......................................115 ml
Weight with
cutter rail + chain + battery: .............. approx. 5 kg
Net weight
(without rechargeable batteries) .. approx. 4.13 kg
Danger!
Sound and vibration
Sound and vibration values were measured in ac-
cordance with EN 60745-1 and EN 60745-2-13.
LpA sound pressure level ..................... 92,1 dB(A)
KpA uncertainty .............................................3 dB
LWA sound power level ........................ 102 dB(A)
KWA uncertainty .............................................3 dB
LWA sound power level guaranteed ....... 105 dB(A)
Wear ear-muffs.
The impact of noise can cause damage to hea-
ring.
Total vibration values (vector sum of three direc-
tions) were determined in accordance with EN
60745-1 and EN 60745-2-13.
Handle under load
Vibration emission value front handle
ah= 3.613 m/s2
Vibration emission value rear handle
ah= 2.836 m/s2
K uncertainty = 1.5 m/s2
The specified vibration value was established in
accordance with a standardized testing method. It
may change according to how the electric equip-
ment is used and may exceed the specified value
in exceptional circumstances.
The specified vibration value can be used to
compare the equipment with other electric power
tools.
The specified vibration value can be used for initi-
al assessment of a harmful effect.
Anl_PXCCSS_0182U_SPK7.indb 14Anl_PXCCSS_0182U_SPK7.indb 14 27.11.2019 14:48:1427.11.2019 14:48:14

GB
- 15 -
Keep the noise emissions and vibrations to a
minimum.
• Only use appliances which are in perfect wor-
king order.
• Service and clean the appliance regularly.
• Adapt your working style to suit the appliance.
• Do not overload the appliance.
• Have the appliance serviced whenever ne-
cessary.
• Switch the appliance off when it is not in use.
• Wear protective gloves.
5. Before starting the equipment
Warning!
Always remove the battery pack before making
adjustments to the equipment.
Danger! Do not fit the battery until the chainsaw
has been fully assembled and the chain tension
has been set. Always wear protective gloves
when working on the chainsaw to protect yourself
against injury.
5.1 Assembly of the cutter rail and the saw
chain
• Carefully unpack all parts and check that they
are complete (Fig. 2-3).
• Undo the fixing screw of the chain wheel co-
ver (Fig. 4).
• Take off the chain wheel (Fig. 5).
• Lay the chain as shown in the groove which
runs around the cutter rail (Fig. 6a/Item A).
• Insert the cutter rail and chain as shown in the
mounting in the chainsaw. At the same time
guide the chain around the chain wheel (Fig.
6b/6c/Item B).
• Attach the chain wheel cover and secure it
with the fixing screw (Fig. 7). Caution: Do not
fully tighten the fixing screw until after adjus-
ting the chain tension (refer to point 5.2).
5.2 Tensioning the saw chain
Warning! Always disconnect the mains plug
before performing any checks or adjustments. Al-
ways wear protective gloves when working on the
chainsaw to protect yourself against injury.
• Undo the fixing screw of the chain wheel co-
ver a few turns (Fig. 4).
• Adjust the chain tension with the chain tensio-
ning screw (Fig. 8/ Item 10). Turning the screw
clockwise increases the tension, turning it
counter-clockwise decreases the chain ten-
sion.The saw chain is correctly tensioned if it
can be lifted around 3-4 mm in the middle of
the cutter rail (Fig. 9).
• Tighten the fixing screw of the chain wheel
cover (Fig. 7).
Danger! All of the chain links must lie proper-
ly in the guide groove of the cutter rail.
Notes on tensioning the chain:
The saw chain must be properly tensioned to
ensure safe operation.You can tell that the chain
tension is perfect if the saw chain can be lifted
by around 3-4 mm in the middle of the cutter rail.
As the saw chain heats up during cutting and
thus changes in length, please check the chain
tension every 10 minutes and adjust it again as
required.This applies in particular to new saw
chains.When you have finished working slacken
the chain again, as the chain will shorten when it
cools down.This will prevent the chain from being
damaged.
5.3 Saw chain lubrication
Warning! Always pull out the battery before per-
forming any checks or adjustments. Always wear
protective gloves when working on the chainsaw
to protect yourself against injury.
Notice! Never operate the chain if it is not lub-
ricated with saw chain oil. Use of the chainsaw
without saw chain oil or if the oil level is below
the “min” mark (Fig. 10/ Item B) will damage the
chainsaw.
Notice! Be aware of the temperature conditions:
different lubricants with completely different
viscosities are required at different ambient tem-
peratures. At lower temperatures you will need
low viscosity oils in order to achieve a sufficient
lubricating film. However, if the same low viscosity
oil is used during the summer it will become even
thinner due to the ambient temperatures alone,
and as a result the lubricating film could break
down, causing the chain to overheat and become
damaged. In addition, the chain oil would burn
and produce unnecessary pollutants.
Filling the oil tank:
• Place the chainsaw on a flat surface.
• Clean the area around the oil tank cover (Fig.
10/Item A) and then clean the oil tank cover.
• Fill the tank with saw chain oil. In the process,
make sure that no dirt enters the tank, as this
could cause the oil nozzle to become blo-
cked.
Anl_PXCCSS_0182U_SPK7.indb 15Anl_PXCCSS_0182U_SPK7.indb 15 27.11.2019 14:48:1427.11.2019 14:48:14

GB
- 16 -
• Close the oil tank cover.
5.4 Charging the Li battery pack (Fig. 11-12)
The battery is protected from exhaustive dischar-
ge. An integrated protective circuit automatically
switches offthe equipment when the battery is
flat.
Warning! Do not actuate the On/Offswitch any
more if the protective circuit has tripped.This may
damage the battery.
1. Remove the battery pack from the handle,
pressing the pushlock button (13) downwards
to do so.
2. Check that your mains voltage is the same as
that marked on the rating plate of the battery
charger. Insert the power plug of the charger
(18) into the socket outlet.The green LED will
then begin to flash.
3. Push the battery pack onto the battery char-
ger.
In section 12 (Charger indicator) you will find a
table with an explanation of the LED indicator on
the charger.
If the battery pack fails to charge, check for the
following:
• voltage at the power socket
• whether there is good contact at the charging
contacts of the charging unit
If the battery pack still fails to charge, send
• the charger and charging adapter
• and the battery pack
to our customer service center.
To ensure that the Li battery pack provides
long service you should take care to recharge
it promptly.You must recharge the battery pack
when you notice that the power of the cordless
chainsaw drops.
6. Operation
6.1 Switching on/off
Switching on
• Plug in the battery on the equipment.
• Hold the chainsaw by the handles with both
hands as shown in Fig. 13 (thumbs under the
handles).
• Press and hold the safety lock-off (Fig. 1/Item
5).
• Switch on the chainsaw at the ON/OFF switch
(Fig. 1/Item 6).You can then release the safe-
ty lock-off.
Switching off
Release the ON/OFF switch (Fig. 1/Item 6).
The integrated brake will bring the running chain-
saw to a standstill within a very short space of
time. Always disconnect the mains plug when you
stop working, even if it is only for a short time.
Warning! Always carry the saw by the front
handle. If the saw is plugged in and you carry it by
the rear handle (which is where the switches are
located), then there is a risk that you could acci-
dentally press the safety lock-offand the ON/OFF
switch at the same time, and the chainsaw could
inadvertently start up.
6.2 Safety devices
Motor brake
The motor brakes the saw chain as soon as the
ON/OFF switch (Fig. 1/Item 6) is released or the
power supply is interrupted.This significantly
reduces the risk of injury that would otherwise be
present if the chain continued to run after being
switched offor disconnected.
Chain brake
The chain brake is a safety mechanism which is
triggered via the front hand guard (Fig. 1/Item 2).
If kickback causes the chainsaw to suddenly jerk
back then the chain brake trips and stops the saw
chain in less than 0.1 seconds.You must check
the operation of the chain brake on a regular ba-
sis.To do this, fold the hand guard (Fig. 1/Item 2)
forward and briefly switch the chainsaw on.The
saw chain must not start up.
Pull back the front hand guard (Fig. 1/Item 2) until
it engages to release the chain brake.
Danger! Never use the saw if the safety equip-
ment is not working properly. Never try to repair
safety related protection systems yourself – al-
ways have any work done by our service depart-
ment or by a similarly qualified workshop.
Hand guard
The front hand guard (which also acts as the
chain brake at the same time) (Fig. 1/Item 2)
and the rear hand guard (Fig. 1/ Item 14) protect
against finger injuries resulting from contact with
the saw chain if the chain breaks because it is
overloaded.
Anl_PXCCSS_0182U_SPK7.indb 16Anl_PXCCSS_0182U_SPK7.indb 16 27.11.2019 14:48:1427.11.2019 14:48:14

GB
- 17 -
7. Working with the chainsaw
7.1 Preparations
To ensure that you can work safely, check the fol-
lowing points before every use:
Condition of the chain saw
Inspect the chainsaw before the start of work for
damage to the housing, the power cable, the saw
chain and the cutter rail. Never use a chainsaw
which is obviously damaged.
Oil container
Fill level of the oil container. Even while working,
keep checking that sufficient oil is in the system.
To avoid damaging the chainsaw, never run the
saw if there is no oil in the system or if the oil
drops below the “min” mark (Fig. 10/Item B).
On average, a single filling will last around 15
minutes depending on the number of pauses in
cutting and the loads involved.
Saw chain
Tension of the saw chain, condition of the cutting
elements.The sharper the chainsaw, the easier
and more controllable it is to operate the chain-
saw. The same also applies to the chain tension.
Again, while working also check the chain tension
every 10 minutes in order to increase your safety.
New saw chains in particular often tend to expand
more.
Chain brake
Check the operation of the chain brake as de-
scribed in the chapter “Safety devices” and then
release it.
Safety clothing
Always wear appropriate tight-fitting safety
clothing like special trousers which protect
against cuts, protective gloves and safety shoes.
Hearing protection and protective goggles.
When felling trees or performing forest work, al-
ways wear a protective helmet with integral face
and hearing protection.This will offer protection
against falling branches and any branches if they
spring back.
7.2 Description of the correct procedures for
basic use of the chainsaw
Felling a tree (Figs. 14-17)
If two or more persons are working at the same
time on felling and cutting back then the minimum
distance between the tree being felled and the
tree being cut back should be at least twice the
height of the tree being felled (Fig. 14). When
felling trees, care must be taken to ensure that no
other persons are endangered, no power supply
lines are hit and no material damage is caused
to equipment or property. In the event that a tree
comes into contact with a power supply line, he
responsible power supply company should be
informed immediately.
When working with the saw on a slope, the opera-
tor of the chainsaw must be standing at a higher
point on the slope than the tree being felled, as
the tree will roll or slip downhill once it has been
felled (Fig. 15).
Before felling the tree you must first plan and if
necessary clear an escape route.This escape
route must lead away diagonally in the opposite
direction to the expected fall direction – this can
be seen in Fig. 16 (A= danger zone, B= direction
of fall, C= escape zone).
Before felling the tree you must take into account
the natural inclination of the tree, the location of
larger branches and the wind direction, as this will
help you to correctly determine the direction in
which the tree will fall.
Dirt, stones, loose bark, nails, staples and wire
must be removed from the tree.
Making the felling notch (Fig. 17)
Cut a notch (A) at right angles to the fall direction
to a depth of 1/3 of the tree diameter as shown
in Fig. 17. First make the lower horizontal felling
notch (1).This prevents the saw chain or the gui-
de rail from becoming trapped when the second
felling notch is made.
Making the felling cut (Fig. 17)
The felling cut should be positioned at least 50
mm above the horizontal felling notch. Make the
felling cut (B) parallel to the horizontal felling
notch.The felling cut should be cut to a depth
which leaves a thin strip (felling hinge strip) (D)
which can act as a hinge.This strip prevents the
tree from rotating and falling in the wrong direc-
tion. Do not cut through the strip.When the felling
cut gets close to the strip the tree should start to
fall. If it becomes clear that the tree may well fall in
a different direction to the desired fall direction (C)
Anl_PXCCSS_0182U_SPK7.indb 17Anl_PXCCSS_0182U_SPK7.indb 17 27.11.2019 14:48:1427.11.2019 14:48:14

GB
- 18 -
or it starts to lean back and traps the saw chain,
interrupt the felling cut and insert wedges made
of wood, plastic or aluminum to open out the cut
and control the lean of the tree until it leans in the
required direction.
When the tree starts to fall, remove the chainsaw
from the cut, switch it off, place it on the ground
and exit the danger zone via the planned escape
route.Watch out for falling branches and take
care not to trip.
Removing branches
Here we are talking about removing branches
from the felled tree. When removing branches,
leave any downward facing branches which are
supporting the tree until the trunk of the tree has
been cut up. Smaller branches should be re-
moved as shown in Fig. 18 (A= cutting direction
when removing branches, B= keep away from the
ground! Supporting branches should be left until
the trunk is cut up) in a single cut from the bottom
to the top. Any branches which are under tension
should be cut from the bottom to the top to pre-
vent the saw from becoming trapped.
Cutting the tree trunk into lengths
Here we are looking at the process of cutting the
felled tree into sections. Make sure you have a
sure footing and distribute your body weight even-
ly onto both feet. If possible the trunk should be
underlaid and supported with branches, beams
or wedges. For easy cutting follow the simple ins-
tructions below.
If the full length of the tree trunk is evenly suppor-
ted as shown in Fig. 19 then proceed by cutting
from the top down.Take care not to cut into the
ground in the process.
If the weight of the tree trunk is resting on one end
as shown in Fig. 20, first cut through 1/3 of the
trunk diameter from the underside (A) in order to
prevent it from splintering. Make the second cut
from the top (2/3 of the diameter) to the height of
the first cut (B) (this prevents the chainsaw from
being trapped).
If the weight of the tree trunk is resting on both
ends as shown in Fig. 21, first cut through 1/3 of
the trunk diameter from the top (A) in order to pre-
vent it from splintering. Make the second cut from
underneath (2/3 of the diameter) to the height of
the first cut (B) (this prevents the chainsaw from
being trapped).
When working with the saw on a slope, always
position yourself at a higher point on the slope
above the tree as shown in Fig. 15. In order to re-
tain full control at the moment when the cut goes
through, reduce pressure towards the end of the
cut without releasing your firm grip on the hand-
les of the chainsaw. Take care to ensure that the
chainsaw does not touch the ground.
After completing the cut, wait for the chain saw to
come to a standstill before removing the chain-
saw. Always switch offthe motor of the chainsaw
before moving from tree to tree.
7.3 Kickback
The term “kickback” describes what happens
when the running chainsaw suddenly kicks up-
ward and backward. Usually, this is caused by
contact between the tip of the cutter rail and the
workpiece or the saw chain becoming trapped.
In the event of kickback, large forces occur sud-
denly and violently. As a result, the chainsaw
usually reacts uncontrollably.This can often result
in very serious injuries to the worker or persons
in the vicinity. The risk of kickback is particularly
great when performing cross cuts, angled cuts
and longitudinal cuts, as it is not possible to use
the claw stop on these cuts.You should therefore
avoid these cuts as far as possible and take parti-
cular care when they are unavoidable.
The risk of kickback is at its greatest when the
saw is positioned for a cut in the region of the tip
of the cutter rail, as the leverage effect is greatest
there (Fig. 22). It is therefore safest to position the
saw flat and as close as possible to the claw stop
before making the cut (Fig. 23).
Warning!
• Make sure that the chain tension is always
correctly adjusted.
• Only use a chainsaw if it is in perfect working
order.
• Only work with a saw chain that has been
properly sharpened in accordance with the
instructions.
• Never operate the saw above shoulder height.
• Never cut with the upper edge or the tip of the
sword.
• Always hold the chainsaw firmly with both
hands.
• Whenever possible, use the claw stop as a
leverage point.
Anl_PXCCSS_0182U_SPK7.indb 18Anl_PXCCSS_0182U_SPK7.indb 18 27.11.2019 14:48:1527.11.2019 14:48:15

GB
- 19 -
Cutting wood which is under tension
Special care is required when cutting wood which
is under tension. Wood which is under tension
from which it is released by cutting may in some
cases react completely unpredictably and uncont-
rollably. In the worst case this could result in extre-
mely severe or even fatal injuries (Fig. 24-26).
This type of work must only be performed by per-
sons who have been specially trained.
8. Cleaning, maintenance and
ordering of spare parts
Danger!
• Remove the battery each time before
cleaning.
• Never immerse the unit in water or other li-
quids in order to clean it.
8.1 Cleaning
• Regularly clean the clamping mechanism by
blowing it out with compressed air or cleaning
it with a brush. Do not use tools for cleaning.
• Keep the handles free of grease so that you
can maintain a firm grip.
• Clean the device as required with a damp
cloth and, if necessary, mild washing up li-
quid.
• If the chainsaw is not to be used for an exten-
ded period of time then you should remove
the chain oil from the tank. Briefly immerse
the saw chain and the cutter rail in an oil bath
and then wrap them in oil paper.
8.2 Maintenance
Replacing the saw chain and cutter rail
The cutter rail needs to be replaced if
• the guide groove of the cutter rail is worn;
• the nose sprocket in the cutter rail is dama-
ged or worn.
Remove the adapter plate (Item 19) from the
cutter rail as shown in Fig. 27. Now fit the adapter
plate to the new cutter rail. Proceed as described
in the section “Assembly of the cutter rail and the
saw chain”.
Checking the automatic chain lubrication
You should check the operation of the automatic
chain lubrication system on a regular basis in or-
der to guard against overheating and the associ-
ated damage to the cutter rail and the saw chain.
To do this, point the tip of the cutter rail towards a
smooth surface (board, section of a cut tree) and
allow the chainsaw to run.
If an increasing oil trace becomes evident during
this process then the automatic chain lubrication
system is working properly. If no clear oil trace is
evident then please refer to the corresponding
instructions in “Troubleshooting”. If the information
contained there still fails to remedy the situation
then please contact our service department or
another similarly qualified workshop.
Danger! Do not actually touch the surface with
the tip of the cutter rail when performing this test.
Keep a safe distance (approx. 20 cm).
Sharpening the saw chain
Effective working with the chainsaw is only pos-
sible if the saw chain is in good condition and
sharp. This also reduces the risk of kickback.
The saw chain can be re-sharpened by any dea-
ler. Do not attempt to sharpen the saw chain your-
self unless you have the necessary special tools
and experience.
8.3 Ordering replacement parts:
Please quote the following data when ordering
replacement parts:
• Type of machine
• Article number of the machine
• Identification number of the machine
• Replacement part number of the part required
For our latest prices and information please go to
www.isc-gmbh.info
9. Notes on environmental
protection / disposal
The equipment is supplied in packaging to pre-
vent it from being damaged in transit. The raw
materials in this packaging can be reused or
recycled.The equipment and its accessories are
made of various types of material, such as metal
and plastic. Never place defective equipment in
your household refuse.The equipment should
be taken to a suitable collection center for proper
disposal. If you do not know the whereabouts of
such a collection point, you should ask in your
local council offices.
Anl_PXCCSS_0182U_SPK7.indb 19Anl_PXCCSS_0182U_SPK7.indb 19 27.11.2019 14:48:1527.11.2019 14:48:15

GB
- 20 -
10. Storage
Store the equipment and accessories out of
children’s reach in a dark and dry place at above
freezing temperature. The ideal storage tempe-
rature is between 5 and 30 °C. Store the electric
tool in its original packaging.
Anl_PXCCSS_0182U_SPK7.indb 20Anl_PXCCSS_0182U_SPK7.indb 20 27.11.2019 14:48:1527.11.2019 14:48:15
This manual suits for next models
1
Table of contents
Other Ozito Chainsaw manuals

Ozito
Ozito OZPCS305A User manual

Ozito
Ozito ECS-2040U Operation instructions

Ozito
Ozito PXCCSS-018 User manual

Ozito
Ozito ECS-355 User manual

Ozito
Ozito PXCCSS-018 User manual

Ozito
Ozito ECS-1835 User manual

Ozito
Ozito PXCCSS-018U User manual

Ozito
Ozito OCS-018 User manual

Ozito
Ozito ECS-1935 User manual

Ozito
Ozito PCS-305A User manual

Ozito
Ozito Power X Change PXCCSS-0182 User manual

Ozito
Ozito PCS-406A User manual

Ozito
Ozito ECS-406A User manual

Ozito
Ozito PCS-254 User manual

Ozito
Ozito CSL-036 User manual

Ozito
Ozito CSE-355 User manual

Ozito
Ozito PXCCSK-418 User manual

Ozito
Ozito 25.4cc-305mm Bar User manual

Ozito
Ozito PCS-406 User manual

Ozito
Ozito OZPCS305A User manual