Ozito PXRDS-300U User manual

WHAT’S IN THE BOX
Cordless Radio
400mm Auxiliary Cable
3 x AAA Batteries
SPECIFICATIONS
Input: 18V
AM Frequency: 522-1620KHz
FM Frequency: 87.5-108MHz
Auxiliary Jack: 3.5mm
Speaker Output: 3W
Weight: 0.6kg
CORDLESS
RADIO
ORIGINAL INSTRUCTIONS
ozito-diy.co.uk
PXRDS-300U
WARRANTY
OZITO UK Unit 9 Stadium Court, Wirral International Business Park, Plantation Road, Bromborough, Wirral, CH62 3QG 0416
All of our products undergo strict quality checks to ensure that they reach you in perfect
condition. In the unlikely event that your device develops a fault, please contact our service
department at the address shown on this guarantee card. You can also contact us by
telephone using the customer service number shown. Please note the following terms under
which guarantee claims can be made:
1. These warranty terms regulate additional warranty services, which the manufacturer
mentioned below promises to buyers of its new products in addition to their statutory
guarantee claims are not affected by this guarantee. Our guarantee is free of charge to you.
2. The warranty services only covers defects due to material or manufacturing faults on
a product which you have bought from the manufacturer mentioned below are limited to
either the rectication of said defects on the product or the replacement of the product,
whichever we prefer.
Please note that our devices are not designed for use in commercial, trade or professional
applications. A guarantee contract will not be created if the device has been used by
commercial, trade or industrial business or has been exposed to similar stresses during the
guarantee period.
3. The following are not covered by our guarantee:
- Damage to the device caused by a failure to follow the assembly instructions or due to
incorrect installation, a failure to follow the operating instructions (for example connecting
it to an incorrect mains voltage or current type) or a failure to follow the maintenance and
safety instructions or by exposing the device to abnormal environmental conditions or by
lack of care and maintenance.
- Damage to the device caused by abuse or incorrect use (for example overloading the
device or the use or unapproved tools or accessories), ingress of foreign bodies into the
device (such as sand, stones or dust, transport damage), the use of force or damage caused
by external forces (for example by dropping it).
- Damage to the device or parts of the device caused by normal or natural wear or tear or by
normal use of the device.
4. Your Product is guaranteed for a period of 60 months from the original date of purchase
and is intended for DIY (Do It Yourself) use only. Lithium Ion batteries and chargers are
covered by a 12 month warranty. Warranty excludes consumable parts. Guarantee claims
should be submitted before the end of the guarantee period within two weeks of the defect
being noticed. No guarantee claims will be accepted after the end of the guarantee period.
The original guarantee period remains applicable to the device even if repairs are carried
out or parts are replaced. In such cases, the work performed or parts tted will not result
in an extension of the guarantee period, and no new guarantee will become active for the
work performed or parts tted. This also applies if an on-site service is used.
IN ORDER TO MAKE A CLAIM UNDER THIS WARRANTY YOU MUST RETURN THE PRODUCT TO
THE PLACE OF PURCHASE WITH YOUR REGISTER RECEIPT.
Please refer to the restrictions of this warranty concerning wearing parts, consumables and
missing parts as set out in the service information in these operating instructions.
CUSTOMER SERVICE HELPLINE
GB: 0151 294 4488
IRL: 1850 882711
Ozito-diy.co.uk

10
5
9 10
ONLINE MANUAL
Scan this QR Code with your
mobile device to take you to the
online manual.
BATTERY & CHARGER (sold separately)
This tool is compatible with all battery and chargers from the Ozito
Power X Change Range.
KNOW YOUR PRODUCT SETUP & PREPARATION
1. BATTERY & CHARGING
1 Control Panel
2 On/Off Switch
3 AAA Battery Compartment
4 Speaker
5 Carry Handle
6 LCD Display Screen
7 3.5mm Auxiliary Jack
8 Rear MP3 Player/Phone
Holder (not shown)
CORDLESS RADIO
The purchased battery will be shipped in a low charge condition, and requires charging
prior to use. Allow several cycles of charging and discharging (through use of the tool)
for the battery to reach its optimum performance / runtime.
1 Connect the charger into a mains power outlet.
4 The charger LED will illuminate
red signifying that the battery is
charging.
3 With the charger sitting on a at
surface, align the raised ribs on
the battery with the recess in the
charger and slide onto the charger
ensuring a rm connection.
2 The charger LED will ash green
showing power is being supplied
to the charger.
5 The charger LED will illuminate
green once the battery is charged.
Charging your lithium ion battery - Fast Charger
Charger LED Indicator
LED Indicator Situation
GREEN (Flashing) Stand By (no battery pack is inserted)
RED (Flashing) Battery is charging (low charge)
RED (Illuminated) Battery is charging (mid charge)
GREEN (Illuminated) Battery is 85% - 100% charged and ready for use
BOTH(Illuminated) Battery pack is too hot or too cold (charging will begin
automatically when battery reaches correct charging
temperature).
BOTH (Flashing) Defective battery. Never charge a defective battery
pack!
Remove battery pack from charger.
1 2 43 6 7 8
9 400mm Auxiliary
Cable
10 3 x AAA Batteries
CAUTION: THE CHARGER FOR THIS PRODUCT SHOULD
BE PROTECTED BY A RESIDUAL CURRENT DEVICE
(RATED AT 30mA OR LESS).

2. BATTERY INSTALLATION
Battery Charge Indicator
The purchased battery is equipped with a
battery charge indicator to show the state of
the battery charge.
Press the charge indicator button and look to
see which LED lights.
Battery requires
immediate charging
Low state of charge, requires charging soon.
Mid state of charge
Full state of charge.
Note: The battery needs to be removed from the tool to check the state of charge.
1 Connect the charger into a mains power outlet.
4 The charger LED will illuminate red signifying that the battery is charging.
3 With the battery sitting on a at
surface, align the raised ribs on the
battery with the recess in the charger
and slide onto the battery ensuring a
rm connection.
2 The charger LED will ash green
showing power is being supplied
to the charger.
5 When removing the charger from the
battery, rst press the battery release
tab, then slide the charger from its
position.
Charging your lithium ion battery - Eco Charger
Charger LED Indicator
LED Indicator Situation
GREEN (Flashing) Stand By (no battery pack is inserted)
RED (Illuminated) Battery is charging (low charge)
GREEN (Illuminated) Battery is charged and ready for use
RED (Flashing) Battery or Charger fault
RED & GREEN (Flashing) Battery pack is too hot or too cold (remove battery from
charger and store at room temperature 20ºC. Insert
battery again when at correct charging temperature). If
this happens again, the battery is defective and needs
to be replaced.
Installing AAA Batteries (for clock & memory function)
Installing the 18V Battery Pack
1. AAA Batteries sit in
compartment at base
of radio housing. AAA
batteries must be
installed prior to 18V
battery pack.
1. Holding the radio
housing, slide the
battery into the base
of the radio until it
clicks into place.
Removing the Battery Pack
1. Press down on the
battery release
button.
2. Open AAA battery
compartment
housing
3. Install AAA batteries
2. Holding the radio
housing, slide the
battery pack out.

PXIDS-300
3. OPERATION
OPERATION
1. To alternate between AM or FM
frequencies and Auxiliary mode,
press the Band AUX button.
1. To increase the volume, press
the Volume + button until desired
volume is reached.
2. To decrease the volume, press the
Volume - button until desired volume
is reached.
1. To turn the radio on, ick the
on/off switch up and display
will illuminate.
2. To turn off, ick the on/off
switch.
2. To nd a station, scroll through a
frequency by pressing the Seek
buttons.
On/off Switch
Volume
Mode & Tuning
FM MEM
MHz
FM MEM
MHz
3. To mute the sound, press Mute
button.
4. To return sound to previous volume,
press Mute button again or any
other button on the display panel.
FM MEM
MHz
Note: The time will still be
shown on the LCD display even
when radio is switched off.
Note: Radio will automatically change to AUX mode when auxiliary cord with device
are connected to AUX jack. To switch back to radio, press Band AUX button.

PXRDS-300U
4. SETTING THE TIME 5.
PROGRAMMING
Setting up Favourite Stations
You can program this product to remember up to ten radio stations on both
the AM and FM modes using the Channel memory system.
1. Turn the radio on.
3. Using the Seek buttons, nd a
radio station you would like to
save.
FM MEM
MHz
FM MEM
MHz
4. Press and hold the Channel button
until the memory number ashes.
FM MEM
MHz
FM MEM
MHz
FM MEM
MHz
5. Press the Channel button again
to save the radio station as this
memory number.
6. To save the next station, press Channel
button once until next memory number
shows on LCD display screen.
2. Press the Channel button once to
open the rst memory setting - Mem
1.
7. Using the Seek buttons, nd the next
radio station to save.
8. Press and hold the Channel button
until the memory number ashes.
Press Channel button again to save
this station.
9. After programming stations to memory, press the Channel button to search through
the saved radio stations.
1. Turn the radio off.
2. Press and hold the Clock
button until the time starts
ashing on the LCD display
screen.
3. Use the Hour
(or Volume -) button to
change the hour.
4. Use the Minutes
(or Volume +) button to
change the minutes.
5. Once desired time is
reached, press the Clock
button again to save.
Note: Up to 10 radio stations can be saved on both the AM and FM modes. Repeat
steps 6 to 8 as necessary to program more stations to the radio’s memory.
Note: The radio is able to automatically search and save radio stations to memory.
Press and hold the Band button.

MAINTENANCE TROUBLESHOOTING
Battery protection system
The tool is equipped with the battery protection system, which helps to ensure a long service
life.
The output power automatically cuts off during operation when the tool and/or battery are
placed under the following situations:
• When the tool is overloaded:
If this occurs, release the trigger switch and remove causes of overload, then pull the
switch trigger again to restart.
• When the remaining battery capacity becomes low:
Recharge the battery pack.
Note: The battery protection system does not in any way damage the tool.
Note: The indicated capacity may be lower than the actual level during use or immediately
after using the tool.
LED lights do not illuminate on charger
Check the charging adaptor is securely plugged into the wall outlet.
Check the battery is rmly connected to the charging cradle.
Check that the charging jack is securely connected to the charging cradle.
The radio turns off after 4-5 hours
The battery pack may have gone into sleep mode, so turn power switch on & off, or check
battery power.
1. When not in use, the radio should be stored in a dry, frost free location, keep
out of children’s reach.
2. Keep ventilation slots of the radio clean at all times and prevent anything from
entering.
3. If the housing of the radio requires cleaning, do not use solvents. Use of a
cloth only is recommended.
4. Blow out the ventilation slots with compressed air periodically .
Note: Ozito Industries will not be responsible for any damage or injuries
caused by repair of the drill by an unauthorised person or by mishandling.

BATTERY AND CHARGER SAFETY WARNINGS
THIS MANUAL CONTAINS IMPORTANT SAFETY AND OPERATING INSTRUCTIONS FOR YOUR BATTERY CHARGER.
1. Before using the charger read all instructions and cautionary markings on the charger, battery pack and the product
using the battery pack.
2. This charger is not intended for any uses other than charging rechargeable batteries. Any other use may result in risk of
re, electric shock or electrocution.
3. Do not place any object on top of the charger or place the charger on a soft surface that may result in excessive internal
heat. Place the charger in a position away from any heat source.
4. To reduce risk of damage to the electric plug and cord, pull by the plug rather than the cord when disconnecting the
charger.
5. Make sure the cord is located so that it will not be stepped on, tripped over, or otherwise subjected to damage or stress.
6. An extension cord should not be used unless absolutely necessary. Use of an improper extension cord could result in the risk
of re, electric shock or electrocution.
7. Do not operate the charger if it has received a sharp blow, been dropped or otherwise damaged in any way. Have it
checked by an electrician or power tool repairer.
8. Do not disassemble charger. Take it to an electrician or power tool repairer when service or repair is required. Incorrect
reassembly may result in a risk of electric shock, electrocution or re.
9. To reduce risk of electric shock, unplug the charger from the outlet before attempting any cleaning. Removing the
battery pack will not reduce this risk.
10. Never attempt to connect 2 chargers together.
11. DO NOT store or use the tool and battery pack in locations where the temperature may reach or exceed 40ºC (such as inside
sheds or metal buildings in summer).
12. The charger is designed to operate on standard household electrical power (240 volts). Do not attempt to use it on any
other voltage!
13. The battery pack is not fully charged out of the carton. First read the safety instructions and then follow the charging
notes and procedures.
14. The longest life and best performance can be obtained if the battery pack is charged when the air temperature is
between 18 - 24ºC. Do not charge the battery pack in an air temperature below 10ºC or above 40ºC. This is important
and will prevent damage to the battery pack.
15. Do not incinerate the battery pack even if it is seriously damaged or is completely worn out. The battery can explode in a
re.
16. Never attempt to open the battery pack for any reason. If the plastic housing of the battery pack breaks or cracks, immediately
discontinue use and do not recharge.
17. During charging, the battery must be placed in a well ventilated area.
DESCRIPTION OF SYMBOLS
SPARE PARTS
Spare parts can be ordered from the Special Orders Desk at your local
Bunnings Warehouse or Homebase store.
For further information, or any parts visit
www.ozito-diy.co.uk or contact Ozito Customer Service:
Great Britain: 0151 294 4488
Ireland: 1850 882711
E-mail: enquires@ozito-diy.co.uk
Warning Read instruction manual
ø Diameter
mA Milliamperes
Recycle battery Do not put in the rubbish
Polarity
Do not incinerate Do not get battery wet
Thermal cut-out protection
Double insulated
/min Revolutions or reciprocation per minute
Ah Amp hour
Indoor use only
Lithium Ion battery Do not use or store battery in
temperatures exceeding 50ºC
Nm Newton Meters no No load speed
VVolts Hz Hertz
ac/~ Alternating current WWatts
Direct current
dc/

RADIO SAFETY WARNINGS
WARNING! Keep the radio housing and handle dry, clean and free
from grease and oil. Always use a clean cloth cleaning. Never use brake uid, gasoline,
petroleum-based products, or any strong solvents to clean your radio. Following this rule will reduce the
risk of loss of control and deterioration of the enclosure plastic.
Do not use radio near water.
Do not install near any heat sources such as radiators, heat registers or
other products (including amplifiers) that produce heat.
Only use attachments/accessories specified by the manufacturer.
To reduce the risk of personal injury and electric shock, do not expose to
water or rain.
Do not use the radio or listen to music or other audio programs while
operating machinery. Doing so may cause distractions that could result in personal injury.
This radio is capable of producing sound levels that can be dangerous to
long-term hearing. Listening to music at a high volume for any period of time may cause the listener
noise-induced hearing loss. The higher the volume, the less time required before your hearing may be
affected.
This appliance is not intended for use by young or infirm persons unless
supervised by a responsible person to ensure that they can use the appliance safely. Young children
should be supervised to ensure that they do not play with the appliance.

size 445 x 210 mm
Danger! - Read the operating instructions to re-
duce the risk of inquiry
Store the batteries only in dry rooms with an
ambient temperature of +10°C to +40°C. Place
only fully charged batteries in storage (charged at
least 40%). (Not supplied)
The reprinting or reproduction by any other me-
ans, in whole or in part, of documentation and
papers accompanying products is permitted only
with the express consent of the iSC GmbH.
Subject to technical changes
PXRDS-300U
GB Additonal operating & safety instructions Cordless Radio
Service information
We have competent service partners in all countries named on the guarantee certicate whose contact
details can also be found on the guarantee certicate. These partners will help you with all service re-
quests such as repairs, spare and wearing part orders or the purchase of consumables.
Please note that the following parts of this product are subject to normal or natural wear and that the
following parts are therefore also required for use as consumables.
Category Example
Wear parts* Battery
Consumables*
Missing parts
* Not necessarily included in the scope of delivery!
In the eect of defects or faults, please register the problem on the internet at www.isc-gmbh.info. Plea-
se ensure that you provide a precise description of the problem and answer the following questions in all
cases:
• Did the equipment work at all or was it defective from the beginning?
• Did you notice anything (symptom or defect) prior to the failure?
• What malfunction does the equipment have in your opinion (main symptom)?
Describe this malfunction.

size 445 x 210 mm
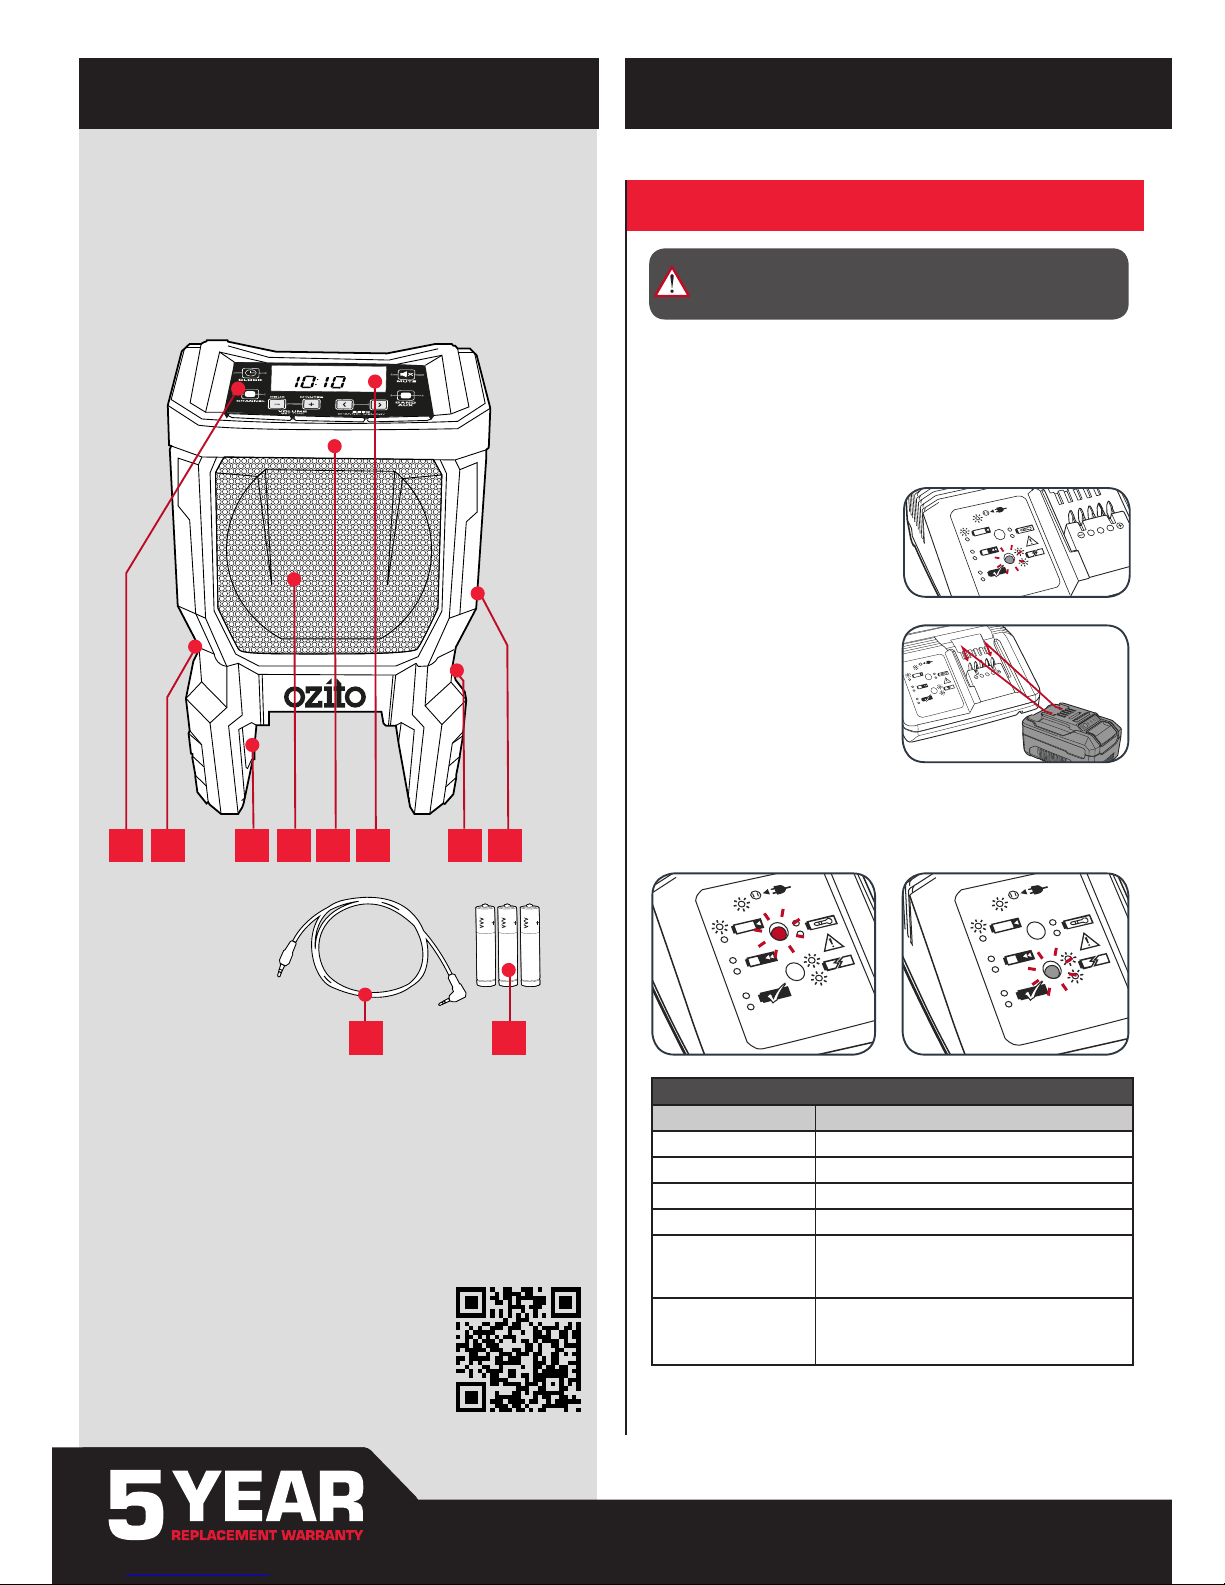
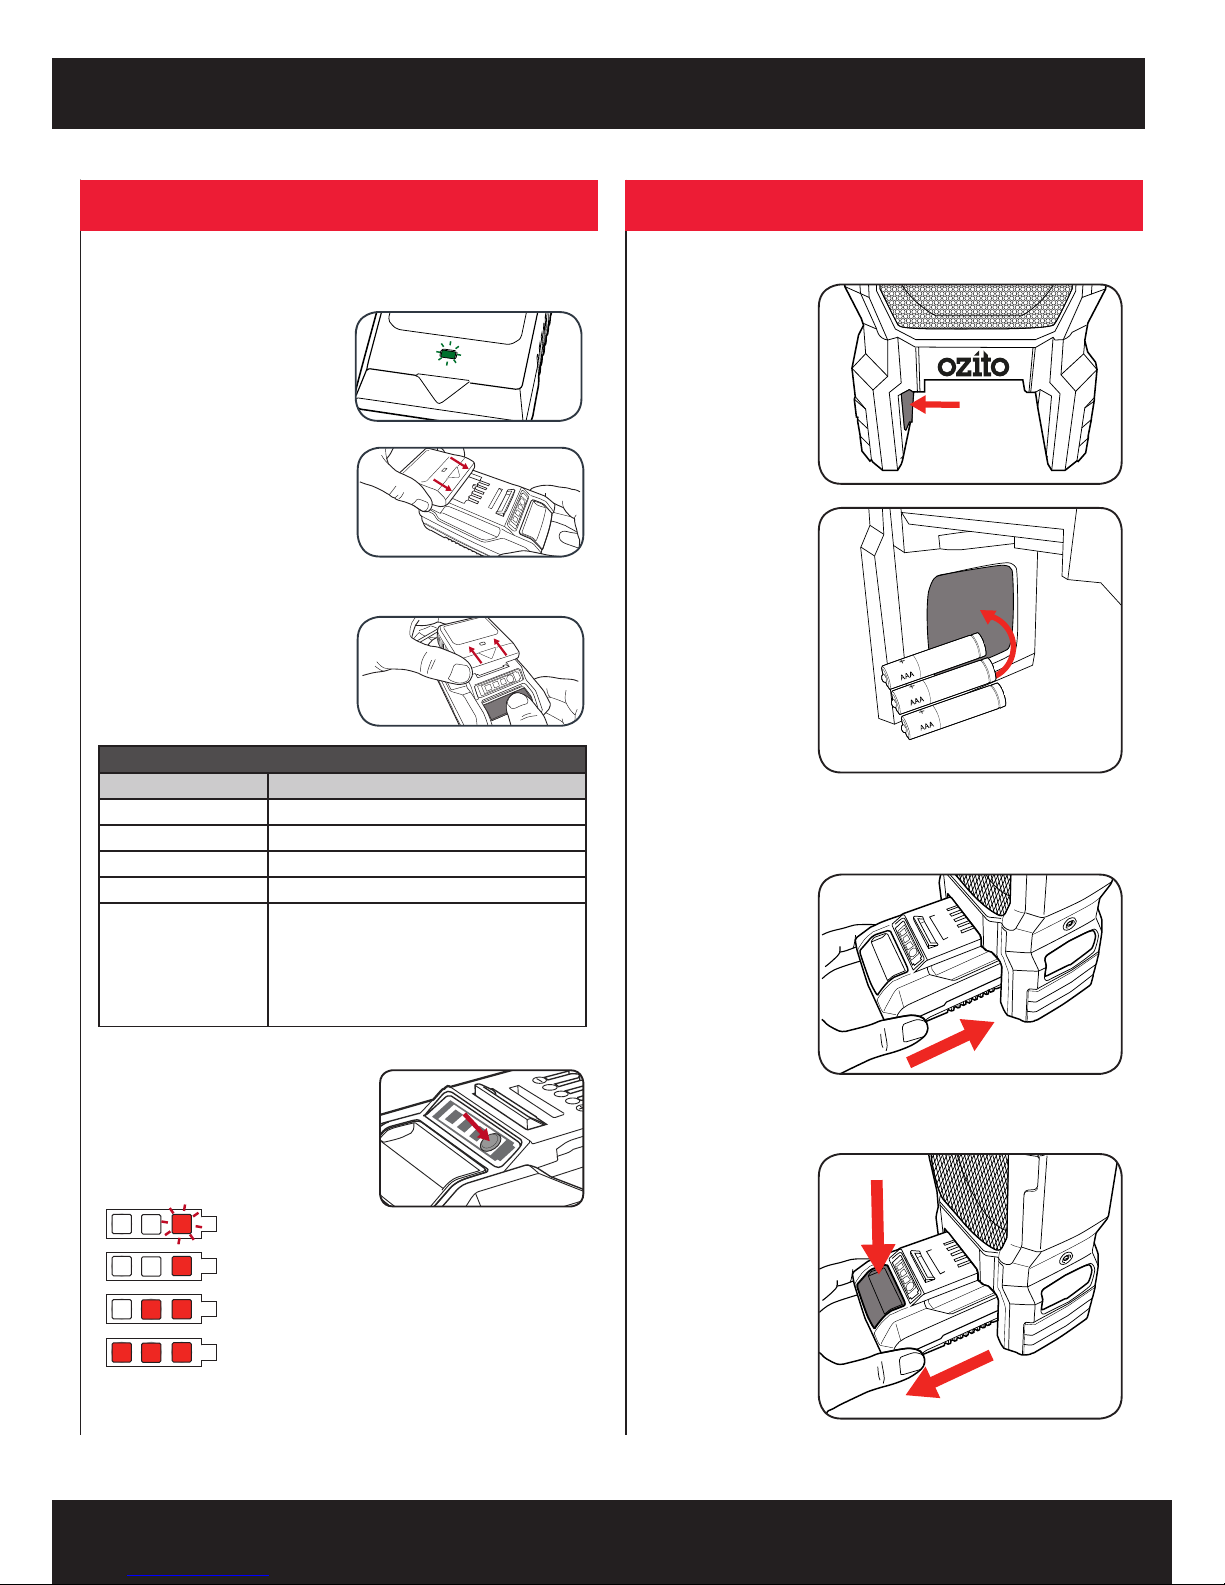
Charger indicator / Fast Charger
Indicator status Explanations and actions
Red LED Green LED
O Flashing Ready for use
The charger is connected to the mains and is ready for use; there is no
battery pack in the charger
On O Charging
The charger is charging the battery pack in quick charge mode.
O On The battery is 85% -100% charged and ready for use.
(Charging time for 1.5 Ah battery: 30 min)
(Charging time for 2.0 Ah battery: 40 min)
(Charging time for 3.0 Ah battery: 60 min)
(Charging time for 4.0 Ah battery: 80 min)
(Charging time for 5.2 Ah battery: 105 min)
Action:
Take the battery pack out of the charger. Disconnect the charger from
the mains supply.
Flashing O Adapted charging
The charger is in gentle charging mode.
For safety reasons the charging is performed less quickly and takes
more than 1 hour.The reasons can be:
- The battery pack has not been used for a very long time or an already
at battery was further discharged (exhaustive discharge).
- The battery pack temperature is outside the ideal range (between 25°
C and 45° C).
Action:
Wait for the charging to be completed; you can still continue to charge
the battery pack.
Flashing Flashing Fault
Charging is no longer possible.The battery pack is defective.
Action:
Never charge a defective battery pack.
Take the battery pack out of the charger.
On On Temperature fault
The battery pack is too hot (e.g. due to direct sunshine) or too cold
(below 0° C).
Action:
Remove the battery pack and keep it at room temperature (approx. 20°
C) for one day .
Items supplied
Please check that the article is complete as
specied in the scope of delivery. If parts are
missing, please contact our service center or the
sales outlet where you made your purchase at
the latest within 5 working days after purchasing
the product and upon presentation of a valid bill
of purchase. Also, refer to the warranty table in
the service information at the end of the operating
instructions.
• Open the packaging and take out the equip-
ment with care.
• Remove the packaging material and any
packaging and/or transportation braces (if
available).
• Check to see if all items are supplied.
• Inspect the equipment and accessories for
transport damage.
• If possible, please keep the packaging until
the end of the guarantee period.
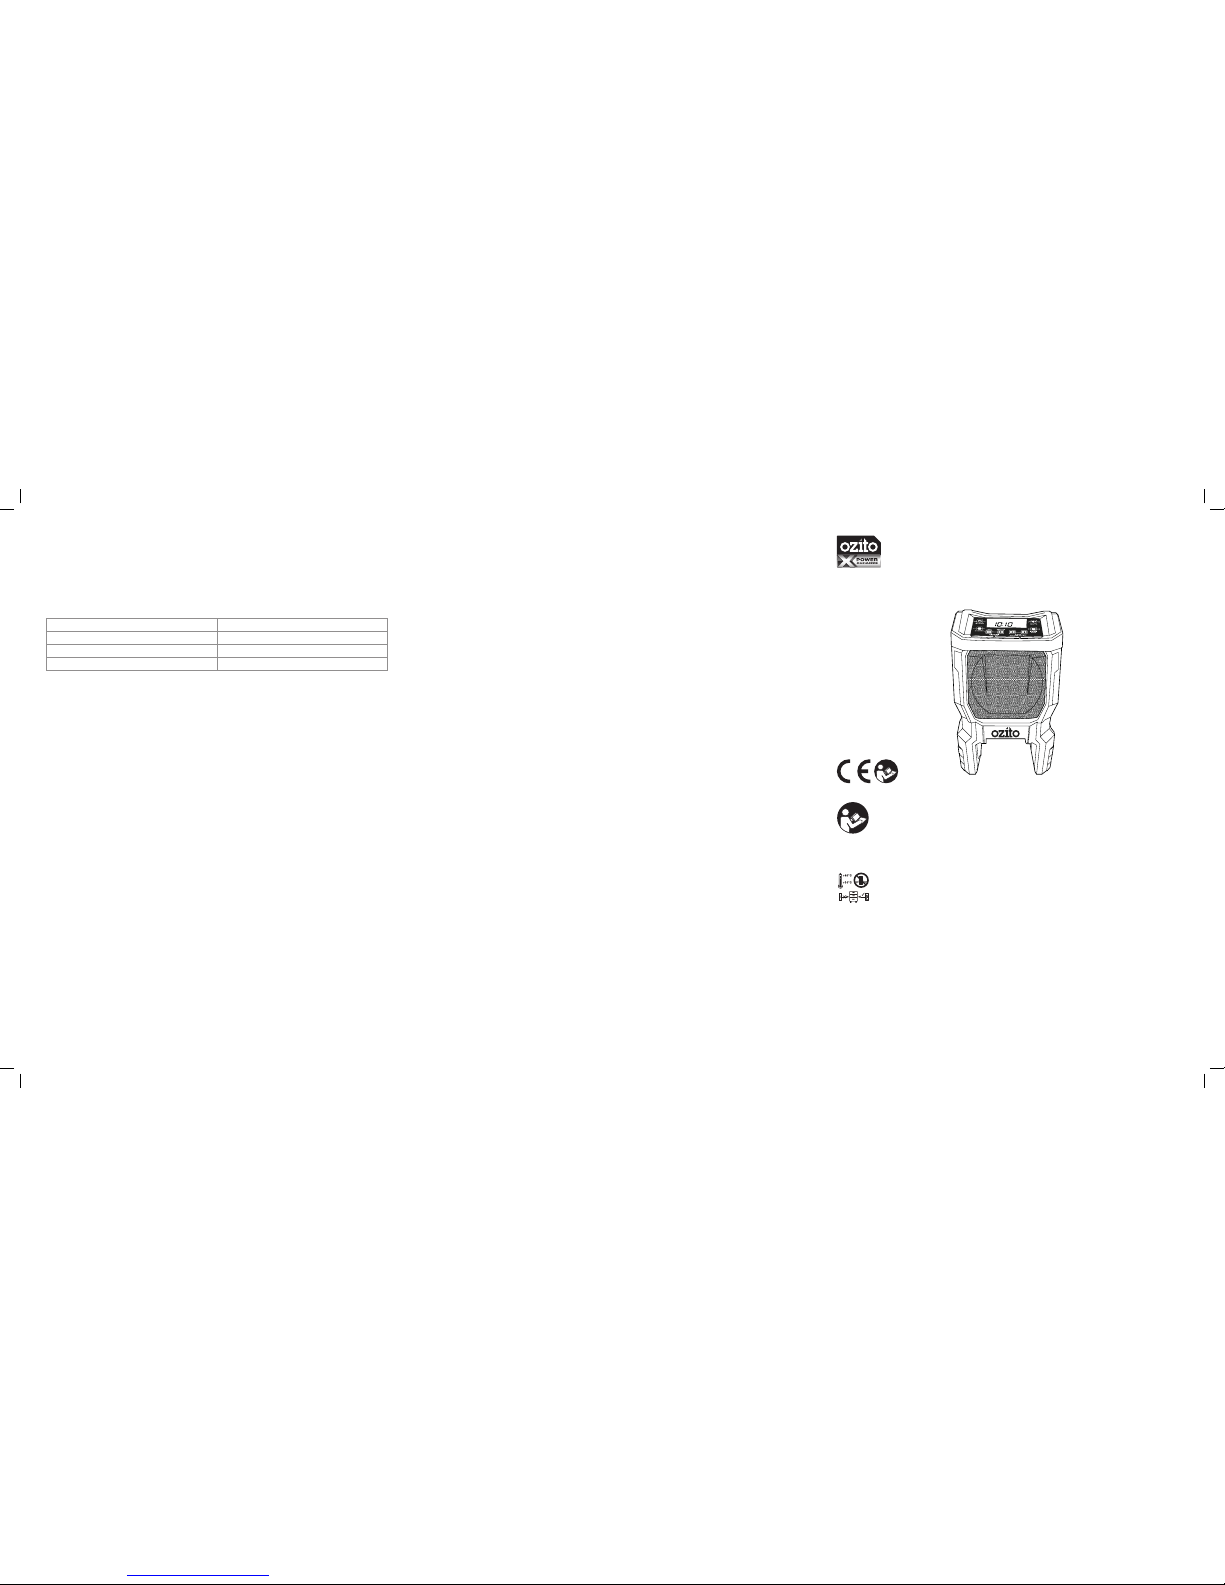
Battery and charger sold separately.This tool is
compatible with all 18V battery and chargers from
the Power X Change range.
Danger!
The equipment and packaging material are
not toys. Do not let children play with plastic
bags, foils or small parts. There is a danger of
swallowing or suocating!
• Radio
• AUX cable
• 3 x AAA batteries
• Original operating instructions
• Safety instructions
Technical data
Mains voltage ......................................... 18 V DC
AM frequency range ................... 522 - 1620 kHz
FM frequency range ................... 87.5 - 108 MHz
Speaker output ............................................. 3 W
AUX connection ...................................... 3.5 mm
Weight ........................................................0.6 kg
Caution!
Residual risks
Even if you use this electric power tool in ac-
cordance with instructions, certain residual
risks cannot be rules out. The following ha-
zards may arise in connection with the equip-
ment’s construction and layout:
1. Lung damage if no suitable protective dust
mask is used.
2. Damage to hearing if no suitable ear protecti-
on is used.
3. Health damage caused by hand-arm vibra-
tions if the equipment is used over a pro-
longed period or is not properly guided and
maintained.
For EU countries only
Never place any electric power tools in your
household refuse.
To comply with European Directive 2012/19/EC
concerning old electric and electronic equipment
and its implementation in national laws, old elec-
tric power tools have to be separated from other
waste and disposed of in an environment-friendly
fashion, e.g. by taking to a recycling depot.
Recycling alternative to the return request:
As an alternative to returning the equipment to
the manufacturer, the owner of the electrical
equipment must make sure that the equipment
is properly disposed of if he no longer wants to
keep the equipment.The old equipment can be
returned to a suitable collection point that will
dispose of the equipment in accordance with the
national recycling and waste disposal regulations.
This does not apply to any accessories or aids
without electrical components supplied with the
old equipment.
This consignment contains lithium-ion batteries.
In accordance with special provision 188 this
consignment is not subject to the ADR regula-
tions. Handle with care. Danger of ignition in case
of damage to the consignment package. If the
consignment package is damaged: Check and
if necessary repackage. For further information
contact: 0049 1807 10 20 20 66 (xed network
14 ct/min, mobile phone max. 42 ct/min) Outside
Germany charges will apply instead for a regular
call to a landline number in Germany.
Table of contents
Other Ozito Radio manuals