OZpig OZP001-01 User manual

HANDBOOK
A complete guide to
cooking and heating
with your Ozpig.
Get outdoors with your own pig
You’ll love your Pig

Your best friend for the outdoors
Whether you’re out camping or just relaxing at home, life is easy when
you have an Ozpig by your side. It takes just minutes to set up and start,
then sit back, relax and enjoy the warmth of a safely contained fire while
you cook up a feast.

CONTENTS
The Ozpig Story 1
Why you’ll love your Pig 2
What’s included in your Ozpig purchase 3
Setting up your Ozpig 3-4
Getting to know your Ozpig 5
Knowing your fire and how to cook with it 6
Different ways to use your Ozpig 7-8
Recipes:
Boss Hog’s Easy Chicken Hotpot 9
Olive Sundried Tomato & Fetta Damper 10
One Pot Breakfast-Continental Savoury Eggs 11
Camp Oven Roast 12
Add To Your Kit:
Additional Ozpig Accessories 13-14
Important Information Before You Start:
How to Care For Your Ozpig Components 15-16
Safety & Warnings 15-16

The Ozpig Story
The Ozpig is a true blue Aussie invention created by a family with a love of the great outdoors.
Hearty appetites and a passion for travel inspired the Shepherd family to develop a portable,
multipurpose cooker that boasts endless cooking options. At the same time, they also wanted
the ambience of an open fire and a versatile heater that could be used on their outdoor
adventures.The result was the Ozpig.
Named after its solid design and squat shape, Ozpig is robust, ingenious and versatile. Plus its
raised, off-the-ground design means it can be used in many locations where an open fire is not
permitted. (However, we always recommend you check local regulations.)
Mounted on stable legs, Ozpig lets you cook up a storm without bending over a campfire, while
the compact chimney directs smoke away from all the action. Plus Ozpig is much more flexible
than a BBQ, enabling you to enjoy baking, chargrilling, deep-frying, wok cooking, rotisserie
roasting or just boiling the kettle for a cuppa.
Fire up the fuel-efficient Ozpig using your choice of easy-to-carry fuel including timber, heat
beads or volcanic rock. Plus with its Australian heritage, the Ozpig has been built tough to
withstand the harshest conditions - with very little maintenance needed. So there’s a good
chance your Ozpig will outlast you!
Ozpig remains a family-owned company proudly based in Queensland, Australia.
1

Versatile cooking:
The swivel function of
the top plate allows it to
be moved directly over
the heat for cooking,
or to one side for more
gentle heating. The
plates are also fully
removable to
allow any pot
or pan to
be used.
Remember: The Ozpig chamber is small and requires ventilation to keep the fire burning. Keep the
door open to varying degrees to prevent the fire from smoking and going out due to lack of oxygen.
2
It’s totally portable.
The chimney pieces
and legs fit inside the
barrel which makes it
very easy to store.
Quick to set-up:
It takes just 2 minutes
to assemble an Ozpig.
3
4
5
1
2
Fuel Efficient: Use any combination of
dry timber, heat beads, re-constituted
logs, volcanic rock and pine cones. The
same amount of fuel used in an open fire
will last around 3 to 4 nights in an Ozpig.
Keeps you warm: Ozpig throws
out plenty of heat to keep you warm on
cooler nights.
Safe, strong & stable:
Ozpig has screw in legs
for extra safety
and stability.
If it gets a knock
it will maintain its
upright position.
6
7
Smoke Free Camping: Once
your Ozpig is up to temperature
(about 5 minutes), pull up a chair
and sit with your friends. There’s
no smoke to avoid!
Park Friendly: Ozpig is
generally “park friendly” as
the chimney top is fitted with a
spark arrestor to prevent sparks
escaping, and reducing the risk
of spot fires.
The Ozpig barrel sits 20cm from
the ground and won’t scorch the
earth below. The bottom is solid,
which ensures that hot ashes
and coals won’t drop down.
Why you’ll love your Pig
There are so many reasons why you’ll
love your Ozpig. Here are just a few:

Your new Ozpig:
What’s in the box.
4 x Zinc Coated Legs
4 x Extension Legs
1 xVinyl Carry Bag
3 x Chimney Sections
1 x Mesh Floor Fire Grate
1 x Ozpig Steel Cooker Body
1 x Multipurpose Tool
(Wood poker & plate lift handle)
Please visit ozpig.com.au to see
the full range of additional Ozpig
accessories available for purchase.
1 x BBQ Plate
3
• 1 X Spark Arrestor
(this fits to the top of the
chimney when assembled)
Setting up
your Ozpig
3
4
5
6
1
2
1 x LargeWarming Tray
When you first take your Ozpig
from its box, please ensure you
have removed all items before
discarding the packaging properly.
(Make sure you don’t throw away
your black vinyl bag). Place the
BBQ plate and the warming plate
to one side, then remove each item
from the barrel of the Ozpig.
Simply start assembling your Ozpig
from the bottom up, by screwing
in two legs firmly. Lean your Ozpig
on those legs and screw in the
remaining two.
Next, place the 3 chimney pieces
on top of the chimney stub at the
back of the Ozpig. Remember to
place the spark arrestor on top of
the top chimney piece to contain
embers.
Ozpig have added a new chimney
stub that assists with the draw of
fire when door is open as well
as improves the effectiveness
of the vented door when fitted.
See opposite page for tting
instructions
Place the Fire Grate into the belly
of the Ozpig - this sits right in the
bottom of the cavity.
Next place your round BBQ plate
on the top ring of your Ozpig.
Ensure the pin on the bottom of
the plate is inserted in the socket
on the side of the top ring.
Lastly place your Large Warming
tray in to the two side sockets on
the other side of the barrel.

Chimney Sections
3 x 300mm long
chimney pieces that fit
together and into the
stub at the back of the
Ozpig.
Spark Arrestor
To prevent sparks
and embers escaping.
Large Warming Plate
1 x 340 x 255mm surface area.
Removable plate for warming
BBQ Plate
270mm removable plate for
cooking and warming.
Zinc Coated Legs
4 x zinc-coated steel
screw in legs for
excellent stability.
Door
Strong hinge
enabling fully
open or closed
positions.
(Leave your
door open
when in use)
Mesh Floor
Fire Grate
Steel Cooker Body
Strong and durable
pressed steel.
Ozpig
Components
Setting Up the 3 Piece
Chimney
OPTION 1
OPTION 2
Option 1 MUST be used when fitting
the Double Offset Chimney.
This option
is ideal for
keeping
moisture
from running
into joints,
however sap
or residues
could run
down outside
of chimney.
Option 2
will achieve
the opposite
results to
Option 1.
4

5
The Ozpig is the perfect companion
for outdoor cooking and heating.
5
Getting to know your Pig
Your Ozpig is so versatile and easy-to-use, just follow these handy tips to get started.
BBQ Plate for cooking
(top plate)
The top plate is ideal for
barbecue style cooking.
For best results:
• Ensure the plate is swiveled
directly over the top of the
Ozpig and allow it to heat well before
placing your meat on to cook.
• Once the meat is almost cooked to your liking,
pivot the top plate away from the heat source
to finish the cooking cycle.
The top plate is also the component used for boiling
kettles and saucepans - for veggies, pasta rice etc.
Vented Door
For best results when
using the Vented Door,
ensure the chimney flue
and the spark arrestor
is clean and free from
obstruction.
You may notice a reduction
in the amount of heat the
Ozpig throws out with the Vented Door closed,
however it does ensure a fully contained fire.
If you’re feeling cool and would like to get
more heat out of the Ozpig, simply open the
door, position yourself at the front of the
Ozpig and enjoy the naked flame. Otherwise,
you can simply open the baffle to achieve a
similar result.
The Lifting Tool
The lifting tool is a multi-use device for
removing the top cooking plate and side
warming plate whilst hot. Ensure you
insert the lifting tool underneath the bar
on the plate (with the bar on the lifting tool
positioned on the lip of the BBQ plate).
The lifting tool is also handy for adjusting
the angle of the door
opening, swiveling
the vents and
closing the door
entirely. It stores
easily on the side
of the Ozpig unit.
Large Warming Plate
The 340 x 255mm larger surface area
of the side warming plate is the perfect
way to slow cook in your camp oven.
By ensuring your camp oven is in direct
contact with the side of the Ozpig (after the
initial browning or frying preparation on
the open top) your meals will continue to
cook slowly for tender, flavorsome results.
By using your Large Warming Plate, you
are leaving the top of the Ozpig free for
boiling a kettle or other forms of cooking
that need a hotter/faster heat source.
The Large Warming Plate, which can sit
on either side of your Ozpig, also provides
another work surface and is the perfect
platform to use for serving food.

6
Knowing your fire and
how to cook with it
Slow Camp
Oven Cooking
TIP:
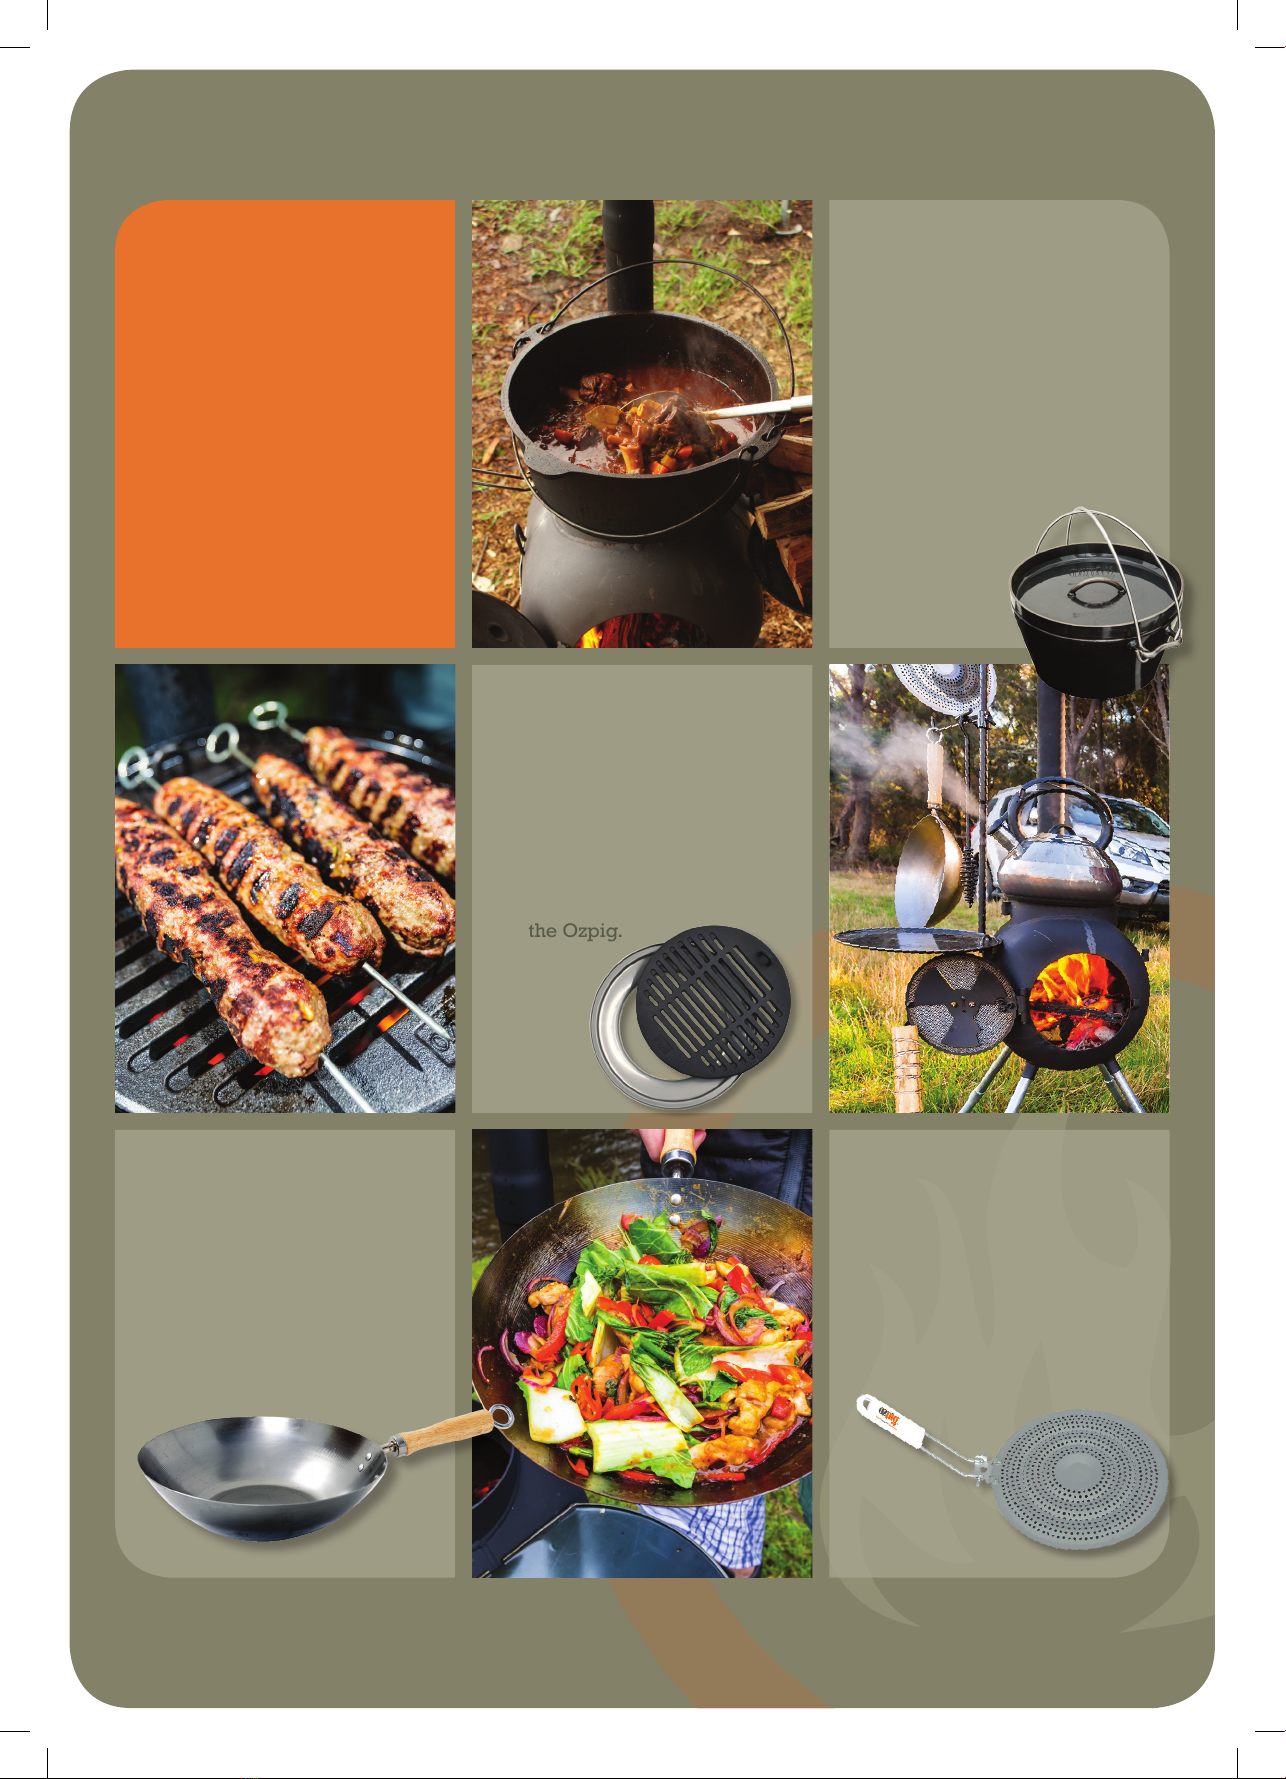
Cooking on your Ozpig is a lot of fun, but for best results
it’s important to know your fire and the best cooking
methods to complement it. Here are a few handy tips to
get you started.
A good belly of coals will maintain the Ozpig’s temperature
for steady cooking.
If the cooking surface is too hot, simply place heat diffuser
underneath the BBQ plate or cooking pot to reduce the heat.
To reduce the heat for a slow simmer when cooking with a pot
or Camp oven, place the heat diffuser under the BBQ plate or
directly under the pot or Camp oven.
For a high heat needed for deep-frying in a wok, use soft
wood cut into smaller pieces. Use 5 – 6 pieces at a time in a
criss-cross formation, to ensure oxygen can reach the middle
of the fire.
For chargrilling use a moderate fire with a large bed of coals
and a small flame. Heat the chargrill before using it and
remember it’s always easier to add more heat rather than
trying to reduce it.
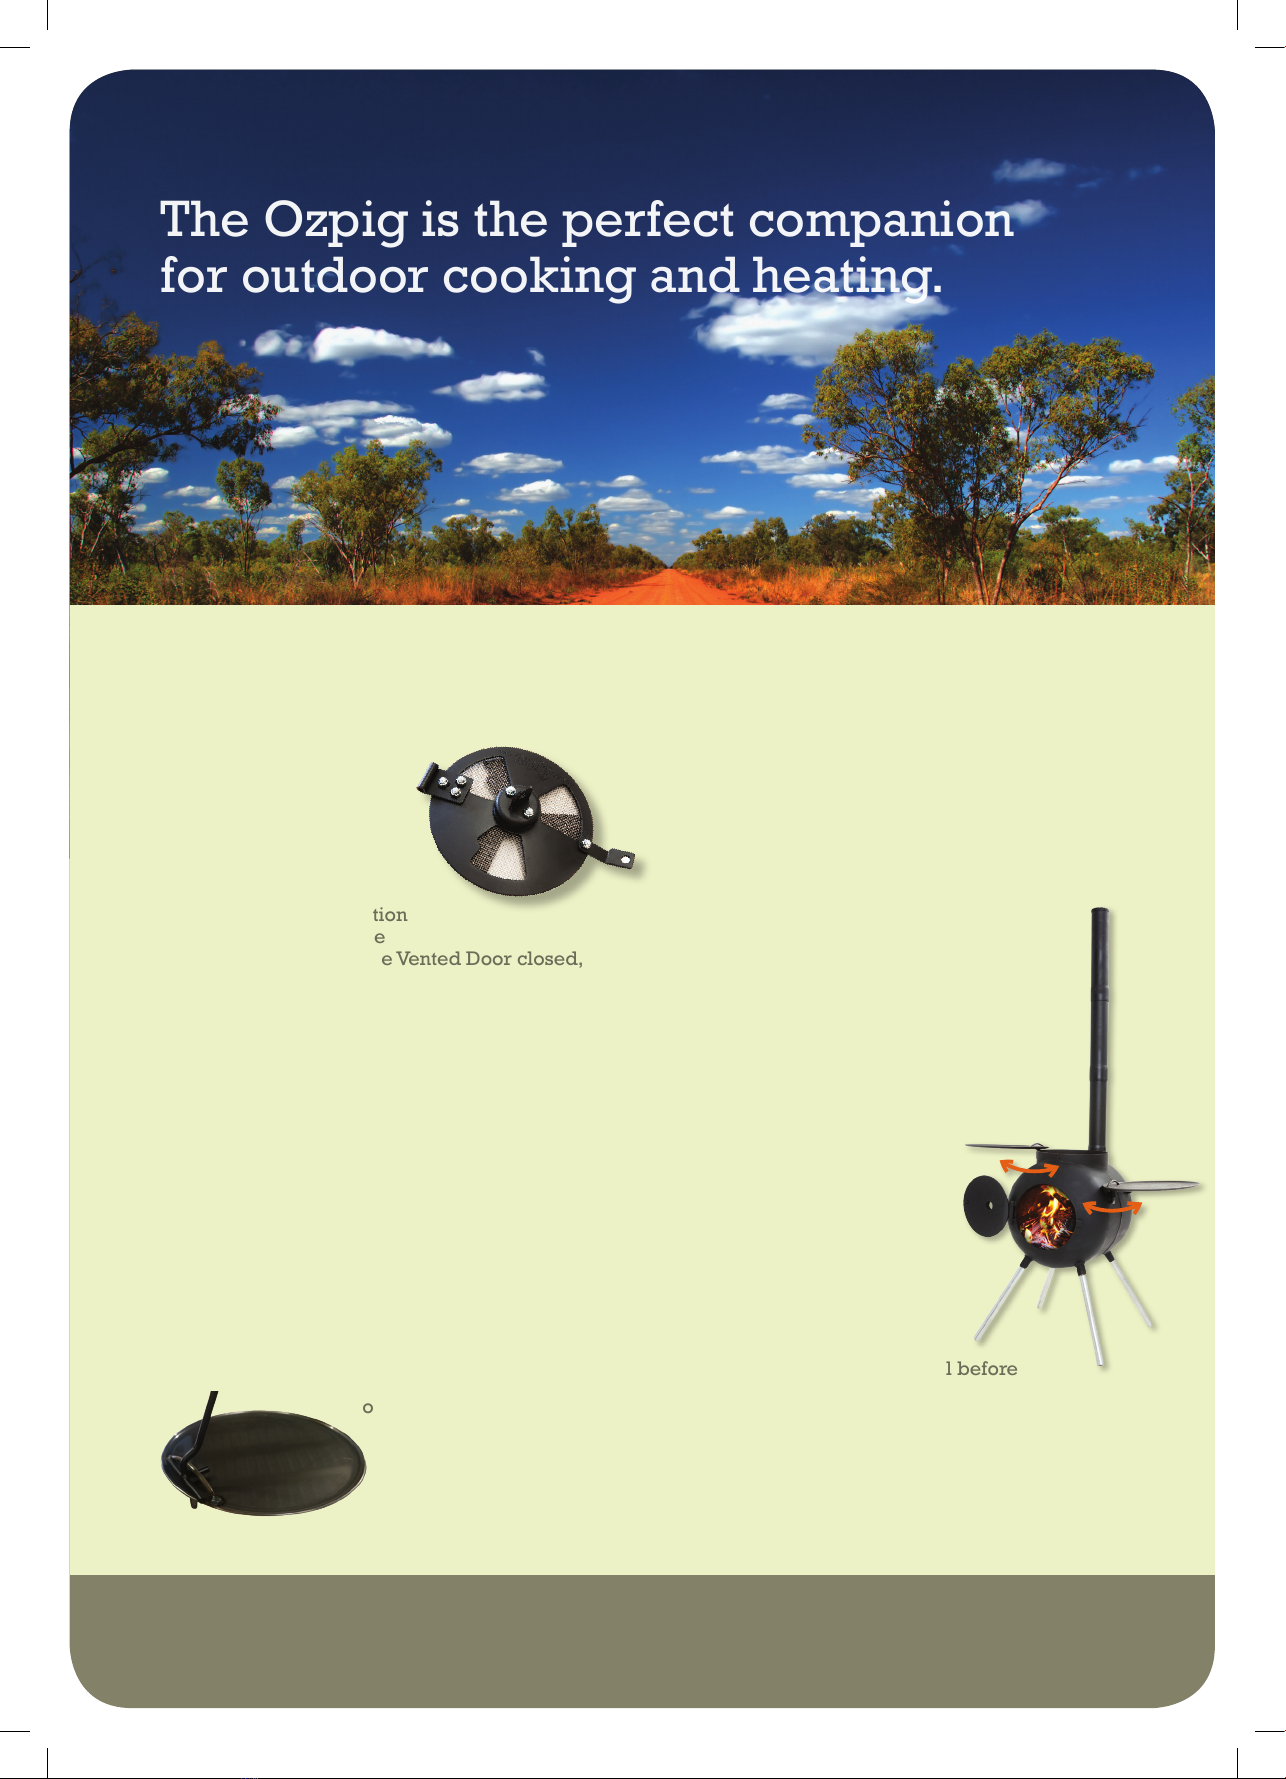
When using the heat bead basket, ensure the charcoal is fully
alight before you start cooking. Control the temperature by
opening or closing the door, or use the heat diffuser. The heat
bead basket puts the heat directly under the cooking surface
and works well for Camp oven cooking.
Use a moderate fire for cooking pizza on your Ozpig. Put some
baking paper down on the BBQ plate, place your pizza base
on top and then turn your wok upside down and place over
the top.Warm the pizza base and flip it to brown both sides.
Add your sauce and toppings and place the wok over the top
to cook the pizza.You can also place hot coals on top of the
wok to brown the pizza.
Camp oven cooking requires
high heat to begin with, so
a medium – large sized fire
is ideal.
Once you’ve started cooking,
allow the fire to burn down
to maintain a moderate heat.
When the meal is cooked most
of the way through, place the
Camp oven on the side plate
and use as a slow cooker.
At this time you need a large
fire in the chamber and ensure
the Camp oven is touching the
side of the Ozpig at all times -
remembering to rotate it
every half hour.
If you open the lid, place the
Camp oven back on top of the
stove for five minutes to build
up any lost heat.When baking
place hot coals on top of the
Camp oven lid to brown
your food.
6
1
2
3
4
5
6
7

There
are so
many
ways to
use your
Ozpig...
7
CAMP OVEN COOKING
Nothing compares to the
smell of soft damper, a
hearty casserole or roast
meat cooking in a Camp oven.
For slow cooking over a
longer period use the Camp
Oven on the warming plate,
ensuring it is always in
direct contact with the
side of the Ozpig.
CHARGRILLING
Add an authentic smokey
chargrilled flavour to steak,
fish, chicken and vegetables
by purchasing the Chargrill
Plate and Drip Tray separately.
You’ll get a versatile coated
cast iron grill and drip tray
to prevent fat from dripping
on the Ozpig.
DIFFUSER
The Diffuser can be
purchased separately and
placed on the top opening
to contain flames, to reduce
and control your cooking
heat and for toasting.
WOK COOKING
Use the wok (available for
purchase) directly over the
fire for deep-frying and
stir-frying, as a lid for
steaming or over the top
of the plate to create an
instant pizza oven.

88
WARMING
Enjoy the ambience
of a crackling open fire
and 360 degree heating
around the Ozpig on
cooler nights.
HEAT BEAD BASKET
Purchase this handy basket
to bring the heat source
directly under the cooking
surface for longer lasting heat
and better cooking control.
Use it in conjunction with
the Rotisserie Kit for a slow,
even heat.
JAFFLES
The perfect way to use
leftovers like stews, curries,
bolognaise and stale bread.
A fire toasted jaffle is an easy,
fuss-free meal that’s perfect
for anytime.
ROTISSERIE
Enjoy succulent roast meats
and delicious low fat cooking
with our automatic rotisserie
kit available for purchase
separately.
PIZZA
Wood-fired pizza is tasty
and simple on the Ozpig.
Just heat the barbecue plate,
place your dough on baking
paper on the plate, add your
toppings and place an
upside down wok over
your pizza until it’s cooked.

9
CAMP OVEN RECIPE
This is a particularly tasty meal that is full
of goodness, easy to make, and smells fantastic!
Heat your camp oven on the Ozpig and add
cooking oil.
Brown the onions, garlic & bacon or prosciutto.
Then brown chicken drumsticks.
Add the remaining ingredients and stir
through.
You can cook on top of the Ozpig for 1 hour
or slow cook on the side warming plate for 4
hours (ensuring the camp oven is touching the
side of the Ozpig).
Serves 4
3
4
5
• 2 tbsp oil
• 8 chicken drumsticks
• 1 onion, chopped
• 3 cloves garlic, crushed
• 3 slices bacon or prosciutto, chopped
• 1 small carton chicken stock
• 1 can tomatoes with basil & garlic
• 1 small jar tomato paste
• 6 olives
• basil leaves
• 1 tbsp brown sugar (optional)
1
2
TIP:
For a richer avour,
add a little wine &
some mushrooms.
Boss Hogs
Easy Chicken Hotpot
assunta’s recipes

• 3 cups of self raising flour
• pinch of salt
• 2 tbsp of butter
• 1 cup milk
• 1/2 teaspoon of vinegar
(or juice of 1/2 lemon)
• 100 grams of fetta cheese
• 1/4 to 1/2 cup of kalamata olives, sliced
• 1/4 to 1/2 cup of sundried tomatoes, chopped
• parmesan cheese to taste
Combine milk with vinegar (or lemon)
to curdle. Allow to sit while you work on the flour
and butter.
Mix the butter and flour with your finger tips,
then add crumbled fetta to the flour mixture.
Add the chopped sundried tomatoes
(reserving 6) along with the olives.
3
1
2
Olive, Sundried Tomato
& Fetta Damper
assunta’s recipes
CAMP OVEN RECIPE
Damper is an old favourite for many campers,
and a great comfort food that is very simple to prepare.
TIP:
When baking,
place a trivet or
cake rack inside
your camp oven.
This allows the
heat to circulate
and helps to
avoid burning
during cooking.
Make a well in the centre of the mixture
and add the curdled milk.
Fold everything through with a knife - do
not over work. The damper should be sticky
to touch, if not, you may need to add a little
extra milk.
Place the dough on a floured board and
sprinkle enough extra flour on top to help
shape the damper - lightly push the reserved
sundried tomatoes on top.
Place on a trivet in a hot camp oven for
20 minutes.
For the last 10 minutes of cooking, place
hot coals or hot heat beads on top of the
camp oven to finish the cooking process.
4
5
6
7
8
10

One Pot Breakfast -
Continental Savoury Eggs
assunta’s recipes
ONE POT RECIPE
• 1 onion, chopped
• 2 to 3 rashers of bacon, chopped
• 1 to 2 ripe tomatoes, chopped
• 3 eggs
• butter or oil
Cook the chopped bacon in the frying pan
and then put to one side.
Using the same pan, cook the chopped onion
in a little oil until light brown. Add the cooked
bacon and chopped tomatoes, along with a little
salt and pepper to taste, then cook until the
tomato is soft.
Make several wells in the mixture with a
spoon, crack an egg into each well and cook on
a very gentle heat. Cover the pan with a lid for a
small period of time to cook the eggs through.
This is delicious served straight onto a piece
of bread or toast.
Variation:
To make this dish go further, add a can of baked
beans to the mixture and stir through before
adding the eggs.
The tomato and onion mixture can be seasoned
with fresh herbs or a very light sprinkling of
mixed dried herbs.
3
4
1
2
Delicious! This is a super easy and super hearty way
to start any day. It’s also great for lunch on the go.
TIP:
Add a little curry pow-
der before adding the
eggs for a simple & tasty
variation.
11

Camp Oven Roast
assunta’s recipes
CAMP OVEN RECIPE
1
2
3
4
5
QUICK ROAST:
Leave the camp oven over the open fire box for
a further 10 to 15 minutes, then put the DIFFUSER
between the camp oven and the open flames.
Cook with the camp oven in this position until the
meat is to your liking.
SLOW ROAST:
Leave the camp oven over the open fire box for
10 minutes, then put the DIFFUSER between the camp
oven and the open flames. Let the roast remain in this
position (with the diffuser) for a further 30 to 40 minutes.
Transfer the camp oven to the lower side warming
plate ensuring that the camp oven body is in contact with
the Ozpig body (this allows enough heat transfer for the
roast to continue slow cooking).
Cook for a further 3 to 4 hours in this position,
remembering to rotate the camp oven 180 degrees
every 30 minutes.
66
77
8
Times can vary according to the size of
the roast and how many times you lift the
lid on the camp oven.
Serving suggestions:
Set up chairs around the Ozpig and
carve your roast straight from the camp
oven while enjoying
a nice bottle of red or a beer.
Prepare your beef, lamb, pork, chicken etc. by making small incisions into the meat and placing sliced
cloves of garlic into these cuts.
Peel and cut potatoes in half, and slice sweet potato portions to about same size as the half potatoes.
Position your camp oven (with a cake rack or trivet inside) over the open firebox of the Ozpig to
pre-heat for 5 to 10 minutes, or until very hot.
Place your dry meat into the camp oven (no oil or water required) and leave over the open fire
box for about 10 to 15 minutes.
Spray or coat the potatoes and sweet potato in a light amount of oil, then add them into the
camp oven (this is optional).
12

Additional Ozpig
Accessories
Our extensive range of accessories has been
especially developed to suit the Ozpig and
to make life easy for you! The range includes
versatile tools to help you cook up amazing
meals and handy extras with storage and
safety in mind.
Heat Bead Basket
(Ideal for “no re” days)
Puts the heat directly
under the cooking
surface to help
control cooking.
Tool Rack
Easily attaches to
your Ozpig for storing
cooking implements,
along with the diffuser,
wok and frying pan.
Double Offset
Chimney Pieces
Using a double offset
takes the flue away from
the body of the Ozpig and
gives extra space to allow
for the use of large frying
pans and pots. Contains 2
pieces.
Double Offset
Chimney Kit
Using a double offset
is great for camping,
allowing you to have the
Ozpig inside an awning
while the flue is up and
away from the canvas.
Contains 4 pieces.
Wok
Fits directly into the top
of the Ozpig for greater
cooking versatility.
Diffuser
Regulates the heat under
the top plate. Ideal for
cooking fish or chicken,
or when a gentle
simmer is required.
Pig Pen Enclosure
Made from powder
coated steel and
simple to erect, this
safety barrier delivers
peace of mind.
13
Please visit
www.ozpig.com.au
for newly added
accessories.
Vented Door
This closes completely
whilst providing a balance
of ventilation to maintain
a good fire base.

Travelling
Carry Bag
Heavy duty, fully zipped
vinyl bag with customised
compartments for your
Ozpig accessories.
Rotisserie Kit
With automatic operation
for perfect camp
roasted meats.
(Chargrill tray
pictured not
included)
Chargrill Plate
& Stainless Steel
Drip Tray
Perfect for authentic
wood-fired flavours.
The coated cast iron grill
is easy to clean and the
drip tray prevents any fats
dripping onto your Ozpig.
Custom Fit Cover
Tailor-made to protect
your Ozpig from
the elements while
assembled.
14
Ozpig Extension Legs
(set of 4)
Zinc Coated steel screw
in extension legs for
added height.
Extra Large
Warming Plate
Enjoy the larger 340 x 255mm
surface area of this warming
tray to keep your food warm or
slow cook with ease by placing
your camp oven on this tray.
Enamel BBQ Plate
The enamel BBQ plate is easy
to use and look after. Having the
enamel coating means quick
and easy cleaning in hot soapy
water without having to season
the plate afterwards.

15
How to Care For Your Ozpig Components
Legs: Occasionally spray the threaded section of the legs with a lubricant/cleaner product for continued lubrication and
protection.
Chimney Sections: Some timbers will produce sap which can fuse the chimney sections. If this occurs, remove the
sections and clean with a stiff wire brush. Then coat the connecting areas with a light spray of oil and rub dry. (Only use
seed oils, such as canola oil.) If the Ozpig is being left outdoors for an extended period, the chimney lengths should be
removed after use and oiled.
Spark Arrestor: Remove and clean on a regular basis. To remove, tap gently and clean with a stiff brush.
BBQ Plates (Top and Side Warming Plates): The plate’s protective coating of oil or wax is designed to wear off over time
and you can protect the plate by seasoning the steel.Your plate will need to be heated, cleaned and seasoned before use.
TIP: Make sure your plate is completely dry and re-oiled after use and before packing away to help prevent rusting.
Please note that moisture on the plate can prevent the oil from adhering and marinades using acid-based ingredients, such
as tomato sauce or vinegar, can remove the seasoning. If barbecuing marinated foods, you can place baking paper on the
BBQ plate prior to cooking.Your plates can be re-seasoned at any time
Never leave the fire unattended and
remember it is always a good idea
to have a bucket of water on hand.
Basic Fire Starting Process
Please note:
• Do not use the Ozpig Cooker and Heater unless
fully assembled.
• Ensure the legs of your Ozpig are securely screwed
in to the base of the unit before igniting.
• Ensure you can light a fire in the area you are in.
Important Information Before You Start:
Set your Ozpig up in a level position and if required,
remove ash from the belly.You will require:
• Kindling
• Dry firewood cut to small pieces no thicker than
50mm diameter and 280mm long (the size of a can
of soft drink)
• Newspaper or fire starters (if required)
• Matches
Place loose balls of scrunched newspaper into the
belly. It helps to put a fire starter in each ball. Place
kindling over newspaper in a ‘tepee’ configuration.
Keep the front door wide open, the top plate swiveled
to the side and the diffuser over the top opening -
to prevent any cinders escaping.
Light the paper and as the kindling burns, slowly
add more firewood until you have a good coal base.
With your fire well established, (burning well and
getting hot) move the hotplate back to into position,
or place your diffuser on top.
TIP: It may help to leave a gap at the back of the plate
to keep the fire strong.
Add wood as required to maintain the flame for a
smoke free fire.
Let everyone present know that the Ozpig is HOT.
3
4
5
6
7
2
1
USING THE 3 PIECE CHIMNEY
Seasoning Your Plates:
We strongly recommend that you season
your plates before use. Start by removing the
protective coating from the BBQ plates, this can
be done by either scrubbing it off or using
a light heat to soften the coating, enabling
you to scratch it off with a paint scraper or
something similar. Once this has been done, it’s
time to start seasoning (we recommend using
flaxseed oil as it is a hard drying oil which
transforms into a hard, tough film).
Place the BBQ plate over the heat until warm, then
take it off and use a clean cloth or paper towel to
apply the flaxseed oil, rubbing it over the surface
of the plate making sure you end up with a nice,
thin layer. Place the BBQ plate back over the heat.
Once the oil starts to smoke, leave it over heat
for a further 5-10 seconds and then remove and
allow to cool. Wipe off any excess oil with paper
towel and repeat at least three times – the more
the better!
WARNING
• Keep the Ozpig in a level position at all
times.
• Always use appropriate tools and cooking
implements with long heat resistant
handles.
• Never touch the surface of the Ozpig to test
if hot.
• Never dump hot coals or ashes where
someone may step OR where the hot coals
or ash might start a fire - dispose of them
appropriately.

16
REDUCING SMOKE
There will always be some smoke when first lighting a fire. Start with kindling and have the top plate and door open.
Only add thicker pieces of timber once you have a good bed of flames. Once the fire is established, close the top plate
or replace with the diffuser.
• Have the door in an open position.
• On starting - do not overload the chamber.
• Make sure that the timber is dry hard wood.
• Use timber no thicker than the size of a can of soft drink.
• Always have a flame burning when adding wood to minimise smoke.
• Always add timber to a bed of flames.
• Coal or heat beads can be added to help create a larger bed of coals, however you will need to ensure this is done
with a bed of kindling.
Remember: the Ozpig chamber is small and requires ventilation to keep the fire burning.
Keep the door at least partly open or use the Vented Door to prevent the fire from smoking
and going out due to lack of oxygen.
SAFETY
The portable Ozpig is designed for outdoor use only.
For your own safety, and that of those around you, please read the following safety information carefully:
• This BBQ will become very hot, do not move during operation.
• Do not leave infants, children or pets unattended near a hot Ozpig.
• Do not use gasoline, alcohol or other highly volatile fluids to ignite timber or charcoal.
• Do not use the Ozpig within 1.5 meters of combustible material.
• Always check and observe local fire regulations and guidelines.
• Do not use the Ozpig unless fully assembled.
• Ensure the Ozpig legs are screwed in securely before using.
• Do not use the Ozpig in high winds.
• Use barbecue mitts or hot pads to protect hands when cooking.
• Do not attempt to move the Ozpig while in use or hot.
• Be aware of loose clothing when lighting or using the Ozpig.
PACKING YOUR OZPIG AWAY
Remove the hot ash/coals safely and ensure your Ozpig is cool before
packing away for transport or storage.
IMPORTANT: Ensure your Ozpig is cool before packing away for
transport or storage.
FAQs
For further information check out the
FAQs and troubleshooting tips on our
website.Visit www.ozpig.com.au/
troubleshooting or share your
questions, concerns or tips with our
large Facebook community of Ozpig
lovers at www.facebook.com/ozpig.
Care and Maintenance to prolong the life of your Ozpig
• We strongly suggest you regularly coat the outside to prevent light surface rust (if your unit is outdoors for
extended periods).
Also, it is advised to regularly coat all chimney parts with oil and a soft cloth or paper towel. Do this whilst the unit is
still warm (not hot).
• Please ensure your Ozpig is covered if left outdoors, and that the unit is cold before doing so. Our website showcases a
custom cover for purchase if required.
• If light rust does appear, this can easily be removed with a wire brush or by lightly sanding the unit with sandpaper.Wipe
clean and repaint with Pot Belly Black.
• Caution: Using abrasive cleaners on the Ozpig will damage the finish.
• Regularly remove ash build-up from under the internal fire grate before lighting the Ozpig.We recommend a small
garden spade.

17
You’ll love your Pig
Find us on Facebook, or check out our website
to see the location of our next live exhibit and
our full range of accessories.
Ozpig Australia 100 Enterprise Street, Kunda Park, Queensland 4556 | 1300 4 OZPIG(69744) | info@ozpig.com.au
Table of contents
Popular Wood Stove manuals by other brands

Morso
Morso 2B Standard Instructions for installation and use

Nibe
Nibe Contura C556T installation instructions

Breckwell
Breckwell LUXURY SERIES SP2700 owner's manual

Nordpeis
Nordpeis Monaco II High Base installation manual

Alderlea
Alderlea T5 Installation & operation guide

RAIS
RAIS GABO Instructions for installation, use and maintenance

Vermont Castings
Vermont Castings 2115 owner's manual

SCAN
SCAN SCAN 68 Series Assembly and instruction manual

Mendip Stoves
Mendip Stoves ASHCOTT Wood Operation and installation manual

RIKA
RIKA LOOK RIKATRONIC 3 operating manual

Palazzetti
Palazzetti EVA GENERAL INFORMATION - WARNINGS - INSTALLATION - MAINTENANCE

Ventis
Ventis HES350 owner's manual