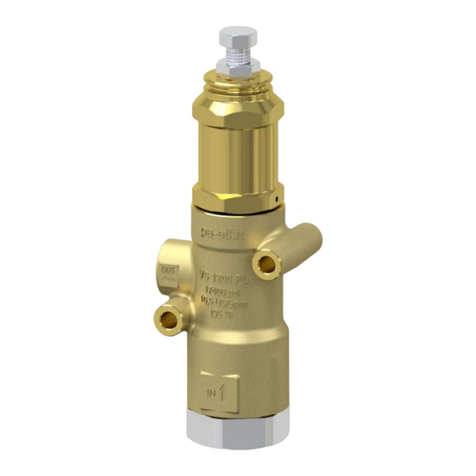
P.A. VRPP 170 User manual

Last update: 30/01/2017
1
VRPP 170 –Pressureregulatingvalvebypneumaticcontrol
Technicalmanual:E246
Pressure regulating valve.
At gun shut off, the water flow is bypassed at reduced pressure.
DN 25
Technical specifications
Construction material
Brass body and internal parts in Sst
Alluminium Pneumatic Jack
Rated temperature (1)
90°C
Rated diameter
DN 25
PART
NUMBER
RATED
PRESSURE
PERMISSIBLE
PRESSURE
MINIMUM
ADJUSTABLE
PRESSURE
MAXIMUM AIR
PRESSURE
MAXIMUM FLOW
RATE
WEIGHT
INLET
OUTLET
BYPASS
bar
MPa
bar
MPa
bar
MPa
bar
MPa
l/min
g
60.5300.00
150
15
170
17
15
1.5
10
1
200
4015
G 1” F
(1) The valve has been designed for a continuous use at a water temperature of 60°C. It can resist for short periods
at a maximum temperature of 90°C
60.5300.00 VRPP 170 G 1” FF
- Pneumatic piston control.
- Pneumatic piston at max pressure => max pressure
defined; without air pressure => circuit in low pressure
- Possibility to vary the work pressure by adjusting the air feed pressure
- Possibility to adjust the max pressure mechanically.
- Usable with a multiple number of lances.
- High balancing to guarantee slight variations of the rated
pressure when the flow varies in bypass.
- Fillets M8 Holes for fixing screws.

Last update: 30/01/2017
2
DIMENSIONAL DRAWING
DESCRIPTION
The valve has an inlet fitting, an outlet fitting and a bypass fitting with G 1”F threading.
A pneumatic jack is fitted to the valve with a feed fitting G ¼” F thread.
SELECTION
This product is to be utilized with clean fresh water, even slightly additivated with normal detergents. For use involving
different or corrosive liquids, contact the PA Technical department. Appropriate filtration should be installed when using
unclean liquids. Choose the valve in line with the running data of the machine where to be installed (rated pressure,
max flow and max temperature of the system). In any case, no machine overpressure has to exceed the permissible
pressure imprimed on the valve.
FUNCTION
The valve regulates the max pressure of the system altering the flow discharged by the bypass. The adjustment is
carried out by changing, through means of a piston, the position of a shutter that partially closes the bypass opening.
INSTALLATION
This product is bound to be incorporated on a finished machine. This accessory, on a machine that produces hot water
must be fitted upstream to the heat generator. On a system that generates hot water, anticipate the fitting of
accessories that limit the accidental increase of fluid temperature.
ALWAYS INSTALL A SAFETY VALVE IN THE CIRCUIT.
The pneumatic jack has to be fed with dry air and lubricated to the maximum pressure of 10 bar –1 Mpa.
It is recommended to use a nozzle with a flow rate that at gun opening, permits to discharge regularly from the bypass
of the valve at least 5% of the flow supplied by the pump in order to have a constant pressure value, easy adjustment
and to avoid troublesome pressure spikes at gun closure. If the nozzle wears out, the working pressure drops. To revive
the working pressure, change the worn out nozzle. On installation of a new nozzle, re-adjust the system to the original
working pressure.

Last update: 30/01/2017
3
DISCHARGE SYSTEM AND WATER ADDUCTION
We recommend to fit the valve with bypass discharge to a tank. It is advisable that the tank be fitted with deflectors to
reduce eventual turbolence and air bubbles generated by the immission of the bypass flow which could be harmful for
the pump. With elevated flow or near to the maximum flow of the valve, the installation with a recirculation of bypass
direct to the pump could cause potential pressure spikes harmful to the pump.
PRESSURE ADJUSTMENT/SETTING
The adjustment has to be made with the system under pressure and the gun open and with the air feed pressure at 4 bar
–0.4 MPa.
Vary the pressure by screwing/unscrewing the attachment in which the jack head is fitted (pos 21) by means of an Hex
key 41. This operation will result easy if the correct nozzle has been chosen. When the attachment is tightened (pos 21)
a consequent increase of pressure has to correspond; if, before reaching the desired value during tightening the
pressure increase does not correspond, do not insist but verify the correct ratio nozzle/flow pressure. Upon reaching the
desired pressure, tighten the nut (pos 20). After setting the maximum pressure, it is possible anyhow to vary the valve
work pressure by adjusting the air feed pressure. By increasing air feed pressure, valve pressure will increase as
well. To decrease valve pressure, it is necessary to reset air pressure and subsequently increase it again up to the
desired pressure level. If the air feed is interrupted the complete circuit will go into low pressure.

Last update: 30/01/2017
4
PROBLEMS AND SOLUTIONS
PROBLEMS
PROBABLE CAUSES
SOLUTIONS
Valve cycles
- Air inside the system
- Worn out seals
- Clogged bypass or diameter too small
- Flush out
- Replace
- Clean or widen passages
The valve does not reach
working pressure
- Piston seals ruined
- Presence of impurities between seat and shutter
- Seat & shutter worn out
- Nozzle worn out
- Incorrect choice of nozzle
- Air shortage in pneumatic jack
- Air pressure too low
- Pneumatic jack seals worn out
- Replace
- Clean seat
- Replace
- Replace
- Fit nozzle with inferior flow factor
- Open air compressed feed
- Reset air pressure to circa 4 bar
- Replace
Pressure spikes
- Minus min.5% of total flow in discharge
- Clogged nozzle
- Re-adjust correctly
- Clean or replace
MAINTENANCE
STANDARD: every 400 working hours (circa 10,000 cycles), check and lubricate the seals with water resistant grease.
SPECIAL: every 800 working hours( circa 20,000 cycles), control the wear of the seals and internal parts and if
necessary, replace with original PA parts taking care during installation and to lubricate with water resistant grease.
Maintenance has to be carried out by Specialized Technicians.
The manufacturer is not to be considered responsible for damage as a result from incorrect fitting and
maintenance
REGULATIONS : see norm manual
The accessory hereby described bears the CE marking in accordance with the Norms and Directives applied on
the Declaration of conformity.
For a correct utilization, follow the directions described in this manual and re-print them on the Use and maintenance
manual of the machine.
Make sure that you are given the Original Conformity Declaration for the accessory chosen. The present manual is
valid for all unloader valves named VRPP 170.
Technical data, descriptions and illustrations are indicative and liable to modification without notice.
Instruction manual, maintenance, installation, spare parts
For a correct utilization, follow the directions of this manual
Re-print them on the Use and Maintenance booklet of the machine.
n. 12.9246.00

Last updated 13/10/2017
60.5300.00 VRPP 170 regul.valv. 1"F Bsp -air contr.
Pos. P/N Description Q.ty K1K2K3K4 Pos. P/N Description Q.ty K1K2K3K4
1 60.5026.31 Coupling, 1"Bsp F brass 1 3
2 10.3206.01 O-ring, 2,62x28,25 mm 2 • 10
3 60.5024.35 Hous.-VB200/150-1"Bsp FF 1 1
4 10.3072.01 O-ring, 1,78x20,35 mm Ni 85 1 • 10
5 60.5002.51 Seat, 15,8x23x6 mm Sst. 1 • 2
6 60.5003.51 Shutter pin, M8 Sst. 1 • 3
7 10.3195.01 O-ring, 2,62x20,29 mm Ni 90 1 • 10
8 60.5010.31 Reduction bushing, brass 1 2
9 10.4080.00 Back-up ring, 12x18,2x2 mm 1 • 10
10 10.3234.00 O-ring, 3,53x10,69 mm 1 • 10
11 60.5301.31 Spring holder, brass 1 1
12 60.5004.51 Piston, M8 Sst. 1 2
13 10.3237.00 O-ring, 3,53x15,47 mm 1 • 10
14 10.4081.00 Back-up ring, 15,8x22x2 mm 1 • 10
15 14.7461.00 Ball, 13/32" Sst. 1 10
16 60.5005.31 Spring guide spacer, brass 1 1
17 60.5006.61 Spring, 6x30x62 mm 1 5
18 60.5303.31 Spring guide spacer, brass 1 1
19 16.1897.22 Screw, DIN912 M6x22 mm z.pl. 4 5
20 60.5302.31 Ring nut, M36 brass 1 1
21 60.5304.31 Piston holder, brass 1 1
22 10.2020.25 Stem seal, 20x25x4 mm 1 • 5
23 11.8901.14 Pneum. filter, G1/4 1 3
24 60.5322.41 Valve head, Al 1 3
25 60.5323.85 Bushing, opn. 20x24x14,8 mm PTFE 1 • 3
26 60.5321.61 Piston, 20-M12x94 mm 1 3
27 10.3058.01 O-ring, 1,78x10,82 mm 1 • 10
28 60.5326.41 Piston, Al 1 3
29 11.4740.00 Hex. nut, M12 1 10
30 60.5324.46 Jacket, Al 1 3
31 60.5325.41 Valve bottom, Al 1 3
32 10.2100.00 Piston seal, 90x100x4,5 mm 2 • 5
33 10.3106.00 O-ring, 2x103 mm 2 • 5
Kit P/N Description
K1 60.5016.24 Spares kit -VB200/150, 10x1pcs. 1
K2 60.5327.24 Spares kit -pneum. cylinder, 5x1pcs. 1


P.A. S.p.A.
Via Milano, 13
42048 Rubiera, Reggio Emilia - Italy
Tel +39.0522.623611
Fax +39.0522.629600
www.pa-etl.it
COMPANY WITH QUALITY MANAGEMENT
SYSTEM CERTIFIED BY DNV
ISO 9001
Table of contents
Other P.A. Control Unit manuals
Popular Control Unit manuals by other brands

Sera
Sera Seramic CO2 control system manual

ADTRAN
ADTRAN Total Access 1500 FT1 DP Installation and Maintenance

OST
OST iConverter XGT+ user manual

Parker Pneumatic
Parker Pneumatic 250B Series Installation & service instructions

YOKOGAWA
YOKOGAWA FA-M3 Vitesse instruction manual

Ebyte
Ebyte E180-ZG120A user manual