Pace Edwards Roll-Top-Cover User manual

RETRACTABLE HARD TONNEAU COVER
Pace Edwards Company
2400 Commercial Blvd.
Centralia WA 98531
(800) 338-3697 toll free
(360) 736-9991 main
(360) 736-9992 fax
www.paceedwards.com
Part #: RT-INSTALL 123
Revised 12/03
Roll-Top-Cover®shown on 2003
Chevrolet Silverado
TABLE OF CONTENTS
Tools Required for Assembly (FIG. 1) ....................................2
Before You Start .....................................................................2
Drain Hole Locations (FIG. 2)..................................................2
Packaging Contents (FIG. 3) ..................................................2
Hardware Kit Supplied with Unit (FIG.4) .................................3
STEP 1: Remove Contents from Box ....................................3
STEP 2: Place Canister..........................................................3
STEP 3: Install Rails (FIG. 5a, 5b) .........................................3
STEP 4: Install Guide Strips...................................................4
STEP 5: Adjust Position of Canister (FIG. 6) .........................4
STEP 6: Install Lock Arm Assembly (FIG. 7a, 7b, 8) ..........4-5
STEP 7: Adjust Position of Guide Strips (FIG. 9)...................5
STEP 8: Adjust Lock Arm Assembly ......................................6
STEP 9: Install Drain Tubes...................................................6
STEP 10: Install Top Cover ...................................................6
Warranty Statement.................................................................7
H
e
l
p
f
u
l M
a
in
te
n
a
n
ce
Hin
ts
......................................................7
INSTALLATION
INSTRUCTIONS

FIG. 2
Drain Tube Holes
1
8
1
2
7 6
5
4
3
2ROLL-TOP-COVER®
TOOLS REQUIRED FOR ASSEMBLY:
Electric drill*
Phillips screwdriver
Slotted screwdriver (or 5/16”& 1/4”nut drivers) and
Center punch*
Needle nose pliers
*If you purchased the clamp on rail option, no drilling or
punching will be required.
BEFORE YOU START:
Read the instructions carefully before you start. If you have
questions regarding the installation of your new Roll-Top-
Cover®retractable tonneau cover, please call our Technical
Support Line at (800) 338-3697 or visit our web site at
www.paceedwards.com.
DRAIN HOLE LOCATIONS:
The Roll-Top-Cover®is designed to carry rainwater from
the fabric cover into the canister and then out through
the drains. Most truck models have standard OE drain
holes or plastic/rubber access ports in the front of the
truck bed. Check to make sure your truck has the OE
drain holes so that drilling into the sheet metal is not
required. If drilling is necessary, be sure to check the
underside of the truck bed for the best location. The
holes should be located near the side and as far forward
as possible. Use a drill bit suitable for sheet metal (such
as a taper drill or step drill). Drill drain tube clearance
holes at 5/8" (16mm). This will need to be done before
installing the cover.
PACKAGING CONTENTS:
FIG. 3
CONTENTS IN CANISTER BOX
1. Canister Assembly
2. Top Cover Assembly
3. Lock Arm Assembly
4. Hardware Pack
5. Shim Pack
6. Drain Tubes
CONTENTS IN RAIL BOX
7. Guide Strips (left & right)
8. Rails (left & right)
FIG. 1

INSTALLATION INSTRUCTIONS 3
HARDWARE KITS SUPPLIED WITH UNIT:
STEP 1: REMOVE CONTENTS FROM BOX
Remove canister and top cover from the box. Perform a quick inventory to insure all parts are
there. (If any parts are missing call Pace Edwards Technical Support for replacement, (800)
338-3697.)
STEP 2: PLACE CANISTER
Use a soft rag or some packing materials from the box to wedge between the fabric roll and
handle to temporarily keep the fabric roll from winding into the canister. Remove the screw
and metal clip holding the handle to the canister. Place the canister in the front of the truck
bed, cab side forward, in the position required for unrolling. Center side to side. Do not attach
the canister yet.
STEP 3: INSTALL & FASTEN THE RAILS**
** If you have purchase the optional Clamp Kit Assembly no drilling will be
required. Refer to the instructions provided with the Clamp kit.**
Remove the side rails and guide strips from their box. The side rails are marked “left” and
“right” (left is the driver’s side of the truck). With the tailgate closed, place the side rails in
position on the truck bed. (Figure 5a & 5b) Side rails have a rubber spacer on the end caps, at
the tailgate end, to establish the correct spacing to the tailgate (1/16”) and to prevent the
tailgate from striking the side rails when closing. Press the rail tightly against the closed
tailgate. Shims may be required to maintain a horizontal top surface on the rails. Peal and
stick the shims horizontally close to the rail mounting holes. Shims are provided in two
thicknesses. Shims may need to be stacked on each other to create the right thickness.
Repeat the same process on each side. Once rails are in the correct position mark the hole
locations through the side rails with a felt tip pen. Remove the side rails. Center punch and drill
with the drill bit provided. To make assembly easy pre-thread the holes with the #10 self-
tapping sheet metal screws provided. Replace the side rails on the truck bed and securely
tighten the screws at this time.
FIG. 4
CAUTION!PERMANENT DAMAGE MAY BE CAUSED IF THE
HANDLE ASSEMBLY IS ALLOWED TO RETRACT INTO THE CANISTER WITHOUT
PROTECTION ON THE UNDERSIDE OF THE FABRIC PANEL!

4ROLL-TOP-COVER
®
STEP 4: INSTALL GUIDE STRIPS
Install the guide strips in the side rails. Be sure the “left” and “right” guide strips are installed
on the correct sides. Loosely screw the guide strips to the side rails from the bottom with the
#8 machine screws provided (Do not tighten yet).
STEP 5: ADJUST CANISTER
POSITION**
Center the canister side-to-side on the
truck bed and fasten it in place with the
same screws as the side rails. (#10
Sheet Metal Screws) (Figure 6) If your
unit has 4 screw holes on each side of
the canister, use the two outermost holes
only. Insert the plastic canister inserts
into the square holes located on either
side of the canister. These will be used
later for mounting the top cover
assembly.
STEP 6: INSTALL LOCK ARM ASSEMBLY
Unroll the cover by pulling the handle, at the end of the fabric panel assembly into the side rails all the way to the
tailgate end of the truck bed. Install the lock arm assembly by sliding the black plastic blocks into the lengthwise
groove on the underside of the handle.(Figure 7a & 7b)
Completed
Assembly
FIG. 5b
Side Rail
Truck
Bed
Rail
Guide Strip
#8 Machine
Screw
FIG. 5a
Truck
Bed Rail
#10 Sheet Metal
Screw
Canister
FIG. 6
CAUTION!PERMANENT DAMAGE MAY BE CAUSED IF THE
HANDLE ASSEMBLY IS ALLOWED TO RETRACT INTO THE CANISTER WITHOUT
PROTECTION ON THE UNDERSIDE OF THE FABRIC PANEL!
!YOU MUST PROTECT THE FABRIC FROM THE LOCK ASSEMBLY!
!DO NOT BEND THE COVER BACKWARDS AGAINST THE ROLL UP DIRECTION AS
IRREPARABLE DAMAGE MAY RESULT!

INSTALLATION INSTRUCTIONS 5
Lock Cam
Remove the lock nut from the lock and
insert the lock through the lock cover and
the center hole in the handle. Install and
securely tighten the lock nut with the
needle nose pliers until the lock pulls into
the fabric and meets resistance to turning.
Attach the lock cam of the arm assembly
to the lock by engaging the square hole
with the square lug on the lock. (Figure 8)
Install and tighten the screw. Test to see
that turning the key moves the arms in and
out. If not, remove the screw and rotate
the lock cam 90 degrees and refasten.
STEP 7: ADJUST POSITIONING OF
GUIDE STRIPS
Allow the cover to retract to the first guide strip
screws (nearest the canister). Align the vertical
portion of the guide strip with the cover
assembly leaving 1/8” (3mm) clearance between
the two. (Figure 9) This will allow for heat
expansion of the aluminum panels on the cover.
Tighten the first (nearest canister) guide strip
screws on both sides. Next, pull the handle to
the guide strip screws nearest the tailgate, align
with 1/8” (3mm) clearance on either side and
tighten these screws. Close the tailgate and the
cover. Make sure that the seal in the handle is
making contact along the entire length of the
tailgate. If it is not this means the truck bed is
not square. Compensate for this by adjusting the guide strips left or right. Test again to
make sure there is 1/8” clearance on either side of the cover. Retract the cover back
towards the canister and tighten the remaining guide strip screws. Check again to make
sure that the cover moves in and out freely without binding. (If not, readjust accordingly.)
FIG. 7bFIG. 7a
Underside of
handle
FIG. 8

6ROLL-TOP-COVER
®
Drain Tube Holes
STEP 8: ADJUST LOCK ARM (if necessary)
Check the lock function. If the rails were installed correctly, the handle will fit against the
tailgate snugly. If the fit is too loose or too tight, there is an adjustment you can do to correct
this. The lock arms enter a plastic receiver in the guide strips. The receivers are adjustable
to fine-tune the fit to the tailgate. To adjust the receivers, lock your cover at the 18” forward
lock position. Look into the rail opening by the tailgate. There are two small Phillips screw
heads showing. Loosen them slightly on both sides. Unlock the cover and relock it at the
tailgate. Pull the handle back firmly on both sides until a snug fit against the tailgate is
achieved. Hold the cover in this position and unlock it. Move the cover back to the 18” lock
position. Tighten the Phillips screws.
STEP 9: INSTALL DRAIN TUBES
With the cover locked at the tailgate, install the two aluminum drain fittings into the canister
floor, pushing them down firmly and evenly until they are against the bottom of the canister.
Slip the plastic tubes onto the drain tube fittings from the underside of the canister and down
through the holes in your truck bed (previously located or prepared in “Before You Start”).
STEP 10: INSTALL TOP COVER
Install the canister top cover with the four long Top Cover screws. Tighten the screws until
the cover is just touching the truck bed. Be sure the high side showing the Roll-Top-Cover®
label faces the tailgate. Do not over tighten. Foam is provided in specific applications to
close up the front of the top cover if needed.

INSTALLATION INSTRUCTIONS 7
WARRANTY STATEMENT
Pace Edwards Company prides itself in fast, friendly warranty service for all of our products.
Our goal is to design quality into everything we make. Pace Edwards’ BedLocker®, JackRabbit™,
and Roll-Top-Cover®retractable hard tonneau covers offer security, durability, style and
convenience unmatched in the marketplace. Our ToolTop™ crossover toolboxes integrate with all
three of our retractable tonneau covers, providing the ultimate solution for those who want the
security of a toolbox combined with a retractable tonneau cover. Both lightweight and durable,
Pace Edwards’ Shelf-It™, Rifle-It™, Deluxe Shelf-It™ and Visor Shelf-It™ line of overhead
storage solutions provide options for storing items neatly above the sun visors in your vehicle.
Other Pace Edwards’ warranted products include the PowerGate™ electric tailgate lock and
DesignerDash™ dash overlay kits.
We warrant our products to be free from defects in material and workmanship under normal
use for one year from the date of purchase. In the event of defect in materials or workmanship,
we will warrant parts only at no charge, which in our judgment show evidence of such defect
within one year from date of purchase.
This warranty is void if the product has direct or indirect damage resulting from accident,
misuse or abuse, lack of reasonable care, modifications, alterations, loss of parts, normal wear
and tear, improper installation or damage during shipping. This warranty does not cover
installations on commercial vehicles or to trucks used for racing or off-road. This warranty is void
when service or repair is performed by a non-approved service center.
At the end of the warranty period, Pace Edwards Company shall be under no further warranty
obligation, express or implied. No other warranty or affirmation of fact, written or oral, is
authorized or made by Pace Edwards Company and the terms of this warranty constitute the
purchaser’s sole and exclusive remedy.
This warranty gives the purchaser specific legal rights and the purchaser may also have other
rights that may vary from state to state.
WARRANTY REQUIREMENTS:
1)Original sales receipt
2)Product returned must be in original packaging
3)Product Serial Number
4)Product Model Number
For your convenience, you may register your warranty claim at Pace Edwards’ web site at
www.paceedwards.com. This will help expedite your warranty claim. If you need warranty
assistance, please call (800) 338-3697 and one of our technical service reps will be happy to help
you. Please have your model and serial numbers and your original sales receipt handy when you
call.
HELPFUL MAINTENANCE HINTS
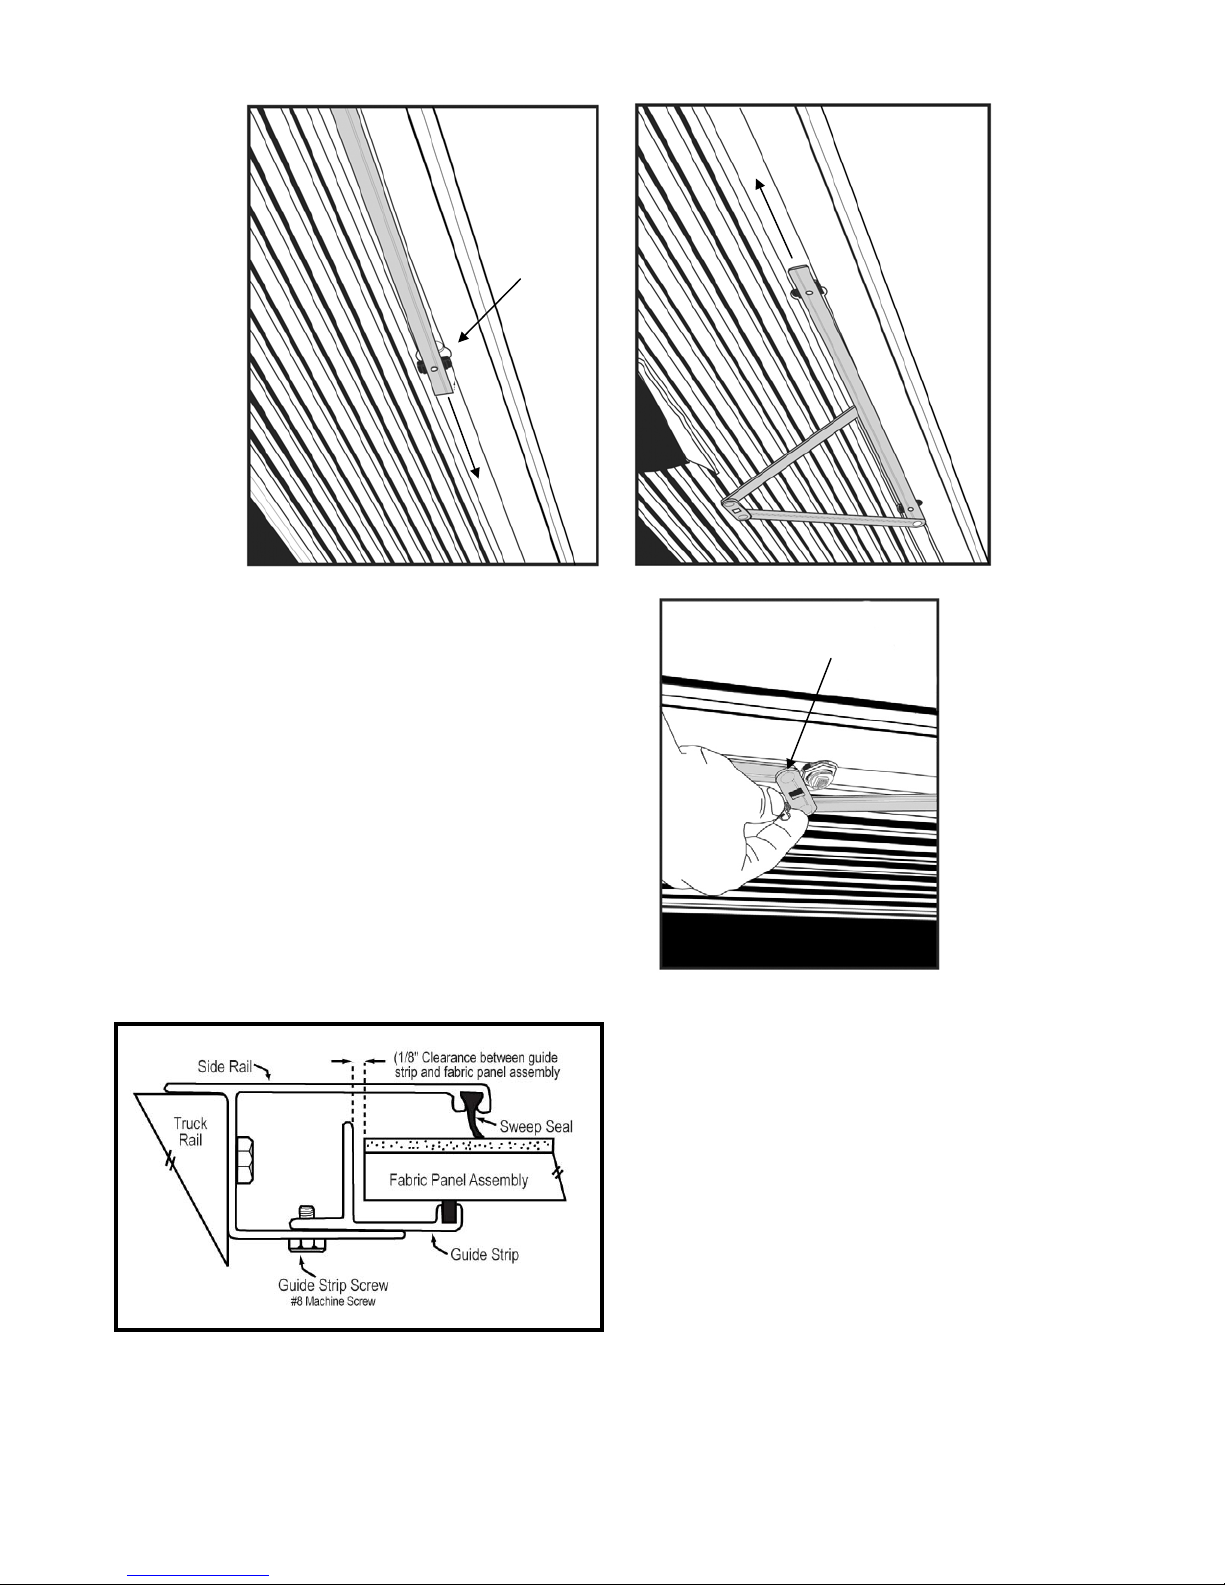
To assure quiet, smooth operation, apply a small amount of grease to the guide strips where the
metal end of the panels and the guide strips meet. This initial application should be sufficient for
a year or more. Regrease the guide strips if the cover begins squeaking during use.
After installation, if the cover is tight or hard to open and close, the shimming in Step 5 may
need to be redone. Over a period of time, if the cover becomes difficult to move in or out
(particularly on hot days), check that the side-to-side clearance on the Roll-Top-Cover®is set at
1/8” or more.
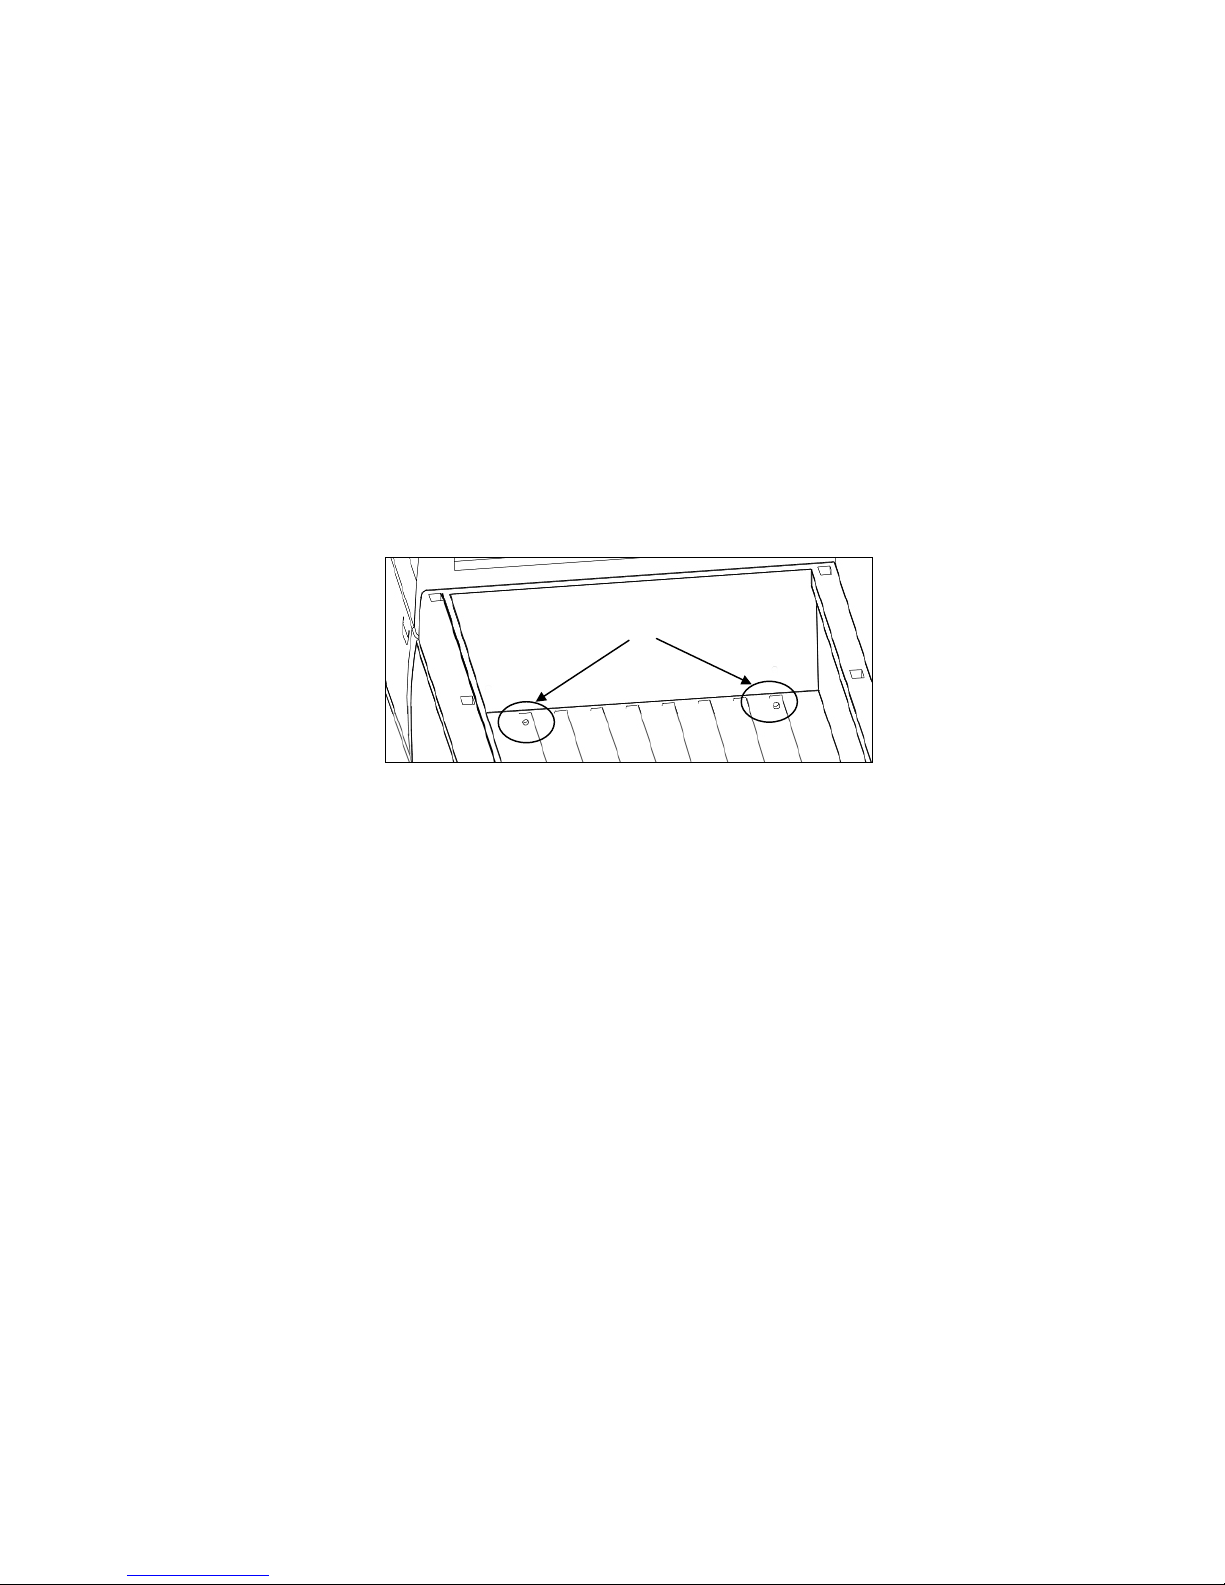
Drain tubes may become clogged over time and should be removed and cleaned. Periodically
remove the top cover and clean out the canister. To help keep the Roll-Top-Cover®retractable
tonneau cover looking its best, we recommend washing it the same as caring for your truck
finish. If you have any questions please call our Technical Support at (800) 338-3697.

2400 Commercial Blvd, Centralia, WA 98531 USA Thank you for choosing products by…
(360) 736-9991 (main) (360) 736-9992 (fax)
(800) 338-3697 (toll-free)
www.paceedwards.com
Table of contents
Other Pace Edwards Automobile Accessories manuals