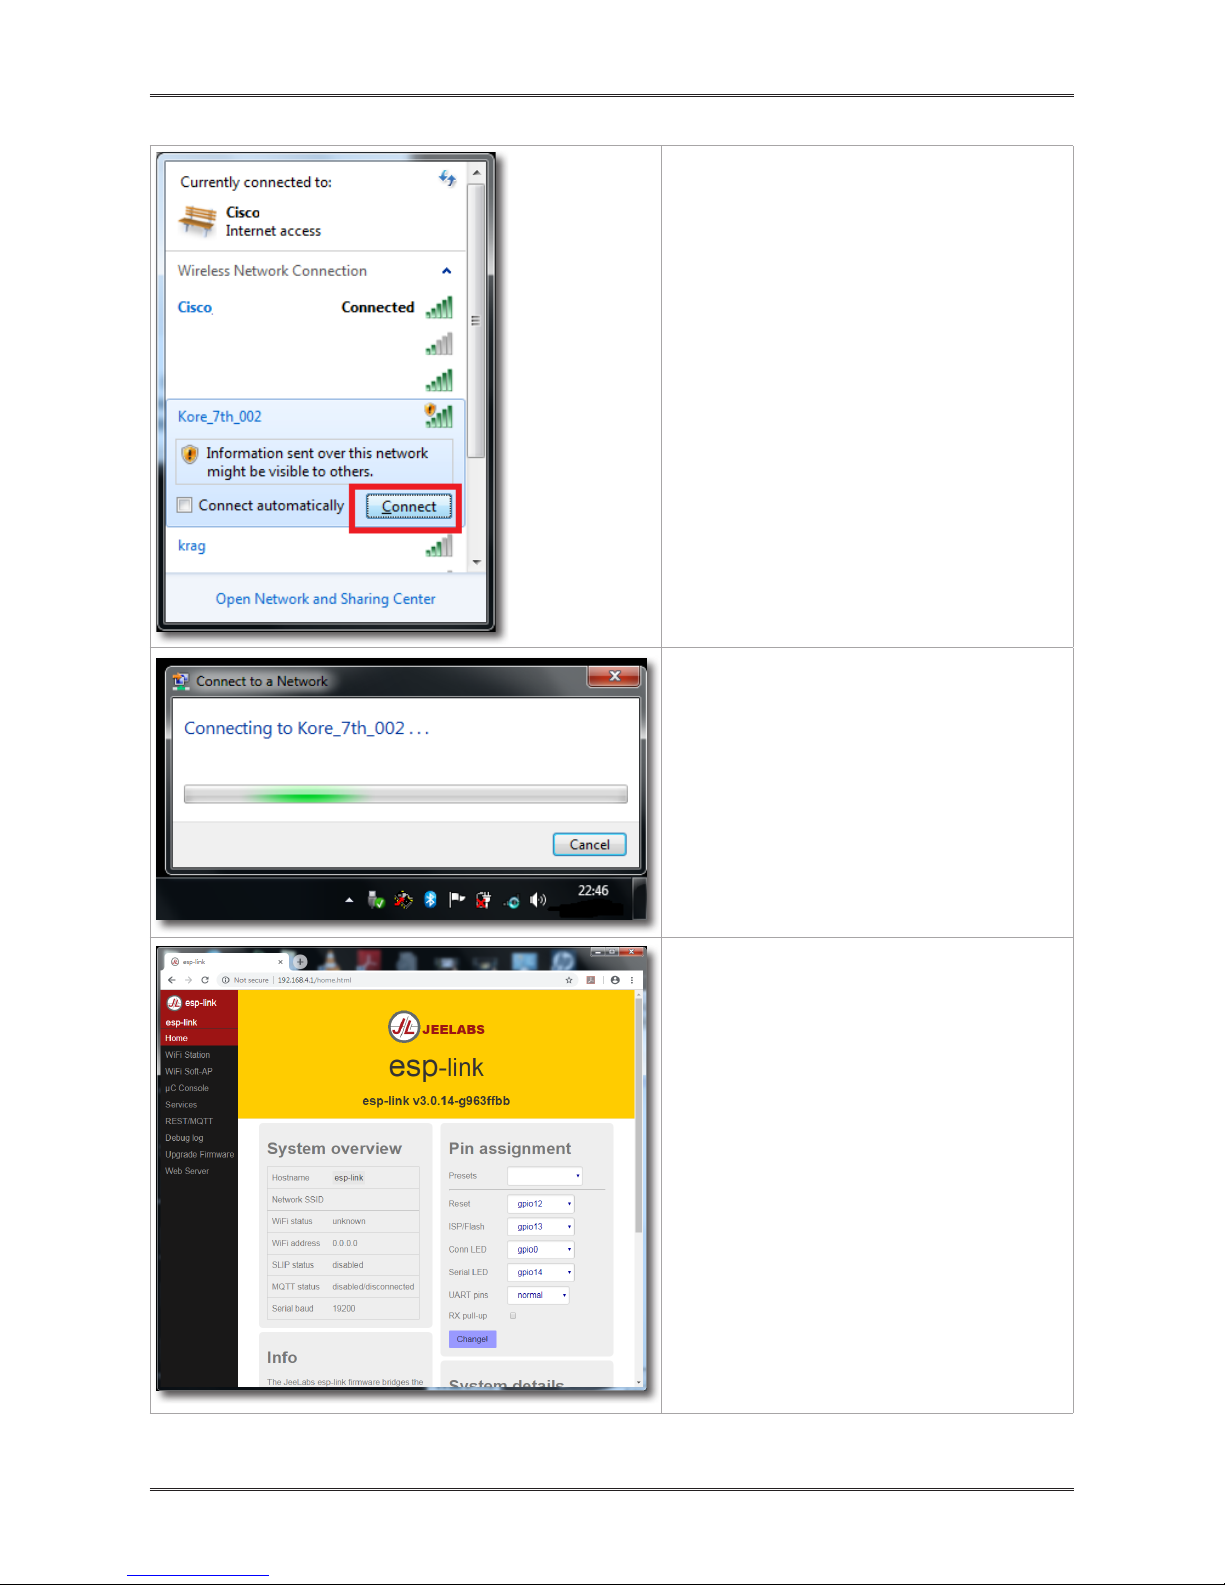
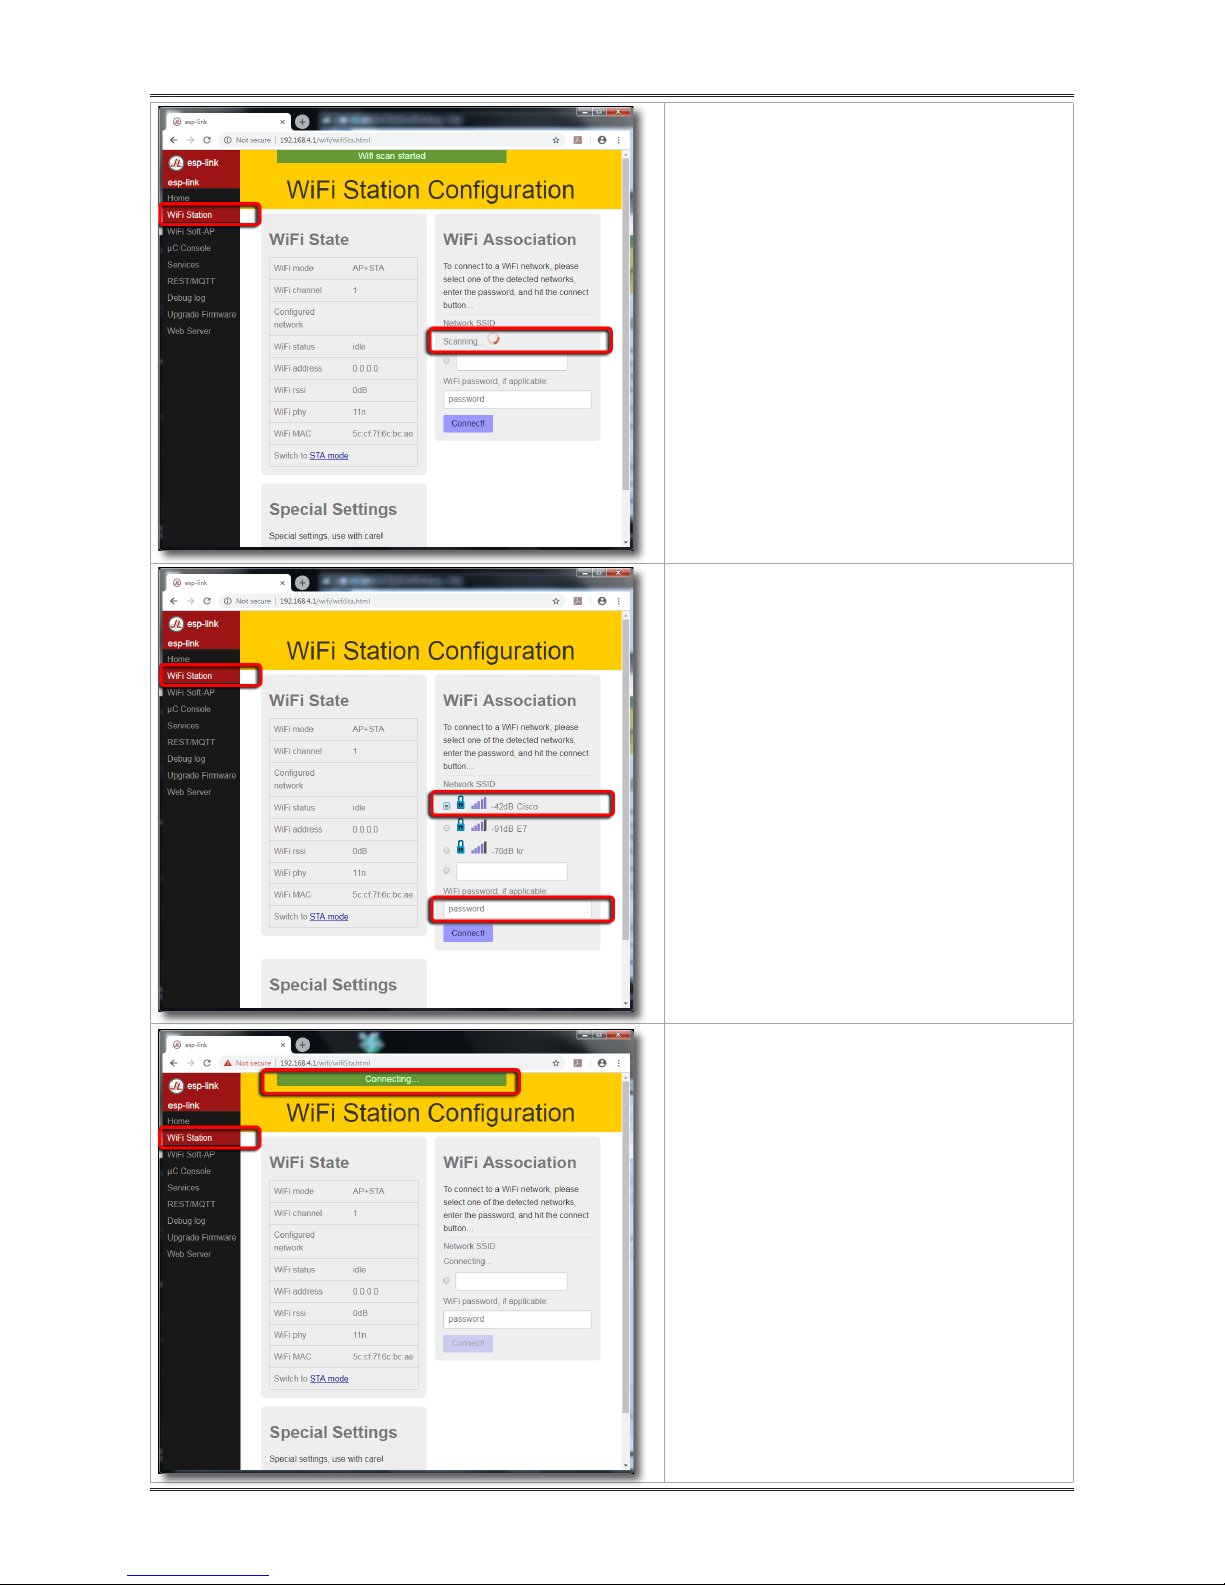
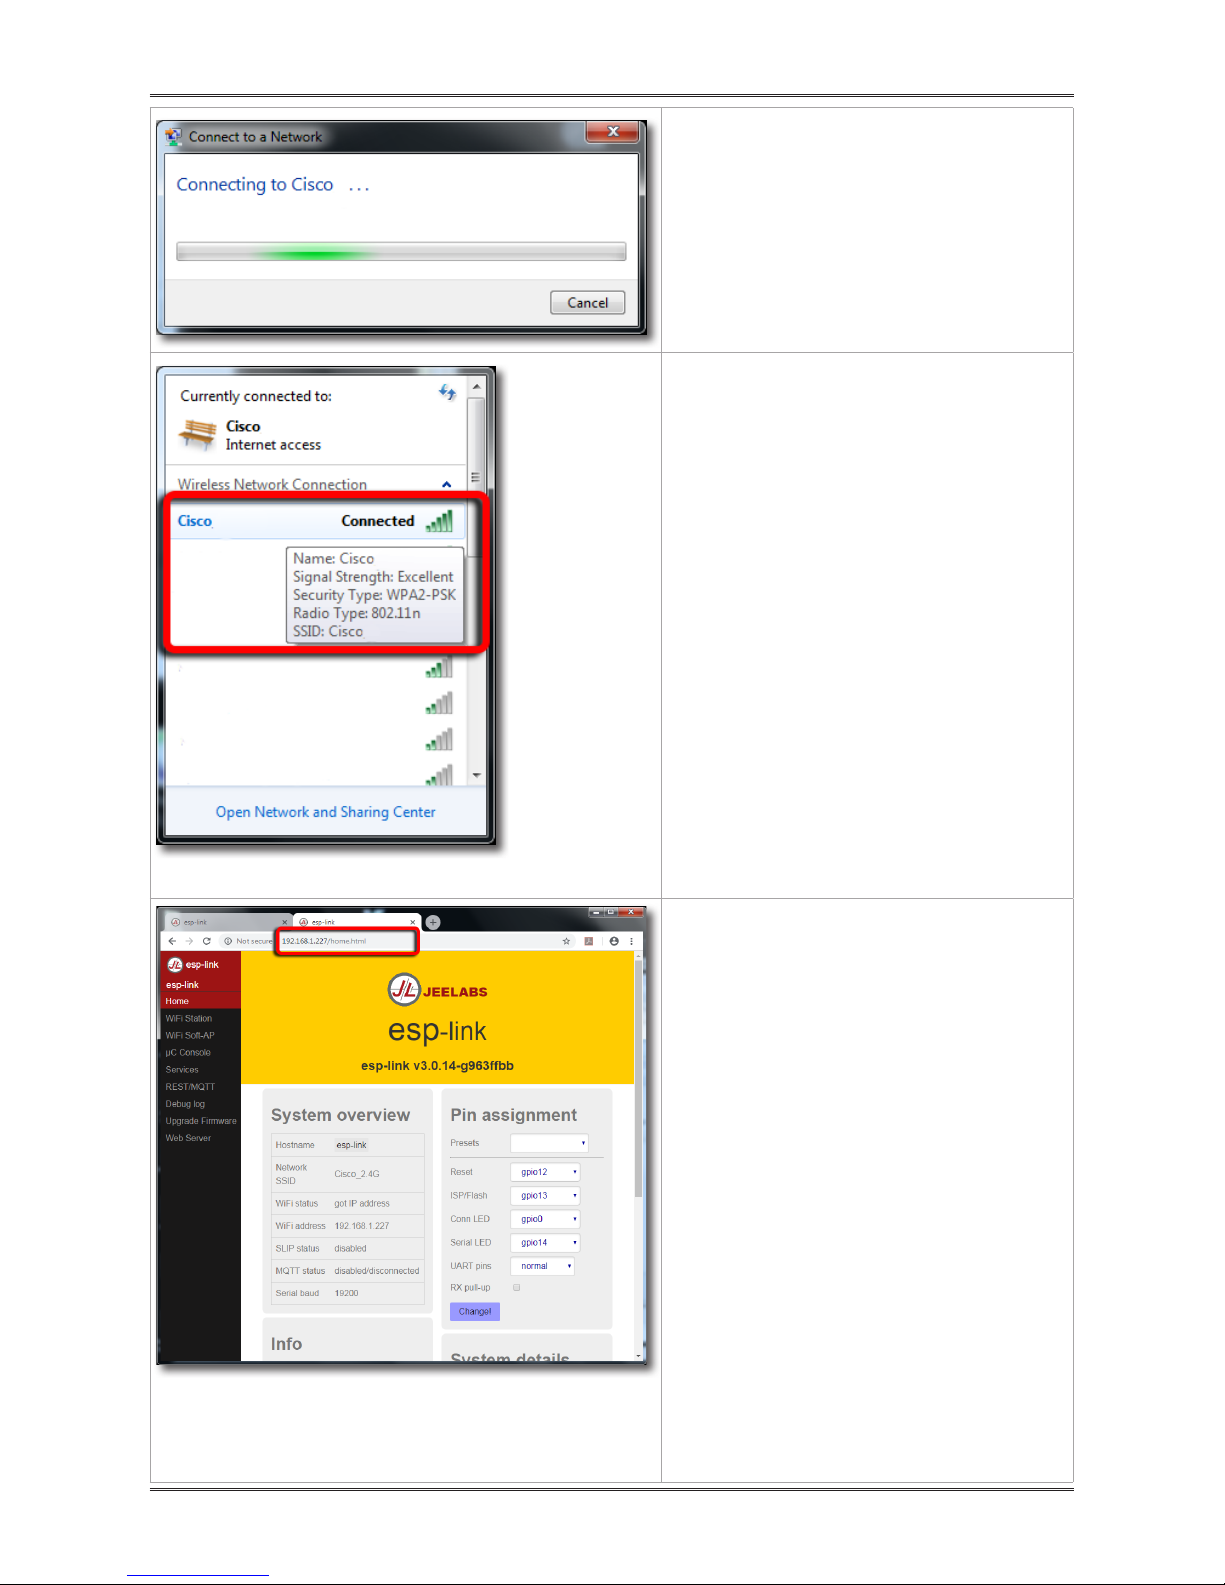
Pacific Sun Kore 7th Manual

Kore 7th
Ultimate dosing station
WiFi Network Setup
User Manual
ver. 2.2
Android / iOS interface
www.Pacific-Sun.eu

Page 2
Kore 7th Manual / kHLab Edition
Wi-Fi Network Protection Setup and Connection to Kore 7th
1. Find your Kore7th doser on your
WiFi network list and click Connect to
this network.
Select Connect to the Kore 7th Wi-Fi
Network.
2. Connecting to the Kore 7th
Wi-Fi Network.
3. Open your Internet Browser
(Chrome, Firefox, Safari, IE or other)
and type the Kore7th doser WiFi
network IP address 192.168.4.1
into the address field.
If you are using IE, you might want to
add http:// to the address else IE may
show an error.
You should enter and see Kore 7th
Wi-Fi network setup page like on this
picture.

Page 3
Kore 7th Manual / kHLab Edition
4
1
2
3
WiFi Soft-AP Configuration
Soft-AP-AP SSID allows to change the name of your doser WiFi network name.
Soft-AP Password allows to setup password for Kore7th WiFi network access.
Soft-AP Auth Mode allows to change authentication mode (WiFi network
Encryption).
Change Soft-AP settings allows to save settings.
2
1
3
4
5. Navigate to WiFi Soft-AP Tab to setup/change your WiFi settings.
You should see the following Configuration options:

Page 4
Kore 7th Manual / kHLab Edition
6. You can change the Kore7th
doser WiFi network name to your
preferred name in the Sof-AP SSID
field.
Note:
You can leave the default manufacture
name.
7. Setup password to secure your
Kore7th doser WiFi network in the
Sof-AP Password field.
Important!
Password must be at least 8
characters long with capital letters
and special characters.
Protect this WiFi network with a
STRONG password!
8. Change the Authentication/
Encryption Mode from OPEN to
WPA_WPA2_PSK.

Page 5
Kore 7th Manual / kHLab Edition
9. Save all settings
Click Change Soft-AP settings!
All the settings will be saved.
Now you can close your Internet
Browser.
Your computer will be disconnected
from this Kore7th doser WiFi
network.
10. Navigate back to your
WiFi network list, select your
Kore7th doser WiFi network and
click Connect.
11. Type your Kore7th doser WiFi
network password in the Security
key field.
Next Click OK.

Page 6
Kore 7th Manual / kHLab Edition
12. You should see:
Connecting to your Kore7th ….
ß13. Now you are Connected to your
Secure Kore7th Doser WiFi network.
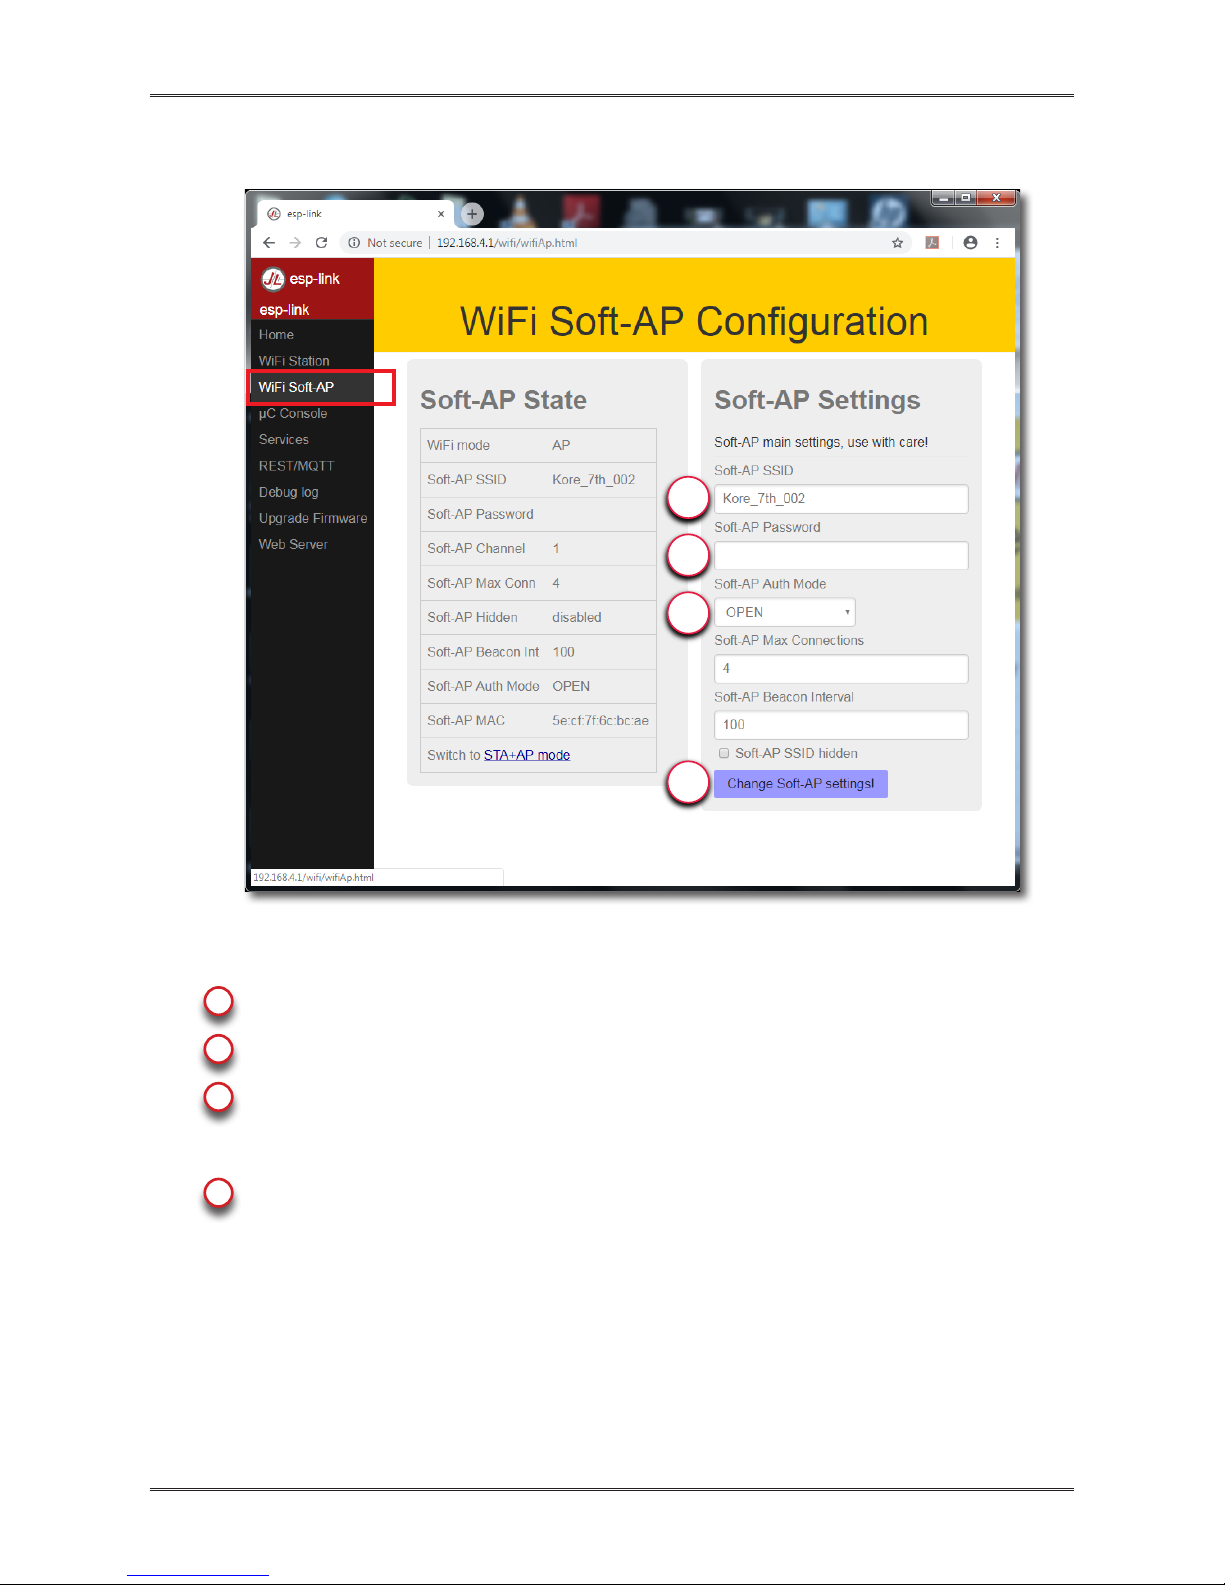
Important!
You should see the Security Type:
WPA2-PSK.
If NOT, you have to go back to the
Kore7th doser WiFi network
settings web browser page and
repeat the above steps.
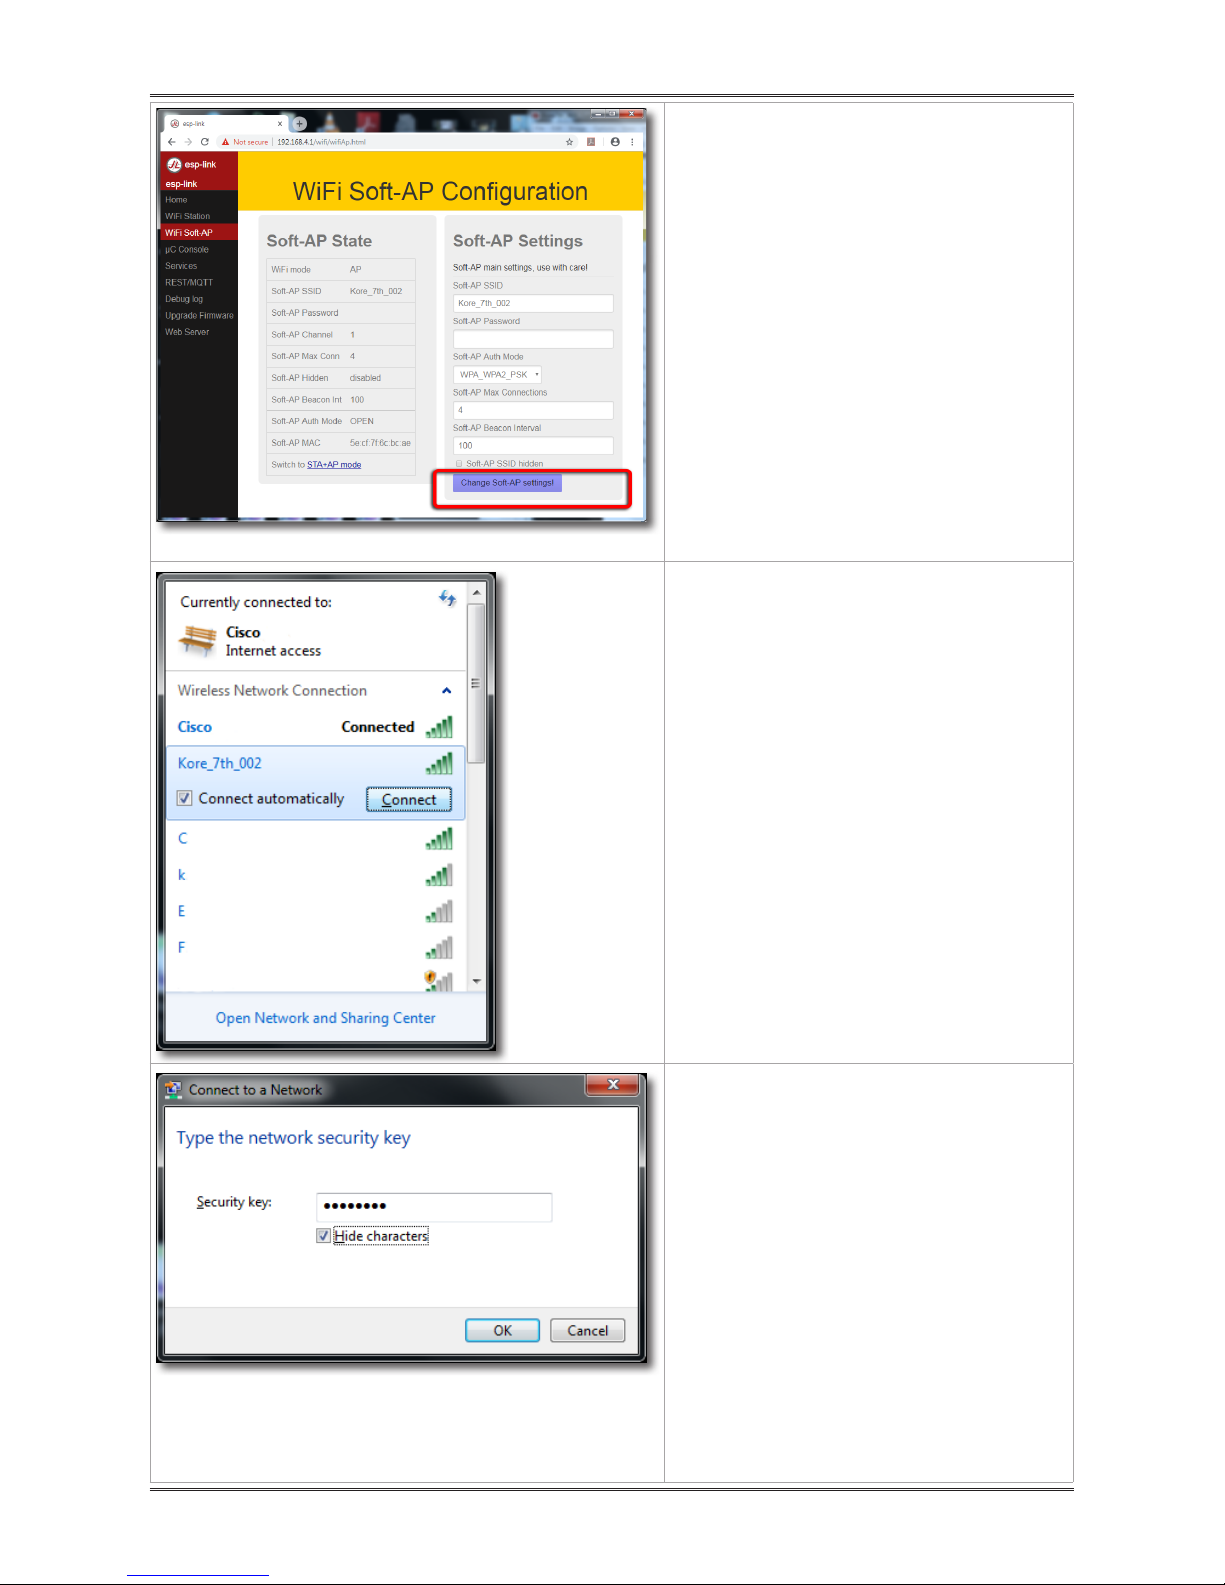
14. Open again the Kore 7th Wi-Fi
network setup.
Open your Internet Browser (Chrome,
Firefox, Safari, IE or other) and type
the Kore7th doser WiFi network
IP address 192.168.4.1 into the
address field.
If you are using IE, you might want to
add http:// to the address else IE may
show an error.
You should enter and see again the
Kore 7th Wi-Fi network setup page
like on this picture.

Page 7
Kore 7th Manual / kHLab Edition
15. Go to WiFi Station settings.
Under WiFi Association you should
see Scanning for available home
WiFi networks.
Start Scanning if didn’t start.
16. Select your Home WiFi network
under Network SSID.
Type in your Home WiFi network in
the password field under the WiFi
password, if applicable.
Next Click Connect!
17. Wait until is Connected.
You should notice Connecting ... on
the top of the window.

Page 8
Kore 7th Manual / kHLab Edition
18. The Connection is completed.
Now your Kore7th doser is
connecter to your Home WiFi
network on a new IP address
192.168.1.227.
Note:
Your IP address can be different.
This is just an example.
Most likely each network setup will
give a different IP address.
Take a note of this NEW IP address
(your Kore7th dising stattion IP).
19. Connect to your Home WiFi
network.
Find your Home WiFi network
on your WiFi network list and click
Connect to this network.
20. If necessary, type your Home
WiFi network password in the
Security key field.
Next Click OK.

Page 9
Kore 7th Manual / kHLab Edition
21. Connecting to your Home WiFi
network ….
22. Now you are Connected to your
Secure Home WiFi network.
23. Open again your Internet Browser
(Chrome, Firefox, Safari, IE or other)
and type the Kore7th doser NEW
IP address 192.168.1.227 into the
address field.
If you are using IE, you might want to
add http:// to the address else IE may
show an error.
You should enter and see Kore 7th
Wi-Fi network setup page like on
this picture.

Page 10
Kore 7th Manual / kHLab Edition
24. Go to WiFi Station settings and
scroll down to Special Settings.
Select option: Static IP
Under Static IP address specify
your NEW Kore7th IP address:
192.168.1.227
Important!
When using Static IP you Kore7t IP
address will not change after doser
restart.
25. Start the “HW Virtual Serial
Port” software.
All configuration settings in HW VSP3
are password-protected.
To enter the password, press the
Login button. The default password
is “admin”.
Next Click OK.
26. Under Port Name Select, NOT
used by any other device, COM port
number.
Under IP Address type in the Kore7th
NEW IP address:
192.168.1.227
Next Click Create COM.

Page 11
Kore 7th Manual / kHLab Edition
27. HW VSP status will
Change to Created.
LAN status will Change to
Connected.
After that you can open
the Pacific Sun Kore 7th
Application.
28. Start the Pacific Sun
Kore 7th Application.
29. After opening the
Pacific Sun Kore 7th
Application, select correct
COM port number for
your Kore 7th from the drop
down (number from the
HW VSP application) and
click “Connect”.
Note:
You can also type the COM
port in manually in the drop
down.
30. Kore 7th application
will indicate “Connected
and settings refreshed.
Doser ready to use …”

Copyright:
Pacific Sun Sp. Z o.o.
I Brygady Pancernej WP 10
84-200 Wejherowo
Poland
tel. + 48 58 778 17 17
email: office@pacific-sun.eu
If you need technical support - please contact with
service@pacific-sun.eu
Other manuals for Kore 7th
2