Pakboats Puffin II Owner's manual

Puffin II
Assembly
and
User Information
ScanSport, Inc. / Pakboats
Post Office Box 700 May Street
Enfield, New Hampshire 03748 USA
Phone: (888) 863-9500 (toll free)
From outside the US: +1 (603) 632-9500
Fax: (603) 632-5611
Email: [email protected]
www.pakboats.com

– 2 –
Figure 1, Parts
(A)
(B)
Cross Ribs
Boat Skin
Stem
Stem
Keel
Seats
Latch Clip
(B)
(C2) (C1)
(D) (D)
Gunwale
Terminator
Gunwale
Terminator
Gunwales
Latch
Rods
End Cap End Cap
Air Valve
Figure 2, Assembled
Cross Ribs:
Stem
(inside boat skin)
KeelInflated Air Tube Seat
(A)(B) (B)(C2) (C1)(D) (D)
Air Valve
Gunwale
(
in sleeve)
Latch Rod
SeatLatch Rod
Gunwale
Terminator
(inside End Cap
End Cap
Gunwale
(
in sleeve)
Inflated
Air Tube

– 3 –
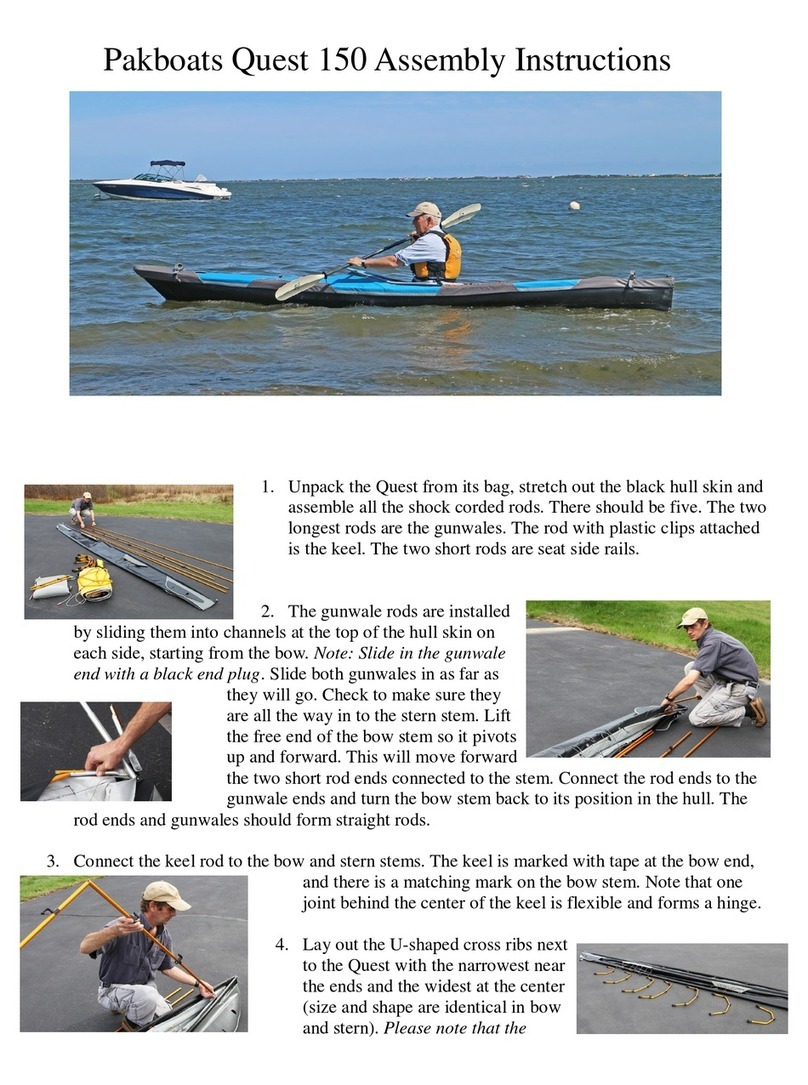
1. Unpack Puffin II from the bag.
2. Insert both gunwales into the
sleeves.
3. Mount the gunwale terminators.
4. Mount the keel and stems.
Assembling the Puffin II
The shortest rod is the keel. The curved parts with metal
forks are stems.
➜Place the keel in the PUFFIN II.
➜Insert the narrow end of one stem into the keel rod
end.
➜Lift the gunwales and clip the gunwale terminator
onto the top of the stem.
➜Repeat the process with the other stem at the other end
of the PUFFIN II.
TIP Push the middle of the keel temporarily to the side
if clipping the second stem into place is a tight fit.
The two longest rods are gunwales.
➜Insert the gunwales into the sleeves along the edges of
the boat skin.
TIP You may find it easier to insert gunwale rods by
folding the hull lengthwise so the sleeves lay one
atop the other. Starting with the sleeve on top, slide a
rod in while gradually rotating. Once fully inserted,
flip hull over so the empty sleeve is on top, and
repeat.
NOTE! We recommend that you study this manual carefully before you start the assembly
procedure! When assembling the Puffin II, please refer to Figure 1 and Figure 2
of this manual.
The horseshoe shaped parts are gunwale terminators.
➜With the boat bottom flat on the ground, insert one end
of a gunwale terminator fully into the end of a gunwale.
➜Put the other end into the other gunwale (it will barely
go in at all).
TIP Spread the gunwales apart until the tube aligns with
the gunwale terminator and slip the terminator into
place. You may find it is simplest to align the
gunwales by pushing them apart with your legs from
inside the PUFFIN II.
➜Pull the hull up around the gunwale terminator.
➜Repeat the process at the other end of the gunwales,
being sure the hull is pulled up around the gunwale
terminators at both ends. Make sure the gunwale sleeve
ends are centered on the terminators before continuing to
step 4.
➜Roll out the boat skin, unfold the shock-corded rods,
and lay out the cross ribs.

– 4 –
The remaining rods are the latch rods and fit onto the
forks on the stems.
➜Attach a latch rod to a fork at one end.
➜Make the rod form an even arc and attach to the fork at
the other end.
➜Repeat the process with the other latch rod.
IMPORTANT: Be sure that the center latches on both rods
face the same direction and that all latches are on top of
installed rods.
NOTE: When the latch rods are installed the stems are
pushed into the ends of the hull, exposing the narrow
sections that were inserted into the keel. If the joints of the
keel rod start separating, pull the keel rod away from the
stems enough to close the keel joints.
4. Mount the latch rods.
5. Mount Cross Rib (A).
6. Mount the two cross ribs (B).
7. Mount cross rib (C1).
8. Mount the three remaining cross
ribs (C2) and (D).
Cross Rib (A) is the widest one with a thwart.
➜Get into the PUFFIN II and position yourself so the
open side of the center-most latches face you, about a foot
away.
➜Pick up cross rib (A) and turn it so the open side of the
spacer clips face the open latches. See Fig. 3.
➜Hold the cross rib inside and across the PUFFIN II
between you and the latches. Tilt the top ends of the cross
rib away from you.
➜Insert one end into the opening in the gunwale sleeve
and press the end of the cross rib up and against the
gunwale so the c-clip snaps around and holds it.
➜Repeat with the other end of the cross rib.
➜Pivot the bottom of the cross rib towards the latches,
with the latch rods lined up to receive the spacer clips on
the cross rib.
➜Pivot the cross rib all the way so both latches snap
shut around it
➜Slide the elastic o-ring fasteners into place over the
ends of the latch clips, preventing them from opening.
.
➜Cross ribs (B) are mounted in front of and behind the
one already installed.
(C1) is the smaller cross rib with a thwart.
➜Install cross rib (C1) two spaces behind the center rib,
that is towards the end where the air valves are.
➜Repeat the process with the remaining cross ribs.
IMPORTANT: Remember to position each cross rib with
the open side of the spacer clips facing the open latches.
Figure 3, Latch Clip
Latch
Rod
Cross Rib
Elastic
O-ring
Latch
Clip
open side
Spacer
Clip

– 5 –
9 Inflate the air tubes.
10. Inflate the seats.
11. Install the seats.
12. Mount the fabric end caps.
➜Inflate one air tube so it is full, but has no significant
pressure.
➜Inflate the other air tube enough to place the keel
between the two white lines in the bottom of the skin.
➜Add air to both tubes to desired pressure.
NOTE: Opening the smaller valve cap exposes a one-way
valve that fits the nacelle on the pump.
➜Pull the air tubes up towards the gunwales.
➜The air valves are located on the side of each seat.
The seats are installed just in front of each thwart.
➜Set the seat into position.
➜Loop the forward seat straps around the cross rib.
➜Set the snaps.
The end caps are attached by means of Velcro fasteners.
HAPPY PADDLING!
Configuring Puffin II for solo seating.
The above procedure configures the boat as a double.
For solo seating, move the wide cross rib with a thwart (A), back one position, and move
cross rib (C1, the smaller one with a thwart, to the bow end as indicated below.
Cross Rib (A)
Cross Rib (C1)
Figure 4, Configuring for solo seating

– 6 –
Disassembly and Packing
1. Remove fabric end caps
2. Open valves on air tubes and seats.
3. Remove seats.
4. Remove cross ribs.
5. Remove latch rods
6. Remove stems and keel
7. Remove the gunwale terminators
8. Pull out the gunwales
9. Fold up all the longitudinal rods
10. Roll up the hull with the rods inside
11. Place the rolled up PUFFIN II hull
in the storage bag.
Then load in the other components,
stems and cross ribs.
➜Undo o-ring fasteners, lift up on latches and pivot
cross ribs out of position, until they release from the
gunwales.
NOTE: If the latches are hard to lift up, push the cross
rib back into the latches, then lift up on the latches and
pivot cross rib out.
➜Remove stems and keel by stepping on each stem and
lifting the gunwale terminator off the top of the stem.
TIP Move the keel to the side to decrease tension in the
hull when the first end is removed.
➜Fold the ends of the hull out of the way and pull the
gunwales out.
TIP Holding the gunwale rod in a slight arc will help
keep the joints from separating as you pull. Do not
allow the joints of the gunwale rods to separate. If
they do not slide easily, use the keel rod to push the
gunwale half way out, then pull the rods out.
➜Lay out the PUFFIN II hull with the bottom flat on the
ground and the sides folded in towards the center.
➜Place all the folded longitudinal rods on end of the
hull, opposite to the air valves..
➜Roll up the hull with the rods and secure with a strap.
➜Start at the center.
➜Remove latch rods by lifting in the center.
NOTE: Opening the large valve cap on each air tube lets
the air out very quickly.
➜Fold the end of the skin down so the gunwale
terminator can be removed.
➜Push the gunwales apart, with the correct alignment
untill they slip out easily.
TIP Step into the PUFFIN II and push the gunwales
apart with your legs to achieve the correct
alignment.

– 7 –
General Information
Storage Your PUFFIN II is equally happy stored assembled or packed in the bag.
Salt Water Following exposure to salt water, rinse the PUFFIN II in fresh water if you can.
This will help preserve the PUFFIN II’s appearance.
Repairs HULL - If you need to repair a puncture or abrasion of the hull, use a patch of the
same material and the repair kit adhesive. Cut a patch to cover an area about 3/4"
past the damaged area of the hull. Round the corners of the patch. Cover the patch
and the area the patch will cover with a thin coat of adhesive. Wait until the adhe-
sive feels dry to the touch and immediately apply patch. Press down well. The
adhesive will cure for twenty-four hours, but the PUFFIN II can go in the water
immediately after a patch is applied.
AIR TUBES - A puncture of an air tube can be repaired the same way as the hull.
Small punctures may be repaired without a patch. Coat the puncture repeatedly
with the repair kit adhesive, letting the adhesive dry between each coat.
NOTE: There must be no pressure in the tube or seat when being repaired.
Safety
• Always wear a personal flotation device.
• Know your abilities and do not exceed them.
• Be aware of changing weather conditions.
Table of contents
Other Pakboats Boat manuals