DC Terminal
Block
Terminal Screws
PA-220R NEXT-GEN FIREWALL QUICK START GUIDE (CONTINUED)
4
Where to Go Next
• To learn more about the firewall, refer to the PA-220R Next-Gen Firewall
Hardware Reference:
https://www.paloaltonetworks.com/documentation/platforms.
• To learn how to configure Palo Alto Networks firewalls, go to the Technical
Documentation portal: https://www.paloaltonetworks.com/documentation.
(Use the Getting Started information in the PAN-OS Administrator’s Guide
for initial configuration tasks.)
• To contact support, go to:
https://www.paloaltonetworks.com/company/contact-support.
Connect to the Management Interface
1. Connect the RJ-45 Ethernet cable from the RJ-45 port on your computer
to the mangaement (MGT) port on the firewall.
2. Change the IP address on your computer to an address in the
192.168.1.0/24 network, such as 192.168.1.2.
3. From a web browser, go to https://192.168.1.1.
4. When prompted, log in to the web interface using the default username
and password (admin/admin).
Figure 7
Connect to the Management (MGT) Port
(Optional) If you are not able to connect to the web interface, check the status
of the firewall by connecting to the micro USB or RJ-45 console port. The con-
sole connection provides access to firewall boot messages, maintenance mode,
and the command line interface (CLI). For information about downloading the
micro USB Windows driver and instructions on how to connect using a Mac or
Linux computer, refer to hps://www.paloaltonetworks.com/documentaon/
misc/micro-usb-console.
2
3Power On the Firewall
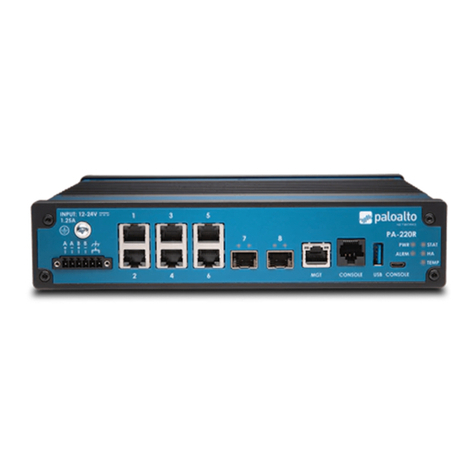
The PA-220R firewall requires a 12-24VDC 1.25A power source. You can connect a
second DC power source for redundancy.
Due to the various cable lengths required for a given installation site, DC power
and ground cables are not included.
Power off the DC power source before connecting the DC terminal block to the
DC power inputs on the firewall.
1. Power off the DC power source that will power the firewall.
2. Connect one end of a 16-22AWG ground cable to the firewall and connect the
other end to earth ground. There are three ground points on the firewall: one
screw-on ground point above the DC terminal block and two ground inputs on the
DC terminal block (last two inputs on the right); use only one of the three ground
points.
• Screw-on ground point (Option 1)—Crimp a 6-32 ring lug (not included) to the end
of the ground cable that will connect to the firewall. Remove the ground screw
from the ground point and use the screw to attach the ring lug to the firewall
(Figure 6). Do not torque the screw by more than 6 in-lbs.
• DC terminal block ground inputs (Option 2)—Strip 1/4” of cable insulation off the
end of the ground cable that will connect to the terminal block, insert the cable
into one of the ground input terminals, and then secure the cable by turning the
flat-head terminal screw clockwise (Figure 6). Do not torque the terminal screws
by more than 2 in-lbs.
3. Strip 1/4” of cable insulation off the ends of two 16AWG DC power cables; one
cable for A+ and one cable for A-.
4. Insert the positive DC cable into terminal A+ and secure the cable by turning the
flat-head terminal screw clockwise. Insert the negative cable into terminal A- and
secure the cable using the terminal screw. Do not torque the terminal screws by
more than 2 in-lbs.
5. (Optional) Repeat steps 3 and 4
to connect a second DC power
source to terminals B+ and B-.
6. Plug the cabled DC terminal
block into the DC inputs
on the firewall. Secure the
terminal block by turning
the two screws on each
side of the block clockwise.
7. Power on the DC power
source to power on the
firewall.
Figure 6
DC Power and
Ground Connections
paloaltonetworks.com/documentaon | © 2018 Palo Alto Networks, Inc. | Part Number: 810-000291-00B | Page 2
