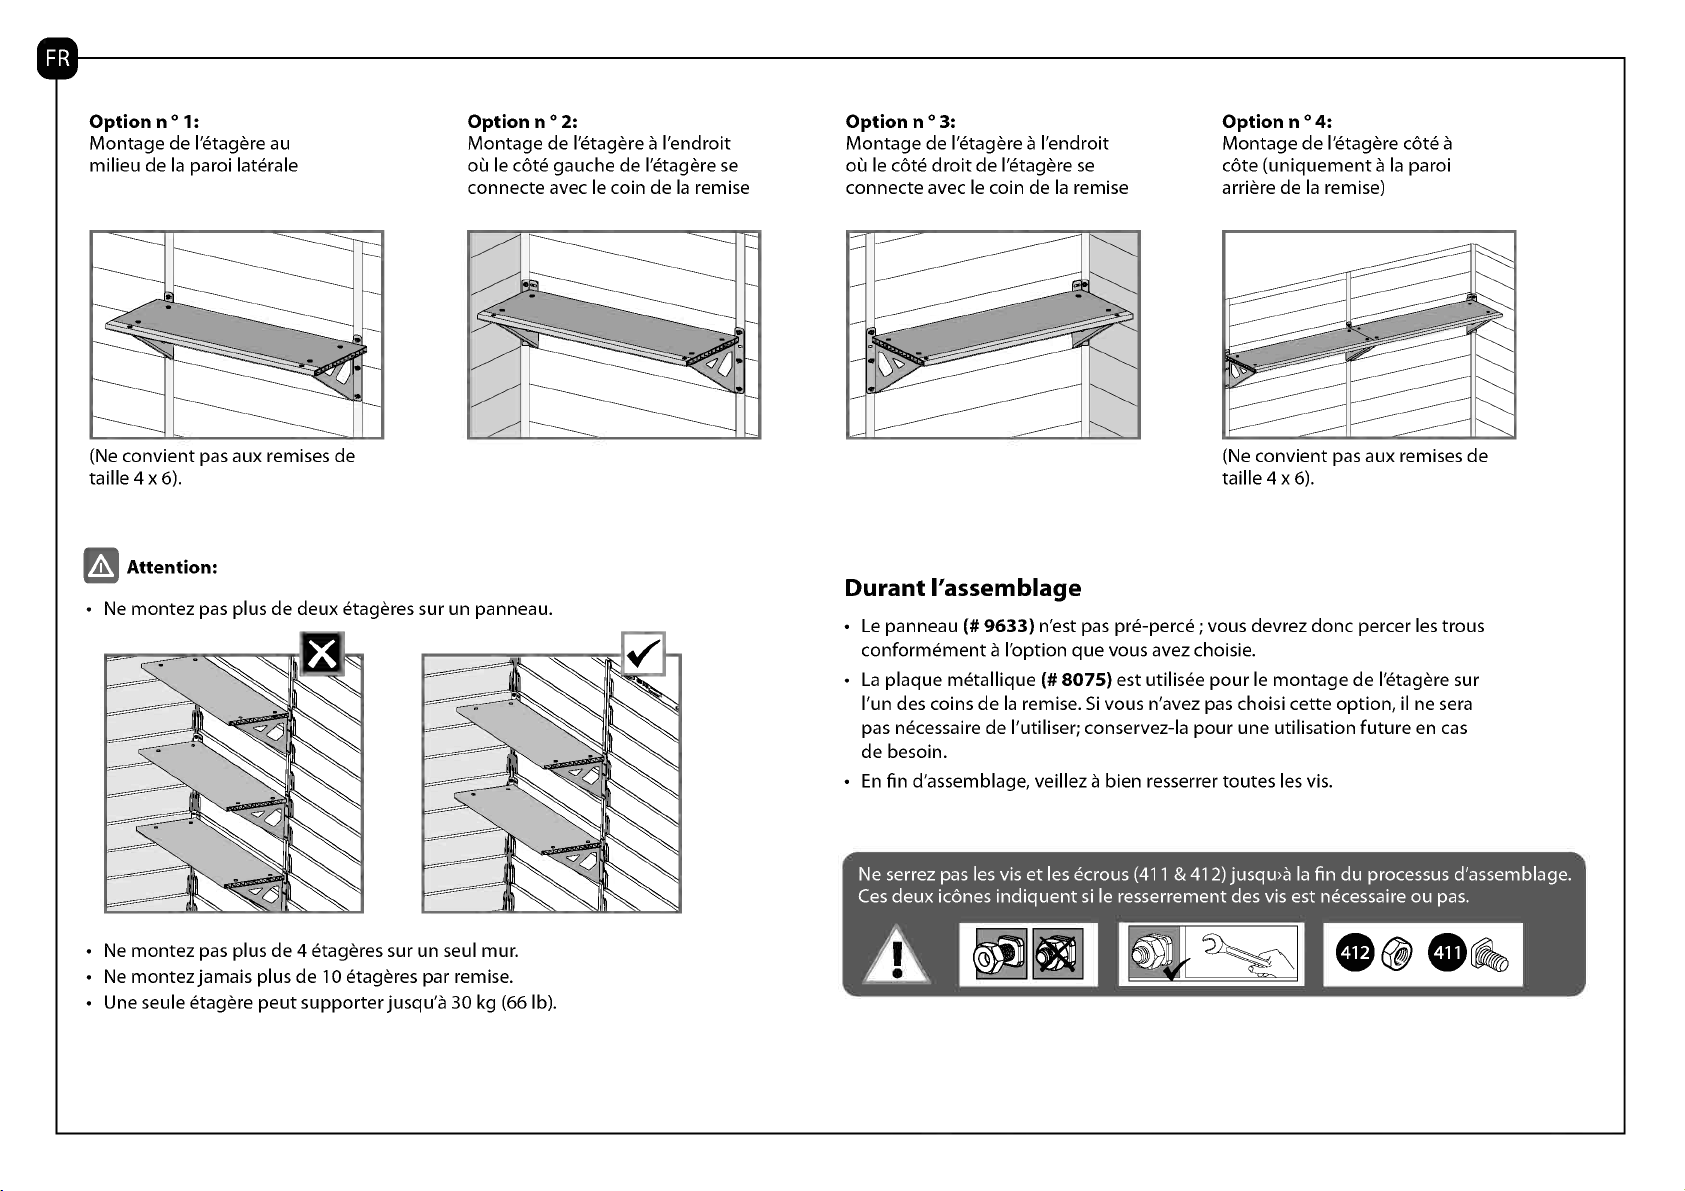
0Option n ° 1:
Montage de l'etagere au
milieu de la paroi laterale
(Ne convient pas aux remises de
taille 4 x 6).
AiAttention:
Option n ° 2:
Montage de l'etagere a l'endroit
oil le cote gauche de l'etagere se
connecte avec le coin de la remise
Ne montez pas plus de deux étagères sur un panneau.
Ne montez pas plus de 4 étagères sur un seul mur.
Ne montez jamais plus de 10 étagères par remise.
Une seule étagère peut supporter jusqu'a 30 kg (66 Ib).
Option n ° 3:
Montage de l'etagere a l'endroit
oil le cote droit de l'etagere se
connecte avec le coin de la remise
Option n ° 4:
Montage de l'etagere cote a
cote (uniquement a la paroi
arriere de la remise)
(Ne convient pas aux remises de
taille 4 x 6).
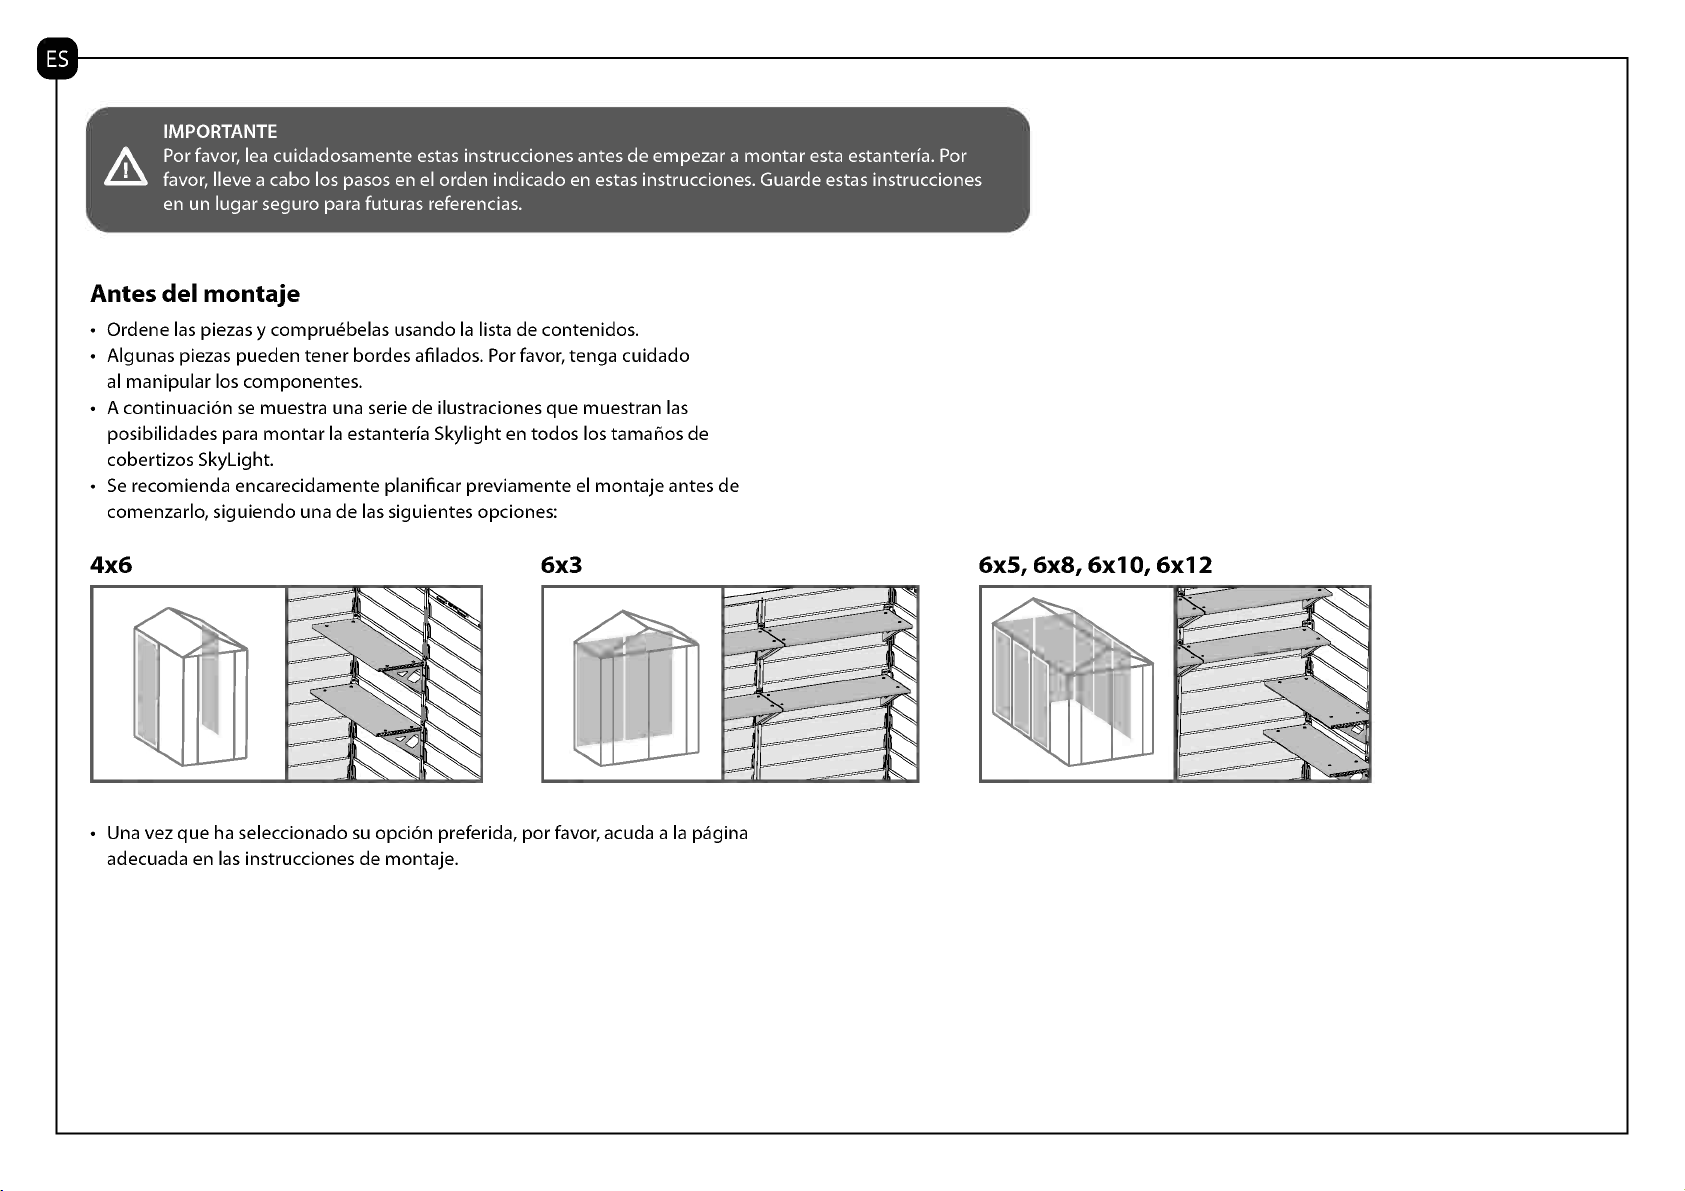
Durant ('assemblage
Le panneau (# 9633) n'est pas pre-perce ; vous devrez donc percer les trous
conformement a ('option que vous avez choisie.
La plaque metallique (# 8075) est utilisee pour le montage de l'etagere sur
l'un des coins de la remise. Si vous n'avez pas choisi cette option, il ne sera
pas necessaire de ('utiliser; conservez-la pour une utilisation future en cas
de besoin.
En fin d'assemblage, veillez a bien resserrer toutes les vis.
Ne serrez pas les vis et les ecrous (411 & 412) jusqu)a la fin du processus d'assemblage.
Ces deux lames indiquent si le resserrement des vis est necessaire ou pas.
AIt 0 0 0 -s