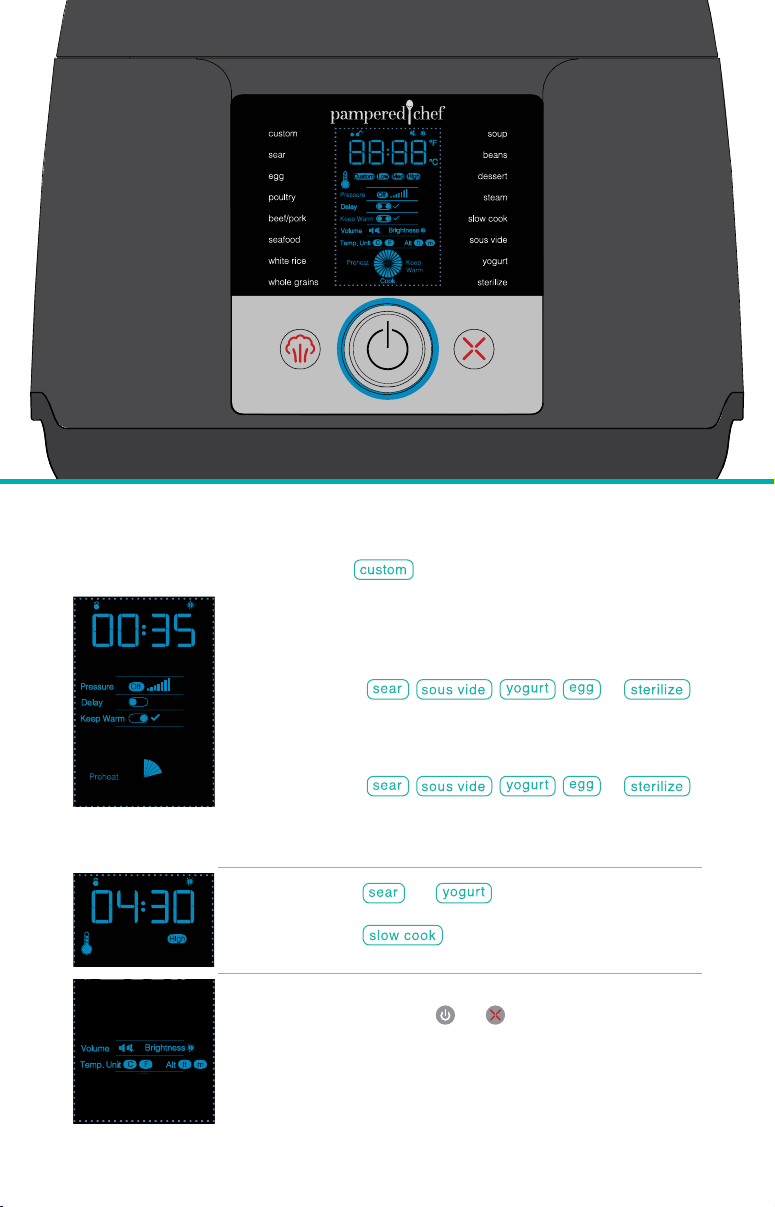
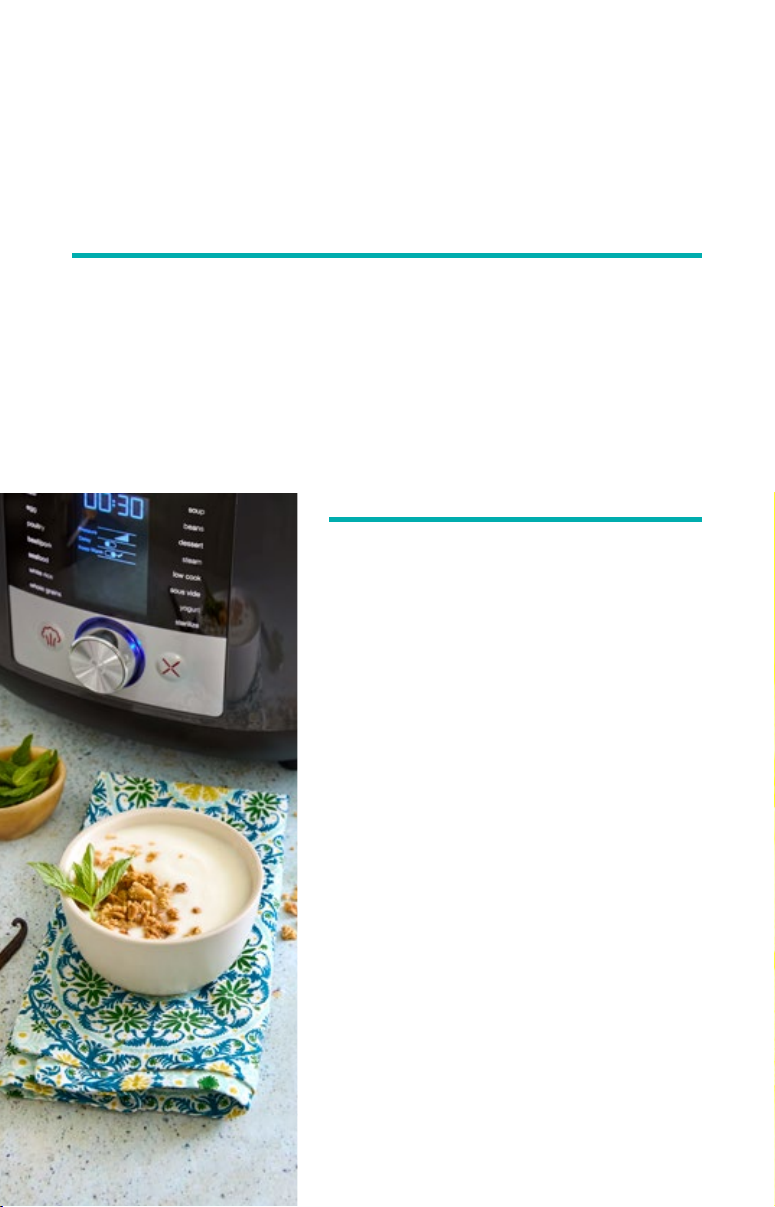
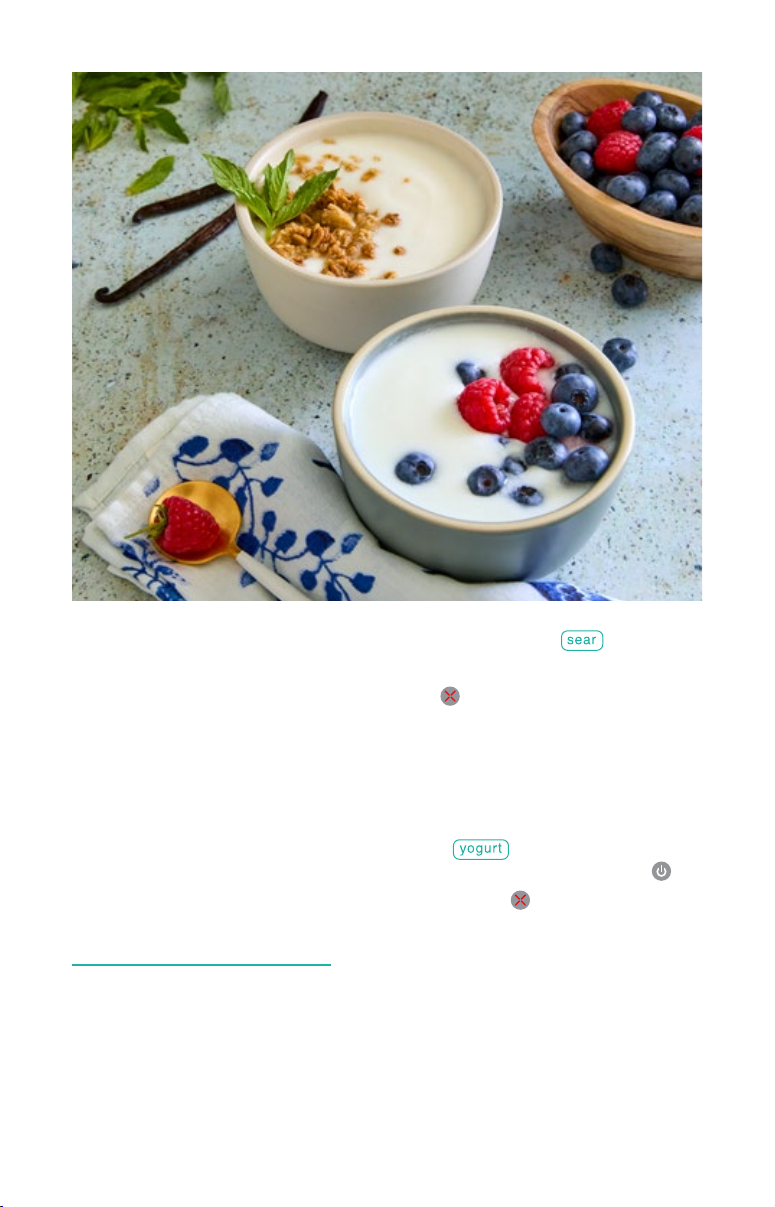
pampered chef Deluxe Multi Cooker Use and care manual

Deluxe Multi Cooker
Cooking Guide

Contents
Get to Know Your Deluxe Multi Cooker .............................................................................3
Which Cooking Method? ..................................................................................................6
Homemade Yogurt............................................................................................................8
Getting Started Recipes..................................................................................................10
Pressure Cook Charts.....................................................................................................12
Sous Vide Charts ............................................................................................................16
Recipes
Pressure Cooker Steak Chili............................................................................................20
Pressure Cooker Ribs With Tangy BBQ Sauce ................................................................22
Pressure Cooker Tuscan Bean Soup ...............................................................................24
Pressure Cooker Spaghetti .............................................................................................26
Pressure Cooker Rice Pudding .......................................................................................28
Sous Vide New York Strip ...............................................................................................30
Sous Vide Pork Chops ....................................................................................................32
Sous Vide Salmon...........................................................................................................34
Sous Vide Fire-Roasted Chicken .....................................................................................36
Slow Cooker Butter Chicken............................................................................................38
Bonus Recipes Using Accessories .................................................40–59
Before using your Deluxe Multi Cooker for the rst time, do an initial test run. You’ll nd the instructions in the
use and care manual. Always follow all the safety instructions listed in the use and care manual such as using heat-safe oven
mitts or pads when handling hot items and how to safely release pressure after cooking. The inner pot has two ll lines marked:
2/3 PC Max and 1/2. When cooking foods that expand like rice, don’t ll above the 1/2 line. Let’s get cooking!
Deluxe Multi Cooker
Cooking Guide

3
Get to Know Your
Deluxe Multi Cooker
Center Display
Steam-
Release
Button Cancel Button
Lid Rest Tab
Steam-
Release
Valve
Pressure
Indicator
Lid Rest Slots
Wire Rack
Carrying Handles
On/Off Switch
Cord Storage
Stainless Steel
Inner Pot
16 Presets
Selector Wheel/Start Button
On the back:

4
Pressure Settings Default Time
This is the only
setting you can
adjust the pressure.
30 min
12 min
15 min
35 min
3 min
4 min
10 min
30 min
25 min
40 min
15 min
Use for heat-resistant
plastic, silicone,
stainless steel, etc.
30 min
Time only
adjusts up.
16 Presets
Control Buttons
The cook time can be adjusted in all presets.
More Cooking Methods Defaults
Saute or sear in the inner pot.
Choose Low to sweat or soften
veggies; Med to pan sear and saute;
High to stir-fry and brown meat.
20 min
Set the time depending on when you
want your food ready. You can also
use Low to keep food warm (mashed
potatoes, stufng) and your stovetop
free for big gatherings.
Low: 8 hr
High: 4 hr
You can adjust the temp so your
food cooks just the way you want it.
When using this setting, Custom on
the center display will light up.
140°F (60°C)
3 hr
8 hr
Choose based on your recipe:
Low: 91°F (33°C)
Med: 98°F (37°C)
High: 105°F (40°C)
You can also use this setting
on Med to proof dough.
Steam-Release
This releases pressure after cooking is done.
• Natural Release is when you let the the unit sit for 10 minutes after cooking is done
so the pressure releases slowly. Then press to release any remaining pressure.
• Manual Release is when you press immediately after cooking is done. This
stops certain foods like pasta from overcooking.
Selector Wheel/Start
Turn the selector wheel to choose a preset and other settings, then press to select.
When ready to start cooking, press and hold. And when you're ready to add and
start cooking on , press to start.
Cancel
You can press this at any time to cancel an operation.

5
Pressure In , you can choose pressure levels from 1–7
(7 is high). If our recipes don’t indicate the level, use 7.
Delay
This lets you delay the start of cooking, but it only
delays the start of the cooking cycle and not the time it
takes to heat up or release pressure. It does not work
with , , , , or .
Keep Warm
This turns on automatically when cooking is done to keep
food hot until ready to eat. You’ll see the timer count up
so you know how long it’s been warming. It does not work
with , , , , or .
Circle
Indicator
This shows the progress of preheating, cooking,
and keeping your food warm so you know the status
at all times.
Low, Med,
High Temp
For and , you can cook on Low, Med, or
High depending on the recipe and what you’re cooking.
For , you can choose Low or High based on
how long you want the food to cook.
Volume
Brightness
Temp. Unit
Alt
Press and hold and together at the same time
to get a separate screen where you can choose the
volume and display brightness, Fahrenheit or Celsius,
and adjust for high altitude cooking if needed.
Center Control & Display Settings

6
Which Cooking Method?
That depends on three things: time, temperature, and texture.
See how to get the very best results, every time.
Pressure Cook
How It Works
Pressure and steam speed up cooking up to 70% faster than
other methods, locking in nutrients and adding moisture.
Best For
Quick cooking: Enjoy fork-tender pot roast in under an hour!
Most foods: Chicken, roasts, firm veggies, potatoes, dried beans,
rice, soup, dessert, you name it!
Need to Know
• Liquid creates the steam and pressure, so add at least 1 cup (250 mL) or what the recipe calls for.
• It takes a little time for pressure to build, like preheating the oven, but you’ll more than make up
the time during cooking.
• Once cooking begins, there’s no peeking. Let the presets take the guesswork out of making
everyday favorites.
No planning required! Fast, flavorful meals, even from frozen.
Slow Cook
How It Works
Food cooks on a low temperature for hours which tenderizes
meat and adds rich flavor.
Best For
Hands-off cooking: Add ingredients in the morning, let cook
all day, and have a flavorful, tender one-pot meal ready for dinner.
Roasts, soups, chili: Soup, stew, and chili are always winners. So
are briskets, short ribs, chuck roasts, pork shoulder, and lamb shanks.
Need to Know
• It’s best to brown meat first for better flavor and texture.
• You can add foods at different stages, but lifting the lid causes heat to escape. It might take extra
time for it to return to the cooking temp (like opening the oven door).
• Fresh herbs, other than rosemary, dry out during slow cooking, so use dried herbs or add fresh
herbs right at the end.
Zero fuss. Just add ingredients and let it do its thing.

7
Sous Vide
How It Works
Food is sealed in an airtight bag and is placed in a temperature-controlled water bath to slowly and
gently cook. The result: Every part of the food—inside and out, top to bottom—cooks to the same
temperature and texture.
Best For
Predictable results: No more undercooked centers with overcooked outsides. For the best results,
quickly sear right before serving to add color, texture, and even more flavor.
Meat, fish, and veggies: Great for tender cuts of meat, firm fish, chicken, or to tenderize tougher
cuts of meat. Plus, veggies taste as vibrant as they look.
Water Bath Know-How
• Store-bought resealable freezer bags are sturdier than storage bags. You can also use reusable
silicone bags or vacuum-sealed bags.
• Place the food in a single layer in the bag so everything cooks evenly.
• Remove the air from the bag before sealing. You can either press on the bag with your forearm to
expel the air, or you can lower the bag into a pot of water and the water pressure will push the air out.
• To cook, fully submerge the bag leaving the seal outside of the water. If it floats, you can clip a binder
clip to the bottom of the bag and place a heavy spoon into the clip opening. Or, you can place the
wire rack on top of the bag and add pie weights or heavy spoons if needed.
Need to Know
• Preheating the water takes about 35 minutes, so this is a good time to prep and marinade.
• All of our recipes use fresh or completely thawed foods, not frozen. Our cooking times are not
accurate for frozen foods.
• Use garlic powder instead of raw garlic for two reasons: taste and safety. With this slower cooking
method, raw garlic can turn bitter, and in rare cases, can become unsafe to eat.
• Most meats can remain in the water bath after reaching the set temperature without overcooking
for up to two hours, so you have plenty of wiggle room for serving.
• We recommend cooking all food at or above 130°F (54.5°C), searing proteins after cooking, and
chilling food immediately after cooking when storing.
The secret to restaurant-quality steaks, fish fillets, and chops.

Homemade Yogurt
With just two ingredients and five minutes of hands-on time,
you can have creamy yogurt, made just the way you like it.
Live or Active Cultures: These are good bacteria that turn milk into yogurt and give it its texture and tangy
avor. You’ll need live cultures, or yogurt starter, for the rst batch. Any plain, unavored store-bought yogurt
with live yogurt cultures will do. After that, you can use your homemade yogurt as the starter. Science!
Culturing: This is the amount of time it takes for milk and starter to turn into yogurt, anywhere from
8–24hours. The longer it cooks, the tangier it gets. At 16 hours or longer, the tanginess will be similar to
store-bought yogurt. When adding sugar before culturing, we recommend culturing no longer than 16hours.
Milk Protein Skin: As milk heats up, a skin can form on the surface, so stir regularly. There’s nothing wrong
with the skin other than it leaves hard bits in the otherwise smooth yogurt. Just skim off when done cooking.
Yogur t Vocabula ry
Before Culturing
• When adding the starter, the milk must be 105–115°F
(41–46°C). If it’s too hot it won’t properly culture (like yeast
when making bread).
• Before adding the yogurt starter to the milk, whisk a small
amount of the heated milk into the starter in a separate bowl.
This way, the starter will be smooth and evenly distribute.
Thick Yogurt
• Place a strainer such as a ne mesh sieve lined with
cheesecloth, coffee lters, or high-quality paper towels
over a large bowl to catch liquid. Then add the yogurt, cover
with plastic wrap, and refrigerate until desired consistency,
about six hours for Greek-style yogurt.
• The liquid that drains off after straining (whey) can be used
in protein drinks, smoothies, soup, marinades, as a starter to
make more yogurt, or as a substitute for buttermilk.
Storing
• Gently spoon into individual portions or storage containers
without stirring.
• You might notice some separation. This is normal, especially
with longer culturing.
• Will stay fresh in your refrigerator for up to two weeks.
Next Batches
• You can use yogurt starter from your homemade yogurt
for up to a week.
• If your yogurt is not culturing as quickly as earlier batches,
the starter may be too weak. Use store-bought yogurt in your
next batch.
Need to Know

9
Homemade Yogurt
Makes 8 cups (2 L)
8 cups (2 L) 2% milk
½ cup (125 mL) plain unsweetened
yogurt with active cultures
Homemade Vanilla Yogurt
Makes 8 cups (2 L)
8 cups (2 L) 2% milk
½ cup (125 mL) plain unsweetened
yogurt with active cultures
½ cup (125 mL) sugar
2 tbsp (30 mL) vanilla extract
. Add the milk to the inner pot. Select on Low and
heat the milk until it reaches to 180–185°F (82–85°C),
20–25 minutes. Stir occasionally to prevent skin from
forming. Press .
. Let the milk cool to 105–115°F (41–46°C), about 1 hour at
room temperature. Stir as needed to keep skin from forming.
If any forms, skim it off.
. In a small bowl, whisk ½ cup (125 mL) of the warm milk into
the starter yogurt. Pour the mixture in the inner pot and stir
well to blend. For vanilla yogurt, add the sugar and vanilla.
. Cover and select on Med. Set the timer to 8 hours
or up to 12 hours for tangier yogurt; press and hold .
. Once the timer is up, press . Gently spoon into storage
containers without stirring. Chill before eating. Serve with
fresh fruit, if you’d like.
Cook’s Tips
The thickness and creaminess of the yogurt depends on the milk you use. If you use skim milk,
the yogurt will be a little thinner.
Don’t add anything other than sugar and vanilla before culturing. Anything acidic, like fresh fruit,
can be added right before serving.
→Visit our blog to see how to make yogurt with nut milks and freeze-dried cultures.

10
Sous Vide Carrots
1 lb. (450 g) baby carrots
2 tbsp (30 mL) butter
2 tsp (10 mL) sugar
¼ tsp (1 mL) salt
1⁄8 tsp (0.5 mL) black pepper
Optional: 1 tbsp (15 mL) nely
choppedparsley
. Fill the inner pot with water to the 1/2 fill line.
Lock the lid and select . Set the
temperature to 185°F (84°C) and the time to
2 hours; press and hold .
. Place the carrots, butter, sugar, salt, and
pepper in a single layer in a gallon-sized
resealable bag, remove the air, and seal.
. When you hear beeps and Add is displayed,
open the lid and submerge the bag with the seal
above the water. Lock the lid; press .
. When the timer is up, press . Carefully
remove the bag.
. Add the carrots and juices to a large skillet and heat over medium-high heat for 3–5 minutes,
stirring occasionally until any excess liquid evaporates. Garnish with parsley, if you’d like.
Easy-to-Peel Hard-Boiled Eggs
. Place the wire rack in the inner pot of the Deluxe
Multi Cooker.
. Add 1 cup (250 mL) of water to the inner pot and
place 6 eggs on the wire rack.
. Lock the lid and select ; press and hold .
. When the timer is up, press . Press .
. Remove the eggs and place in cold, running water
for several minutes to stop the cooking.
Getting Started Recipes
Learn how easy it use different settings and cooking methods
with these foolproof recipes.

11
Pressure Cooker Chicken Parmesan Pasta
2 tbsp (30 mL) olive oil, divided
1 lb. (450 g) chicken tenderloins, cut into bite-size pieces
2 tbsp (30 mL) Italian seasoning
1 jar (24 oz./650 mL) tomato pasta sauce
2 cups (500 mL) uncooked penne pasta (8oz./250 g)
1 cup (250 mL) water
1 oz. (30 g) Parmesan cheese, nely grated (½cup/125 mL)
3 oz. (90 g) mozzarella cheese, coarsely grated (¾cup/175mL)
. Set to on Med; press and hold . Heat 1 tbsp (15 mL) of oil in the inner pot for 3 minutes.
In a small bowl, toss the chicken with the seasoning to coat.
. Add half of the chicken and cook uncovered for 5–7 minutes, stirring once, until browned (the chicken will
not be cooked through). Remove from the inner pot. Repeat with the remaining oil and chicken. Press .
. Return the chicken to the pot. Add the sauce, pasta, and water. Lock the lid and select .
Set for 5 minutes; press and hold .
. When the timer is up, press . Press .
. Stir the Parmesan cheese into the pasta. Top with mozzarella cheese and cover. Let stand for 3–4 minutes
before serving.

Beef Weight
Fresh/Thawed
Frozen
Brisket, whole 3–4 lbs. (1.5–2 kg) 50 min–1 hr 1 hr 20 min–1 hr 30 min
Chuck roast,
whole 3–4 lbs. (1.5–2 kg) 50 min–1 hr 1 hr 25 min–1 hr 35 min
Ground 1–2 lbs. (0.5–1 kg) 8–10 min 12–14 min
Ribs 2–3 lbs. (1–1.5 kg) 35–40 min 1 hr–1 hr 25 min
Stew meat 1–2 lbs. (0.5–1 kg) 30–35 min 1 hr–1 hr 15 min
Pork
Ribs 3–4 lbs. (1.5–2 kg) 35–40 min 1 hr 5 min–1 hr 15 min
Sausage links 1–2 lbs. (0.5–1 kg) 4–6 min 6–8 min
Shoulder, cut 3–4 lbs. (1.5–2 kg) 35–40 min 1 hr 5 min–1 hr 15 min
Shoulder, whole 3–4 lbs. (1.5–2 kg) 1 hr 20 min–1 hr 30 min 1 hr 50 min–2 hr
Tenderloin, whole 2–3 lbs. (1–1.5 kg) 16–18 min 30–35 min
Pressure Cooking Charts
Meat &Poultry
. Add at least 1 cup (250 mL) of water, broth, or sauce to the inner pot.
. Remove the meat from its packaging (see cook’s tip) and add to the inner pot. Lock the lid.
Select the setting and set the timer according to the chart; press and hold to start cooking.
. When the timer is up, press . Press .
Cook’s Tips
It can be difcult to remove the original packaging from meat when it’s frozen. Before freezing, place
the meat in a resealable bag in a single layer to make it easier to remove when frozen.
The cooking times are recommendations and may vary based on the amount and thickness of the
food being cooked. If you’re cooking very thick cuts of meat, additional time may be required
12

Chicken Weight
Fresh/Thawed
Frozen
Breasts, bone-in 2–4 lbs. (1–2 kg) 12–15 min 25–30 min
Breasts, boneless 2–4 lbs. (1–2 kg) 6–10 min 8–12 min
Legs, bone-in 2–3 lbs. (1–1.5 kg) 4–6 min 8–10 min
Thighs, bone-in 2–3 lbs. (1–1.5 kg) 10–12 min 16–20 min
Thighs, boneless 2–4 lbs. (1–2 kg) 4–6 min 6–8 min
Tenderloins 2–4 lbs. (1–2 kg) 4–6 min 6–8 min
Whole 4–5 lbs. (2–2.5 kg) 25–30 min 40–45 min
Turkey
Breast, bone-in 4–6 lbs. (2–3 kg) 45–50 min 1 hr 15 min–1 hr 20 min
Ground 1–2 lbs. (0.5–1 kg) 6–8 min 12–14 min
Legs 2–3 lbs. (1–1.5 kg) 18–20 min 25–30 min
Thighs, bone-in 2–3 lbs. (1–1.5 kg) 30–35 min 50–60 min
13
Pressure Cook

14
Grains &Rice
Water Time Release Method
Barley, pearl 2¼ cups (550 mL) 25 min Natural, 10 min
Brown basmati rice 1 cup (250 mL) 15 min Natural, 10 min
Brown jasmine rice 1 cup (250 mL) 15 min Natural, 10 min
Brown long-grain rice 1 cup (250 mL) 15 min Natural, 10 min
Brown short-grain rice 1 ¼ cup (300 mL) 20 min Natural, 10 min
Brown medium-grain rice 1 ¼ cup (300 mL) 20 min Natural, 10 min
Couscous, pearl 1¼ cups (300 mL) 2 min Natural, 10 min
Couscous, quick cook 1½ cups (375 mL) 1 min Manual
Farro 1½ cups (375 mL) 12 min Natural, 10 min
Millet 2 cups (500 mL) 8 min Natural, 10 min
Quinoa 1½ cups (375 mL) 3 min Manual
Steel-cut oats 3¼ cups (800 mL) 10 min Natural, 10 min
White basmati rice 1 cup (250 mL) 4 min Natural, 10 min
White jasmine rice 1 cup (250 mL) 4 min Natural, 10 min
White long-grain rice 1 cup (250 mL) 4 min Natural, 10 min
White medium-grain rice 1½ cups (375 mL) 4 min Natural, 10 min
White short-grain rice 1½ cups (375 mL) 4 min Natural, 10 min
. Rinse 1 cup (250 mL) of grains or rice in cool water. Add to the inner pot with 1 tbsp (15 mL)
of oil and the suggested amount of water. Lock the lid.
. Select the setting and set the time. Press and hold to start cooking.
. When the timer is up, release the pressure using the recommended method.
→Visit our blog to learn how to make an oatmeal breakfast bar.

15
Pressure Cook
Place on Wire Rack Time
Acorn squash
1½ lbs. (700 g), skin on, quartered Yes 10 min
Artichokes
3 large, stems trimmed and tops of leaves removed Yes 25 min
Beets
1 lb. (450 g), peeled and cut into 1" (2.5-cm) pieces No 10 min
Broccoli
1½ lbs. (700 g), cut into 2" (5-cm) pieces No 1 min
Brussels sprouts, whole
1 lb. (450 g), trimmed as needed No 4 min
Butternut squash
1½ lbs. (700 g)
Cut in half lengthwise, remove seeds Yes 13 min
Peeled, cut into 1" (2.5-cm) pieces No 5 min
Cabbage
2½ lbs. (1.1 kg), cut into wedges with core intact No 3 min
Carrot
1 lb. (450 g), peeled, cut into 2" (5-cm) pieces No 4 min
Cauliower
2lbs. (1 kg), cut into 2" (5-cm) pieces No 1 min
Russet potatoes, red or golden
2 lbs. (1 kg), peeled (optional), cut into 1" (2.5-cm) pieces No 5 min
Spaghetti squash
1 lb. (450 g), cut in half lengthwise, seeded Yes 12 min
Sweet potatoes
2 lbs. (1 kg), peeled (optional), cut into 1" (2.5-cm) pieces No 4 min
Vegetables
. Add at least 1 cup (250 mL) of water and the prepared vegetables to the inner pot. Lock the lid.
. Select and set the timer according to the chart; press and hold to start cooking.
. When the timer is up, press . Press .
Tip: We don’t recommend pressure cooking tender vegetables such as peas, asparagus, or
summer squash because they can easily overcook.
Time
Black beans 25 min
Black-eyed peas 15 min
Chickpeas 40 min
Time
Great Northern
beans 28 min
Kidney beans, red 28 min
Lentils, green 5 min
Time
Navy beans 25 min
Pinto beans 25 min
Split peas, green
or yellow 10 min
Beans &Legumes
. Rinse and sort 1 cup (250 mL) of dried beans or legumes in cool water. Add to the inner pot with
3 cups (750mL) of water and 1 tbsp (15 mL) of oil. Lock the lid.
. Select and set the timer according to the chart. Press and hold to start cooking.
. When the timer is up, let the pressure naturally release for 10 minutes, then press . Press .

16
Beef Water Temperature Doneness Cook Time
Burgers
4 patties (8 oz./125 g each),
80% lean ground chuck
130°F (54°C) Medium-rare 2–4 hr
135°F (57°C) Medium 2–4 hr
145°F (63°C) Medium-well 2–4 hr
150°F (66°C) Well-done 2–4 hr
Steak: New York strip,
ribeye, sirloin, T-bone
1–1½" (2.5–4-cm) thick
130°F (54°C) Medium-rare 2–4 hr
135°F (57°C) Medium 2–4 hr
145°F (63°C) Medium-well 2–4 hr
155°F (68°C) Well-done 2–4 hr
Tenderloin
2-4" (5-10-cm) slices
130°F (54°C) Medium-rare 2–4 hr
135°F (57°C) Medium 2–4 hr
145°F (63°C) Medium-well 2–4 hr
155°F (68°C) Well-done 2–4 hr
Pork
Chops, boneless
1–1½" (2.5–4-cm) thick
140°F (60°C) Medium-rare 2–4 hr
150°F (66°C) Medium-well 2–4 hr
160°F (71°C) Well-done 2–4 hr
Ribs
up to 3 lbs. (1.5 kg) 160°F (71°C) Well-done 16–18 hr
Tenderloin
1½–2" (4–5-cm) slices
130°F (54°C) Medium-rare 2–4 hr
140°F (60°C) Medium 2–4 hr
150°F (66°C) Medium-well 2–4 hr
Sous Vide Charts
Meat &Poultry
. Fill the inner pot to the 1/2 fill line with water. Lock the lid and select . Set the
temperature and time according to the chart; press and hold .
. While the water is heating, prepare the meat or poultry and place in a single layer in a gallon-sized
resealable bag. Remove the air and seal. When you hear three beeps and Add is displayed, open the
lid and submerge the bag with the seal above the water. Lock the lid; press .
. When the timer is up, press . Remove the bag from the water.
Cook’s Tips
After removing the cooked meat from the bag, place on a paper-towel lined plate and pat dry on
both sides. Then, for better avor, color, and texture, quickly sear right before serving.
The food will reach the set temp at the minimum cook time and hold that temp in the water bath
without overcooking until the maximum cook time, so dinner is ready when you are!

17
Sous Vide Cooking
Chicken Water Temperature Doneness
Cook Time
Breasts, bone-in
or boneless
145°F (63°C) Incredibly juicy and tender 2–4 hr
150°F (66°C) So very juicy and tender 2–4 hr
155°F (68°C) So juicy 2–4 hr
Thighs, bone-in
or boneless
165°F (74°C) So juicy and tender 2–4 hr
165°F (74°C) Fall off the bone 4–8 hr

Seafood
. Fill the inner pot to the 1/2 fill line with water. Lock the lid and select . Set the
temperature and time according to the chart; press and hold .
. While the water is heating, place fish in a single layer in a gallon-sized resealable bag.
Remove the air and seal. When you hear three beeps and Add is displayed, open the lid
and submerge the bag with the seal above the water. Lock the lid; press .
. When the timer is up, press . Remove the bag from the water.
Cook’s Tips
After removing the cooked sh from the bag, place on a paper-towel lined plate and pat dry on
both sides. Then, for better avor, color, and texture, quickly sear rm sh right before serving.
The fish will reach the set temp at the minimum cook time and hold that temp in the water bath
without overcooking until the maximum cook time.
Seafood Water Temperature Doneness Cook Time
Firm sh: Salmon,
Mahi Mahi
1–2" (2.5–5-cm) llets
125°F (52°C) Flaky 1–1½ hr
130°F (55°C) Firm and tender 1–1½ hr
Shrimp
1 lb. (450 g)
135°F (57°C) Barely opaque, tender 45 min–1½ hr
140°F (60°C) Firm 45 min–1½ hr

19
Sous Vide Cooking
Fruits &Vegetables
. Fill the inner pot to the 1/2 fill line with water. Lock the lid and select . Set the
temperature and time according to the chart; press and hold .
. While the water is heating, place fruit or veggies in a single layer in a gallon-sized resealable
bag. Remove the air and seal. When you hear three beeps and Add is displayed, open the lid
and submerge the bag with the seal above the water. Lock the lid; press .
. When the timer is up, press . Remove the bag from the water.
Cook’s Tip
The food will reach the set temp at the minimum cook time and hold that temp in the water bath
without overcooking until the maximum cook time.
Fruits Water Temperature Cook Time
Apple
3 large, cut in half 185°F (84°C) 1½ hr
Pear
3 medium, cut in half 185°F (84°C) 1½–2 hr
Pineapple
1 whole, cut into 1–2" (2.5–5-cm) pieces 185°F (84°C) 45 min–2 hr
Vegetables
Carrots
Peeled 185°F (84°C) 2–2½ hr
Asparagus
Trimmed 185°F (84°C) 1–2 hr
Brussels sprouts
Trimmed 185°F (84°C) 1–2 hr
Cauliower orets 185°F (84°C) 1–2 hr
Broccoli orets 185°F (84°C) 1–2 hr
Red whole baby potatoes 185°F (84°C) 2–3 hr
Russet potatoes
Cut into 1" (2.5-cm) cubes 185°F (84°C) 1–1½ hr
Sweet potatoes
Cut into 1" (2.5-cm) cubes 185°F (84°C) 1–1½ hr

20
Pressure Cooker
SteakChili
Table of contents