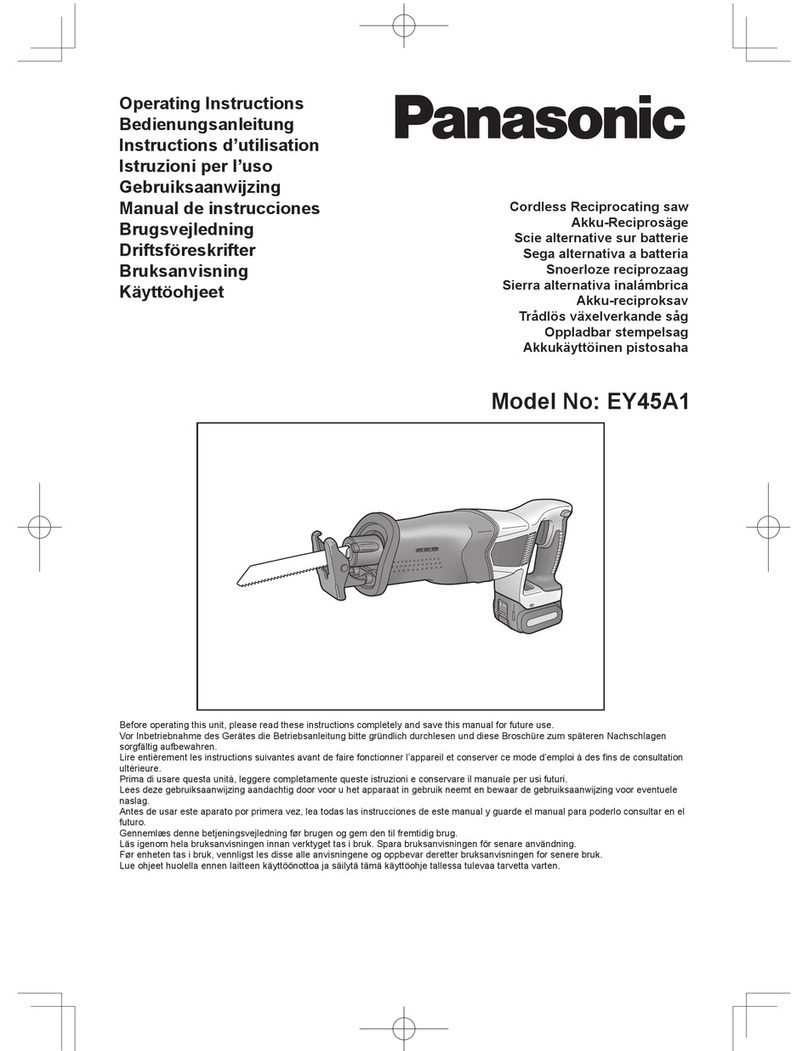
Panasonic EY45A1 User manual

Operating Instructions
Bedienungsanleitung
Instructions d’utilisation
Istruzioni per l’uso
Gebruiksaanwijzing
Manual de instrucciones
Brugsvejledning
Driftsföreskrifter
Bruksanvisning
Käyttöohjeet
Cordless Reciprocating saw
Akku-Reciprosäge
Scie alternative sur batterie
Sega alternativa a batteria
Snoerloze reciprozaag
Akku-reciproksav
Akkukäyttöinen pistosaha
Model No: EY45A1
Before operating this unit, please read these instructions completely and save this manual for future use.
Vor Inbetriebnahme des Gerätes die Betriebsanleitung bitte gründlich durchlesen und diese Broschüre zum späteren Nachschlagen
sorgfältig aufbewahren.
ultérieure.
Prima di usare questa unità, leggere completamente queste istruzioni e conservare il manuale per usi futuri.
Lees deze gebruiksaanwijzing aandachtig door voor u het apparaat in gebruik neemt en bewaar de gebruiksaanwijzing voor eventuele
naslag.
Antes de usar este aparato por primera vez, lea todas las instrucciones de este manual y guarde el manual para poderlo consultar en el
futuro.
Gennemlæs denne betjeningsvejledning før brugen og gem den til fremtidig brug.
Läs igenom hela bruksanvisningen innan verktyget tas i bruk. Spara bruksanvisningen för senare användning.
Før enheten tas i bruk, vennligst les disse alle anvisningene og oppbevar deretter bruksanvisningen for senere bruk.
Lue ohjeet huolella ennen laitteen käyttöönottoa ja säilytä tämä käyttöohje tallessa tulevaa tarvetta varten.

– 2 –
English: Page 6 Español: Página 57
Deutsch: Seite 17 Dansk: Side 67
Page 27 Svenska: Sid 77
Italiano: Pagina 37 Norsk: Side 87
Nederlands: Bladzijde 47 Suomi: Sivu 97
Sayfa 107
V
(7)
(8)
(9)
(1)
(10)
(11)
(6) (5)
(12)
(13)
(4)
(2)
(3)

– 3 –
(1)
Power switch
Netzschalter
Interrupteur d’alimentation
Interruttore di accensione
Hoofdschakelaar
Interruptor de alimentación
Afbryder
Strömbrytare
Strømbryter
Käyttökytkin
(2)
Switch lock lever
Schalterverriegelungshebel
Levier de verrouillage d’interrupteur
Levetta di blocco interruttore
Schakelaarblokkeertoets
Palanca de bloqueo del interruptor
Låsehåndtag
Strömbrytarspärr
Låsespake for bryteren
Käyttökytkimen lukitusvipu
Anahtar kilit kolu
(3)
Battery low warning lamp
Akkuladungs-Warnlampe
Témoin d’avertissement de batterie basse
Spia avvertenza batteria scarica
Waarschuwingslampje voor lage accuspanning
Luz de aviso de baja carga de batería
Advarselslampes batterieffekt lav
Varningslampa för svagt batteri
Varsellampe for at batteriet er for lavt
Alhaisen akkujännitteen varoituslamppu
(4)
Overheat warning lamp (battery)
Überhitzungs-Warnlampe (Akku)
Témoin d’avertissement de
surchauffe (batterie)
Spia avvertenza
surriscaldamento (batteria)
Oververhitting-waarschuwingslampje (accu)
Luz de advertencia de
sobrecalentamiento (batería)
Advarselslamp til overophedning (batteri)
Varningslampa för överhettning (batteri)
Varsellampe for overoppheting (batteri)
Ylikuumenemisen varoituslamppu (akku)
(5)
Front cover
Vordere Abdeckung
Couvercle avant
Coperchio frontale
Voorste afdekking
Tapa frontal
Frontdæksel
Främre lucka
Frontdeksel
Suojakansi
(6)
Protective shoe
Sicherheitsbacke
Sabot de protection
Protezione
Beschermende schoen zapata
protectora
Beskyttende sko
Skyddssko
Beskyttelsessko
Suojakenkä
(7)
Blade clamp bracket
Sägeblatthalterung
Support de blocage de lame
Staffa a morsetto lama
Zaagbladklemsteun
Soporte de abrazadera de
cuchilla
Savbladsholder
Sågbladshållare
Bladklemmebrakett
Avaimeton terän kiinnitys
(8)
Locking sleeve
Verriegelungsmuffe
Manchon de verrouillage
Manicotto di bloccaggio
Vergrendelingshuls
Casquillo de cierre
Låsebøsning
Låshylsa
Låsehylse
Lukitusholkki
(9)
Metal blade
Metallsägeblatt
Lame à métal
Lama per metallo
Metaalzaagblad
Cuchilla de metal
Metalsavblad
Metallsågblad
Metallblad
Metalliterä
(10)
Battery pack
Akku
Batterie autonome
Pacco batteria
Accu
Batería
Batteripakning
Batteri
Batteripakke
Akku
(11)
Battery charger
Ladegerät
Chargeur de batterie
Caricabatterie
Acculader
Cargador de batería
Batterioplader
Batteriladdare
Batterilader
Akkulaturi
(12)
Battery pack cover
Akkuabdeckung
Couvercle de la batterie autonome
Coperchio batterie
Accudeksel
Cubierta de la batería
Akkuafdækning
Batteriskydd
Batteripakkedeksel
Akun liitinsuoja
(13)
Wood blade
Holzsägeblatt
Lame à bois
Lama per legno
Houtzaagblad
Cuchilla de madera
Træsavblad
Träsågblad
Treblad
Puuterä

– 4 –
[Fig. 1]
[Fig. 3]
[Fig. 6]
28 mm
[Fig. 7]
[Fig. 2]
[Fig. 5]
[Fig. 4]
Alignment marks
Ausrichtmarkierungen
Marques d’alignement
Marcature allineamento
Uitlijntekens
Marcas de alineación
Flugtemærker
Anpassningsmärken
Innrettingsmerker
Sovitusmerkit
Button
Knopf
Bouton
Pulsante
Knop
Botón
Knap
Knapp
Knapp
Painike
Attaching
Anbringen
Connexion
Collegamento
Bevestigen
Acoplamiento
Påsætning
Montering
Montering
Kiinnittäminen
Takma
Removing
Entfernen
Retrait
Rimozione
Verwijderen
Desacoplamiento
Aftagning
Lossdragning
Demontering
Irrottaminen

– 5 –
[Fig. 8]
Pack cover
Akkuabdeckung
Couvercle de la
batterie autonome
Coperchio pacco
Accudeksel
Cubierta de batería
Pakningsdæksel
Batteriskydd
Pakkedeksel
Akkukotelon kansi
Terminals
Anschlüsse
Bornes
Terminali
Aansluitpunten
Terminales
Terminaler
Poler
Ender
Liittimet
Terminaller
Label (red or yellow)
Etikett (rot oder gelb)
Etiquette (rouge ou jaune)
Etichetta (rossa o gialla)
Label (rood of geel)
Etiqueta (roja o amarilla)
Label (rødt eller gult)
Etikett (röd eller gul)
Etikett (rød eller gul)
Tarra (punainen tai keltainen)
[Fig. 9]
Attaching
Anbringen
Connexion
Collegamento
Bevestigen
Acoplamiento
Påsætning
Montering
Montering
Kiinnittäminen
Takma
Removing
Entfernen
Retrait
Rimozione
Verwijderen
Desacoplamiento
Aftagning
Lossdragning
Demontering
Irrottaminen
Alignment marks
Ausrichtmarkierungen
Marques d’alignement
Marcature allineamento
Uitlijntekens
Marcas de alineación
Flugtemærker
Anpassningsmärken
Opprettingsmerke
Sovitusmerkit
Battery pack release button
Akku-Entriegelungsknopf
Bouton de libération de batterie autonome
Tasto di rilascio pacco batteria
Accu-ontgrendeltoets
Botón de liberación de batería
Udløserknap til batteripakning
Frigöringsknapp för batteri
Utløserknapp for batteripakke
Akkupaketin irrotuspainike

Original instructions: English
Other languages
Read “the Safety Instructions” booklet
and the following before using.
I.
Thank you for purchasing the
Panasonic Reciprocating saw. This
Reciprocating saw can be used with
Panasonic rechargeable batteries to
provide excellent cutting performance.
The Reciprocating saw is for cutting
metal, wood, and drywall only.
II.
1) Keep hands away from cutting area
and blade. Keep your insulated
gripping surfaces. If both hands are
holding the tool, they cannot be cut by
the blade.
2) Never hold piece being cut in your
hands or across your leg. It is
important to support the work properly
to minimize body exposure or loss of
control.
3) Be aware that this tool is always in an
operating condition, since it does not
have to be plugged into an electrical
outlet.
4) Always use safety goggles or glasses
with side shields. Ordinary eye or sun
glasses are NOT safety glasses.
5) When this tool is used for woodworking
dust mask.
6) Avoid cutting nails. Inspect workpiece
for any nails and remove them before
operation.
7) Do not cut oversized workpiece.
8) Check for the proper clearance beyond
the workpiece before cutting so that
workbench, etc.
9)
10) Make sure the blade is not contacting
the workpiece before the switch is
turned on.
11) Keep hands away from moving parts.
12) Do not touch the blade or workpiece
immediately after operation; they may
be extremely hot and could burn your
skin.
13) Never swing tool.
14) Do not use blades which are deformed
or cracked.
15) Do not use blades which do not
comply with the characteristics
16) Remove the battery pack from the tool
body before replacement of the blade,
making adjustments, or other
maintenance work.
17) Wear ear protectors when using the
tool for extended periods.
18) During charging, the charger may
become slightly warm. This is normal.
Do NOT charge the battery for a long
period.
19) Do not store the tool and battery pack
in locations where the temperature
may reach or exceed 50°C (122°F)
(such as a metal tool shed, or a car in
the summer), which can lead to
deterioration of the storage battery.
20) The ambient temperature range is
between 0°C (32°F) and 40°C (104°F).
III.
SAWS
1)
an operation where the cutting
wiring or its own cord.
Cutting accessory contacting a “live”
wire may make exposed metal parts of
the power tool “live” and could give the
operator an electric shock.
2)
to secure and support the
Holding the workpiece by hand or
against your body leaves it unstable
and may lead to loss of control.
– 6 –
EN

1) - This
manual contains important safety and
operating instructions for battery
charger.
2) Before using battery charger, read all
instructions and cautionary markings
on battery charger, battery pack.
3) - To reduce the risk of injury,
charge only applicable battery pack as
shown in the last page. Other types of
batteries may burst causing personal
injury and damage.
4) Do not expose charger and battery
pack to rain or snow or use in damp
location.
5) Use of an attachment not
recommended may result in a risk of
6) To reduce risk of damaging the electric
plug and cord, pull by plug rather than
cord when disconnecting charger.
7) An extension cord should not be used.
8) If the supply cord is damaged, it must
be replaced by the manufacturer or its
person in order to avoid a hazard.
9) Do not operate charger if it has
received a sharp blow, been dropped,
or otherwise damaged in any way; take
10) To reduce risk of electric shock, unplug
charger from outlet before attempting
any maintenance or cleaning.
11) Make sure cord is located so that it will
not be stepped on, tripped over, or
otherwise subjected to damage or
stress.
12) The charger and battery pack are
Do not attempt to charge any other
cordless tool or battery pack with this
charger. Do not attempt to charge the
battery pack with any other charger.
13) Do not attempt to disassemble the
battery charger and the battery pack
housing.
14) Do not store the tool and battery pack
in locations where the temperature
may reach or exceed 50°C (122°F)
(such as a metal tool shed, or a car in
the summer), which can lead to
deterioration of the storage battery.
15) Do not charge battery pack when the
temperature is BELOW 0°C (32°F) or
ABOVE 40°C (104°F).
16) Do not incinerate the battery pack. It
17) The charger is designed to operate on
standard household electrical power
only. Charge only on the volt age
indicated on the nameplate. Do not
attempt to use it on any other voltage!
18) Do not abuse cord. Never carry
charger by cord or yank it to
disconnect from outlet. Keep cord
away from heat, oil and sharp edges.
19) Charge the battery pack in a well
ventilated place, do not cover the
charger and battery pack with a cloth,
etc., while charging.
20) Do not short the battery pack. A battery
over heating and burns.
21) If the supply cord of this
appliance is damaged, it must only be
replaced by a repair shop appointed by
the manufacturer, because special
purpose tools are required.
22) This appliance can be used by children
aged from 8 years and above and
persons with reduced physical,
sensory or mental capabilities, or lack
of experience and knowledge if they
have been given supervision or
instruction concerning use of the
appliance in a safe way and
understand the hazards involved.
23) Children shall not play with the
appliance. Cleaning and user
maintenance shall not be made by
children without supervision.
– 7 –
EN
24) This appliance is not intended for use
by persons (including children) with
reduced physical, sensory or mental
capabilities, or lack of experience and
knowledge, unless they have been
given supervision or instruction
concerning use of the appliance by a
person responsible for their safety.
WARNING
• Do not use other than the Panasonic
battery packs that are designed for use
with this rechargeable tool.
• Panasonic is not responsible for any
damage or accident caused by the use
of recycled or counterfeit battery pack.
• Do not dispose of the battery pack in a
• Do not allow metal objects to touch the
battery pack terminals.
• Do not carry or store the battery pack in
the same container as nails or similar
metal objects.
• Do not charge the battery pack in a
high-temperature location, such as next
explode.
• After removing the battery pack from the
tool or the charger, always reattach the
pack cover. Otherwise, the battery
contacts could be shorted, leading to a
• When the Battery Pack Has
Deteriorated, Replace It with a New
One. Continued use of a damaged
battery pack may result in heat
generation, ignition or battery rupture.
• To prevent leakage, overheating, smoke
occurring, follow these instructions when
handling our rechargeable power tools
- Do not allow material cuttings or dust
to fall onto the battery pack.
- When storing, remove any material
cuttings and dust from the battery
pack, and place the battery pack
separately from metal objects (screws,
nails, etc.) when storing in the tool
case.
WARNING
• Do not handle the rechargeable power
tools in the following way.
(There is a hazard of smoke generation,
- Use or leave in places exposed to rain
or moisture.
- Use submerging in water.
Meaning
Volts
Direct current
No load speed
Revolutions or
reciprocations per minutes
Electrical capacity of battery
pack
To reduce the risk of injury,
user must read and
understand instruction
manual.
For indoor use only.
WARNING
• To reduce the risk of injury, always
remove battery pack before changing
the blade.
• Do not inhale any smoke emitted from
the tool or battery pack as it may be
harmful.
Inspection before use
• Has the correct jigsaw blade been
attached for the object to be cut?
• Has the correct stem shape and thickness
of the blade been mounted?
•
• Check if the blade is cracked or broken.
• Check that there are no foreign objects in
the object to be cut.
– 8 –
EN

reciprocating saw blade
Be sure to remove the battery pack before
performing the blade replacement
procedure, which includes preparation,
inspection, and replacement steps.
Failure to do so may result in an accident
in which tool operation is triggered
inadvertently.
1. Rotate the locking sleeve. [Fig. 1]
2. Insert the reciprocating saw blade while
holding the locking sleeve in the rotated
position.
The blade can be attached facing up or
down as appropriate for the type of work
being performed. [Fig. 2]
3. Let go of the locking sleeve.
• An integrated spring will return the
sleeve to its position automatically,
locking the reciprocating saw blade in
place.
•
Grip the back of the reciprocating saw
blade and pull it two or three times to
verify that it is securely attached. [Fig. 3]
• Check that the temperature of the
then remove the blade.
1. To connect the battery pack: [Fig. 4 ]
Line up the alignment marks and attach
the battery pack.
• Slide the battery pack until it locks into
position.
2. To remove the battery pack: [Fig. 4 ]
Pull the button from the front to release
the battery pack.
1. Push the switch lock lever down, pull the
power switch. [Fig. 5]
• The switch lock can be disengaged by
pushing in the off-lock switch from
either side.
• The speed increases with the amount
of depression of the power switch.
power switch.
3. Check that the temperature of the blade
remove the blade.
When operating the tool by pulling the
trigger, there may be a momentary lag
before rotation starts. This does not
signal a malfunction.
• This lag occurs as the tool’s circuitry
starts up when the trigger is pulled for
battery pack or after the tool has not
been used for at least 1 minute.
Rotation will start without any lag
during second and subsequent
operations.
Switch lock
A switch lock prevents the motor from
starting if the switch is pulled inadvertently.
Normally, the lock is engaged.
• To disengage the lock, press the off-lock
switch. (The switch can be pressed on
either side of the tool.)
• While you are on the switch, the tool will
continue to operate even if you remove
Fine-tuning the tool speed
with the switch
The tool speed varies continuously
depending on how far the switch is pulled
back. When starting to make a cut, pull
back on the switch lightly to start cutting
gradually. When the switch is released, the
brake will engage so that the tool stops
immediately.
Cutting
• Hold the protective shoe against the
material being cut, taking care to align the
reciprocating saw blade with the desired
cut position, and pull the switch.
• The blade may vibrate occasionally,
which is a normal phenomenon.
• If cuttings accumulate on the uneven
surfaces near where the reciprocating
saw blade is attached, clean them off
before resuming work.
• Once the tool has started, it will continue
to operate even if you remove your
• Check that there are no obstacles to cut
underneath workpiece.
– 9 –
EN

• Check that there are no objects such as
nails in the material to be cut.
If the blade comes into contact with any
such objects during cutting, a strong
reaction force will be generated and
severe injury may occur.
• Do not place your hand on the object in
the direction cutting is to take place. If this
is not observed, there is a risk of injury.
• Do not touch the jigsaw blade
immediately after cutting. If this is not
observed, burns may occur.
on it
Hold the tool securely with both hands.
There is no need to exert excessive force
on the tool while operating it. Exercise
caution as applying excessive force to the
tool in a prying or pushing motion may
damage the tool.
When cutting in a small arc, a lower feed
speed will result.
Attempting to move the saw too quickly
may damage the reciprocating saw blade.
WARNING
• Do not remove the front cover.
Always hold the tool with your hand on
top of the front cover.
• After pausing or completing work,
always turn off the switch and remove
the battery pack from the tool.
When choosing a reciprocating saw blade,
from the protective shoe beyond the
material being cut after the stroke length
(28 mm) has been subtracted [Fig. 6].
Attempting to cut a pipe, piece of lumber,
or other material that exceeds the
reciprocating saw blade’s cutting capacity
may cause the tip of the blade to strike the
inside of the pipe or the piece of lumber,
damaging the blade [Fig. 7].
• Keep the protective shoe in contact
with the material being cut while
operating the tool.
• Failure to do so may cause the
reciprocating saw blade to be
damaged due to the resulting
vibrations.
• When cutting in a small arc, a lower
feed speed will result.
Off
(normal
operation)
Flashing
(No charge)
Battery protection
feature active
Excessive (complete) discharging of lithium
ion batteries shortens their service life
dramatically. The tool includes a battery
protection feature designed to prevent
excessive discharging of the battery pack.
• The battery protection feature activates
immediately before the battery loses its
charge, causing the battery low warning
• If you notice the battery low warning lamp
immediately.
• If it is started with too little battery power
remaining, the tool may stop operating
without the battery low warning lamp
too little battery power remaining to use
the tool, and the battery pack should be
charged before further use.
• If the tool is subject to a sudden load
during use that causes the motor to lock
up, the overdischarge prevention sensor
may be triggered, and the battery low
of the motor’s locking up and cycle the
trigger.
– 10 –
EN

Off
(normal
operation)
Flashing: Overheat
Indicates operation has
been halted due to
battery overheating.
To protect the motor or battery, be sure to
note the following when carrying out this
operation.
• If the motor or battery becomes hot, the
protection function will be activated and
the motor or battery will stop operating.
The overheat warning lamp on the control
feature is active.
• If the overheating protection feature
activates, allow the tool to cool thoroughly
(at least 30 minutes). The tool is ready for
use when the overheat warning lamp
goes out.
• Avoid using the tool in a way that causes
the overheating protection feature to
activate repeatedly.
• If the tool is operated continuously under
high-load conditions or if it is used in
hot-temperature conditions (such as
during summer), the overheating
protection feature may activate frequently.
• If the tool is used in cold-temperature
conditions (such as during winter) or if it
is frequently stopped during use, the
overheating protection feature may not
activate.
• The ambient temperature range is
between 0°C (32°F) and 40°C (104°F). If
the battery pack is used when the battery
temperature is below 0°C (32°F), the tool
may fail to function properly.
• When charging a cool battery pack
(below 0°C (32°F)) in a warm place, leave
the battery pack at the place and wait for
more than one hour to warm up the
battery to the level of the ambient
temperature.
For Appropriate Use of
• For optimum battery life, store the Li-ion
battery pack following use without
charging it.
• When operating the battery pack, make
sure the work place is well ventilated.
For safe use
•
when the switch is switched on, the
overheat warning lamp and the battery
safe operation is not possible, and the
main unit will not rotate normally. Connect
the battery pack into the unit of the tool
until the red or yellow label disappears.
• Only use rechargeable battery packs for
Panasonic rechargeable tools. Do not use
packs which have been disassembled
and parts replaced).
• Do not use deteriorated battery packs.
There is a risk of the generation of heat,
ignition and explosion.
•
it to the store immediately.
• Attach the battery pack by sliding until the
yellow and red labels are no longer
visible, and check that it does not fall out
of place.
- Failure to do so may result in scalding.
• The usage temperature range for lithium
ion battery packs is 0 to 40 degrees.
- Use of battery packs cooled to below
zero, such as in colder northern areas,
may result in abnormal operation of the
device. In such cases, leave the battery
pack in a location of 10 degrees or more
for one hour or more before use, and
only use the device after the battery
pack has warmed up.
Charging
1) If the temperature of the battery pack
(14°F), charging will automatically stop
to prevent degradation of the battery.
– 11 –
EN

2) The ambient temperature range is
between 0°C (32°F) and 40°C (104°F).
If the battery pack is used when the
battery temperature is below 0°C
(32°F), the tool may fail to function
properly.
3) Use the charger at temperatures
between 0°C (32°F) and 40°C (104°F),
and charge the battery at a
temperature similar to that of the
battery itself. (There should be no
more than a 15°C (59°F) difference
between the temperatures of the
battery and the charging location.)
4) When charging a cool battery pack
(below 0°C (32°F)) in a warm place,
leave the battery pack at the place and
wait for more than one hour to warm
up the battery to the level of the
ambient temperature.
5) Cool down the charger when charging
more than two battery packs
consecutively.
6)
hole, when holding charger or any
other occasions.
7) Unplug the charger when not in use.
8) Store the charger between 0 and 40
degrees, and charge the battery pack
at a temperature close to the storage
temperature.
• If the battery pack is charged while
at a temperature below 0 degrees, a
full charge will give only around 50%
of a normal charge. Commence
charging after 1 hour or more at the
prescribed temperature.
9) Do not charge in a poorly ventilated
place.
10) Do not cover the battery pack or
charger with a cloth or the like while
charing is in progrress.
Your battery pack is not fully charged at
the time of purchase. Be sure to charge
the battery before use.
How to charge
1. Plug the charger into the AC outlet.
Sparks may be produced when the plug
is inserted into the AC power supply, but
this is not a problem in terms of safety.
charger.
(1) Line up the alignment marks and
place the battery onto the dock on
the charger.
Not all battery packs display the
alignment mark [Fig. 9] (on page 5).
(2) Slide forward in the direction of the
arrow. [Fig. 9 ]
3. During charging, the charging lamp will
be lit. When charging is completed, an
internal electronic switch will
automatically be triggered to prevent
overcharging.
• Charging will not start if the battery
pack is hot (for example, immediately
after heavy-duty operation).
The orange standby lamp will be
Charging will then begin automatically.
slowly once the battery is approximately
80% charged.
5. When charging is completed, the
charging lamp in green color will turn off.
6. If the temperature of the battery pack is
0°C (32°F) or less, charging takes
longer to fully charge the battery pack
than the standard charging time.
Even when the battery is fully charged, it
will have approximately 50% of the
power of a fully charged battery at
normal operating temperature.
7. Consult an authorized dealer if the
charging lamp (green) does not turn off.
8. If a fully charged battery pack is inserted
into the charger again, the charging
lamp lights up. After several minutes,
the charging lamp in green color will turn
off.
9. Remove the battery pack while the
battery pack release button is held up.
[Fig. 9 ]
– 12 –
EN

Charging is completed. (Full charge.)
Battery is approximately 80% charged.
Now charging.
Turn off Illuminated Flashing
Charger is plugged into the AC outlet. Ready to charge.
Charging Status Lamp.
Left: green Right: orange will be displayed.
Battery pack is cool.
The battery pack is being charged slowly to reduce the load on
the battery.
Battery pack is warm.
Charging will begin when temperature of battery pack drops. If
the temperature of the battery pack is -10° or less, the charging
when the temperature of the battery pack goes up.
Charging is not possible. Clogged with dust or malfunction of
the battery pack.
(Green) (Orange)
Battery Recycling
For environmental protection and recycling of materials, be sure that it is disposed of at
mean that used electrical and electronic products and batteries should not be
mixed with general household waste.
For proper treatment, recovery and recycling of old products and used
batteries, please take them to applicable collection points, in accordance with
By disposing of these products and batteries correctly, you will help to save
valuable resources and prevent any potential negative effects on human health
and the environment which could otherwise arise from inappropriate waste
handling.
For more information about collection and recycling of old products and
batteries, please contact your local municipality, your waste disposal service or
the point of sale where you purchased the items.
Penalties may be applicable for incorrect disposal of this waste, in accordance
with national legislation.
If you wish to discard electrical and electronic equipment, please contact your dealer or
supplier for further information.
– 13 –
EN

These symbols are only valid in the European Union. If you wish to discard these items,
please contact your local authorities or dealer and ask for the correct method of disposal.
• Use only a dry, soft cloth for wiping the unit. Do not use a damp cloth, thinner, benzine, or
other volatile solvents for cleaning.
• In the event that the inside of the tool or battery pack is exposed to water, drain and allow
tool. If you experience any problems operating the tool, consult with a repair shop.
ACCESSORIES
•
or personal injury. Use recommended accessories only.
• To prevent the risk of injury, only use accessory or attachment for its stated purpose.
•
IX.
Model EY45A1
Motor 14.4 V DC 18 V DC
1.6 mm
28 mm
0 - 2250 min-1 0 - 2800 min-1
capacities
Wood 235 mm
Mild steel 130 mm
Overall length 460 mm
3.3 kg—
3.05 kg—
— 3.40 kg
— 3.15 kg
—3.20 kg
—3.40 kg
Model EY0L82
Electrical rating See the rating plate on the bottom of the charger.
Weight 0.93 kg
– 14 –
EN

X.
Noise information and vibration values in accordance with EN62841-2-11,EN62841-1.
The declared vibration total values and the declared noise emission values have been
measured in accordance with a standard test method and may be used for comparing one
tool with another. The declared vibration total values and the declared noise emission
values may also be used in a preliminary assessment of exposure.
A-weighted emission sound pressure level LpA 79.7 dB
Uncertainly for the sound pressure level KpA 3 dB
A-weighted sound power level LWA 90.7 dB
Uncertainly for the sound power level KWA 3 dB
connection end, For wood and metal, Thickness 1.25 mm, Effective
blade length 280 mm>.
ah,B 2
end, For wood and metal, Thickness 1.25 mm, Effective blade
length 280 mm>.
Kh,B 2
connection end, For metal, Thickness 0.9 mm, Effective blade length
205 mm>.
ah,B 2
connection end, For metal, Thickness 0.9 mm, Effective blade
length 205 mm>.
Kh,B 2
Vibration emission value when cutting wooden beams with saw blade
<For wood and metal, Thickness 1.25 mm, Effective blade length
280 mm>.
ah,WB 2
connection end, For wood and metal, Thickness 1.25 mm,
Effective blade length 280 mm>.
Kh,WB 2
– 15 –
EN

XI.
This appliance is supplied with a moulded
three pin mains plug for your safety and
plug.
Should the fuse need to be replaced
please ensure that the replacement fuse
has a rating of 5 amp and that it is
approved by ASTA or BSI to BS1362.
Check for the ASTA mark or the BSI
mark on the body of the fuse.
If the plug contains a removable fuse cover
fuse is replaced.
If you lose the fuse cover the plug must not
be used until a replacement cover is
obtained.
A replacement fuse cover can be
purchased from your local Panasonic
Dealer.
IF THE FITTED MOULDED PLUG IS
UNSUITABLE FOR THE SOCKET
OUTLET IN YOUR HOME THEN THE
FUSE SHOULD BE REMOVED AND THE
PLUG CUT OFF AND DISPOSED OF
SAFELY. THERE IS A DANGER OF
SEVERE ELECTRICAL SHOCK IF THE
CUT OFF PLUG IS INSERTED INTO ANY
13 AMP SOCKET.
The location of the fuse differs according to
B).
the instructions below. Illustrations may
differ from actual AC mains plug.
Open the fuse cover with a screwdriver and
replace the fuse and close or attach the
fuse cover.
Figure B
Fuse Cover
Figure A
– 16 –
EN

Original-Anleitung: Englisch
Übersetzung der Original-Anleitung: Andere
Sprachen
I.
Wir bedanken uns für den Kauf dieser Sti
chsäge von Panasonic. Diese Stichsägekann
verwendet werden, um eine exzellente
Schnittleistung zu gewährleisten. Die Stichsäge
ist ausschließlich für den Schnitt von Metall,
Holz und Trockenbauwand bestimmt.
II.
1) Halten Sie Ihre Hände von Schnittbereich
und Sägeblatt fern. Halten Sie die
Halten Sie das Tool mit beiden Händen, um
Verletzungen durch das Sägeblatt zu
vermeiden.
2) Halten Sie das zu schneidende Werkstück
auf keinen Fall mit Ihren Händen oder über
Ihr Bein. Das Werkstück muss einwandfrei
abgestützt werden, um die Gefahr von
Körperverletzungen oder des Verlusts der
Kontrolle zu minimieren.
3) Denken Sie daran, dass das Werkzeug
ständig betriebsbereit ist, da es nicht an die
Steckdose angeschlossen werden muß.
4) Verwenden Sie stets eine Schutzbrille mit
Seitenschirmen. Gewöhnliche Brillen oder
Sonnenbrillen sind KEINE Schutzbrillen.
5) Wenn Sie diese Maschine für
Holzbearbeitung in einem begrenzten
Raum (z.B. Innenraum) benutzen, sollten
Sie eine Staubmaske tragen.
6) Schneiden Sie keine Nägel durch.
Untersuchen Sie das Werkstück auf Nägel,
und entfernen Sie diese vor der
Bearbeitung.
7) Schneiden Sie keine übergroßen
Werkstücke.
8) Vergewissern Sie sich vor dem Sägen, dass
genügend Freiraum hinter dem Werkstück
vorhanden ist, damit das Sägeblatt nicht
Fußboden, Werkbank usw. stößt.
9) Halten Sie die Maschine mit festem Griff.
10) Vergewissern Sie sich vor dem Einschalten
der Maschine, dass das Sägeblatt nicht
das Werkstück berührt.
11) Halten Sie die Hände von beweglichen
Teilen fern.
12)
Vermeiden Sie eine Berührung des Sägeblatts
oder des Werkstücks unmittelbar nach der
Bearbeitung, weil sie dann noch sehr heiß sind
und Hautverbrennungen verursachen können.
13) Unterlassen Sie das Schwingen des Tools.
14) Verwenden Sie keine Sägeblätter, die
Verformungen oder Risse aufweisen.
15)
Verwenden Sie keine Sägeblätter, die nicht den
16) Nehmen Sie den Akku von der Maschine
ab, bevor Sie das Sägeblatt auswechseln,
Einstellungen vornehmen oder andere
Wartungsarbeiten ausführen.
17) Geeigneten Gehörschutz tragen, wenn
Werkzeug längere Zeit im Betrieb ist!
18)
etwas erhitzen. Dies ist normal. Den Akku
19)
Werkzeug und Akku dürfen nicht an Orten
(z.B.Werkzeugschuppen aus Metall oder das
Innere von Fahrzeugen im Sommer). Andernfalls
droht eine Leistungsbeeinträchtigung des Akkus.
20) Der Umgebungstemperaturbereich liegt
zwischen 0°C (32°F) und 40°C (104°F).
III.
WEISUNGEN FÜR
1)
Schneidezubehör, das mit einem
„stromführenden“ Draht in Kontakt kommt, kann
freiliegende Metallteile des Elektrowerkzeugs
„stromführend“ machen und dem Bediener
einen elektrischen Schlag zufügen.
– 17 –
DE

2)
das Werkstück auf eine andere
geeignete Weise auf einer stabilen
Unterlage fest.
Wenn Sie das Werkstück mit der Hand
oder gegen Ihren Körper halten, wird es
instabil, und dies kann zum Verlust der
Kontrolle führen.
1)
- Die
vorliegende Anleitung enthält wichtige
Sicherheits- und Betriebshinweise für das
Ladegerät.
2) Lesen Sie vor Gebrauch des Ladegeräts
alle Anweisungen und Hinweise auf
Ladegerät und Akku.
3) - Um die Verletzungsgefahr zu
verringern, laden Sie nur geeignete Akkus,
wie auf der letzten Seite gezeigt.
Andersartige Batterien können bersten und
Verletzungen und Beschädigungen
verursachen.
4) Setzen Sie Ladegerät und Akku keinem
Regen oder Schnee aus, und vermeiden
Sie feuchte Benutzungsorte.
5) Der Einsatz eines nicht ausdrücklich
empfohlenen Zusatzgeräts kann zu
Bränden, Stromschlägen oder
Personenschäden führen.
6) Fassen Sie beim Trennen des Ladegeräts
vom Netz stets den Stecker, um Schäden
an Netzkabel oder -stecker aus-
zuschließen.
7) Verwenden Sie keinesfalls ein
Verlängerungskabel.
8) Wird das Netzkabel des Ladegeräts
beschädigt, so darf es nur vom Hersteller,
einer Vertrags- Reparaturwerkstatt des
Herstellers oder einer ähnlichen
um Gefahren zu vermeiden.
9) Falls das ladegerät einem heftigen Stoß
ausgesetzt war, auf den Boden gefallen
oder auf andere Artbeschädigt worden ist,
darf es keinesfalls betrieben werden,
sondern ist zum Kundendienst zu bringen.
10) Trennen Sie das Ladegerät vor der
Wartung oder Reinigung von der
Steckdose, um Stromschläge
auszuschließen.
11) Das Netzkabel ist so zu verlengen, dass
niemand darauf treten oder darüber
stolpern kann und anderweitige
Baschädigungen oder Belastungen des
Kabels ausgeschlossen sind.
12) Ladegerät und Akku sind speziell
aufeinander abgestimmt.Daher darf das
Ladegerät nicht für batteriebetriebene
Werkzeuge oder Akkus anderer Hersteller
eingsetzt werden. Außerdem darf der Akku
auch keinesfalls mit einem anderen
Ladegerät aufgeladen werden.
13) Zerlegen Sie keinesfalls das Ladegerät und
das Akkugehäuse.
14) Werkzeug und Akku dürfen nicht an Orten
gelagert werden, wo die Temperatur auf
(z.B.Werkzeugschuppen aus Metall oder
das Innere von Fahrzeugen im Sommer).
Andernfalls droht eine Leistungs-
beeinträchtigung des Akkus.
15)
geladen werden.
16) Erschöpfte Akkus keinesfalls verbrennen,
da sie sonst explodieren können.
17) Das Ladegerät ist für Betrieb mit der
üblichen Netzspannung ausgelegt. Das
Typenschild angegebenen Spannung
erfolgen.
18) Das Netzkabel darf nicht übermäßig
belastet werden. Tragen Sie daher niemals
das Ladegerät am Netzkabel, und ziehen
Sie das Kabel stets nur am Stecker aus der
Steckdose. Halten Sie das Netzkabel fern
von Wärme, Öl und svharfen Kanten.
19) Laden Sie den Akku an einem gut
belüfteten Ort, und decken Sie Ladegerät
und Akku während des Ladevorgangs
keinesfalls mit einem Tuch oder dgl. ab.
20) Der Akku darf keinesfalls kurz-geschlossen
werden. Ein Kurz-schluss kann zu
Überhitzung und Verbrennungen führen.
– 18 –
DE

21) Wird das Netzkabel des
Ladegeräts beschädigt, so darf es nur von
einer Vertrags-Reparaturwekstatt des
Herstellers ausgetaushcht werden, da für
diese Aebeit Spezialwerkzeug erforderlich
ist.
22) Dieses Gerät kann durch Kinder ab einem
Alter von 8 Jahren und Personen mit
eingeschränkten körperlichen,
sensorischen bzw. geistigen Fähigkeiten,
mangelnder Erfahrung bzw. fehlendem
Wissen verwendet werden, vorausgesetzt
sie werden beaufsichtigt oder wurden im
sicheren Gebrauch des Geräts unterwiesen
und sind sich der damit verbundenen
Gefahren bewusst.
23) Kinder dürfen nicht mit dem Gerät spielen.
Reinigungs- und Wartungsarbeiten dürfen
nicht von Kindern ohne Beaufsichtigung
durchgeführt werden.
24) Dieses Gerät ist nicht für den Gebrauch durch
Personen (einschließlich Kindern) mit
verminderten körperlichen oder geistigen
Fähigkeiten oder mangelnder Erfahrung und
Kenntnis vorgesehen, es sei denn, sie haben
eine Betreuung oder Unterweisung im Gebrauch
des Gerätes von einer Person erhalten, die für
ihre Sicherheit verantwortlich ist.
WARNUNG:
•
Verwenden Sie nur die Panasonic-Akkus, die
für den Einsatz mit dieser Akku-Maschine
ausgelegt sind.
•
Panasonic übernimmt keine Verantwortung
für etwaige Schäden oder Unfälle, die durch
den Gebrauch von recycelten oder
gefälschten Akkus verursacht werden.
•
Werfen Sie den Akku nicht ins Feuer, und
setzen Sie ihn auch keiner übermäßigen
Wärme aus.
•
Achten Sie darauf , dass keine
Metallgegenstände mit den Kontakten des
Akkus in Berührung kommen.
•
Unterlassen Sie das Tragen oder
Aufbewahren des Akkus zusammen mit
Nägeln oder ähnlichen Metallgegenständen
im selben Behälter.
•
Laden Sie den Akku nicht an einem heißen
Ort, wie z. B. in der Nähe eines Feuers oder
in direktem Sonnenlicht. Anderenfalls kann
der Akku überhitzen, Feuer fangen oder
explodieren.
WARNUNG:
•
Nachdem Sie den Akku von der Maschine
oder dem Ladegerät abgenommen haben,
bringen Sie stets die Akkuabdeckung wieder
an. Anderenfalls könnten die Akkukontakte
kurzgeschlossen werden, was zu einem
Brand führen kann.
•
Wenn der Akku schwach geworden ist,
ersetzen Sie ihn durch einen neuen.
Fortgesetzter Gebrauch eines beschädigten
Akkus kann zu Wärmeerzeugung,
Entzündung oder Bruch führen.
•
Um Leckagen, Überhitzung,
Rauchentwicklung, Brände und Explosionen
zu verhindern, befolgen Sie beim Umgang
mit unseren Akku-Elektrowerkzeugen
Anweisungen.
-
Lassen Sie kein Bohrklein oder Staub auf
den Akku fallen.
-
Bevor Sie den Akku wieder verstauen,
entfernen Sie das gesamte Bohrklein und
den Staub von ihm. Lagern Sie den Akku
getrennt von Metallgegenständen
(Schrauben, Nägeln usw.) im
Werkzeugkoffer.
•
Behandeln Sie die Akku-Elektrowerkzeuge
keinesfalls wie folgt:
(Es besteht die Gefahr von
Rauchentwicklung, Feuer und Explosion.)
-
Verwenden oder Liegenlassen in
Bereichen, die Regen oder Feuchtigkeit
ausgesetzt sind
-
Verwendung unter Wasser
Bedeutung
Volt
Gleichstrom
Leerlaufdrehzahl
Drehzahl oder Hubzahl pro
Minute
Akkukapazitat in Ampere
Stunden
Zur Verminderung der
Verletzungsgefahr muss die
Bedienungsanleitung gründlich
gelesen werden.
Nur für Inneneinsatz.
– 19 –
DE

WARNING:
•
Zur Verringerung der Verletzungsgefahr
muss zum Auswechseln des Sägeblatts
immer der Akku entfernt werden.
•
Atmen Sie nicht den vom Werkzeug oder
vom Akkupack ausströmenden Rauch ein,
da er gesundheitsschädlich sein kann.
•
Ist das richtige Sägeblatt für das zu
bearbeitende Werkstück eingespannt?
•
Wurde die richtige Stammform und
Sägeblattdicke verwendet?
•
Ist das Sägeblatt fest eingespannt?
•
Kontrollieren, ob das Sägeblatt nicht gerissen
oder gebrochen ist.
•
Kontrollieren, ob im zu bearbeitenden
Werkstück keine Fremdkörper vorhanden
sind.
Anbringen und Entfernung des
Stichsägeblatts
Stellen Sie sicher dass das Akkupaket vor dem
Ersatzvorgang des Stichsägeblatts, der
Vorbereitungs-, Inspektions- und Ersatzschritte
umfasst, entfernt wird.
Die Nichtbeachtung kann aufgrund der
versehentlichen Aktivierung des Werkzeugs
Unfälle zur Folge haben.
1. Drehen Sie die Verriegelungsmuffe. [Fig. 1]
2. Setzen Sie das Stichsägeblatt, während Sie
die Verriegelungsmuffe in die gedrehte
Position halten, ein.
Das Sägeblatt kann nach oben oder nach
unten gerichteten werden, je nach Arbeit die
auszuführen ist. [Fig. 2]
3. Lassen Sie die Verriegelungsmuffe los.
•
Eine integrierte Feder wird die Muffe
automatisch zu Ihrer Position
zurückbringen, und das Stichsägeblatt in
diese Position verriegeln.
•
Fassen Sie die Hinterseite des
Stichsägeblatts an, und ziehen Sie zwei
oder drei Mal, um sicherzustellen, dass es
sicher befestigt ist. [Fig. 3]
•
Kontrollieren Sie, ob sich das Sägeblatt
ausreichend abgekühlt hat und nehmen
Sie das Sägeblatt ab.
Akkus
1. Zum Anschließen des Akkus: [Fig. 4 ]
Die Ausrichtmarkierungen aufeinander
ausrichten, und den Akku anbringen.
•
Den Akku einschieben, bis er einrastet.
2. Zum Entfernen des Akkus: [Fig. 4 ]
Die Taste von vorne ziehen, um die
Batteriepackung zu lösen.
1. Drücken Sie den Schalterverriegelungshebel
nach unten und ziehen Sie den Netzschalter.
[Fig. 5]
•
Um die Einschaltsperre zu entriegeln,
drücken Sie auf den Entriegelungsschalter
von einer der beiden Seiten.
•
Die Geschwindigkeit erhöht sich mit
zunehmendem Druck auf den Netzschalter.
2. Lassen Sie den Netzschalter nach
abgeschlossenem Schneiden los.
3. Kontrollieren Sie, ob sich das Sägeblatt
ausreichend abgekühlt hat und nehmen Sie
das Sägeblatt ab.
Wird die Maschine durch Betätigen des
Auslösers gestartet, kann eine kurzzeitige
Verzögerung auftreten, bevor die Drehung
beginnt. Dies ist kein Anzeichen für eine
Funktionsstörung.
•
Diese Verzögerung tritt beim Hochfahren
der Schaltkreise der Maschine auf, wenn
der Auslöser zum ersten Mal nach dem
Einsetzen eines neuen Akkus betätigt wird,
oder nachdem die Maschine mindestens 1
Minute lang nicht benutzt worden ist. Bei
der zweiten und jeder weiteren Betätigung
läuft die Maschine ohne Verzögerung an.
Einschaltsperre
Die Einschaltsperre verhindert die
Inbetriebnahme des Motors, im Fall, dass der
Schalter versehentlich gezogen wird. Das
Schloss ist normalerweise verriegelt.
•
Um das Schloss zu entriegeln, drücken Sie
auf den Entriegelungsschalter. (Der Schalter
kann vor beiden Seiten des Werkzeugs
gedrückt werden.)
•
Während Sie den Schalter gedrückt halten,
wird das Werkzeug weiterhin in Betrieb
bleiben, auch wenn Sie Ihre Finger vom
Entriegelungsschalter entfernen.
– 20 –
DE
Other manuals for EY45A1
4
This manual suits for next models
2
Table of contents
Languages:
Other Panasonic Cordless Saw manuals

Panasonic
Panasonic EY4542 - CIRCULAR SAW 14.4V User manual

Panasonic
Panasonic EY3530 - CORDLESS METAL SAW User manual

Panasonic
Panasonic EY45A1 User manual

Panasonic
Panasonic EY3544 - CUTTER - POWER TOOLS User manual

Panasonic
Panasonic EY45A1 User manual

Panasonic
Panasonic EY3544 - CUTTER - POWER TOOLS User manual

Panasonic
Panasonic EY47A1 User manual

Panasonic
Panasonic EY3551 - 18V WOOD SAW User manual

Panasonic
Panasonic 45A1LJ User manual

Panasonic
Panasonic EY45A1 User manual